Article Image

Nova Market | Device Hub - Setup, Operations and Reports

Set up your Nova Market self-checkout kiosk in Nayax Retail Core - register the device, build your product catalog, and add employee profiles so your kiosk is ready for customers.

General

Setup Your Nova Market | Devices

Activate your Nova Market kiosk, connect it to Nayax Retail Core, and configure every hardware component so your device processes cashless transactions reliably from day one.

📱
Operator Scenario
Your Nova Market hardware has arrived and is sitting unboxed on-site. The VPOS payment terminal, tablet, and Nayax Retail Core management system are all present - but until you configure admin permissions, establish a network connection, log in with your Nayax Core credentials, and connect any external hardware, the kiosk cannot process a single payment. Skipping the admin setup step means no one can access the kiosk settings. Skipping the network connection means no transactions reach your dashboard. This guide walks you through every setup step, in the right order, so your kiosk goes live without a support call.

What you are setting up and why sequence matters

What

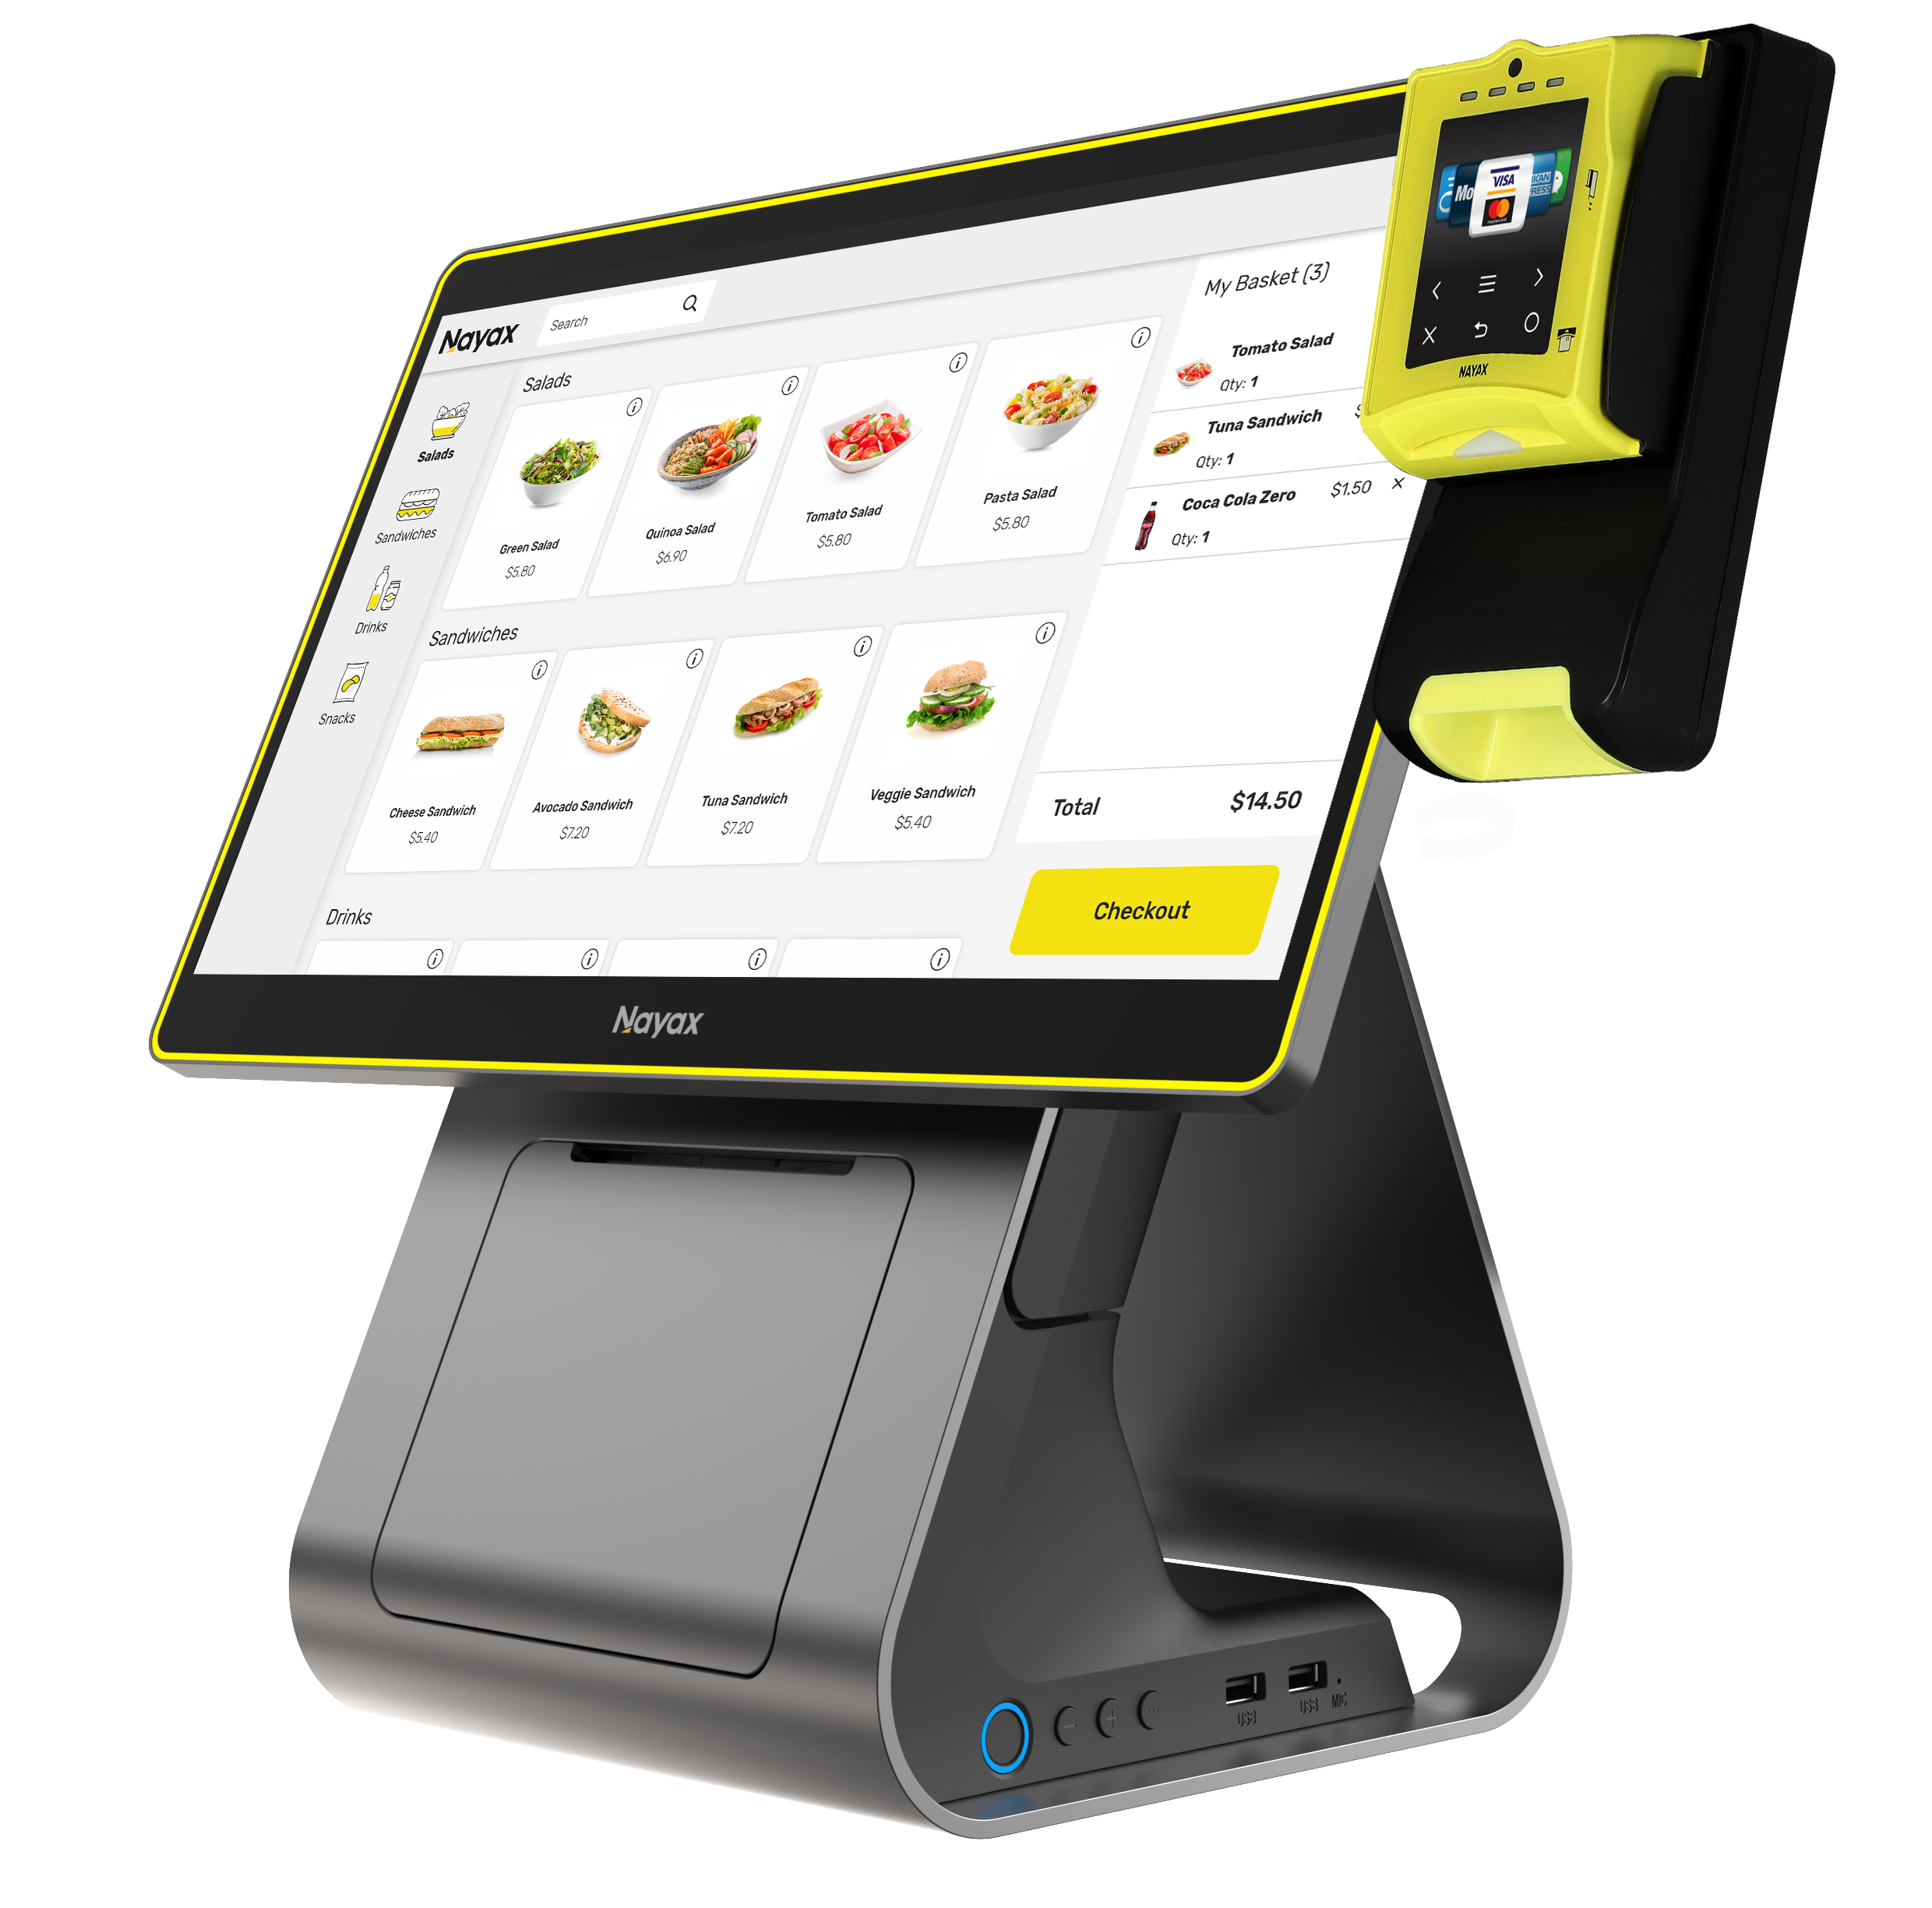
The Nova Market is a self-checkout kiosk combining a VPOS payment terminal, a tablet running the Nayax Retail Core interface, and optional external devices (receipt printer, scale). This guide covers the full device-side setup - everything from admin access to hardware peripherals.

Why setup order matters

Admin permissions must exist before anyone can access kiosk settings. The network connection must be established before the kiosk can receive catalog data or report transactions. Logging in with Nayax Core credentials links the device to your account. Each step unlocks the next - complete them in the order shown.

💡
Before this guide: Your company must already be set up in Nayax Retail Core by the Nayax support team. If you have not yet received your Nayax Core credentials and company confirmation, contact Nayax support before proceeding. Attempting device setup without a provisioned account will fail at the login step.

Before You Start

  • ✅ Nayax support has confirmed your company is set up in Nayax Retail Core and you have received your login credentials.
  • ✅ The Nova Market hardware is unboxed: VPOS payment terminal, tablet, and all cables and mounts are present.
  • ✅ A Wi-Fi network or SIM card is available at the installation location.
  • ✅ You have the Wi-Fi network name (SSID) and password for the installation location.
  • ✅ You know which external devices will be connected to this kiosk (receipt printer, scale).
⚠️
Hardware components: The Nova Market setup involves three physical components - the VPOS device (cashless payment terminal), the tablet (Nayax Retail Core interface), and any external peripherals. All three must be set up before the kiosk can process a transaction.

Setup Phases - Complete in Order

Three setup phases, each building on the last. Links to individual step-by-step guides are included at each point.

1
Phase 1 - Kiosk Settings
Set Up Admin Permissions
Configure who can access the kiosk and what they can do before going live

Admin Mode is the operator-facing settings layer of the Nova Market. Configure it first - without admin access, no one can change kiosk settings, manage users, or troubleshoot problems on-site.

⚠️
Do this before going live. If admin permissions are not configured before the kiosk is activated, no operator on-site will be able to access settings or recover from a kiosk error without a remote support call.
2
Phase 2 - Device Configuration
Connect and Configure the Nova Market Device
Network, Nayax Core login, and machine configuration for the payment terminal

In this phase you connect the kiosk to the internet, log in with your Nayax Core credentials to link it to your account, and configure the machine settings for your payment terminal type.

Step 1 - Connect the Nova Market hardware
Step 2 - Create a network connection
ℹ️
Which guide do I need? Use the Nova Devices guide for the Nova Market tablet. Use the VPOS Touch guide if you are also connecting a VPOS Touch payment terminal at the same location.
Step 3 -- Log in and configure
What you should see after Phase 2: The kiosk screen shows the Nayax Retail Core interface. The device status in Nayax Core updates to Connected. If the status does not update within 5 minutes of logging in, check the network connection and repeat the login step.

All Nova Market Guides

All available Nova Market guides, organised by operational area. Use these after completing initial setup to manage day-to-day kiosk operations.

Daily Operations & Transactions
Operations
How to Process a Purchase | Nova Market
Step-by-step guide for processing a standard customer purchase at the kiosk.
Read guide ›
Operations
How to Process Immediate Payments | Nova Market
Process a quick payment without a full product scan -- for walk-up or attendant-assisted transactions.
Read guide ›
Operations
How to Assign a Transaction to a Customer | Nova Market
Link a completed transaction to a customer profile for loyalty tracking and reporting.
Read guide ›
Operations
How to View Last Transactions | Nova Market
Review recent transaction history directly on the kiosk for quick on-site checks.
Read guide ›
Operations
How to Add or Edit Customer Profiles | Nova Market
Create and manage customer records for loyalty programmes and personalised receipts.
Read guide ›
Operations
How to Access Card Identification at the POS | Nova Market
Identify and manage payment cards at the point of sale for prepaid and account-linked transactions.
Read guide ›
Prepaid
How to Check a Prepaid Card Balance | Nova Market
Check the available balance on a customer prepaid card at the kiosk.
Read guide ›
Prepaid
How to Top Up a Prepaid Card | Nova Market
Add credit to a customer prepaid card directly from the kiosk.
Read guide ›
Prepaid
How to Load/Top Up a Prepaid Card | Nova Market
Load initial credit onto a new prepaid card or top up an existing card balance.
Read guide ›
Operations
How to View Company Reports | Nova Market
Access company-level sales and transaction reports directly from the Nova Market interface.
Read guide ›
Display
How to Set a Screen Saver | Retail Core
Configure the kiosk screen saver for idle periods -- set timing and display content.
Read guide ›
Reports
Receipts
Catalog, Products & Activation

Your Nova Market is Ready When...

✅ Setup Completion Checklist

  • Admin Mode is accessible on the kiosk and at least one user profile exists with the correct permissions
  • The kiosk is connected to the network - the device status in Nayax Core shows Connected
  • You are logged in with your Nayax Core credentials and the kiosk is linked to your operator account
  • Machine configuration has been applied in Nayax Core for the correct payment terminal type
  • Any external devices (printer, scale) are connected and tested
  • Receipt paper is loaded and a test receipt prints correctly
  • A test transaction completes successfully and appears in Reports > Transactions within 5 minutes
🎉
Your Nova Market device is live and ready to take payments.

All transactions will now appear in your Nayax Retail Core dashboard. Your next step is to set up your product catalog so the correct product names and prices appear against each transaction in your reports. Use the catalog guides in the All Guides section above.


Troubleshooting

FAQ

FAQ

Did you find this article helpful?