How to Add Employee Profiles | Employee
To add employee profiles and configure your employee settings, you need to begin by establishing an organized set of employee roles. These roles serve as a means to categorize and control your employees based on their access levels within Retail Core
Video Guide
00:00: This guide will walk you through adding employee profiles in Retail Core. From entering employee details to assigning roles and access levels, follow these engaging instructions to streamline the process and ensure all necessary information is accurately set up. 00:16: On the dashboard of your Retail Core management suite - click the Employee tab 00:21: In the sub-menu click on Employees tab. 00:24: In the main screen click + icon at the top right of the screen. This will open the add new employee field. 00:30: Type in the following fields for your employee. Number, name, last name, and password. 00:35: Scroll down and click on "POS access level" tab 00:38: Click on '+' icon on the right 00:41: At the 'Create the access' select "include" from the dropdown option. 00:45: Set and allocate the following fields and when complete click Add button. 00:49: Pro tip! The option to scroll through drop menus when it shows more than one page. 00:54: Confirm the button to save your progress. 00:57: Scroll below to the seller in stores section and click '+' icon on the right. 01:02: At the 'Create Seller in stores' section select "include" from the dropdown option. Set and allocate the fields and when complete click "Add" button. 01:10: Click the confirm button to save your progress. 01:13: Finalize and create the employee profile. 01:16: The guide covered adding employee profiles in the Retail Core, including entering personal details, setting access levels, assigning roles, and finalizing the profile creation. By following these precise steps, you can efficiently manage employee information within the software.
Click Employee Tab
Image Attached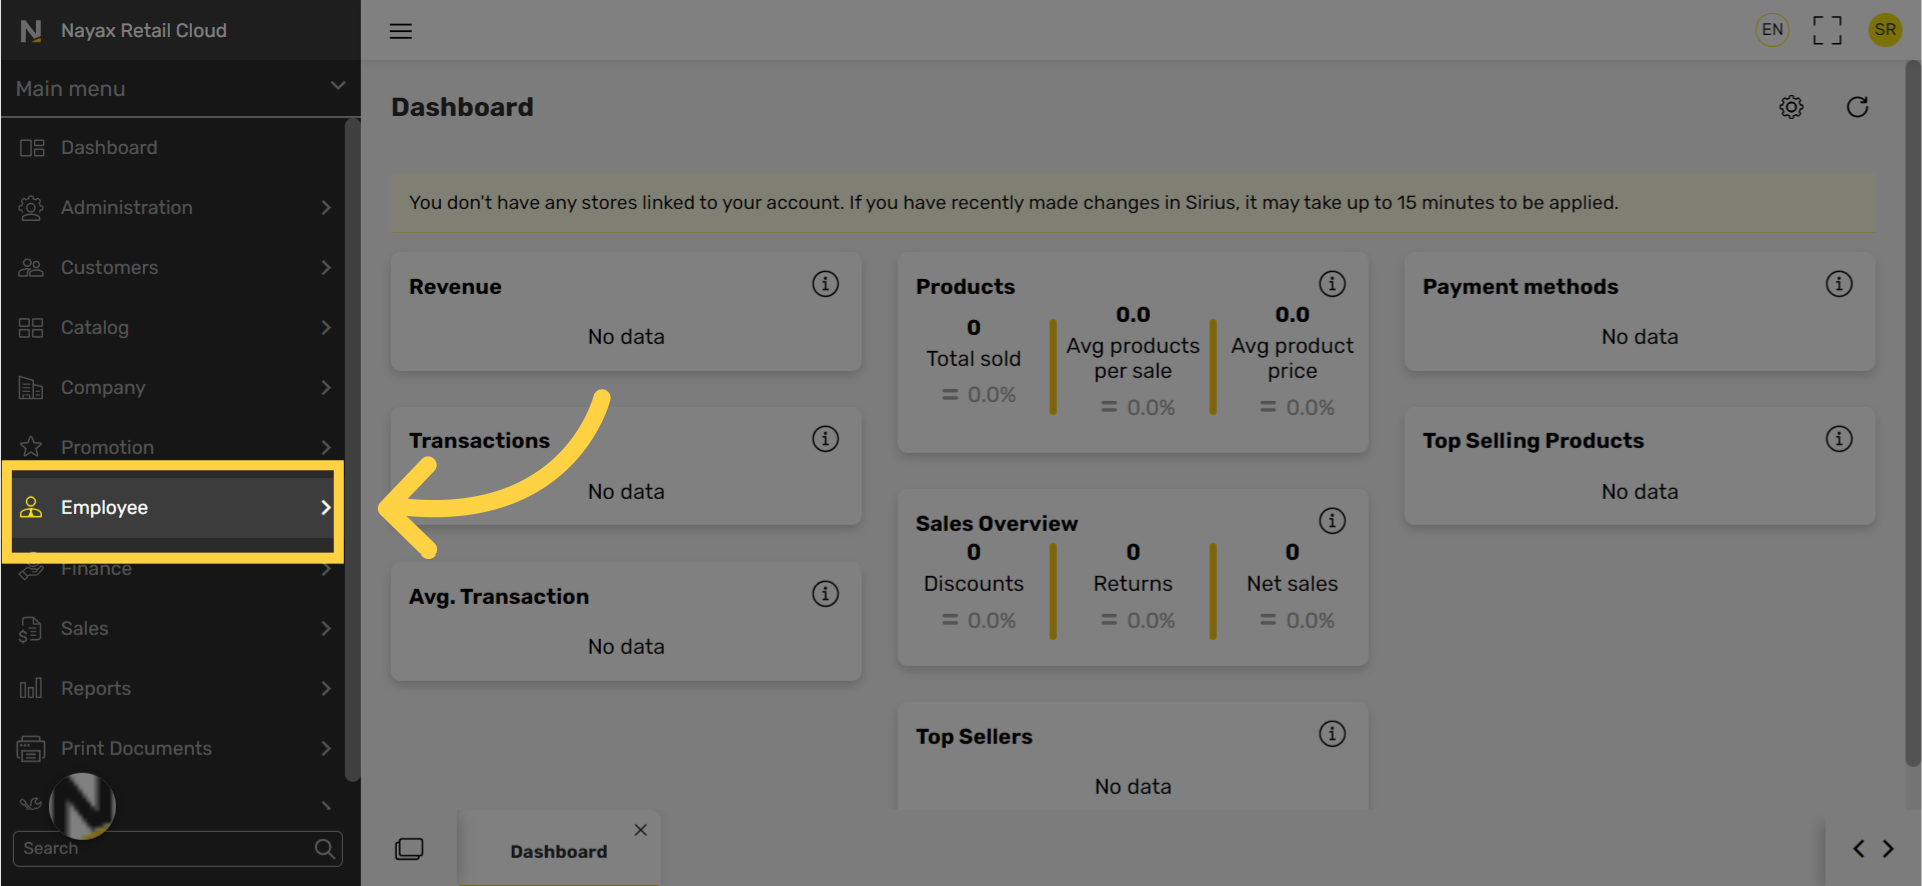
Click Employees Tab
Image Attached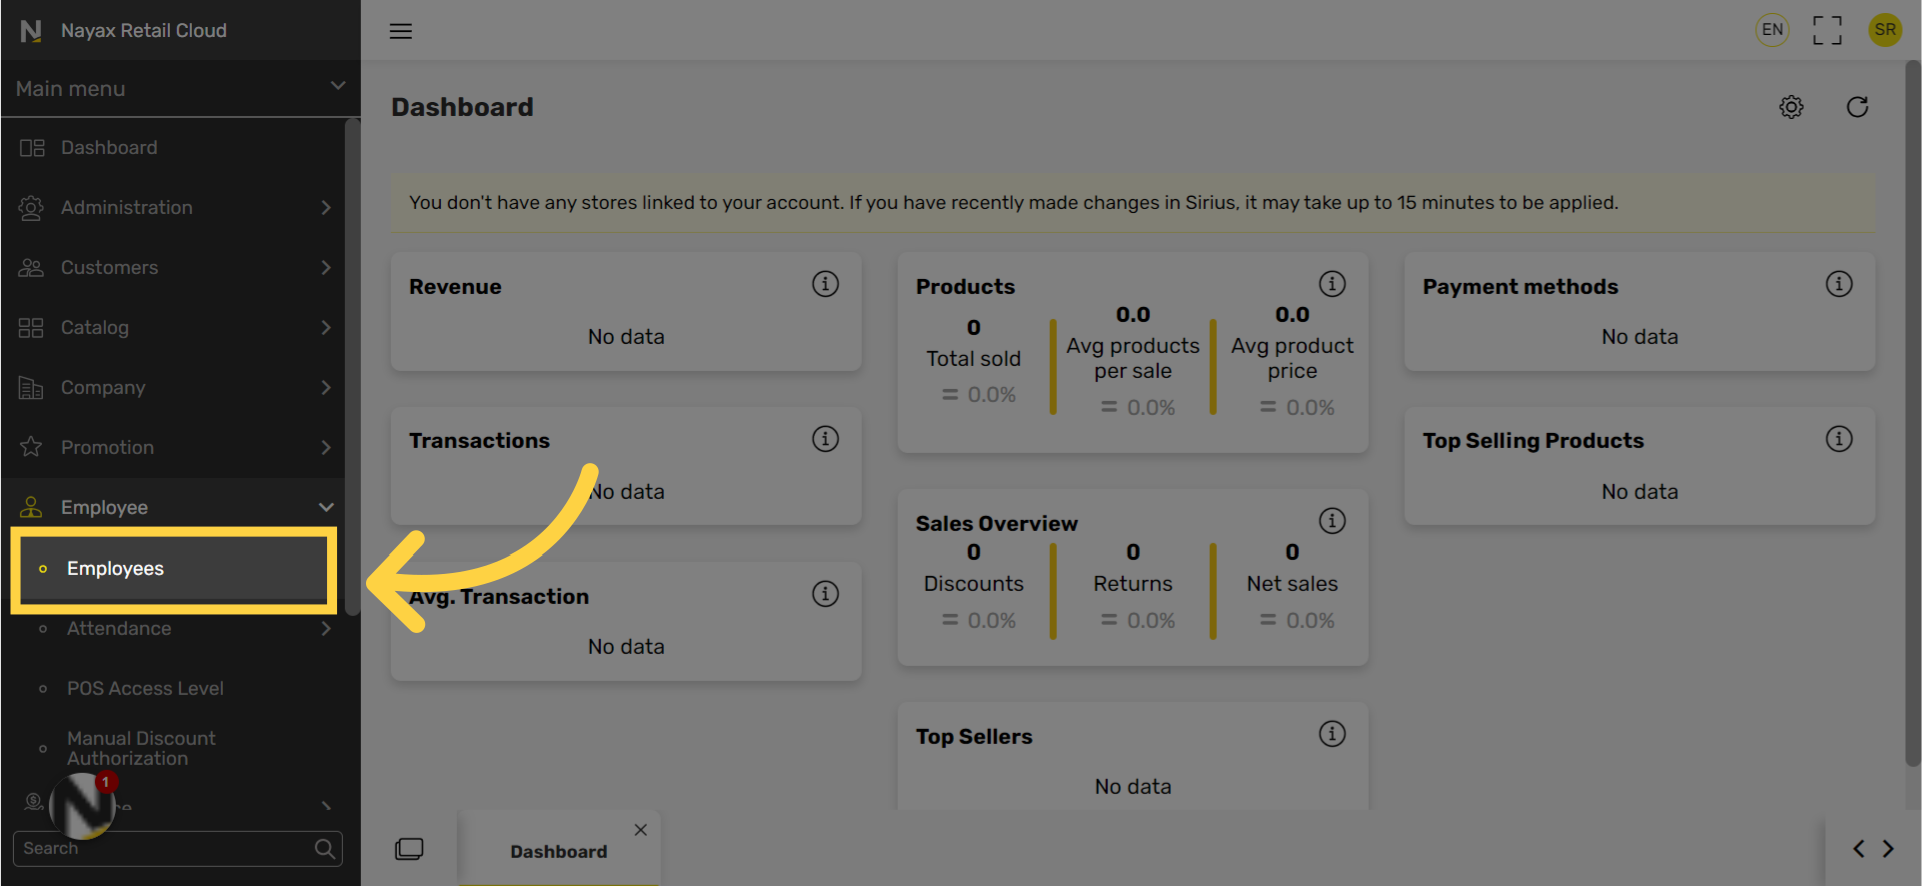
Click+ Icon
Image Attached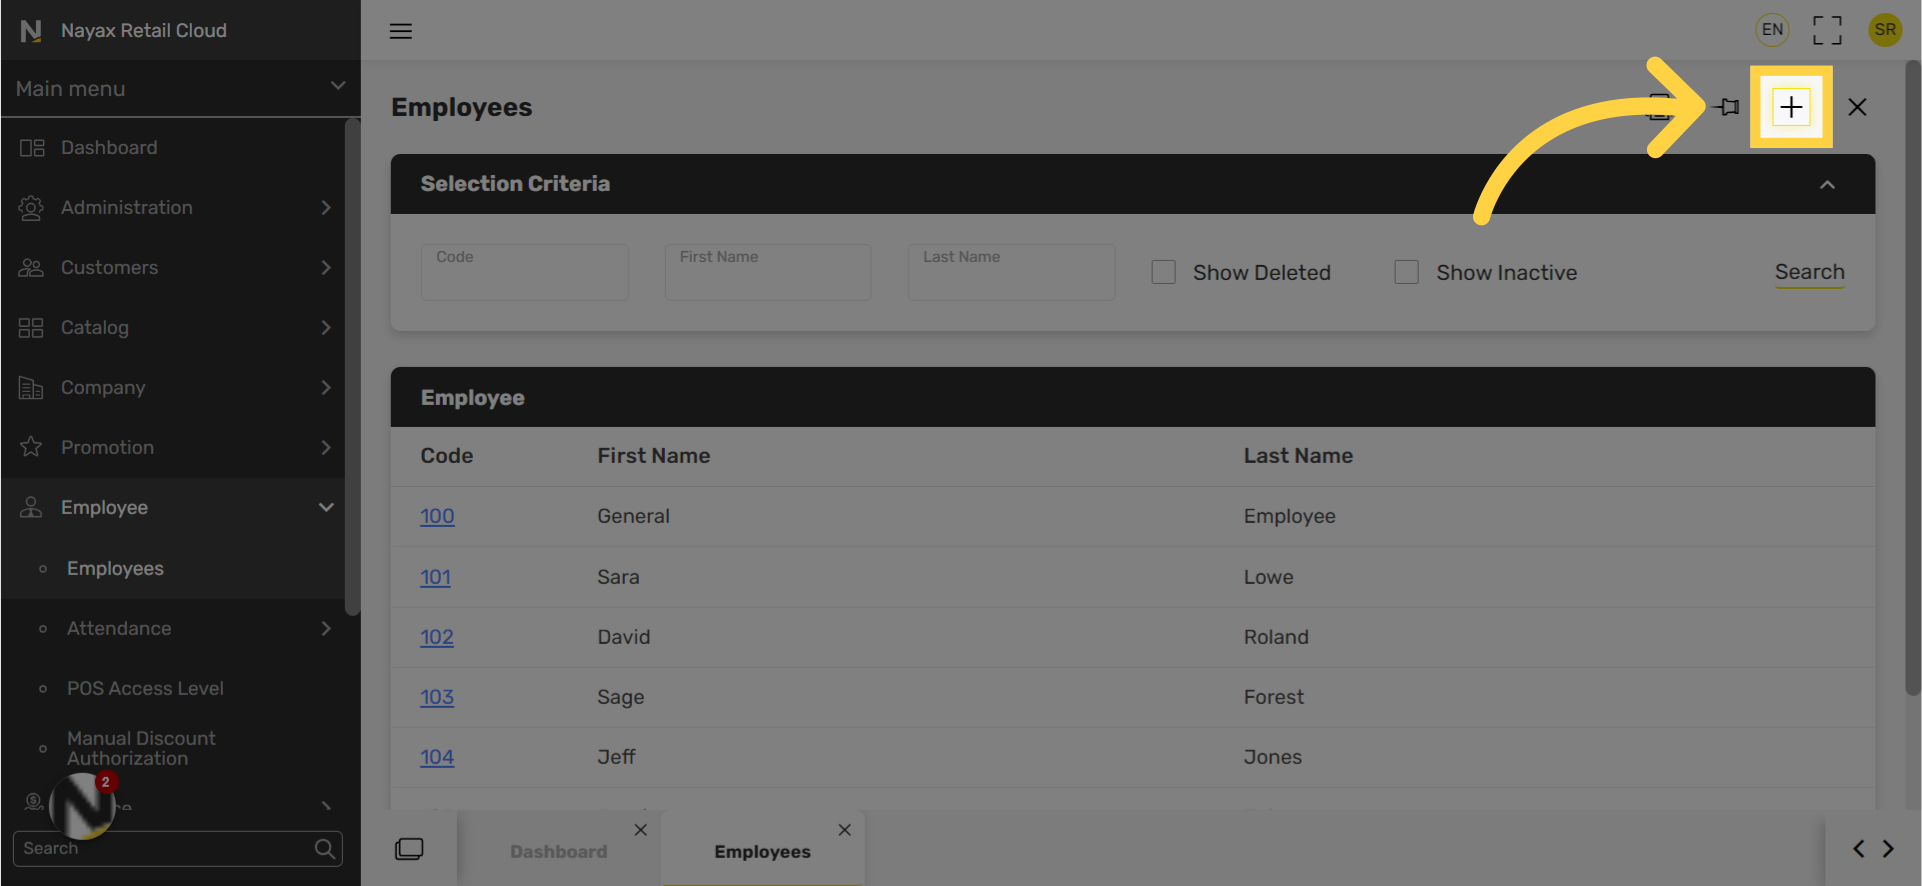
Fill in the following fields:
Image Attached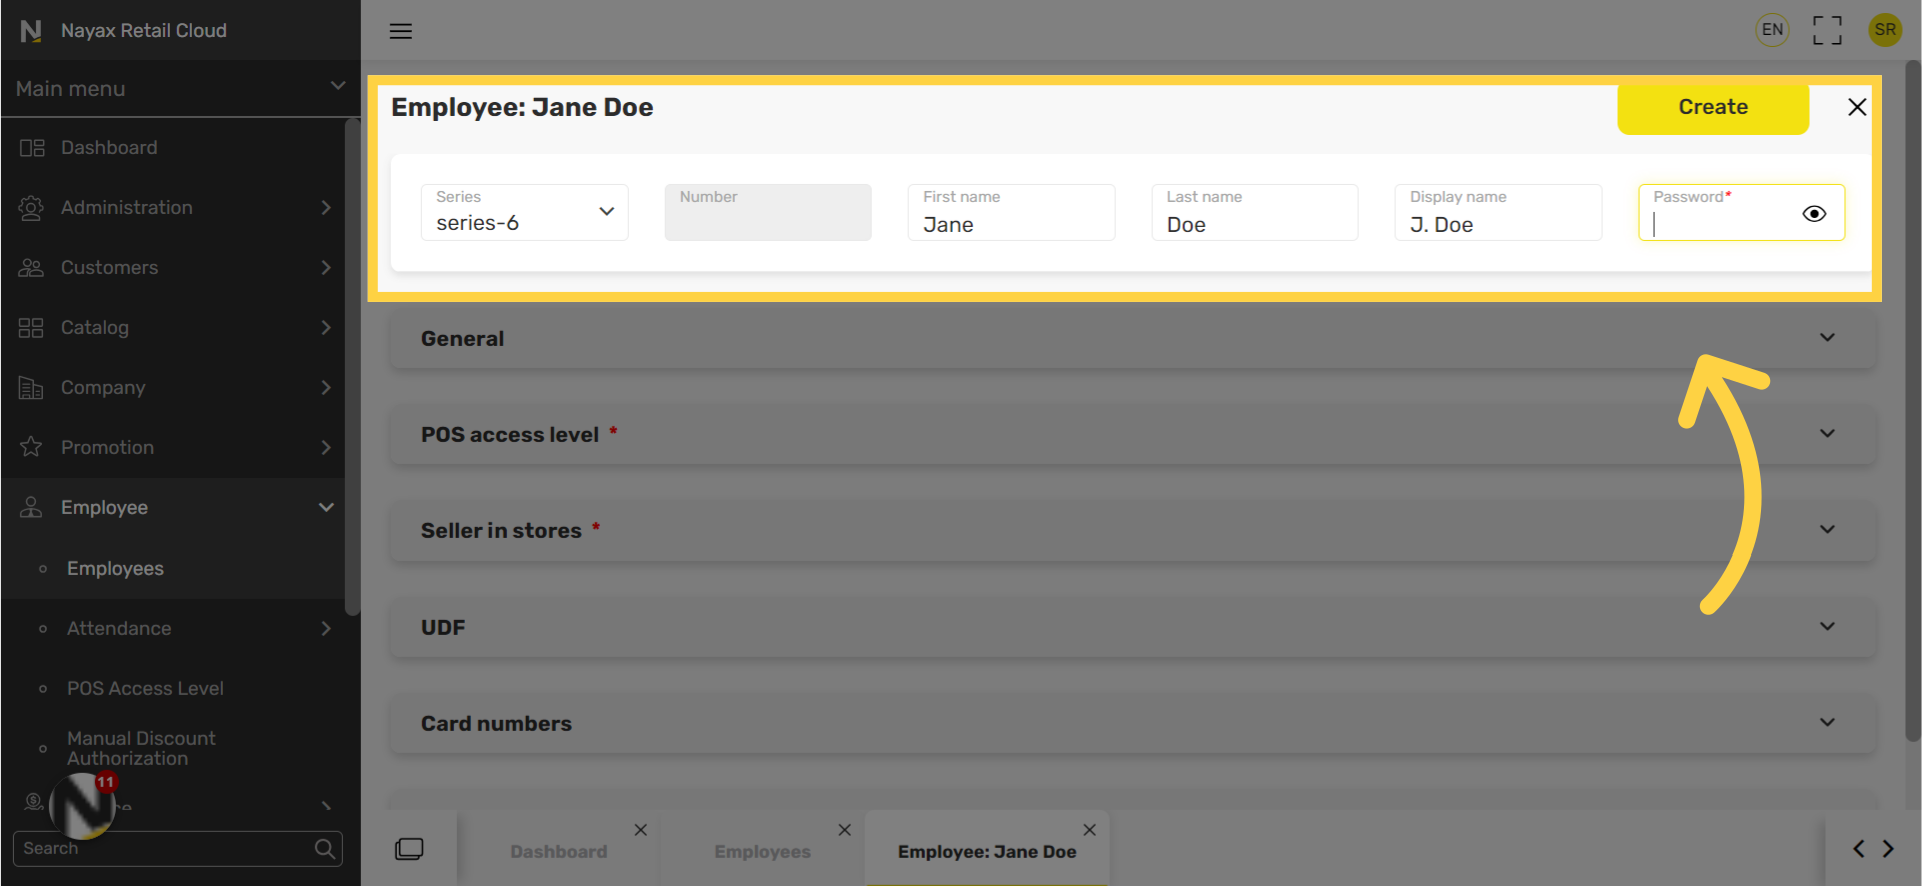
Click POS Access Level Tab
Image Attached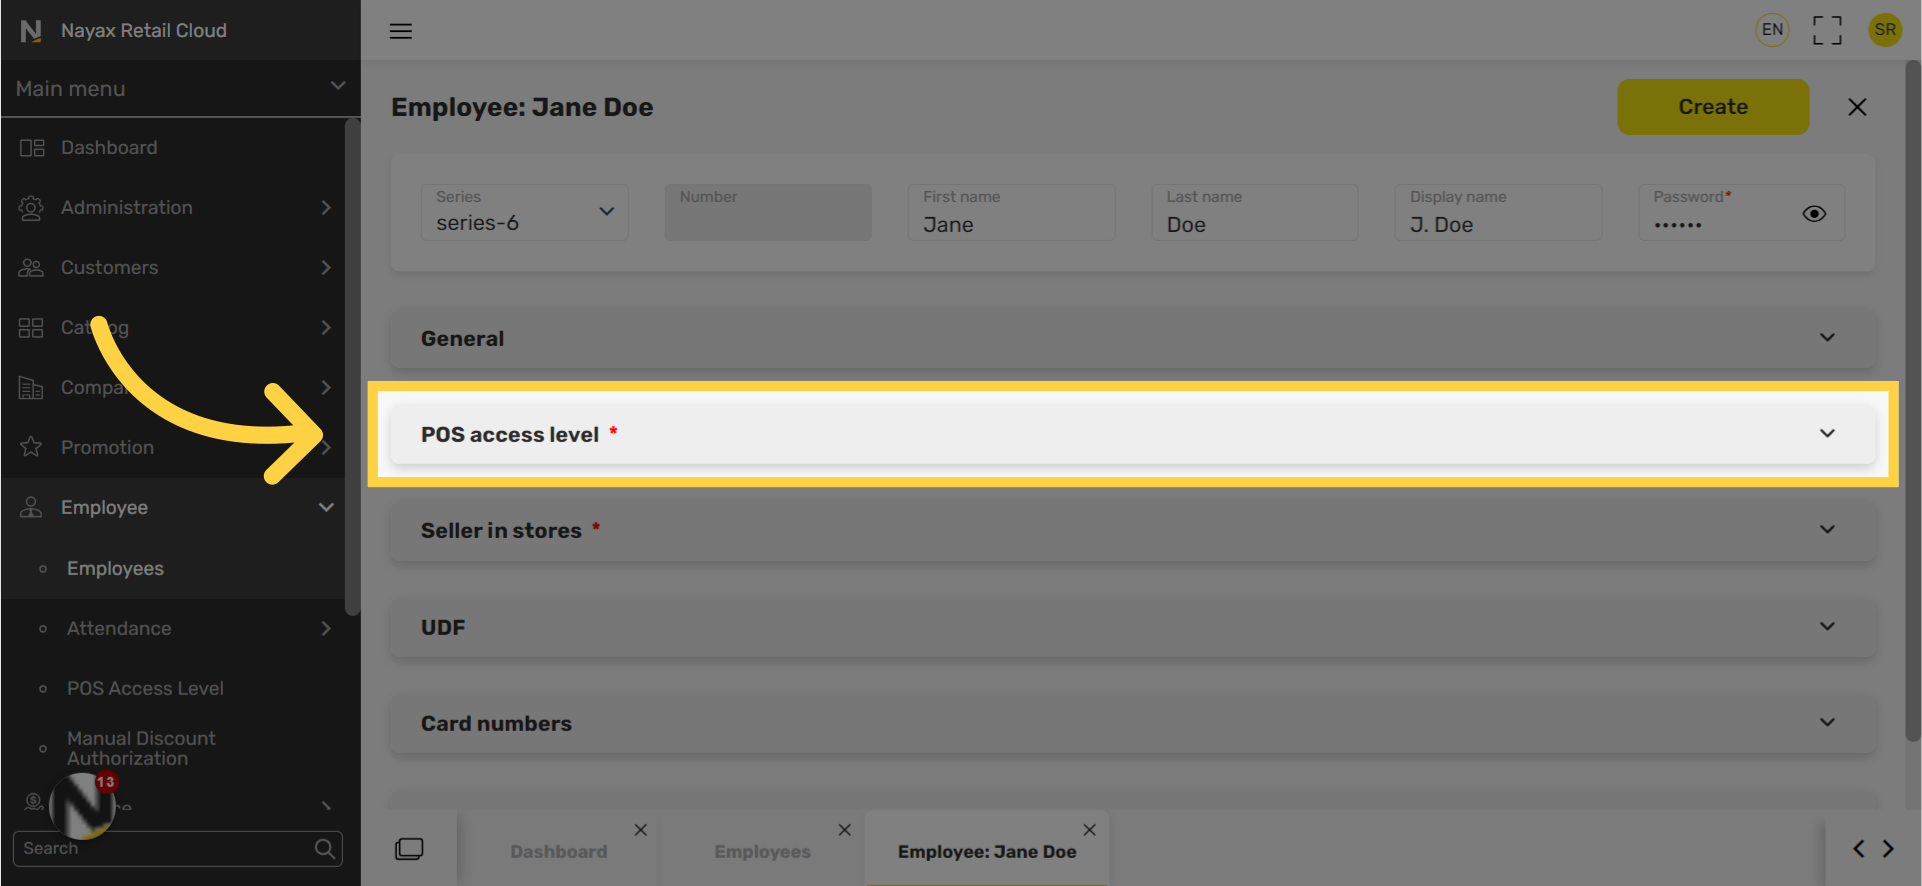
Click + Icon
Image Attached
Select Include
Image Attached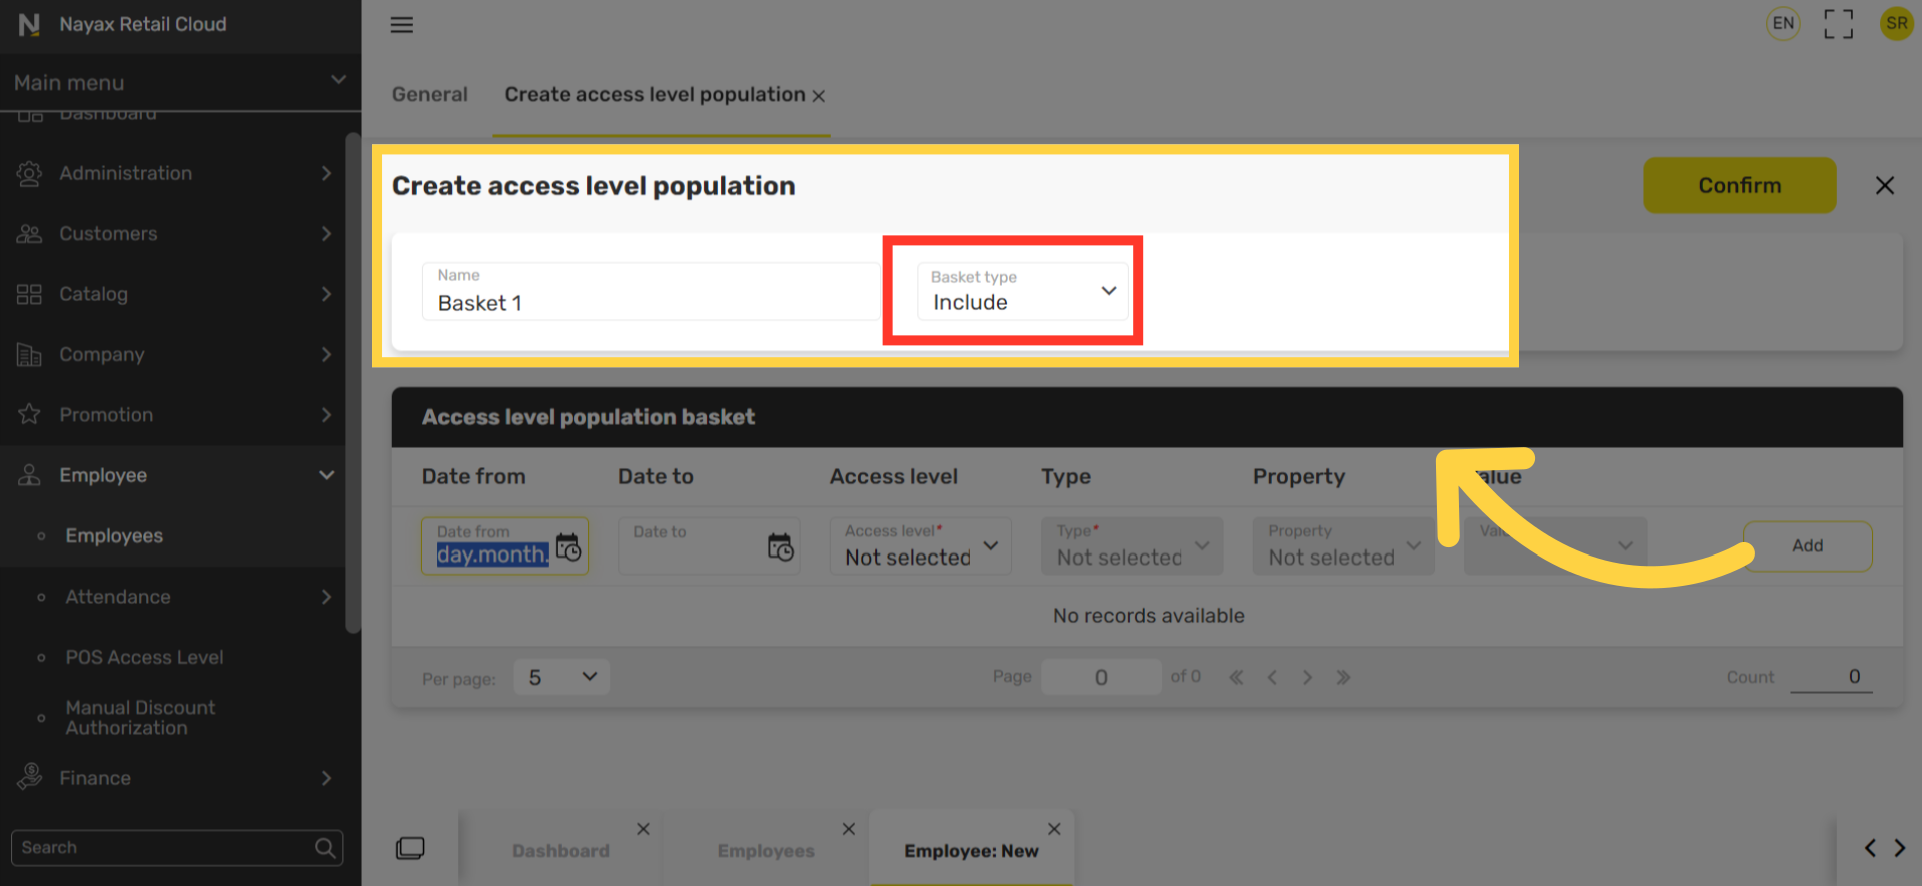
Click Add
Image Attached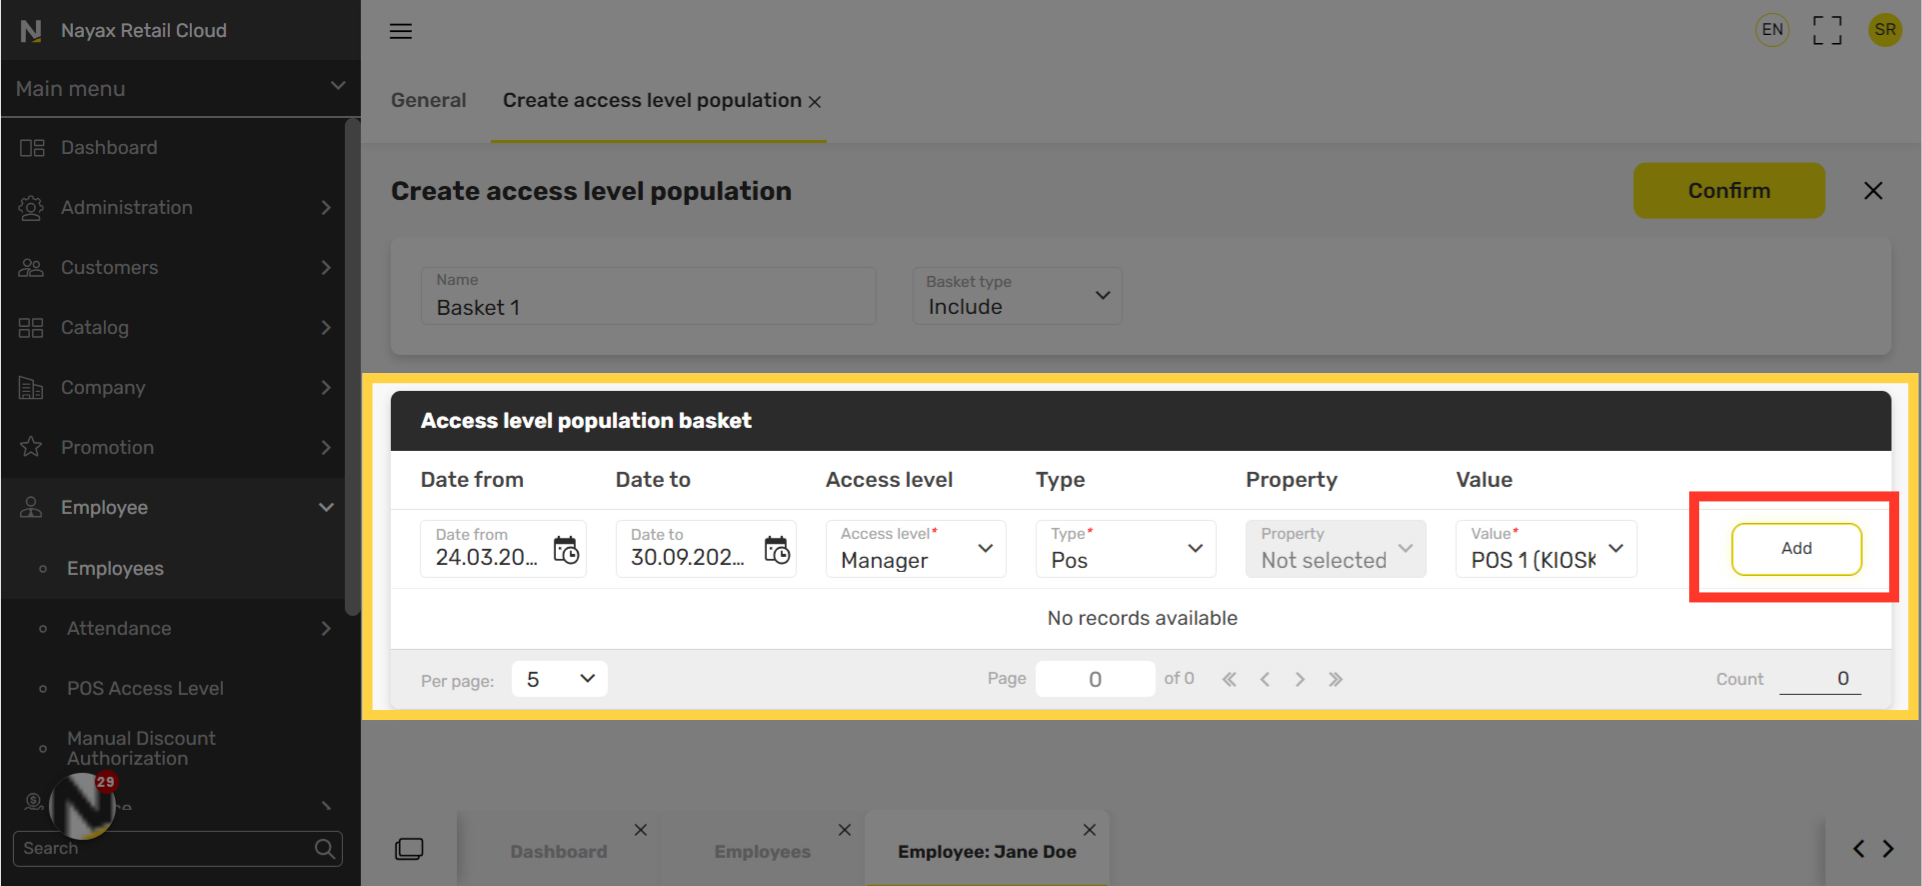
Pro tip!
Image Attached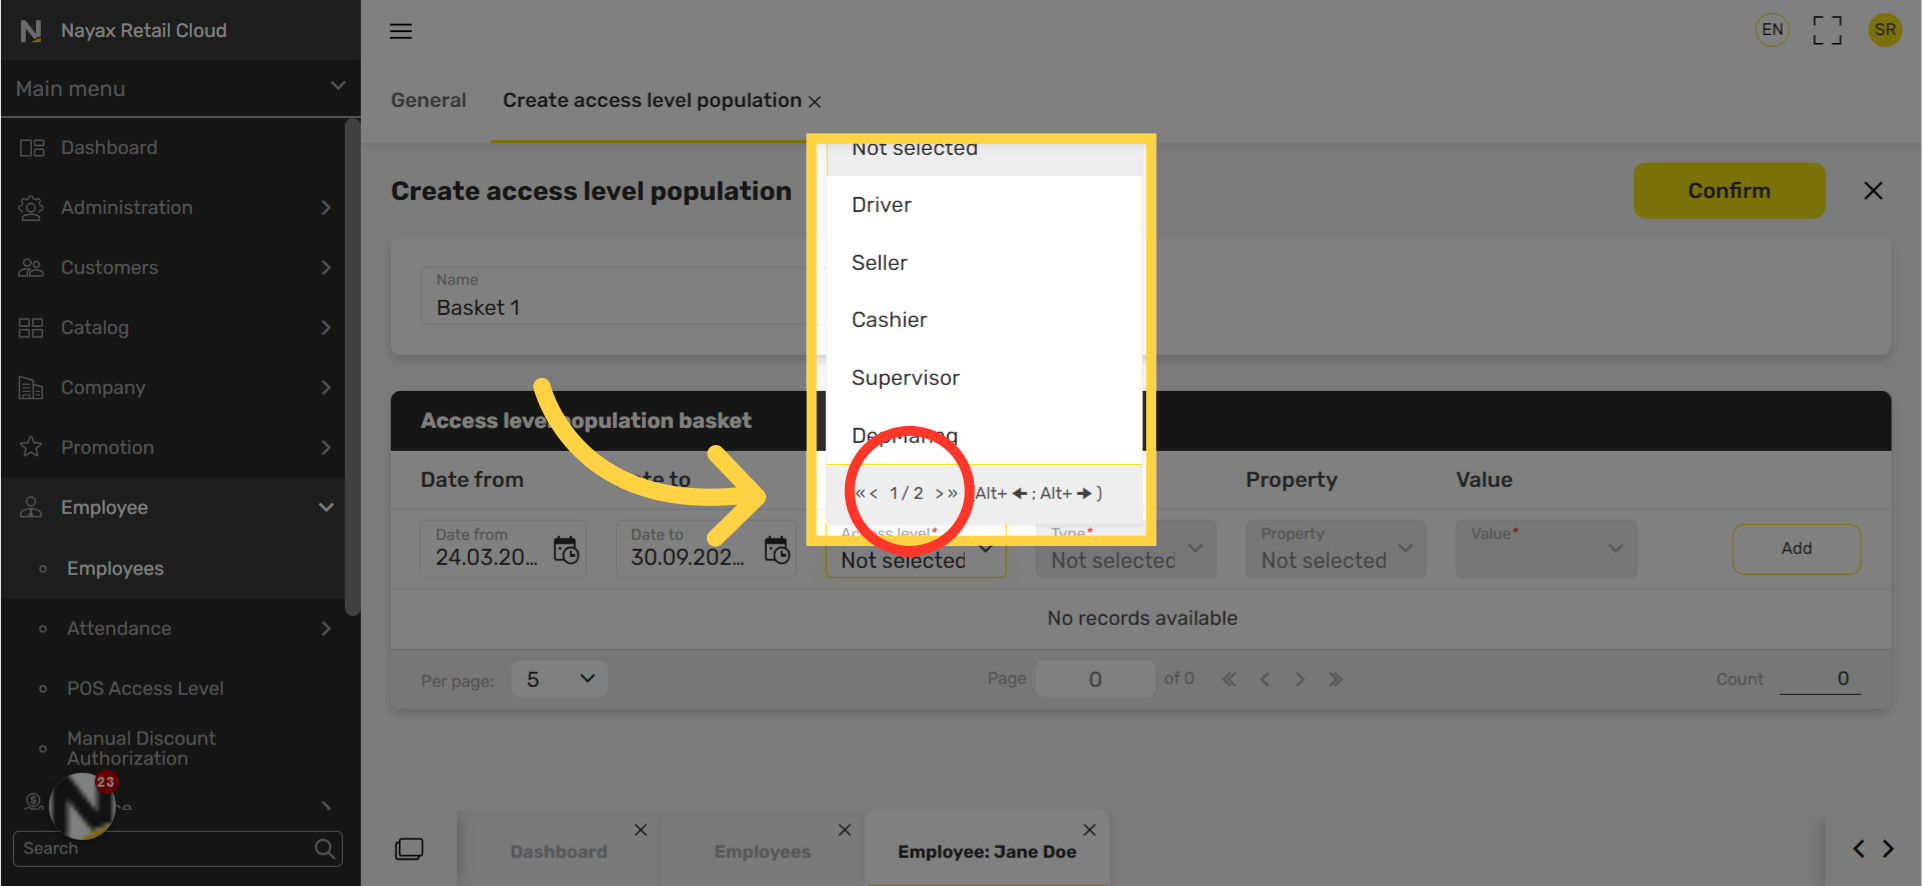
Click Confirm
Image Attached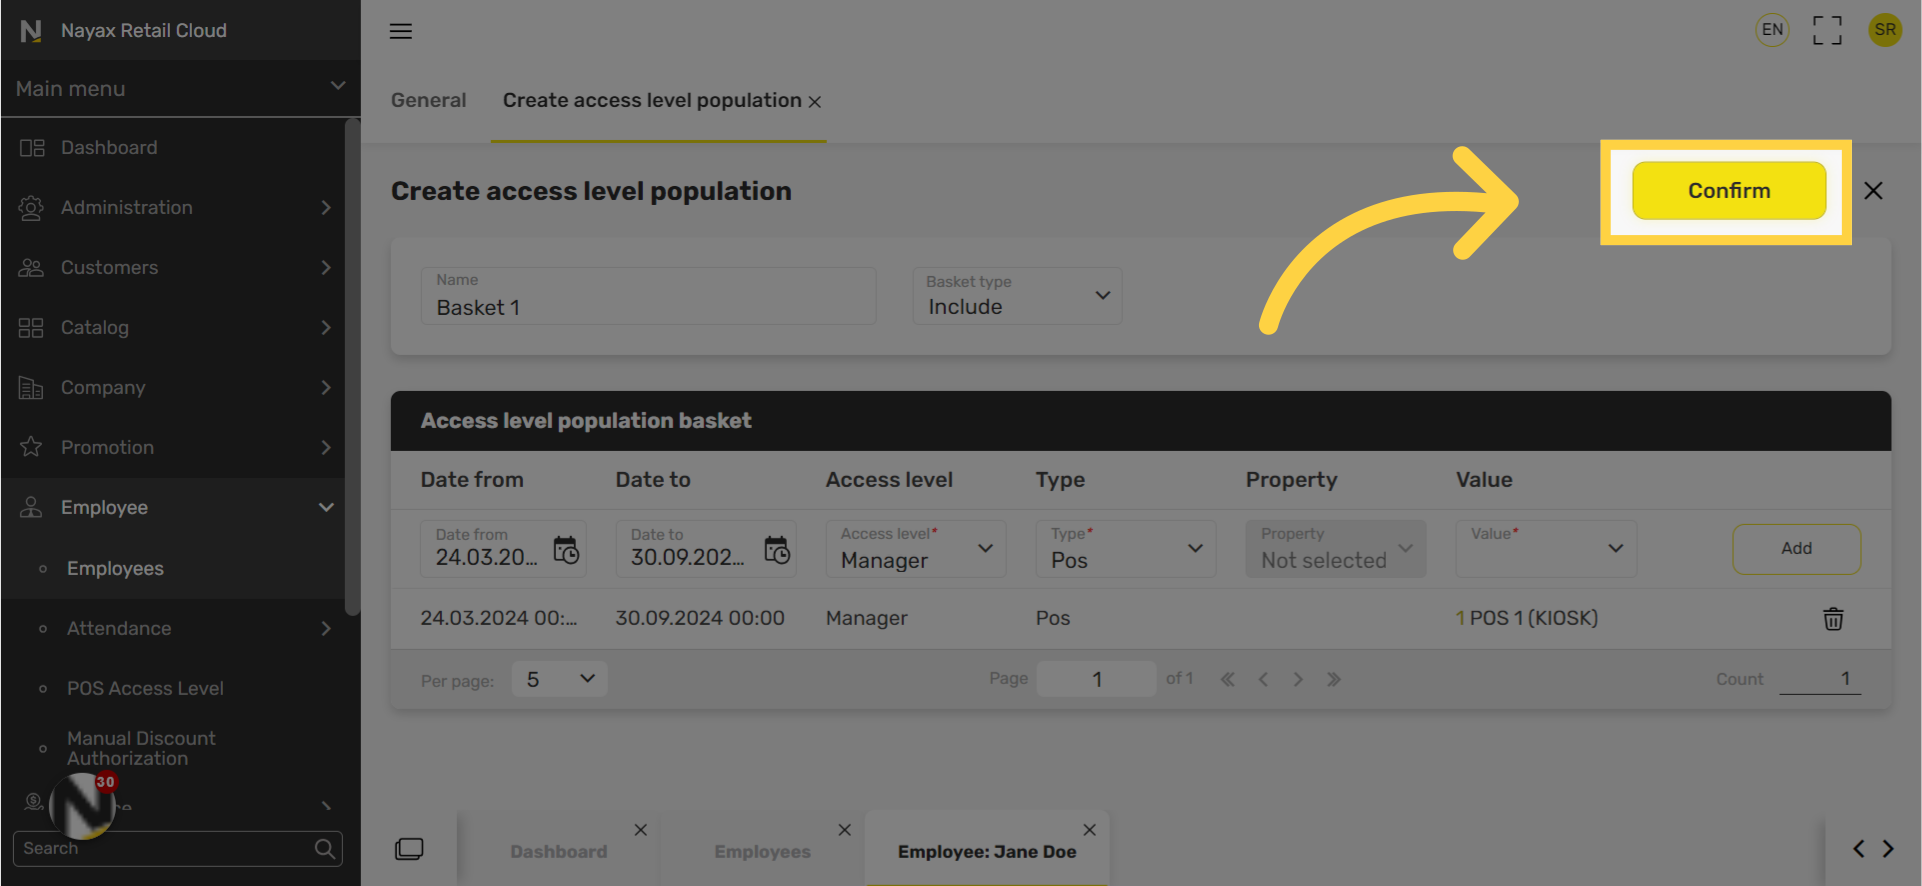
Click + Icon
Image Attached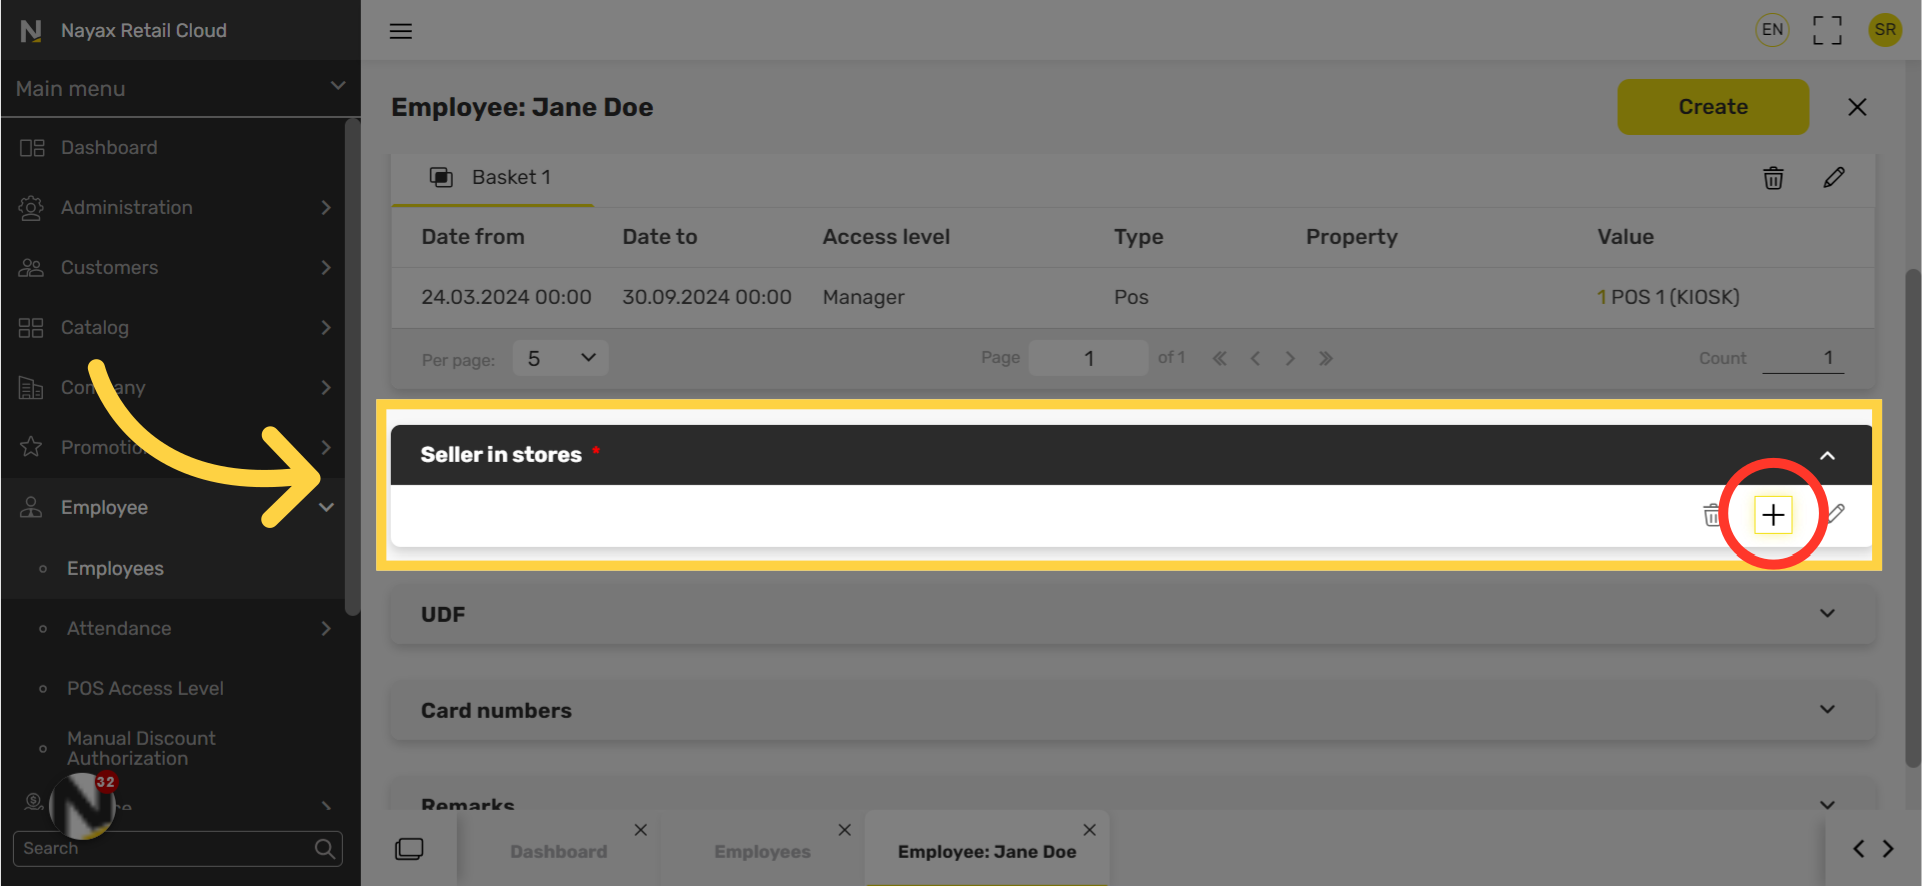
Select Include and Add
Image Attached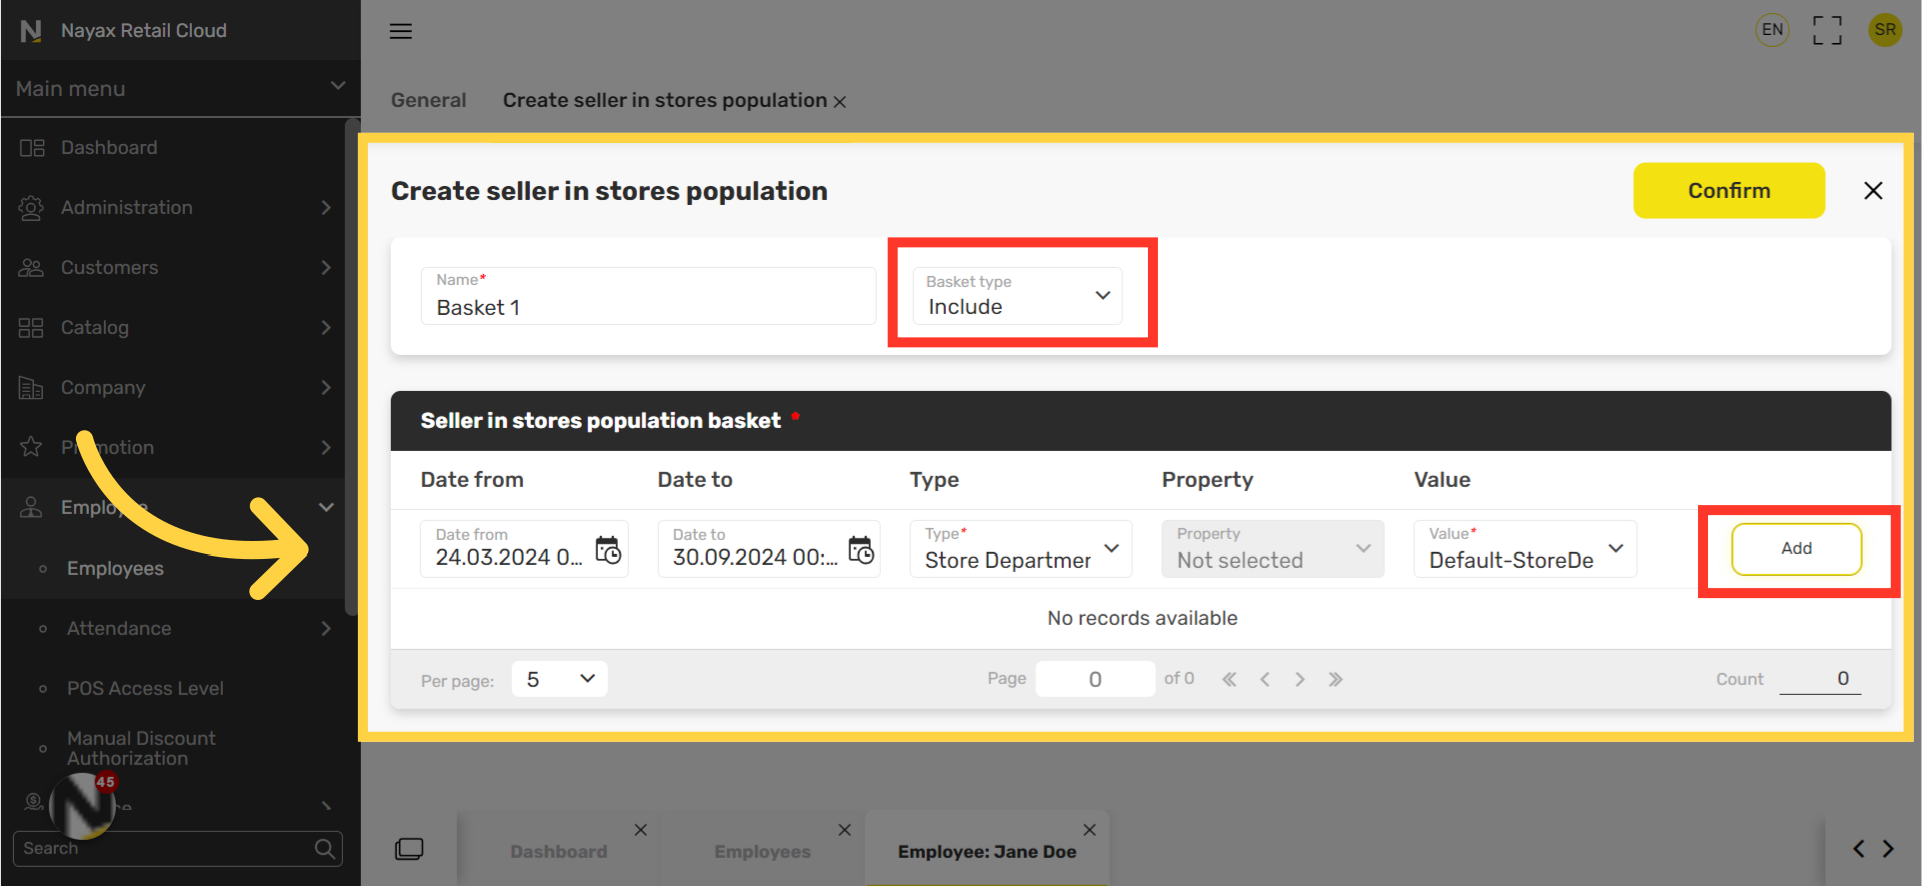
Click Confirm
Image Attached
Click Create
Image Attached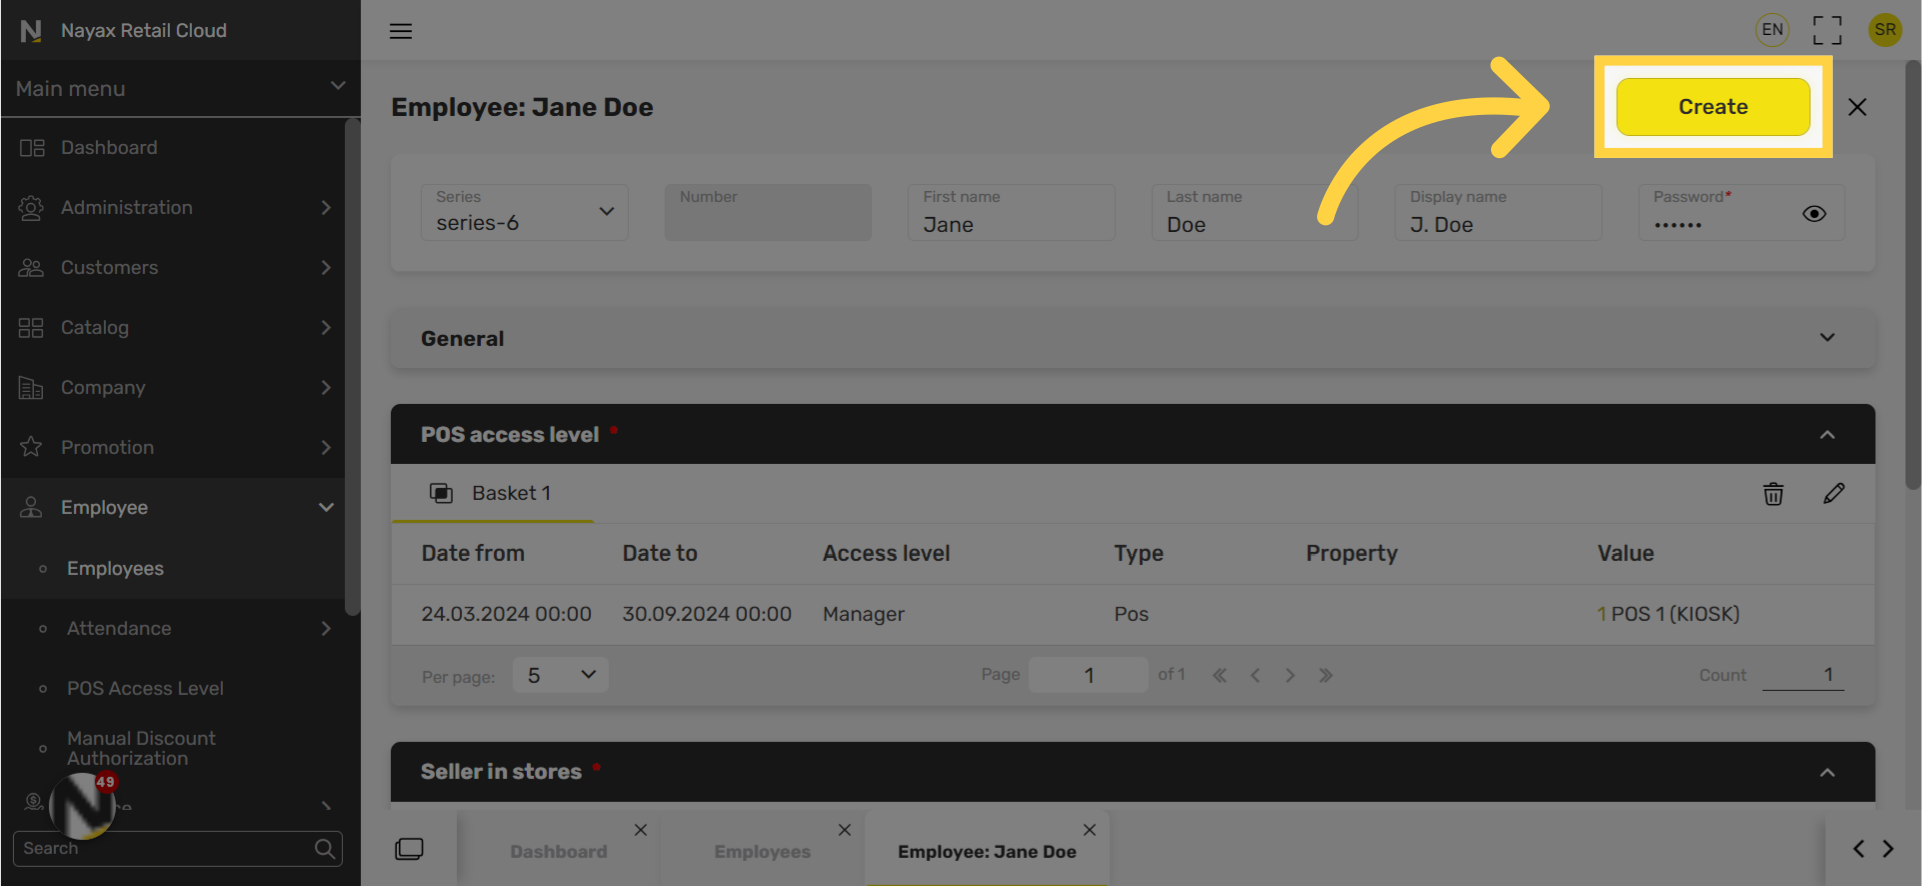
Thank you!
Did you find this article helpful?