How to Link Printer to a Printer Group | Tools
To associate printer with the printer list created follow the following steps:
1
Video Guide
2
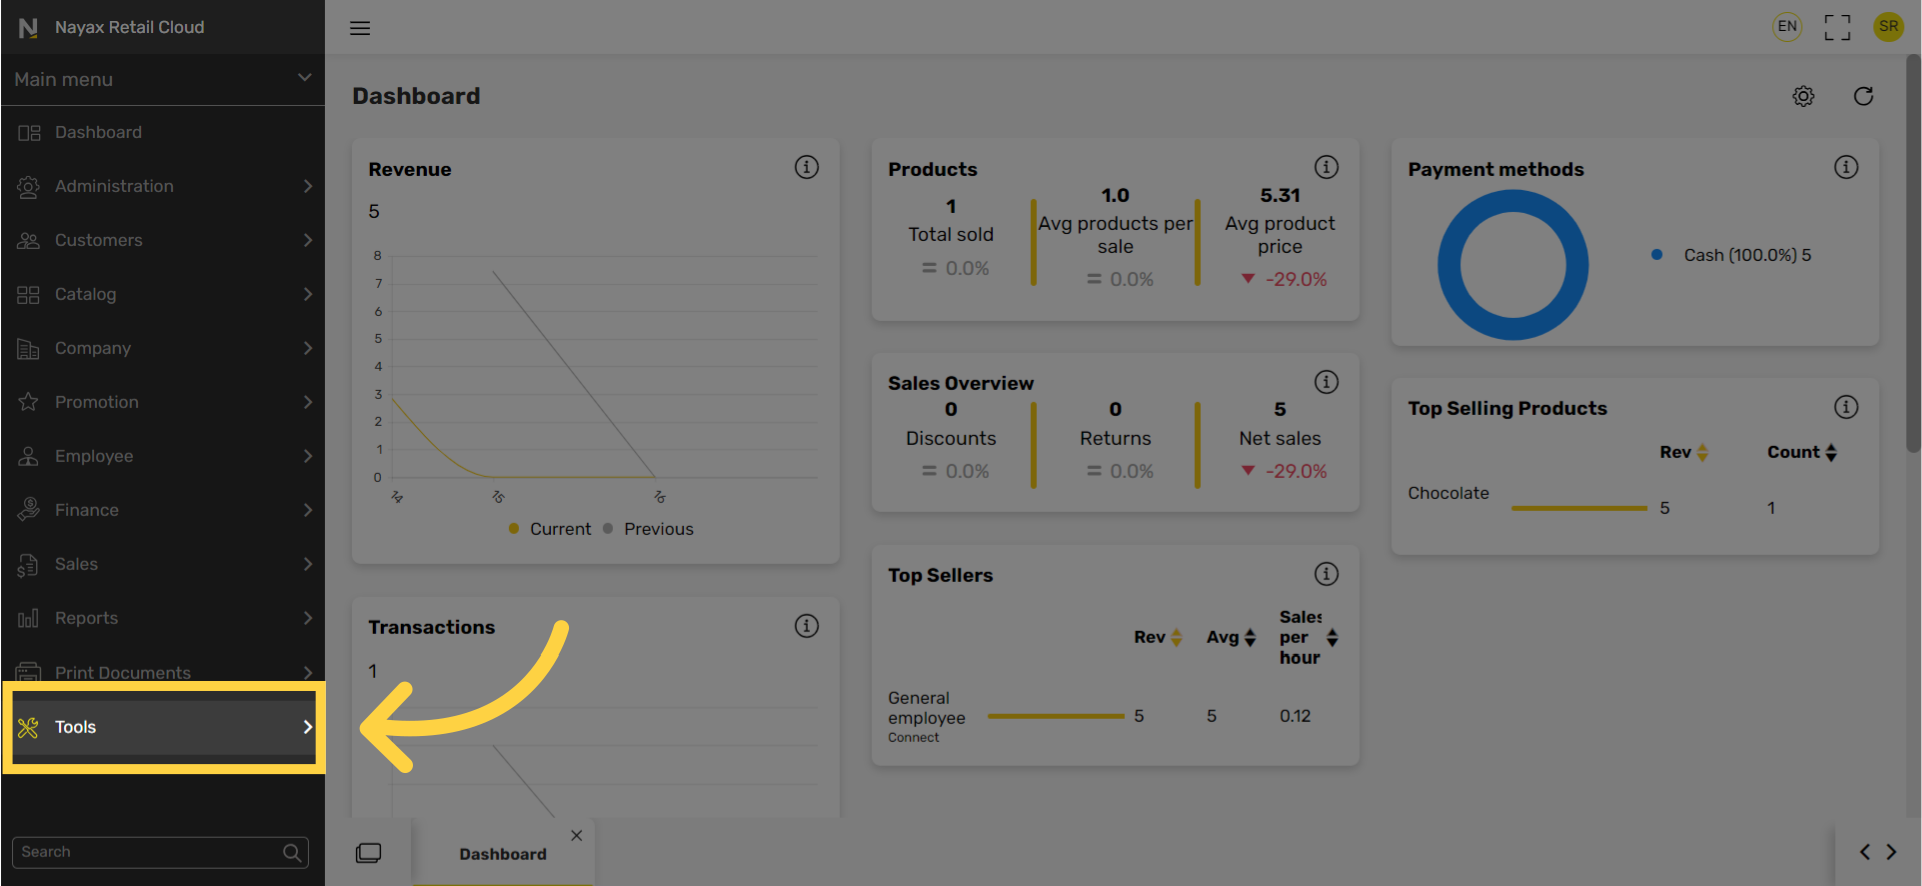
Click Tools Tab
Image AttachedOn the dashboard of your Retail Core management suite click the Tools tab.
3
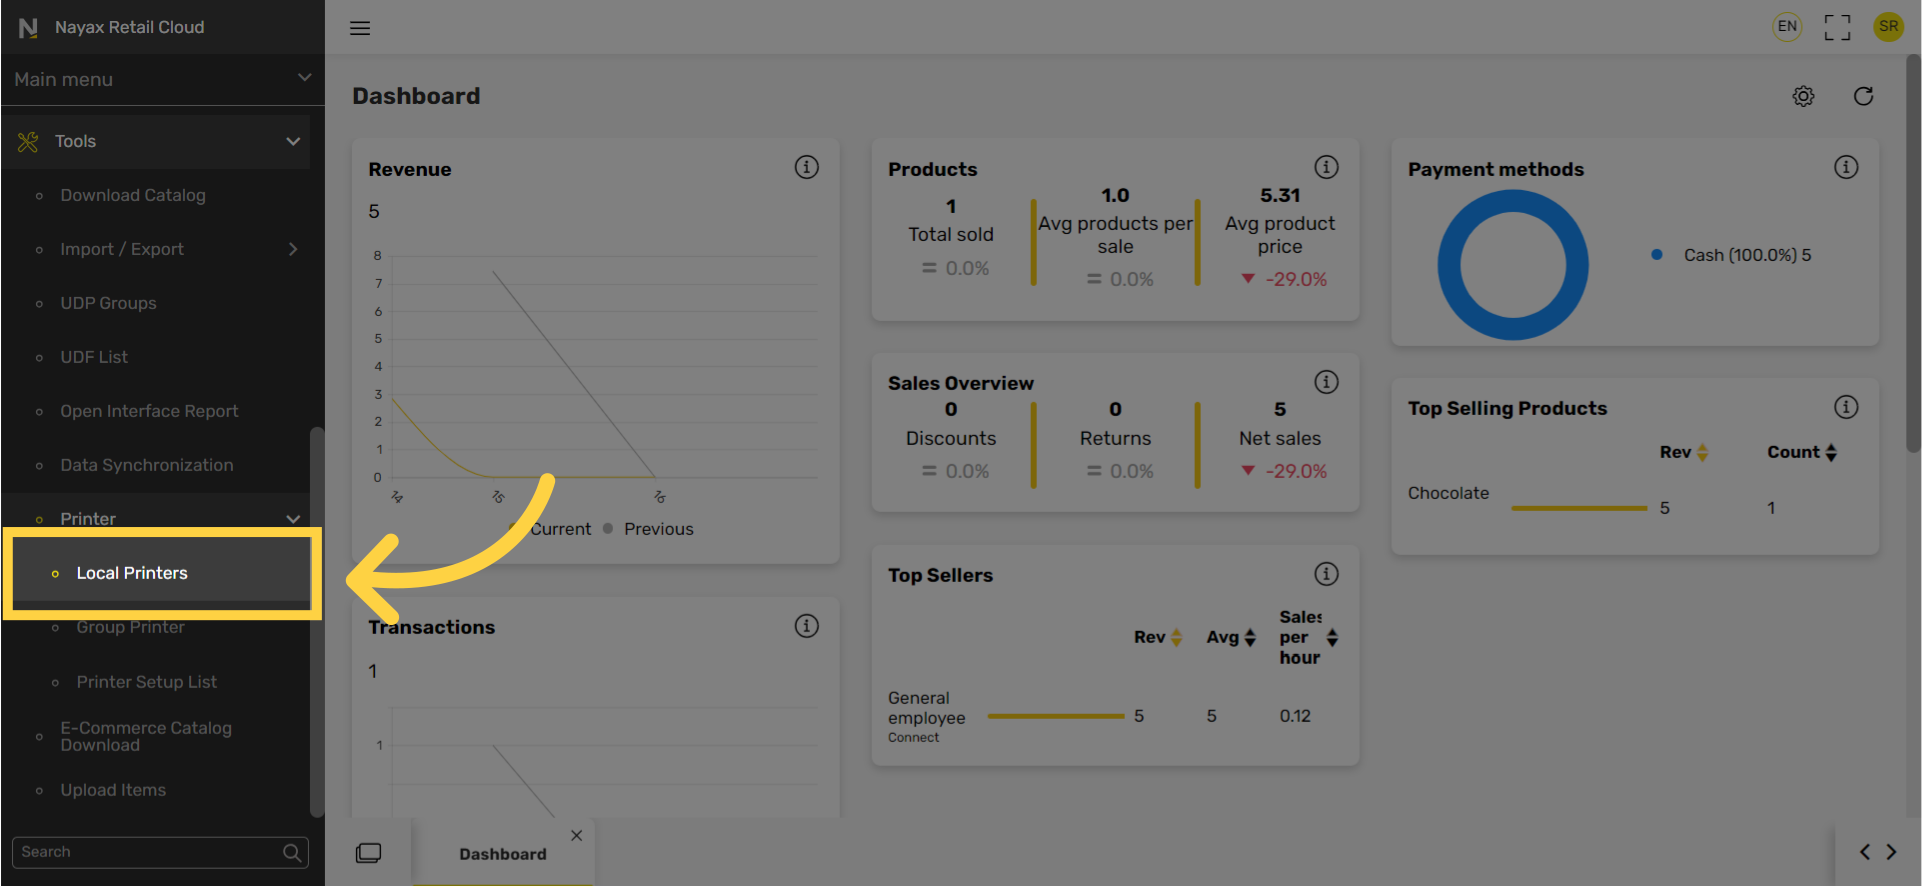
Click Printer Tab
Image AttachedIn the sub-menu click on Printer.

4
Click Local Printers Tab
Image AttachedIn the sub-menu click on local printers tab.
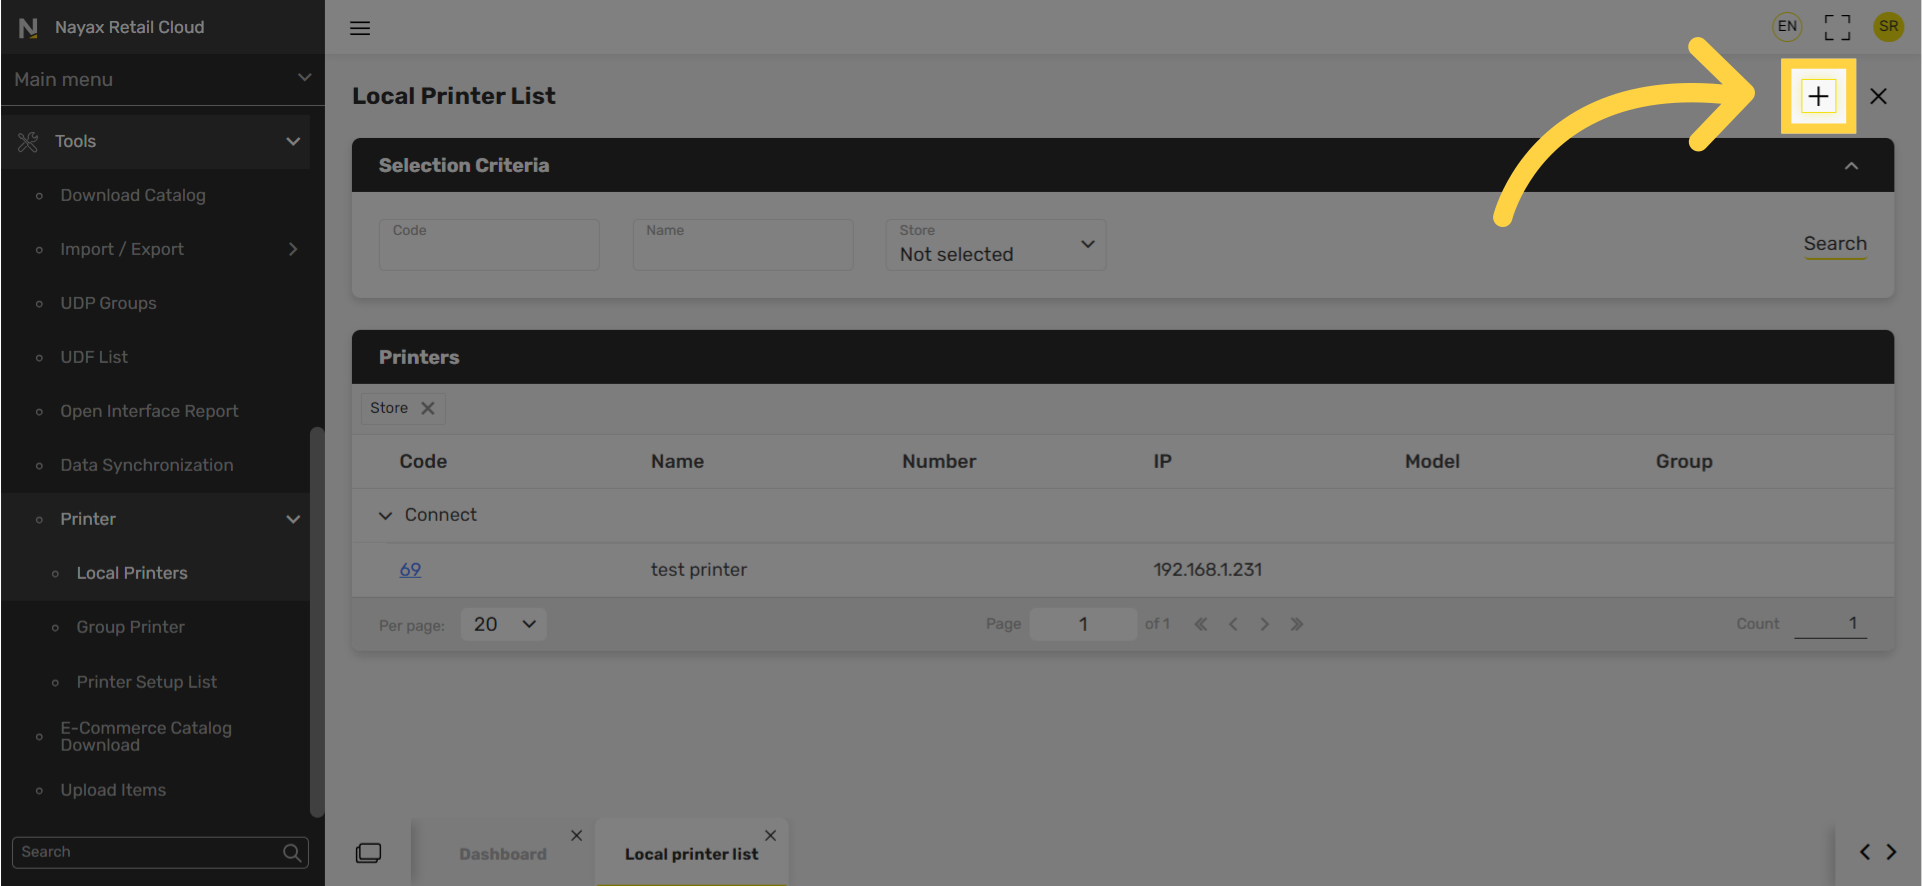
5
Click + Icon
Image AttachedClick + icon at the top right of the screen.
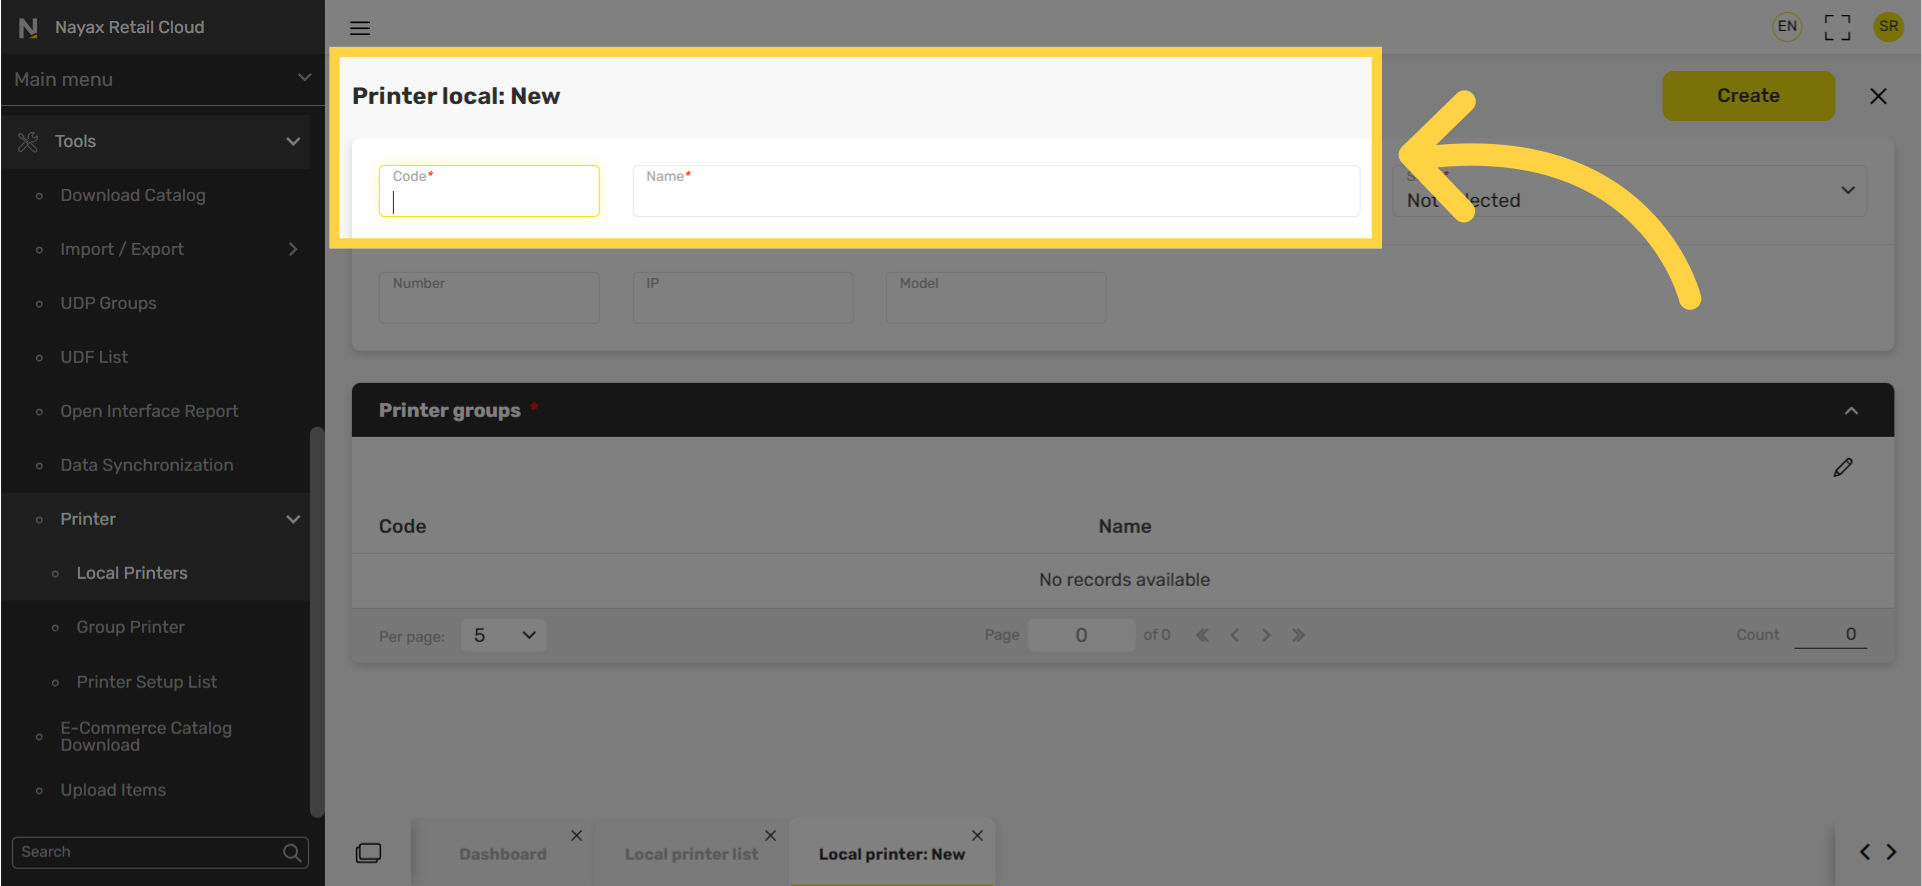
6
Enter Code and Name
Image AttachedEnter code and name the printer.
7
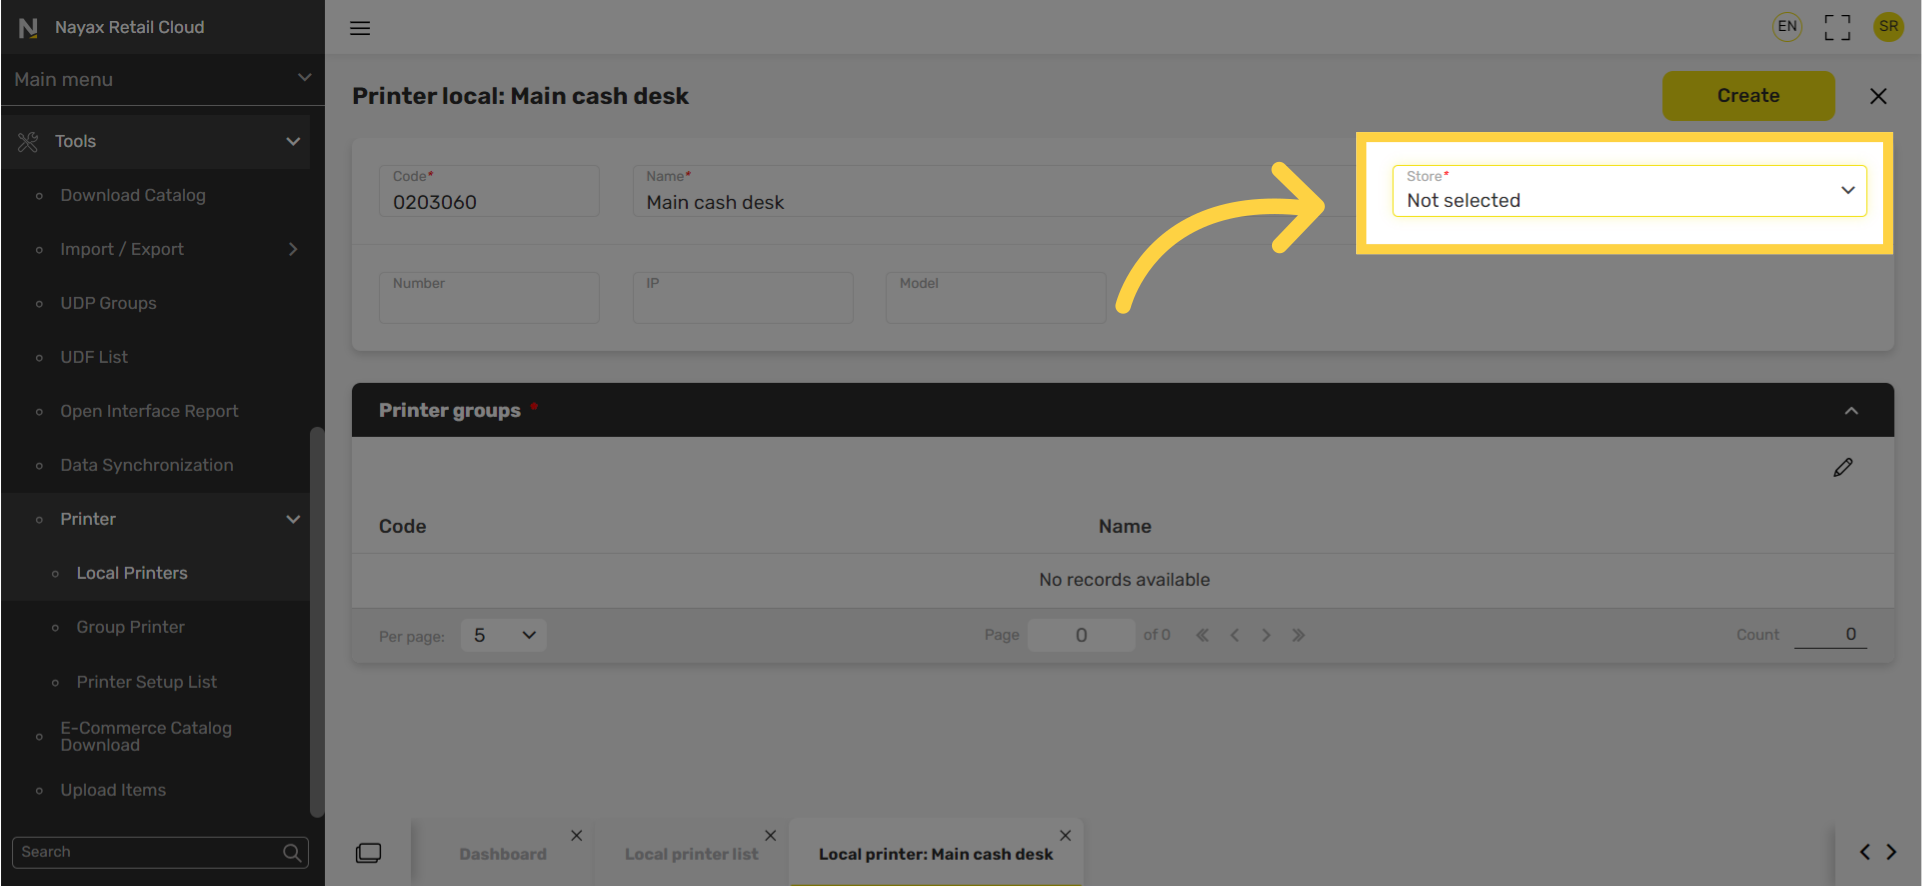
Select Store
Image AttachedClick the Store field and select the store from the drop down menu to associate for the printer.
8
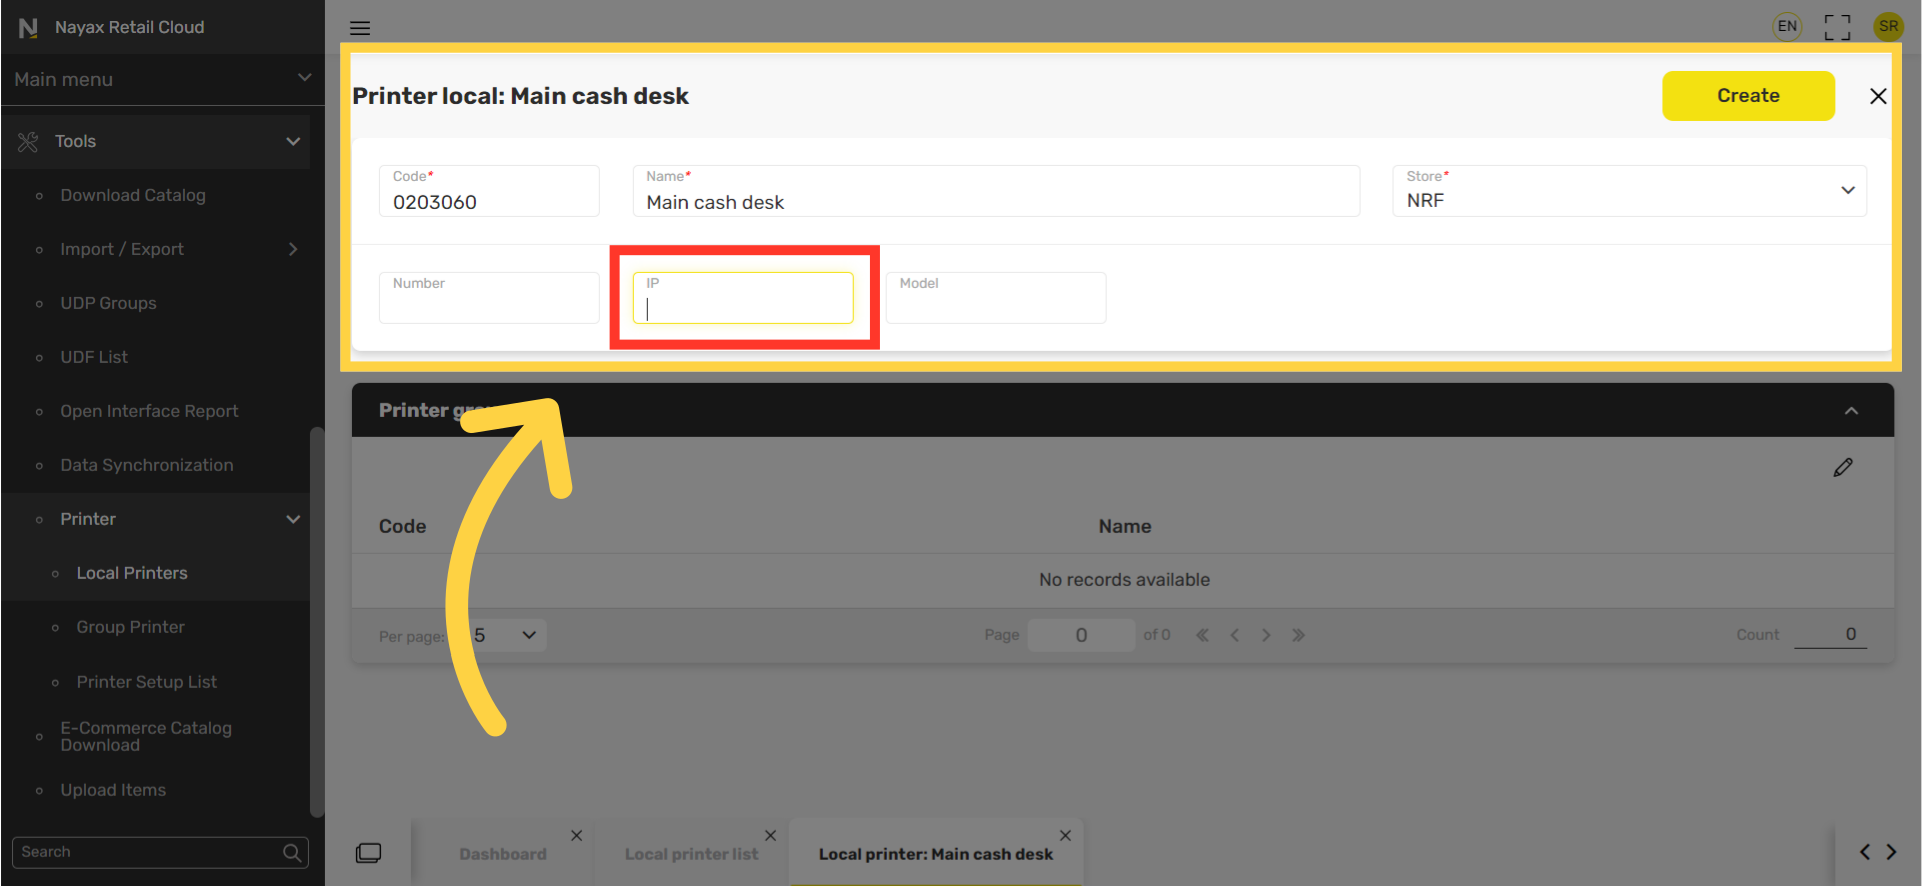
Enter Printers IP Address
Image Attached
Enter the printers IP address or else it will not work!
9
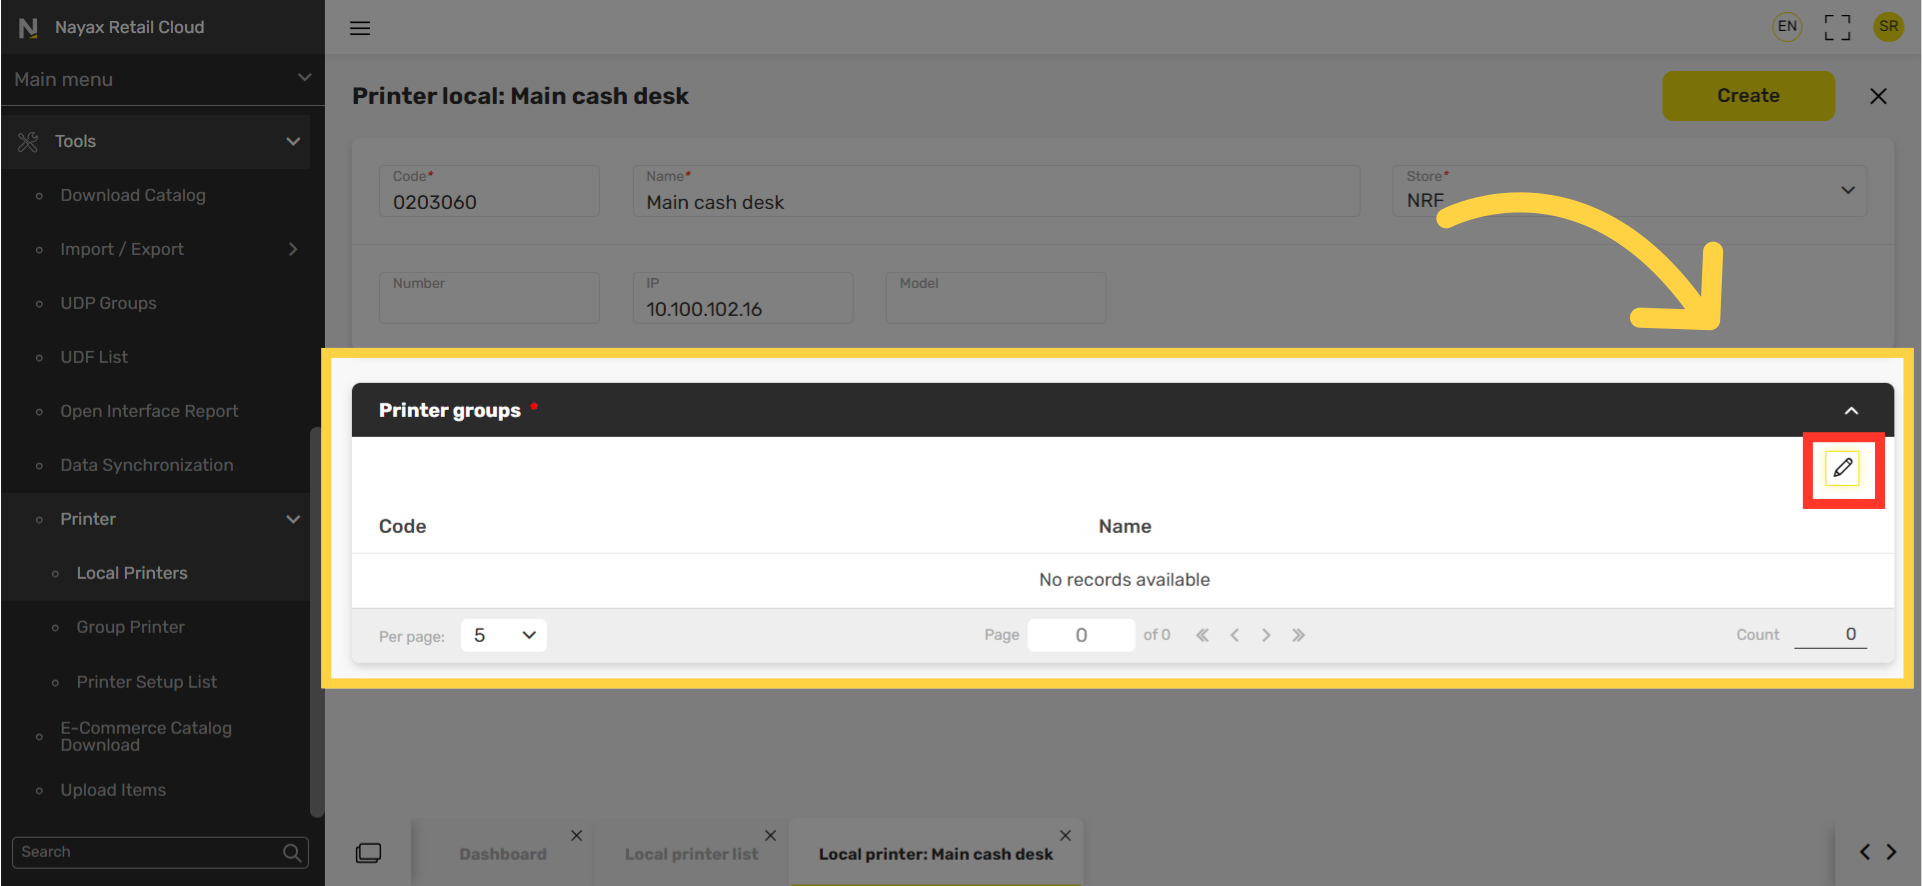
Click Printer Groups
Image AttachedScroll below to the Printer groups section and click open the table.

10
Click Edit Pen
Image Attached
Click the edit pen tool highlighted in RED on the visual.
11
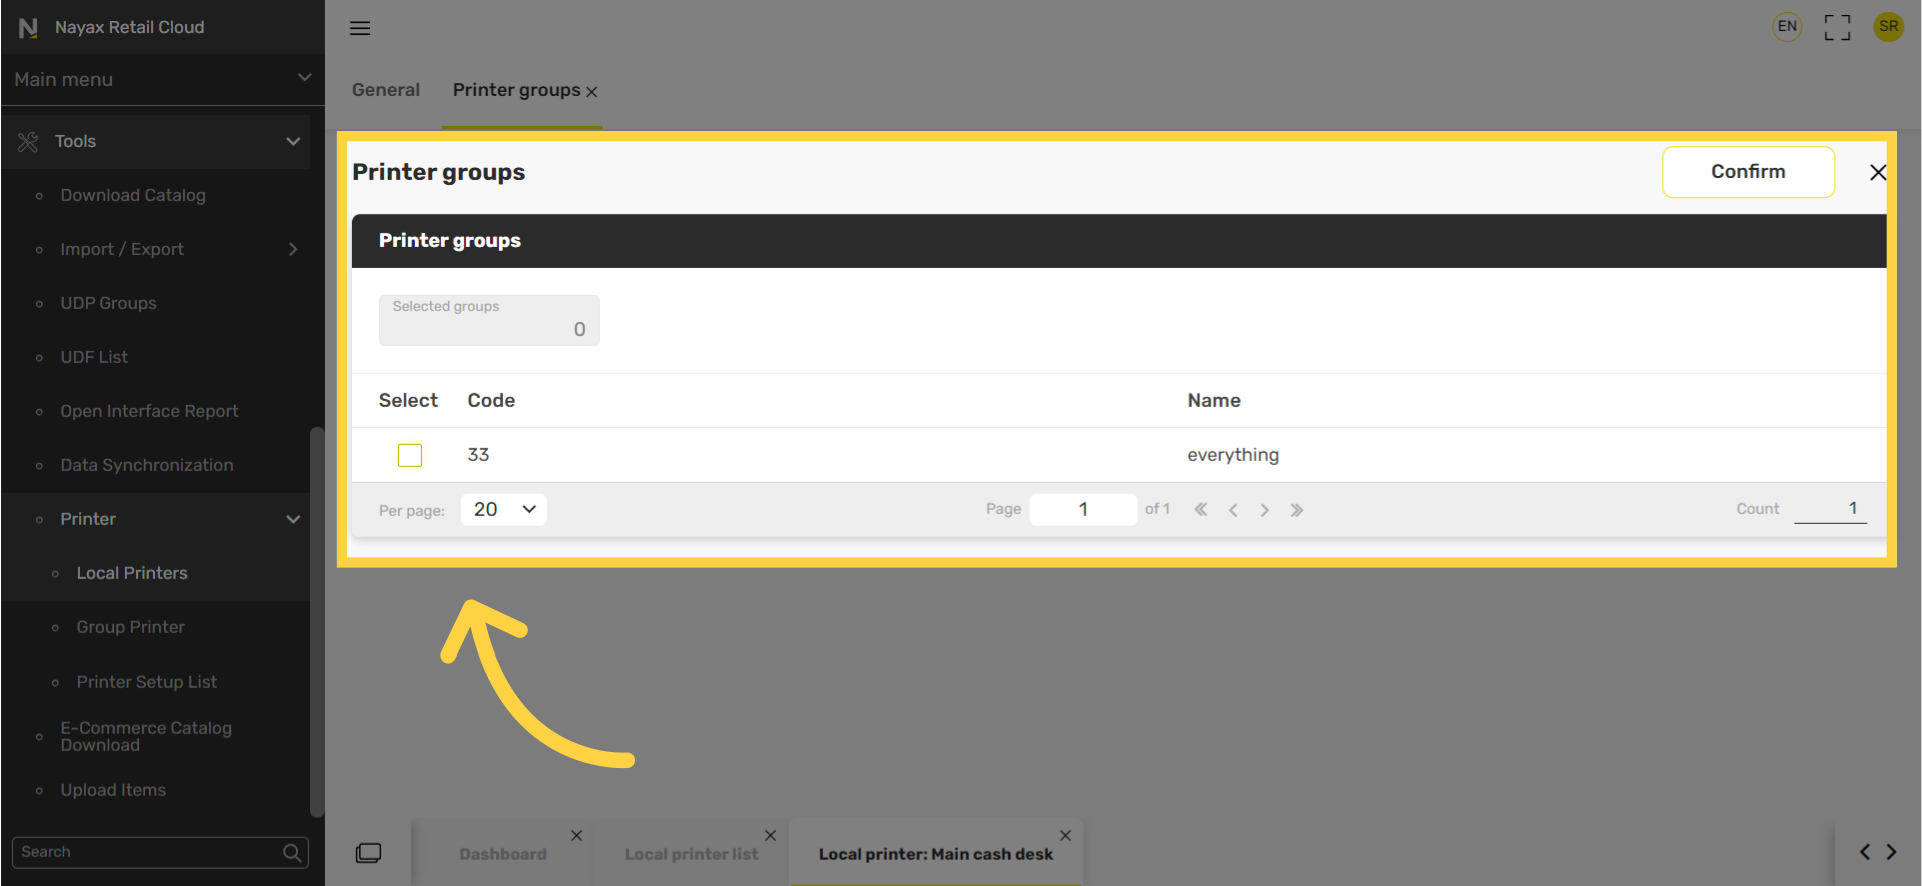
Click Checkbox
Image AttachedSelect the printer group you wish to associate with the selected printer.
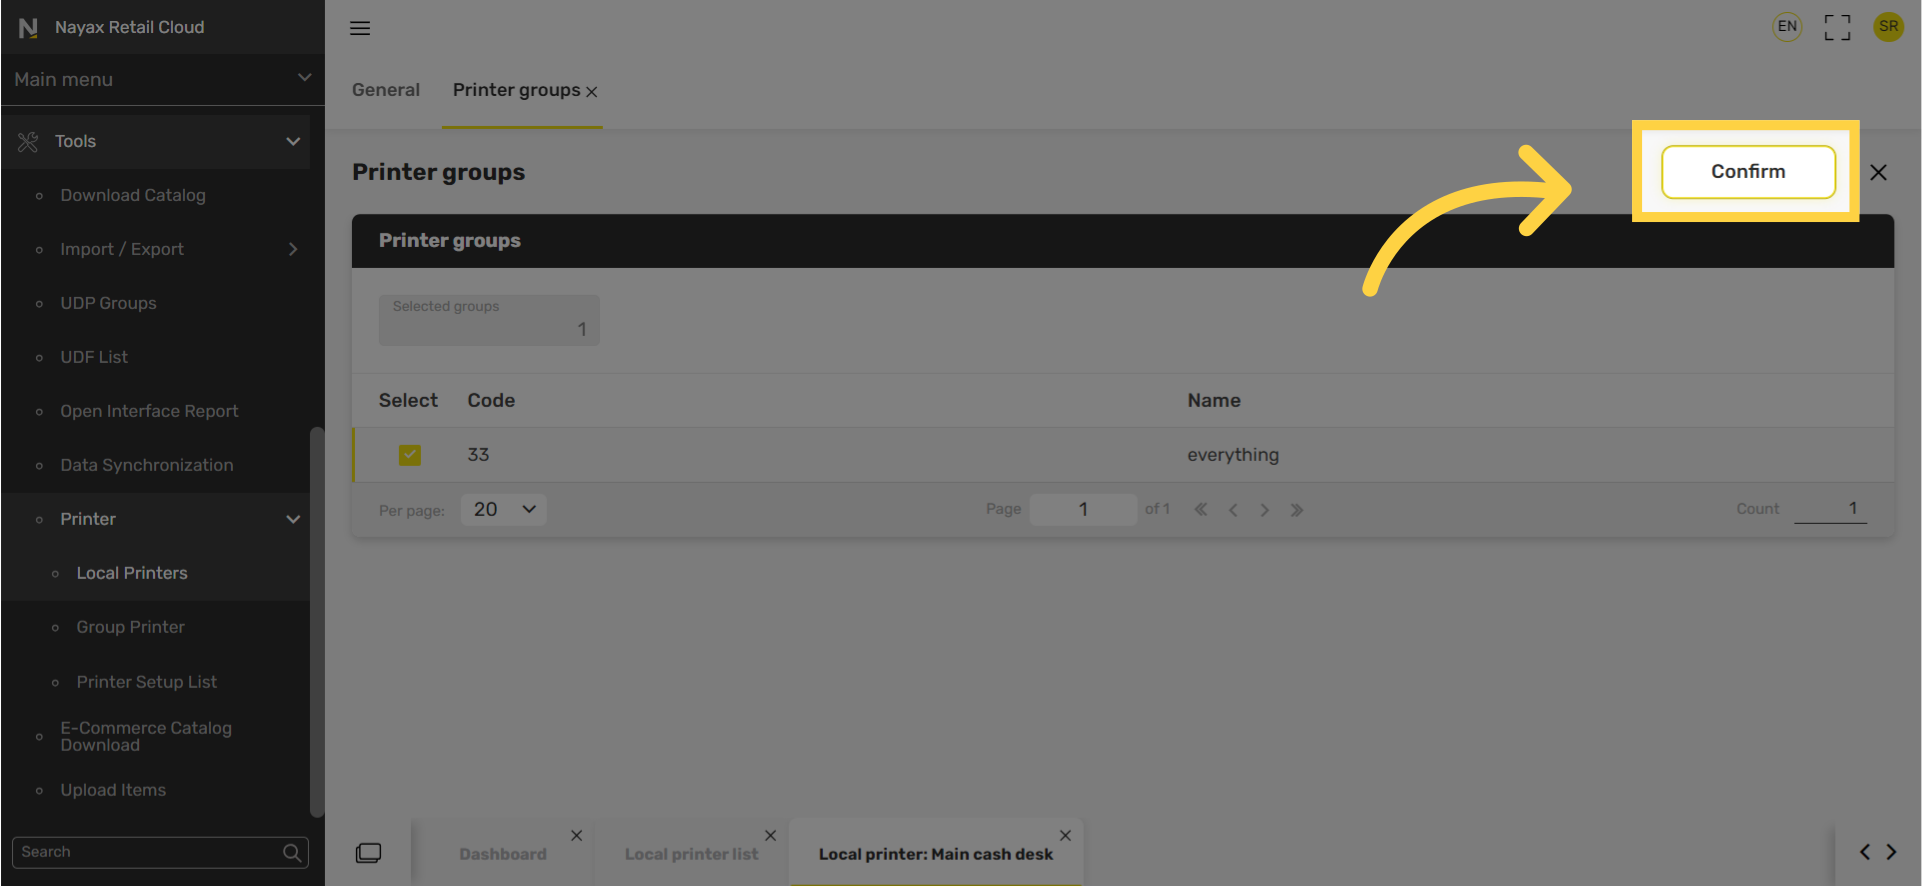
12
Click Confirm
Image AttachedClick the confirm button to save these settings.
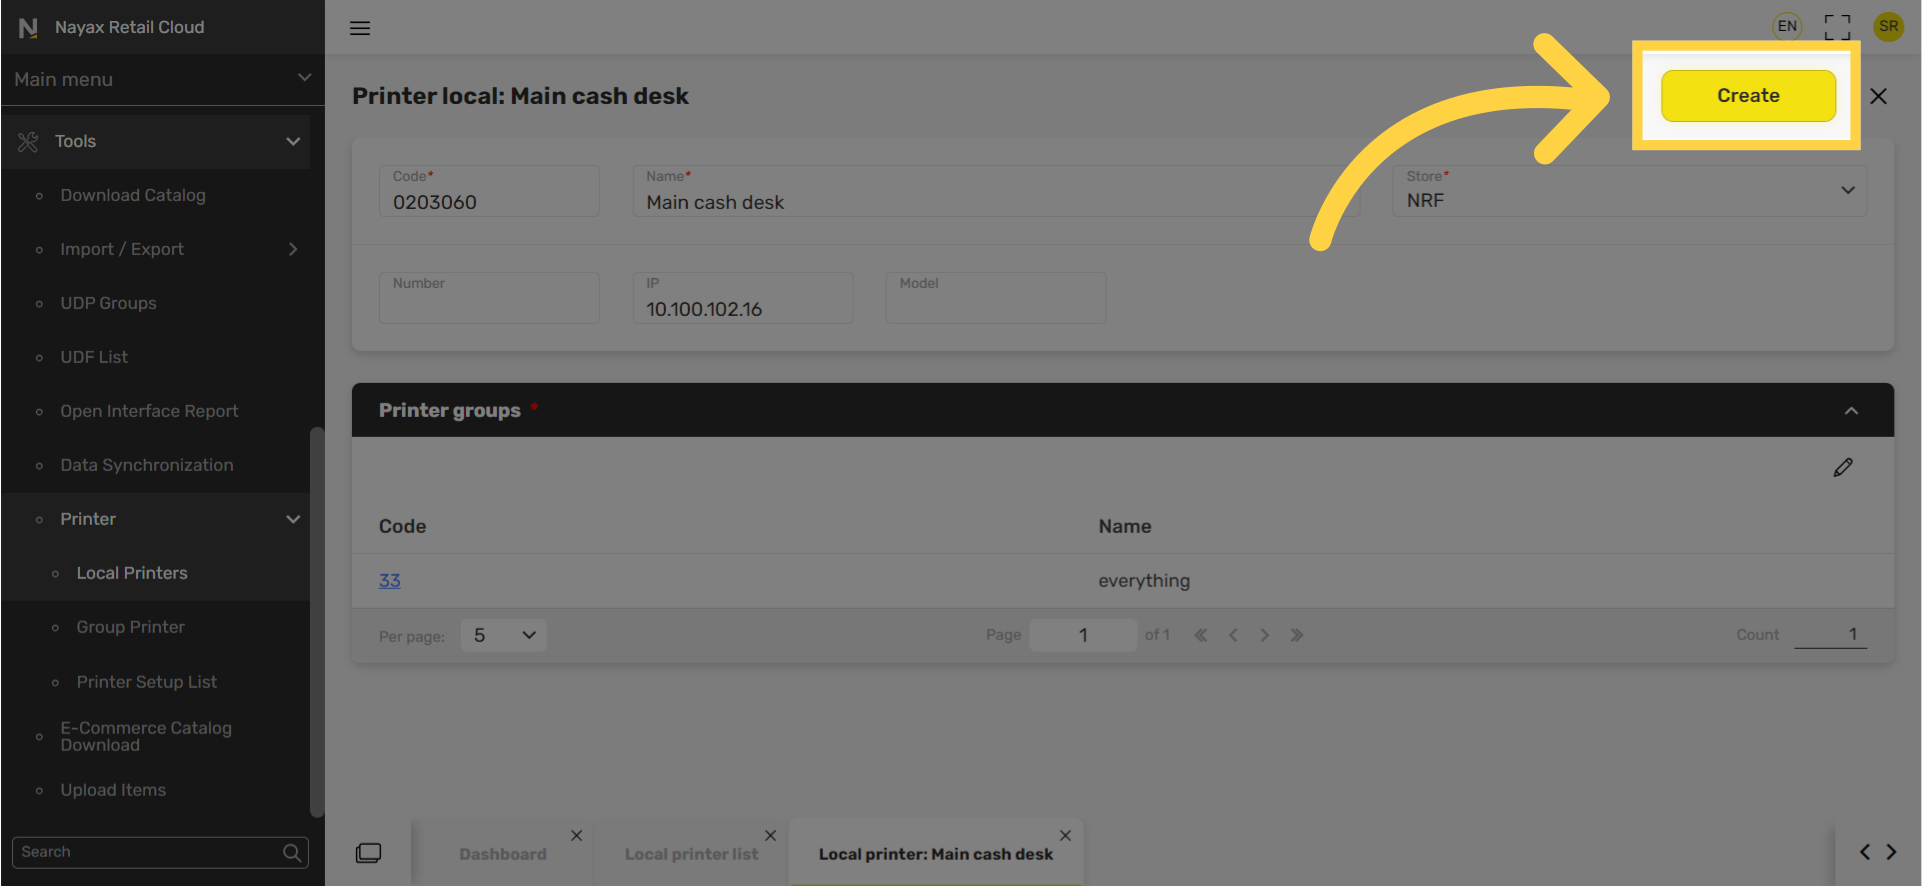
13
Click Create
Image AttachedClick the Create Button to save your progress!
Thank you!
Did you find this article helpful?