How to Configure Weekly Rates for EV Charging Stations | Administration
Learn how to set pricing for individual chargers, not just the whole location. Customize rates by charger, apply day and time-based pricing, and enable time-of-use rates to match your energy costs.
Video Guide
00:01: Learn how to set pricing for individual chargers, not just the whole location. Customize rates by charger, apply day and time-based pricing, and enable time-of-use rates to match your energy costs.
00:13: On the Dashboard of your Nayax Energy Core platform, click on the Administration tab.
00:20: In the dropdown menu, locate and click on the Tariff tab.
00:24: Find the machine actor name for which you want to configure tariffs and click on it to proceed.
00:31: On the Machine Actors page, to set the charging session fees, click on the "Add Fee" tab as highlighted.
00:38: In the pop-up window, click the 'Price Strategy' arrow highlighted to open the drop-down menu.
00:45: Click on weekly to set the weeklyschedule tariffs.
00:50: The Energy Fee Scheduler will open. You can define the start and end dates in advance for this tariff to take effect. Additionally, you can opt to override VAT if you establish custom VAT rates at the tariff level for locations with specific tax regulations or billing situations.
01:08: Enter the tariff values for Peak, Standard, and Off-Peak.
01:13: To set the daily schedule on your calendar, click on the desired day and time for scheduling.
01:20: The Tariff Period will open, enabling you to select and set the energy tariff for your desired timeframe.
01:28: You can easily fill in missing days and times, copy them by day, or clear them to start anew. To copy a day, simply click on "Copy Day" as highlighted.
01:38: The copy day table will open, allowing you to select your preferences and choose the appropriate checkboxes. Click 'Copy' to continue.
01:48: Once you have set your tariffs and are ready to proceed, click the Save button to save your progress.
01:54: You will return to the main screen, where you’ll see that your energy fee has been added successfully.
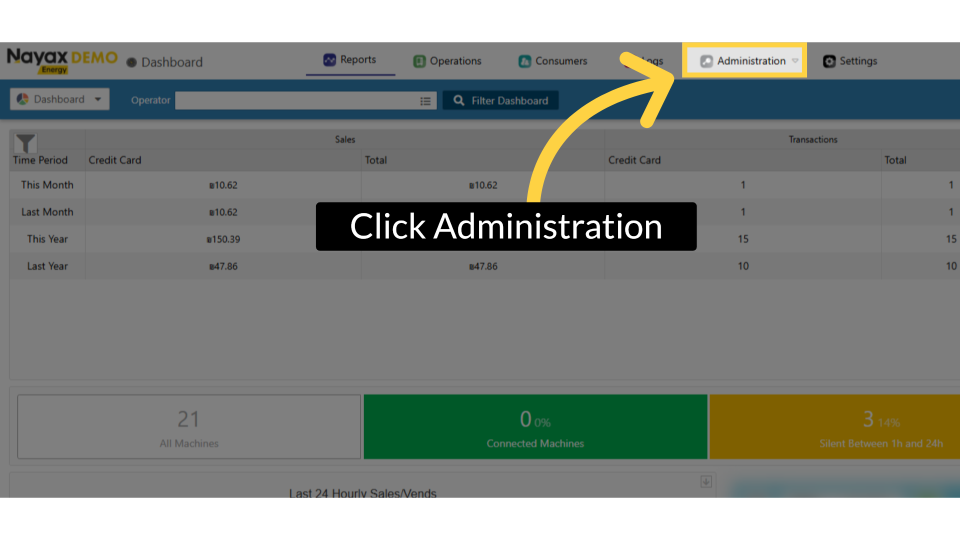
Click Administration
Image AttachedOn the Dashboard of your Nayax Energy Core platform, click on the Administration tab.
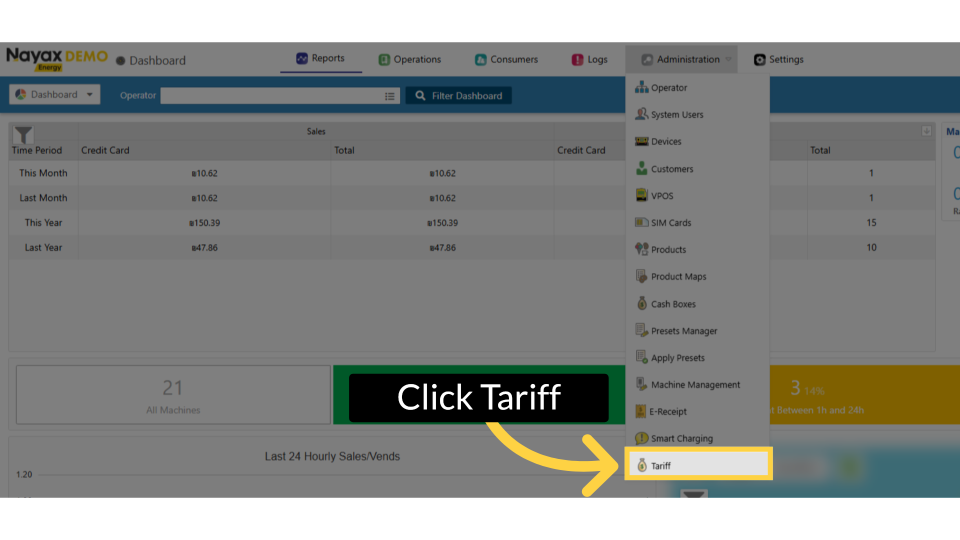
Click Tariff
Image AttachedIn the dropdown menu, locate and click on the Tariff tab.
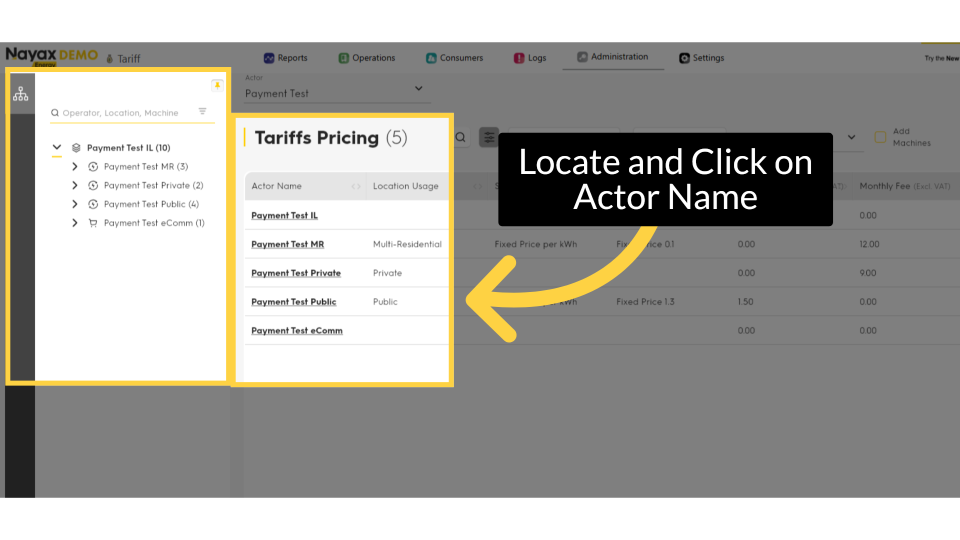
Locate and Click on Actor Name
Image AttachedFind the machine actor name for which you want to configure tariffs and click on it to proceed.
Add Fee
Image AttachedOn the Machine Actors page, to set the charging energy fee, click on the "Add Fee" tab as highlighted.

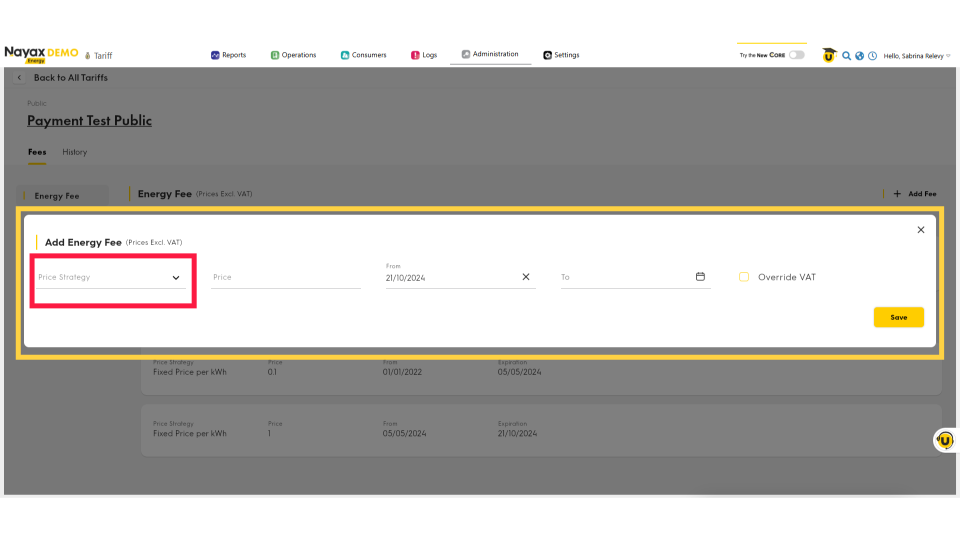
Pricing Options
Image AttachedIn the pop-up window, click the 'Price Strategy' arrow highlighted to open the drop-down menu.
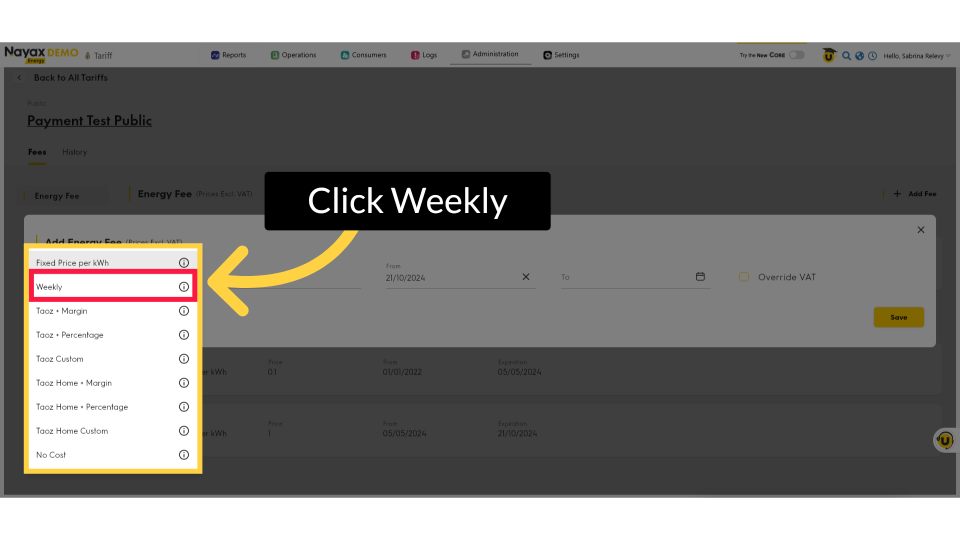
Click Weekly
Image AttachedClick on weekly to set the weekly schedule tariffs.
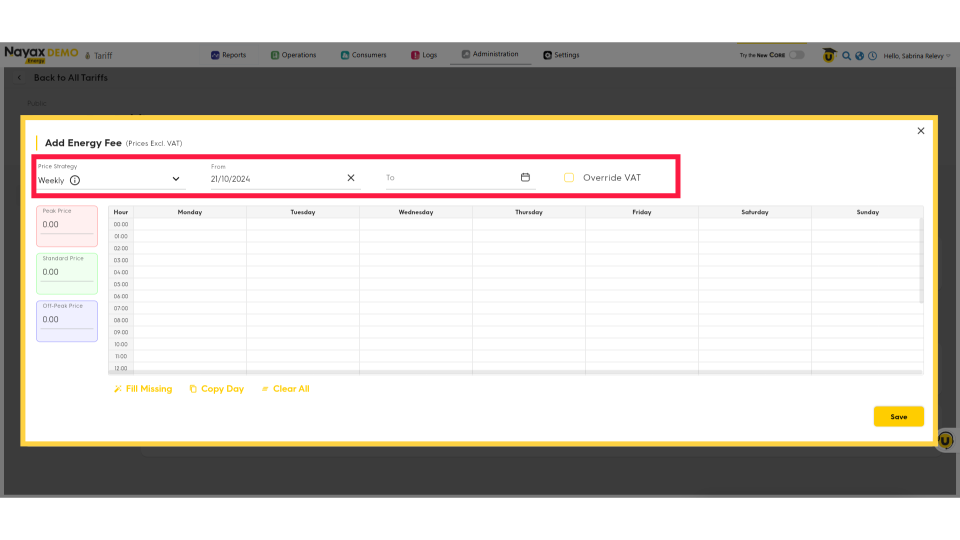
Pop- Up Schedule
Image AttachedThe Energy Fee Scheduler will open. You can define the start and end dates in advance for this tariff to take effect.
Additionally, you can opt to override VAT if you establish custom VAT rates at the tariff level for locations with specific tax regulations or billing situations.
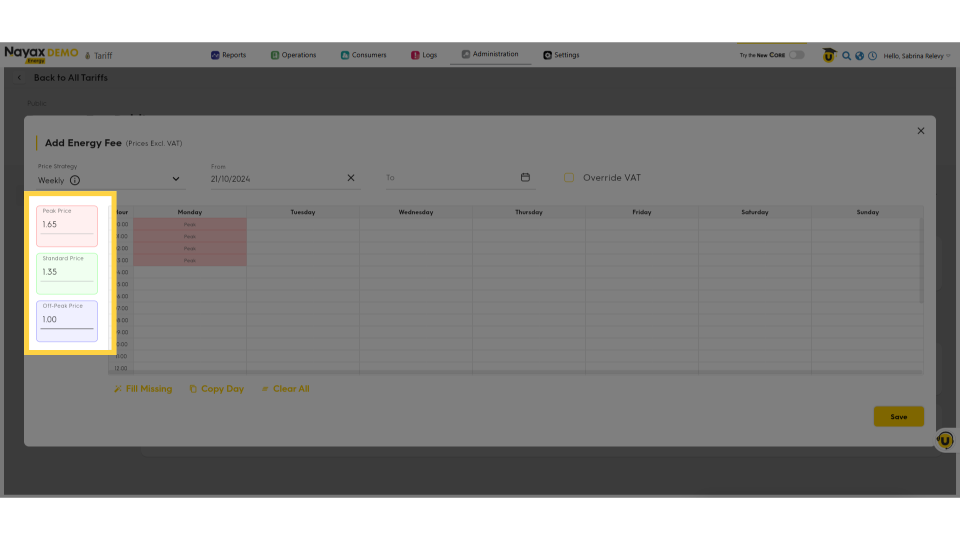
Set Tariffs
Image AttachedEnter the tariff values for Peak, Standard, and Off-Peak.
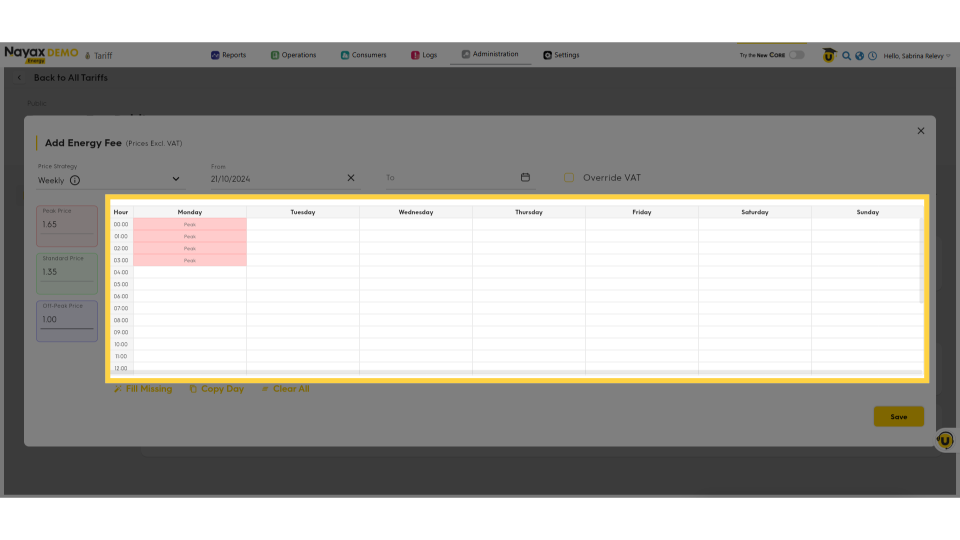
Set Schedule
Image AttachedTo set the daily schedule on your calendar, click on the desired day and time for scheduling.
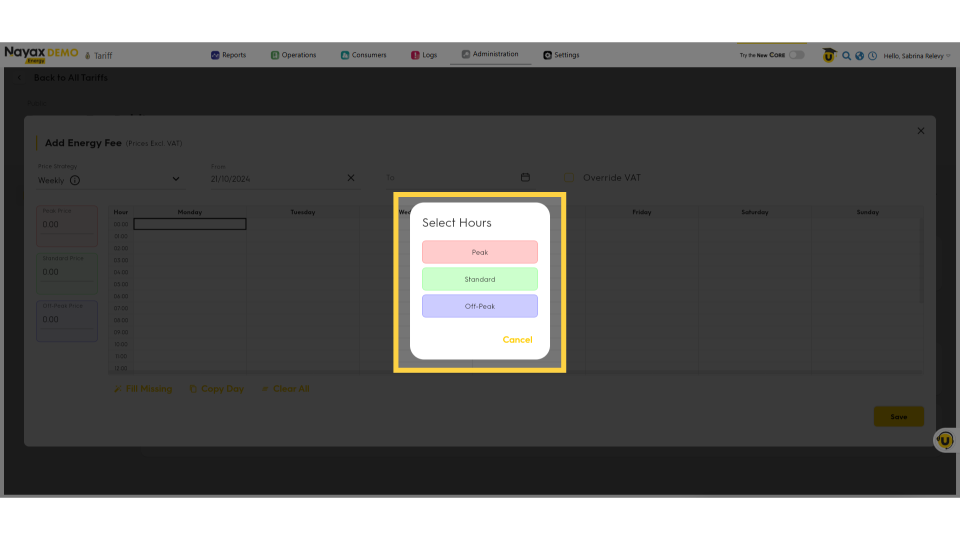
Set Tariff Period
Image AttachedThe Tariff Period will open, enabling you to select and set the energy tariff for your desired timeframe.
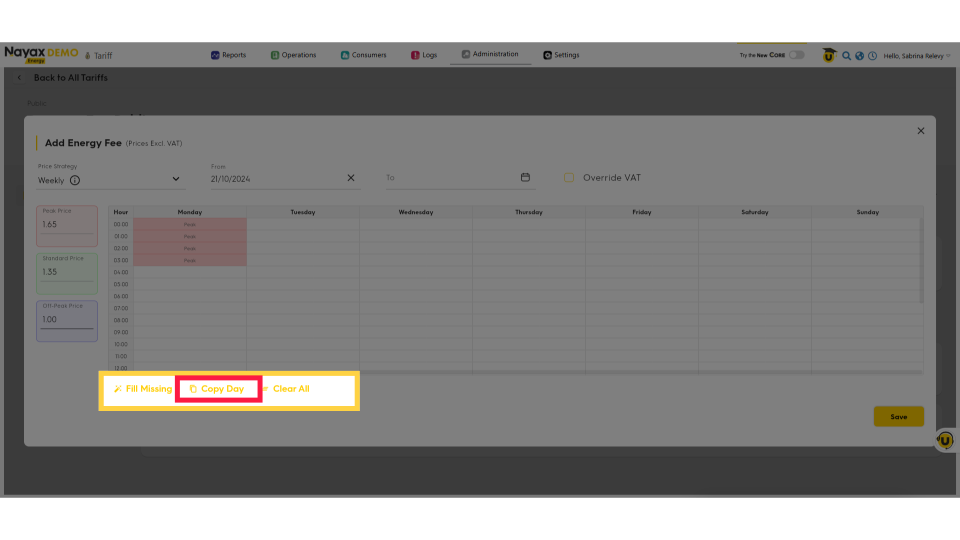
Bulk Fill Options
Image AttachedYou can easily fill in missing days and times, copy them by day, or clear them to start a new. To copy a day, simply click on "Copy Day" as highlighted.
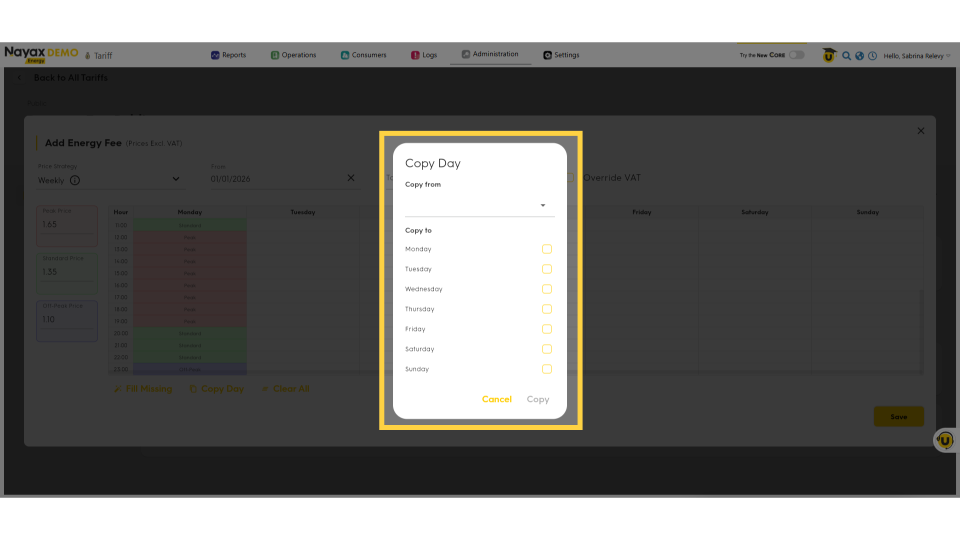
Copy Day
Image AttachedThe copy day table will open, allowing you to select your preferences and choose the appropriate checkboxes. Click 'Copy' to continue.
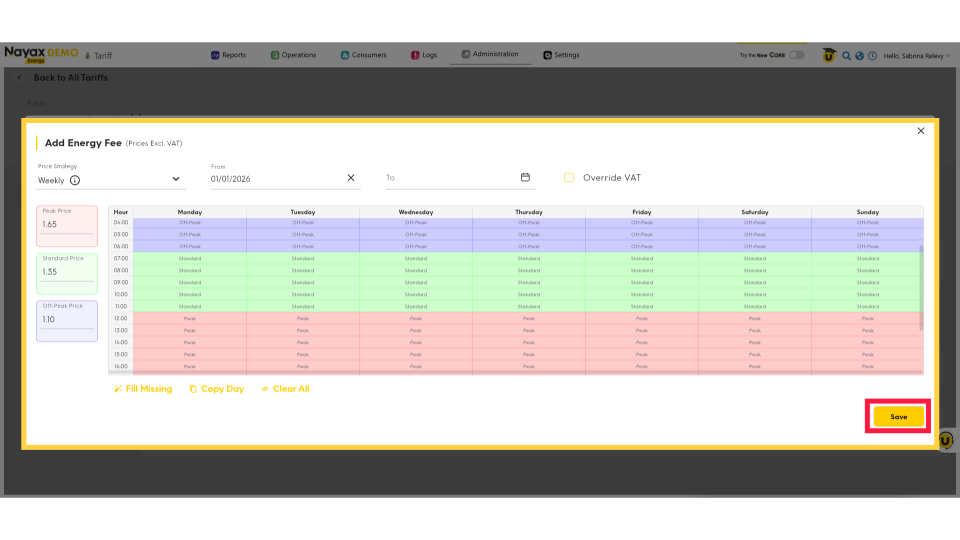
Click Save
Image AttachedOnce you have set your tariffs and are ready to proceed, click the Save button to save your progress.
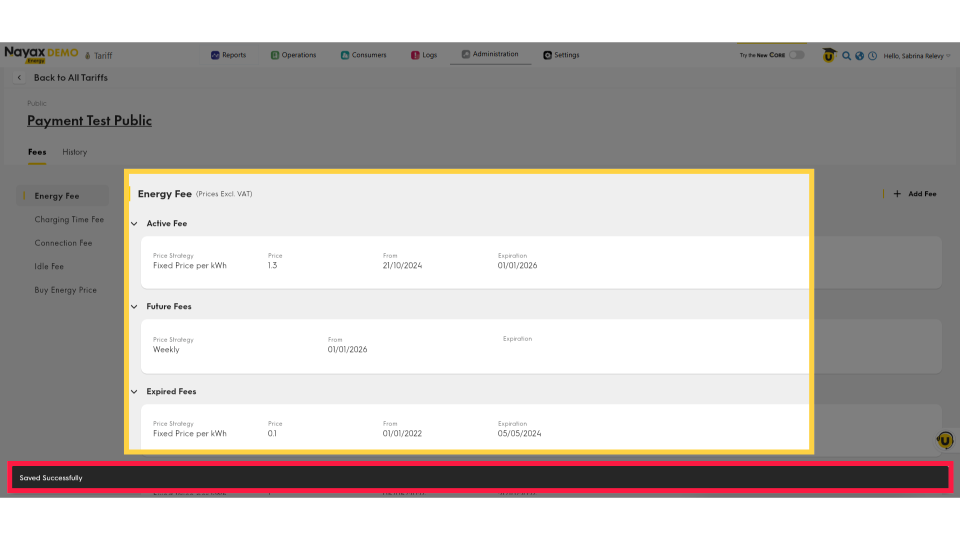
Saved Successfully
Image AttachedYou will return to the main screen, where you’ll see that your energy fee has been added successfully.
Thank you!
Did you find this article helpful?