How to Set Up System User Alerts and Notifications | Administration
Configure system user alerts in Nayax Core to receive real-time email, SMS, or push notifications for the events that matter most and choose exactly when and how each alert reaches you.
Why Set Up System User Alerts and Notifications?
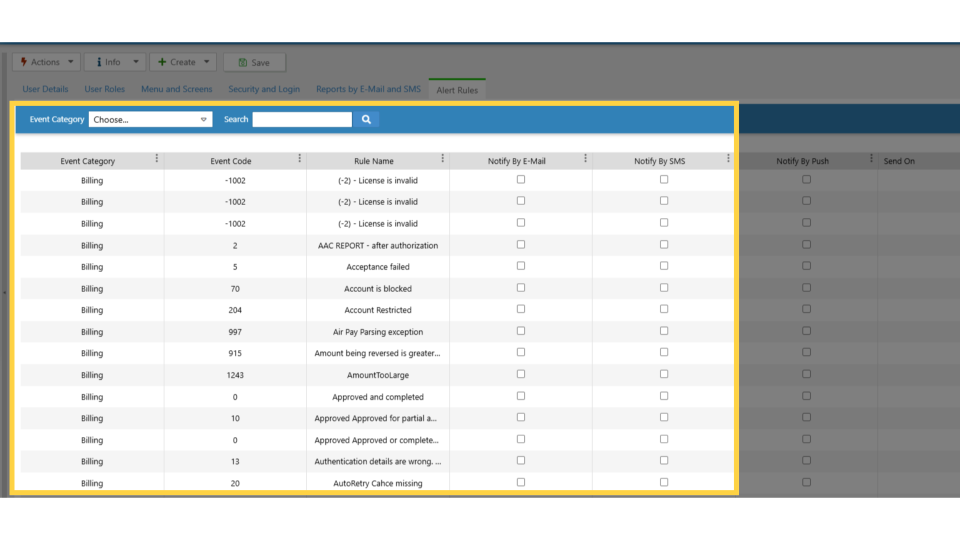
Your operation generates hundreds of events every day, and not all of them need your attention. But the ones that do need to reach the right person, fast.
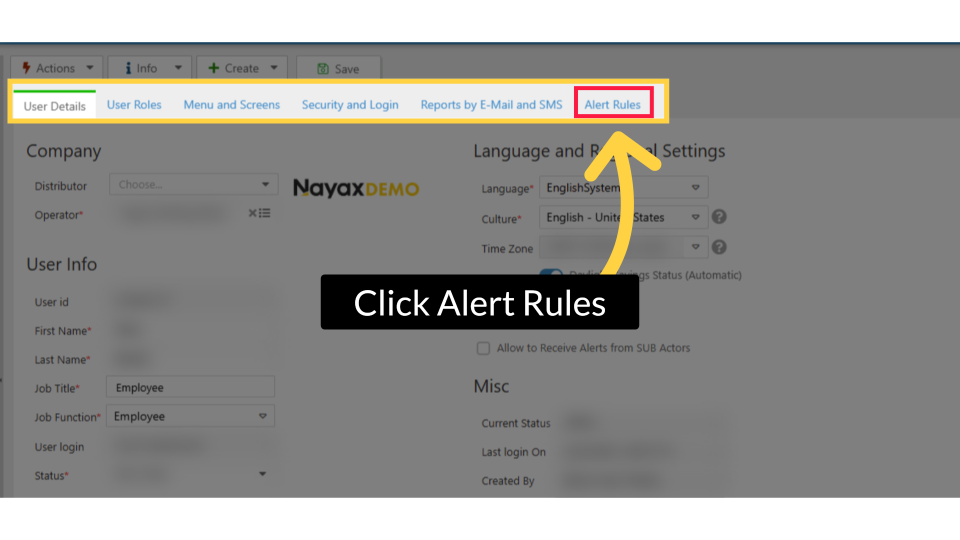
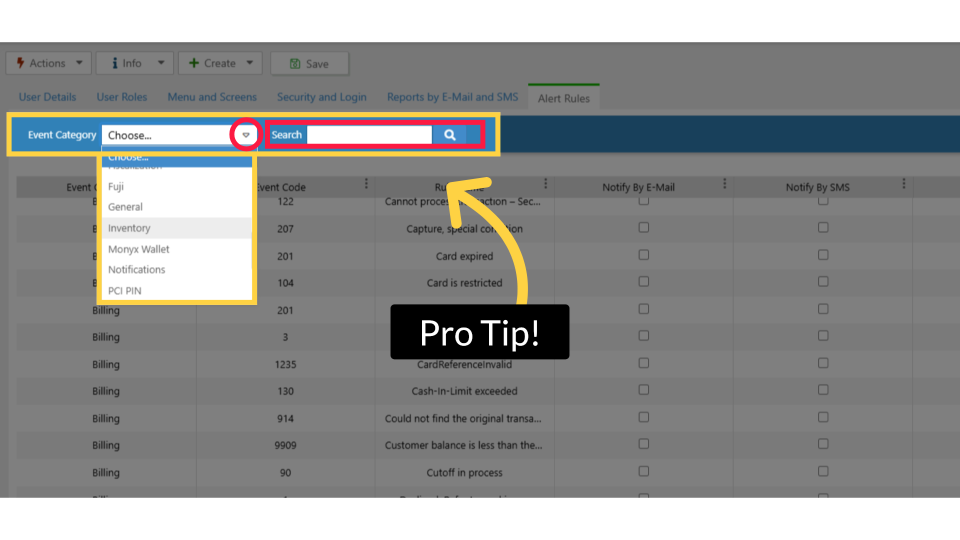
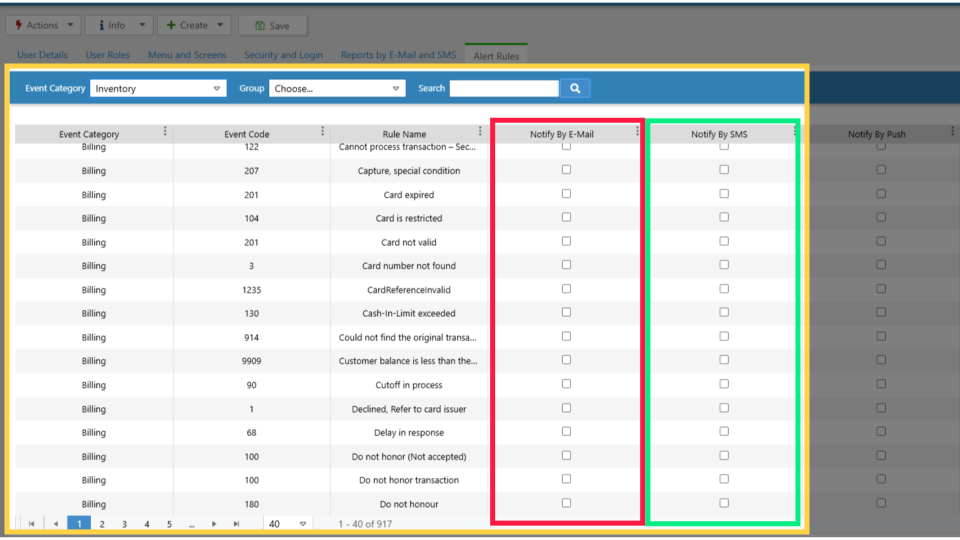
System user alerts in Nayax Core let you put the right notifications in front of the right people, individually configured per user, delivered through the channel they actually check. Whether that's an email to your finance team when a billing event fires, an SMS to your field technician when a device goes offline, or a push notification to your route manager when inventory runs low, every alert goes exactly where it needs to go.
Unlike operator-level alerts that route to a third-party system, system user alerts are personal. Each user in your organization can have a notification profile tailored to their role, responsibilities, and preferred way of receiving information.
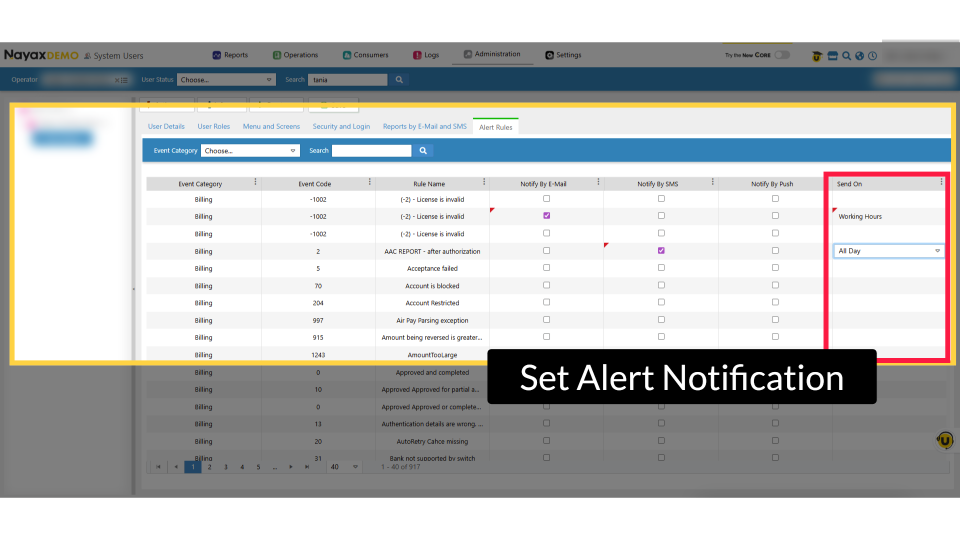
You also stay in control of when alerts are sent. Restrict notifications to working hours so your team isn't disturbed at 3 am for non-critical events, or set critical alerts to run all day so nothing falls through the cracks overnight.
The result is a team that's informed without being overwhelmed and an operation where the right people always know what needs their attention, the moment it happens.
Did you find this article helpful?