Overview of Machine Tabs and Actions | Operations
Dashboard
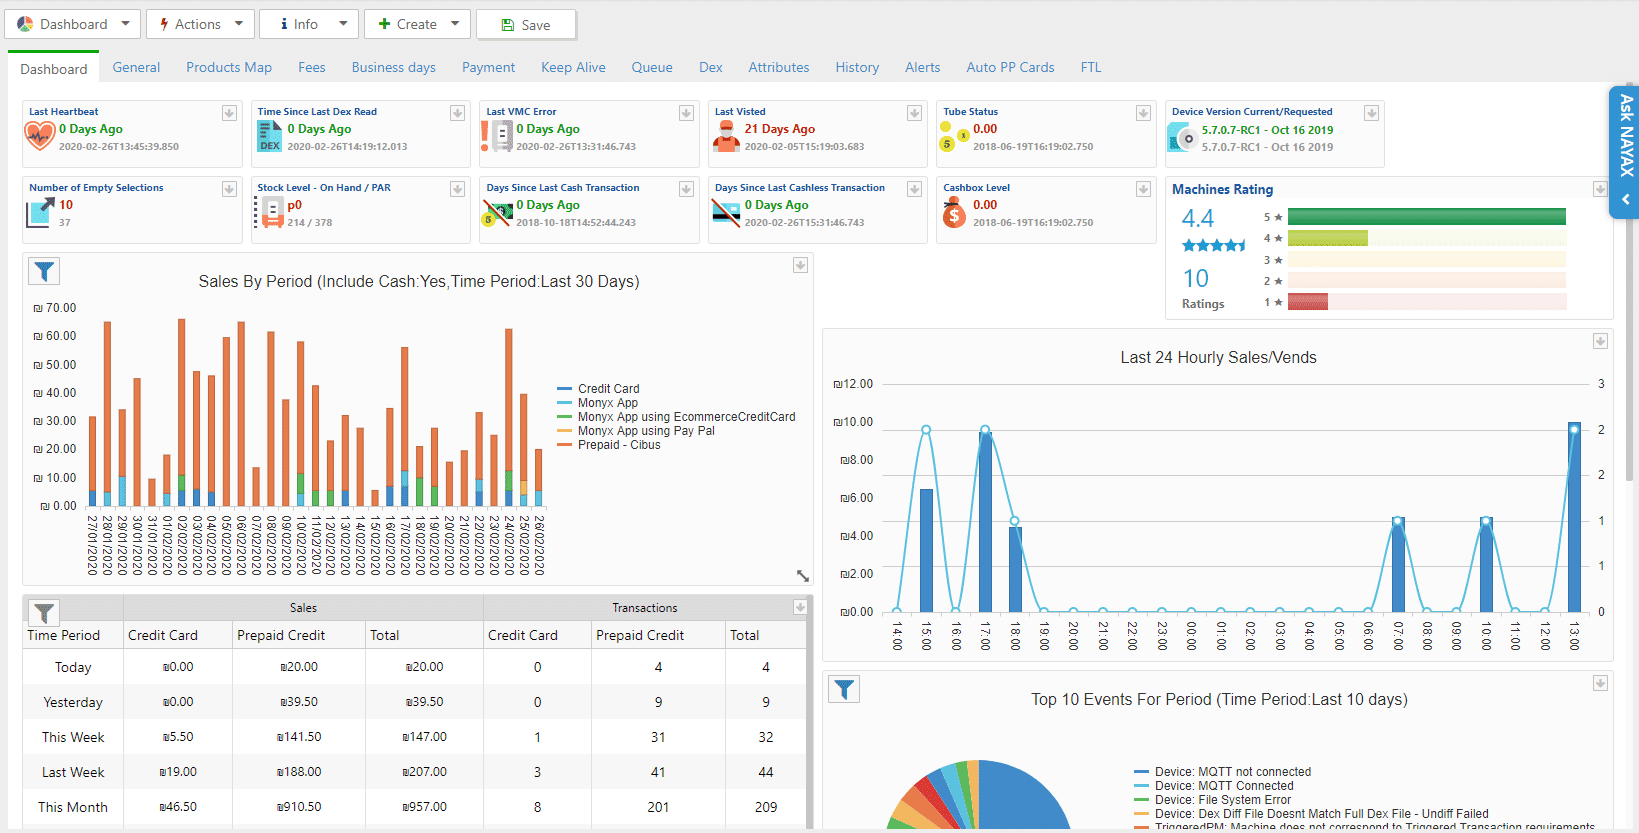
Image AttachedWhat is this tab?
This tab shows a visual dashboard of this machine. Here you can see different information on your machine, in blocks called Widgets. Each widget displays a different parameter.
To add a new widget, click on the Dashboard button, located above the tabs. Then, click Add Dashboard Widget > Select the desired widget and its positioning on the page > click Add widget.
After adding a widget, you can reposition it by drag-and-drop it in the desired location.
You can filter most of the widgets to display the data you need to manage your business smoothly. Simply click the filter icon and choose the new display options for the widget.
Click Operations Tab
Image Attached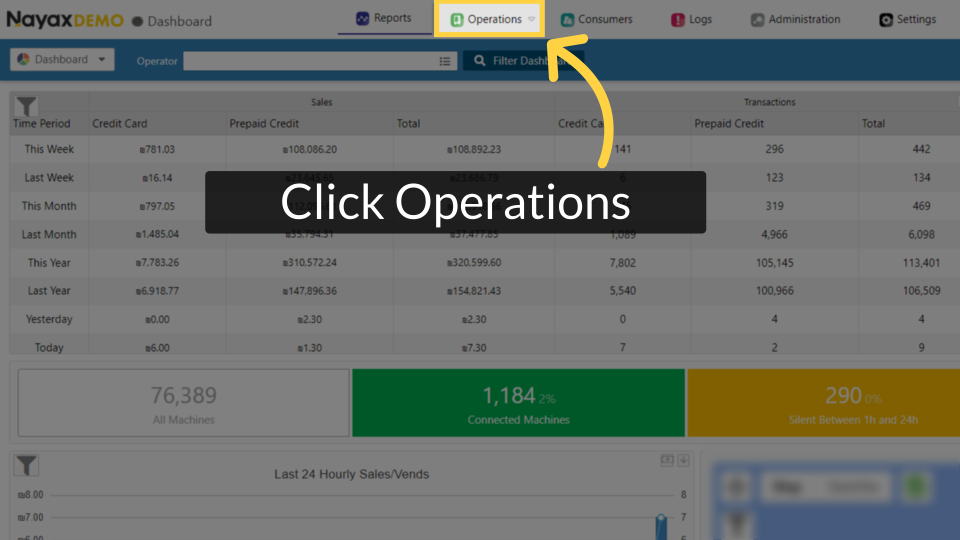
Click Machines
Image Attached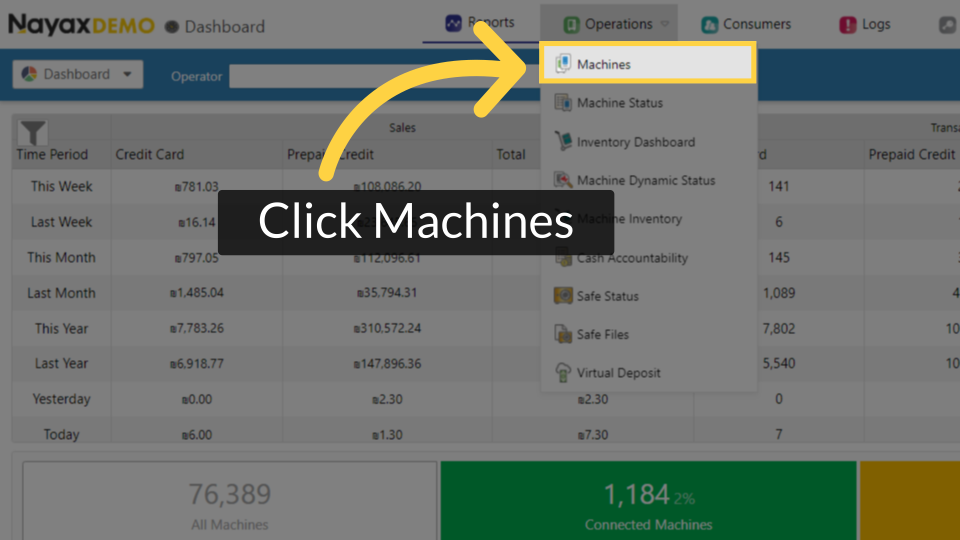
Fill Operator Details
Locate Operator from Hierarchy
Image Attached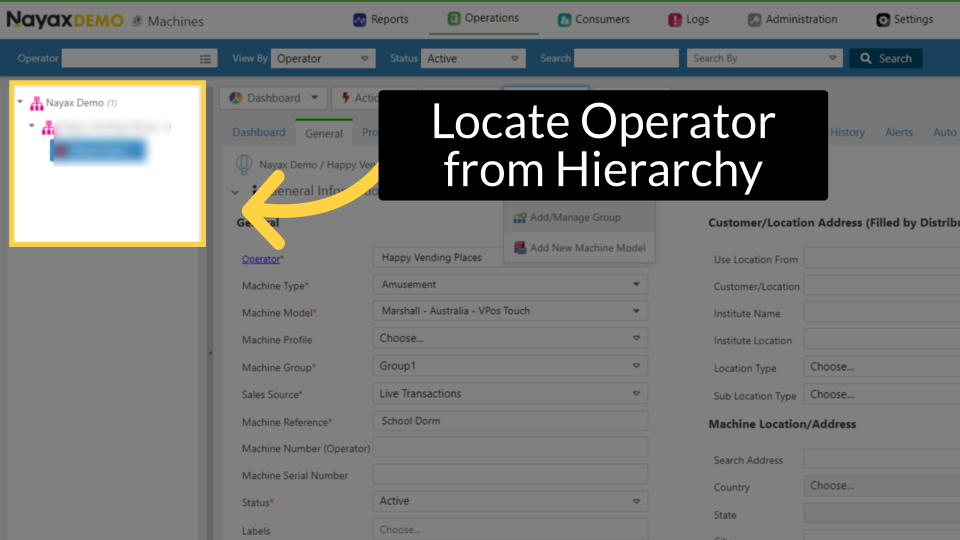
General
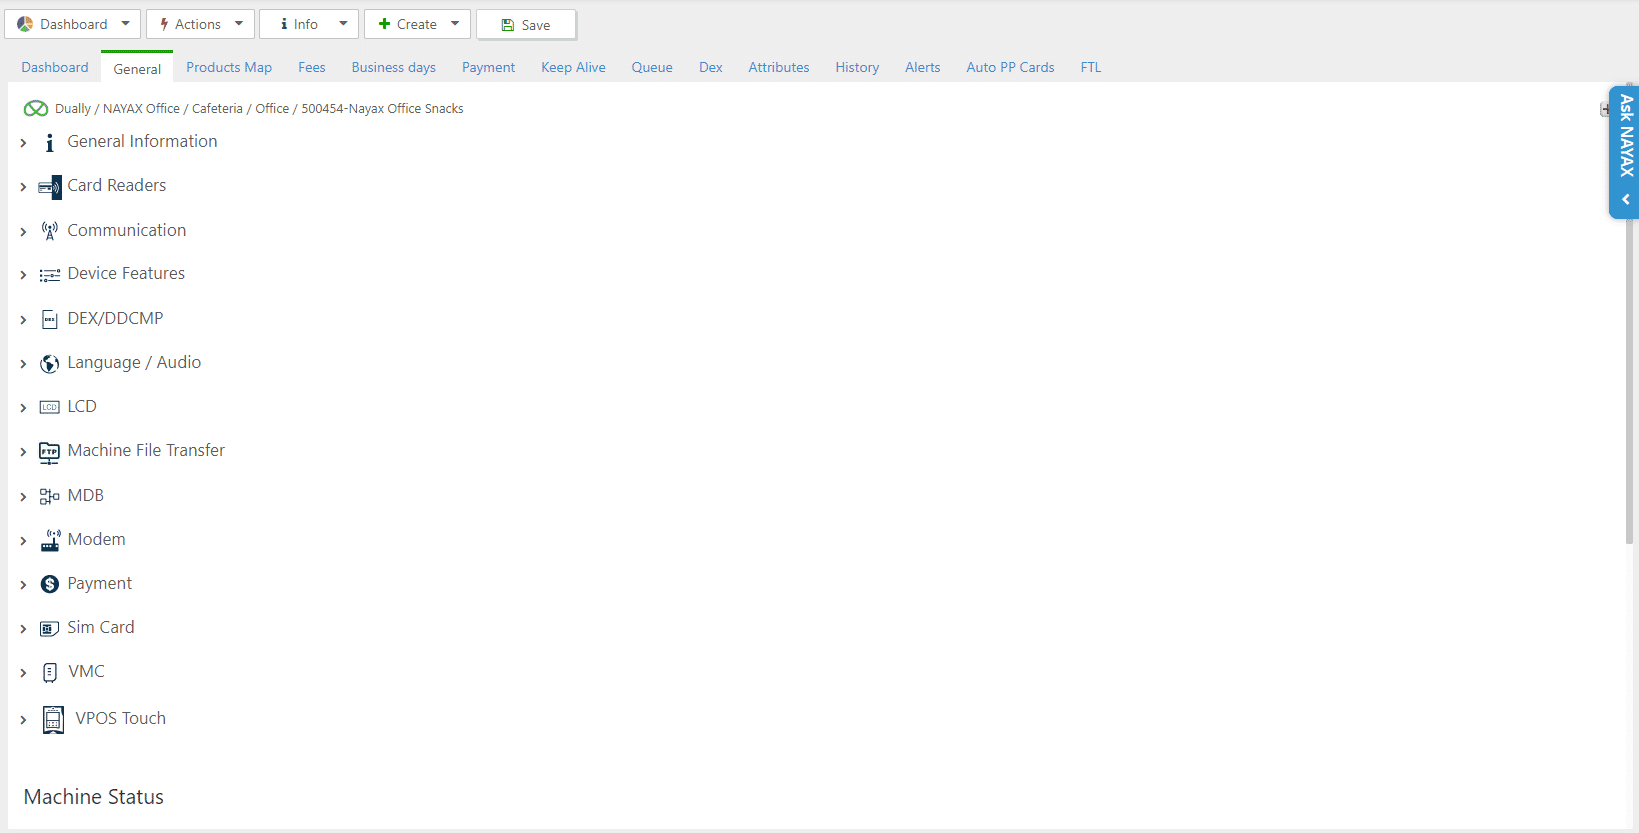
Image AttachedWhat is this tab?
This tab has all the machine attributes that configure the machine itself. Each section has different attributes.
Note that not all attributes will appear here, some are hidden. You can choose attributes to display/hide in the Attributes tab.
Below the attributes, you can see information on the machine status.
Products Map
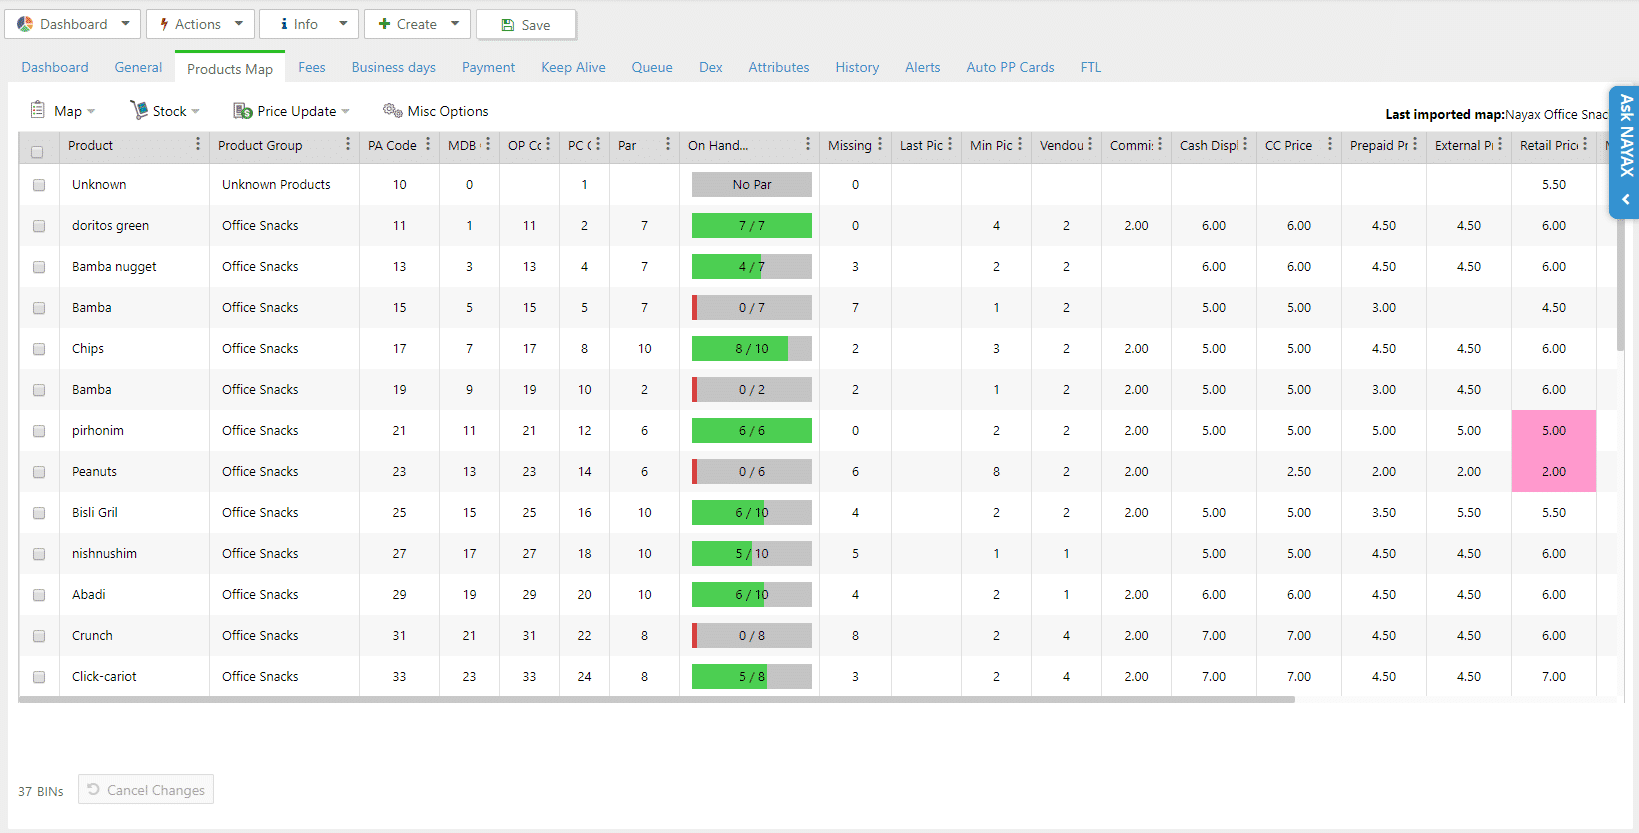
Image AttachedWhat is this tab?
This tab displays information about the products that this machine holds. You can fully manage your inventory from this tab.
Fees
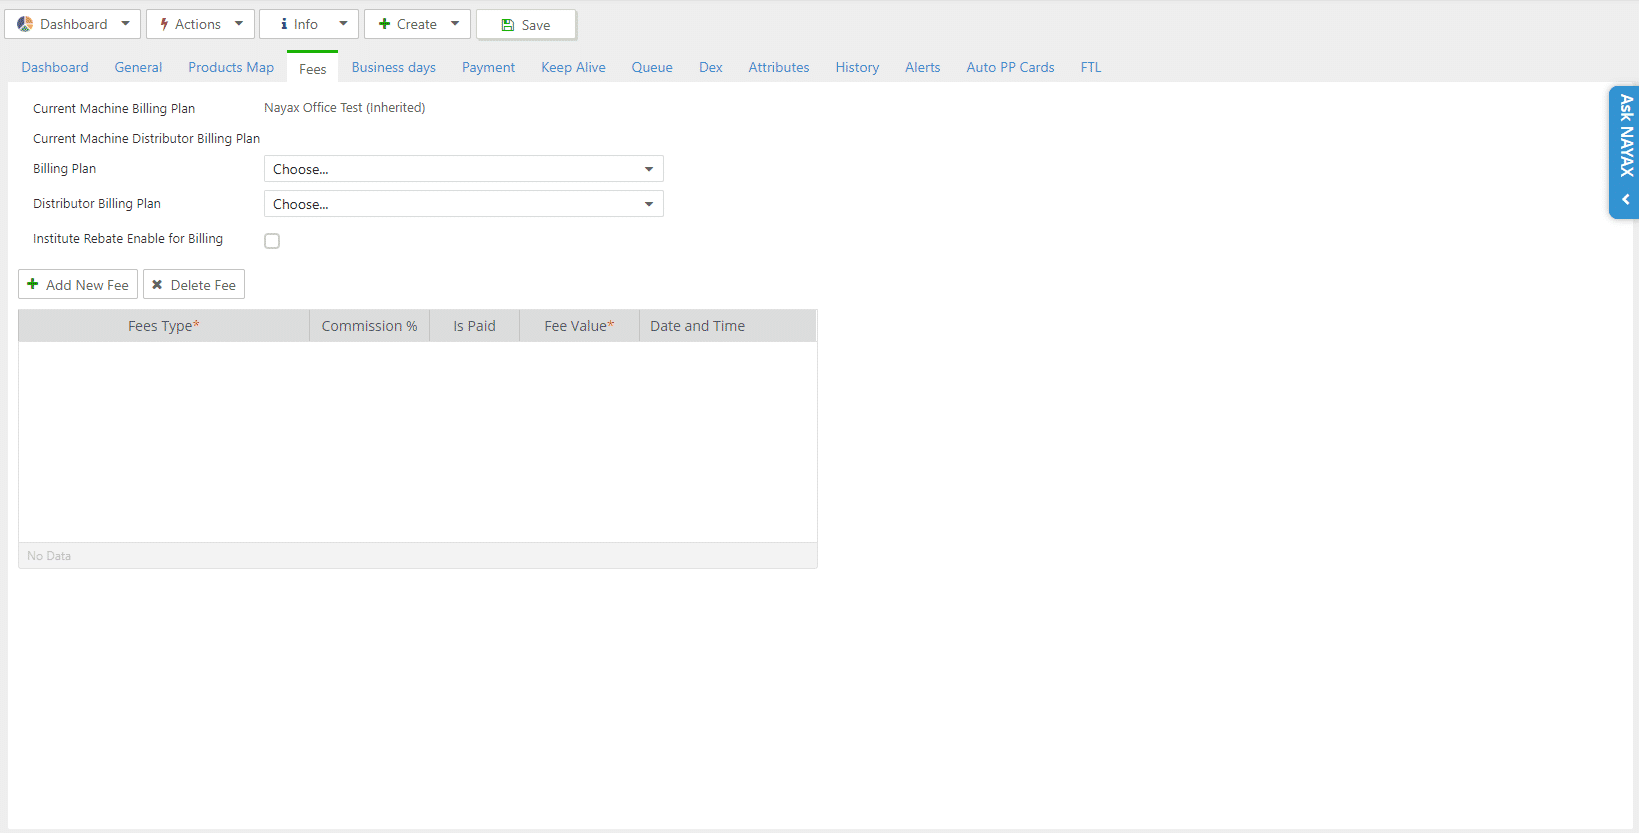
Image AttachedWhat is this tab?
This tab allows you to see the machine's billing plan.
Business Days
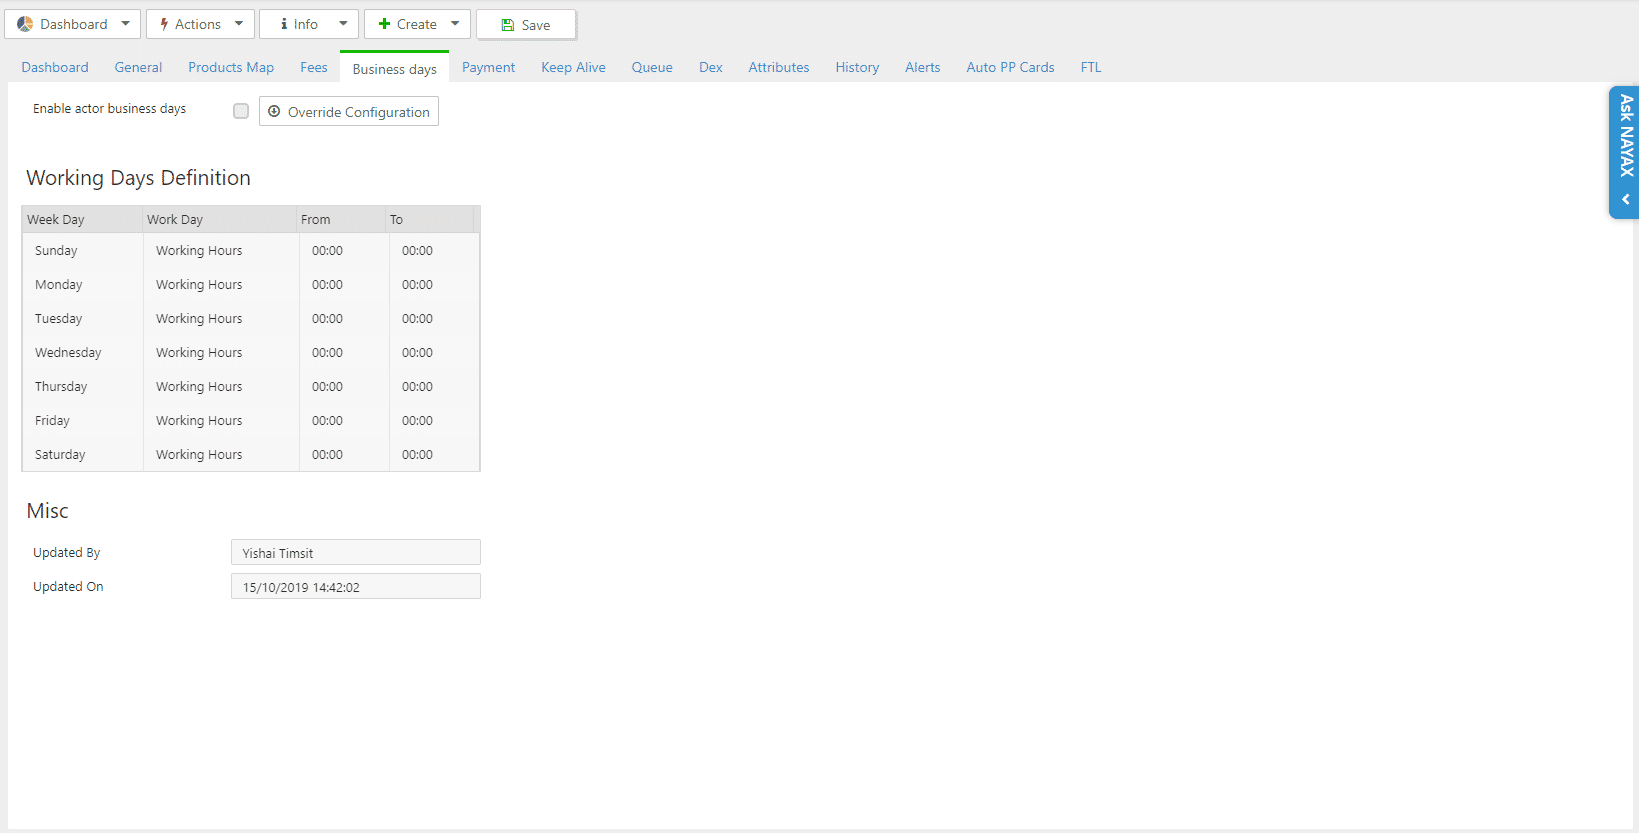
Image AttachedWhat is this tab?
This tab allows you to specify working days and hours for this machine (much like the "Business Days" tab on the Operator's page). The primary purpose of this feature is to receive notifications and alerts.
These settings are inherited from the Operator level unless chosen otherwise in the hierarchy.
To change these settings, click on the "Enable Actor Business Days" checkbox, choose the selected days and/or hours, and click the "Save Information" button.
Payment
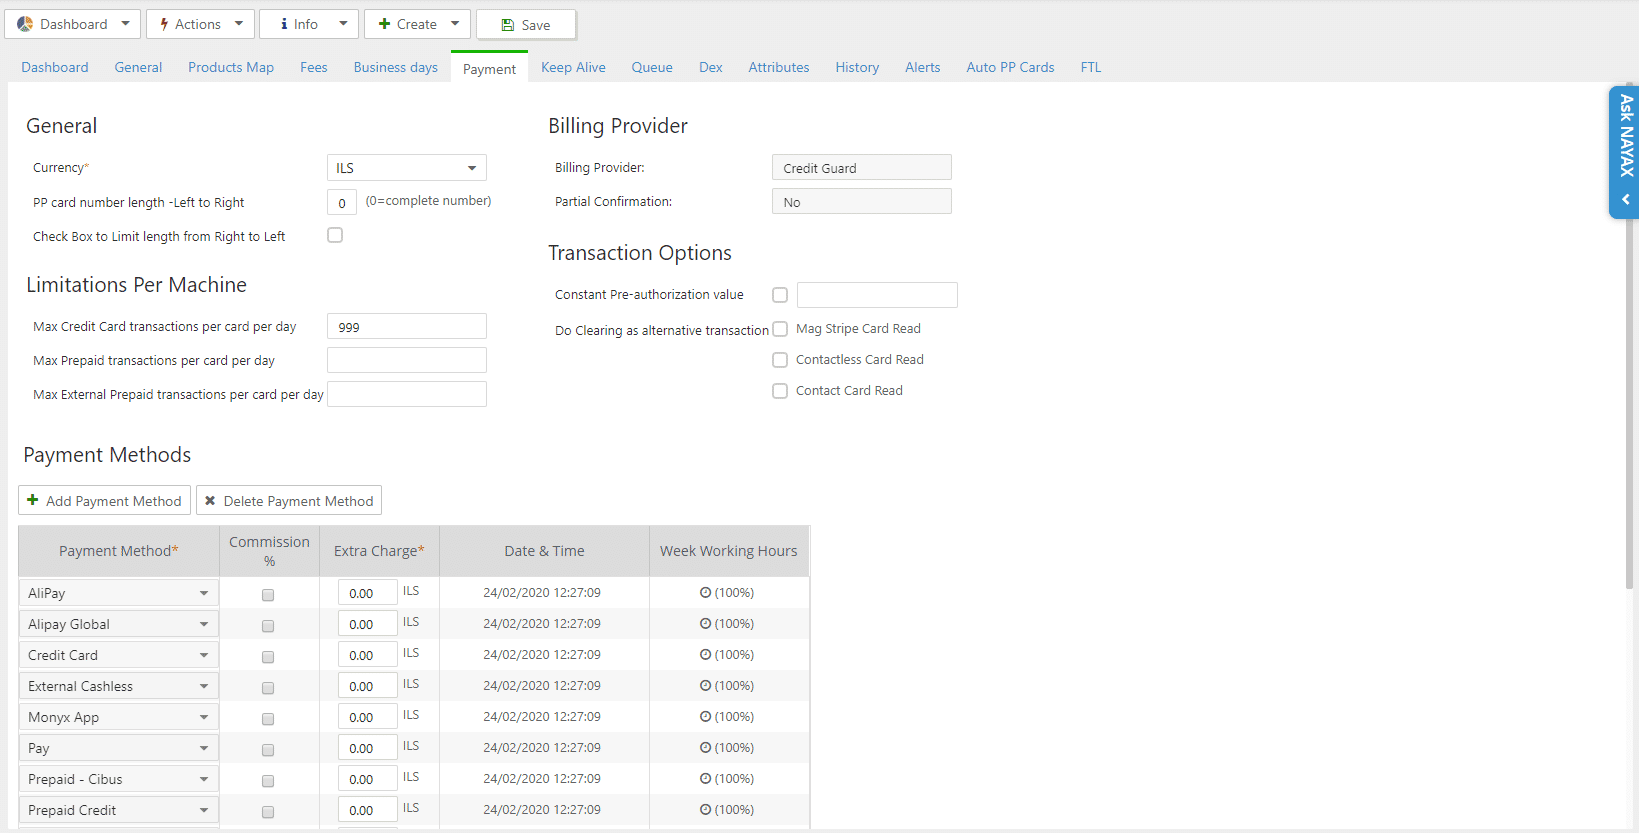
Image AttachedWhat is this tab?
This tab allows you to set or limit different payment options for this machine.
Note that some of these settings are inherited from the Operator level. For example, if the payment methods on the operator level are set to "Credit card" and "AliPay", these will be the only options you can choose from on the machine level.
Keep Alive
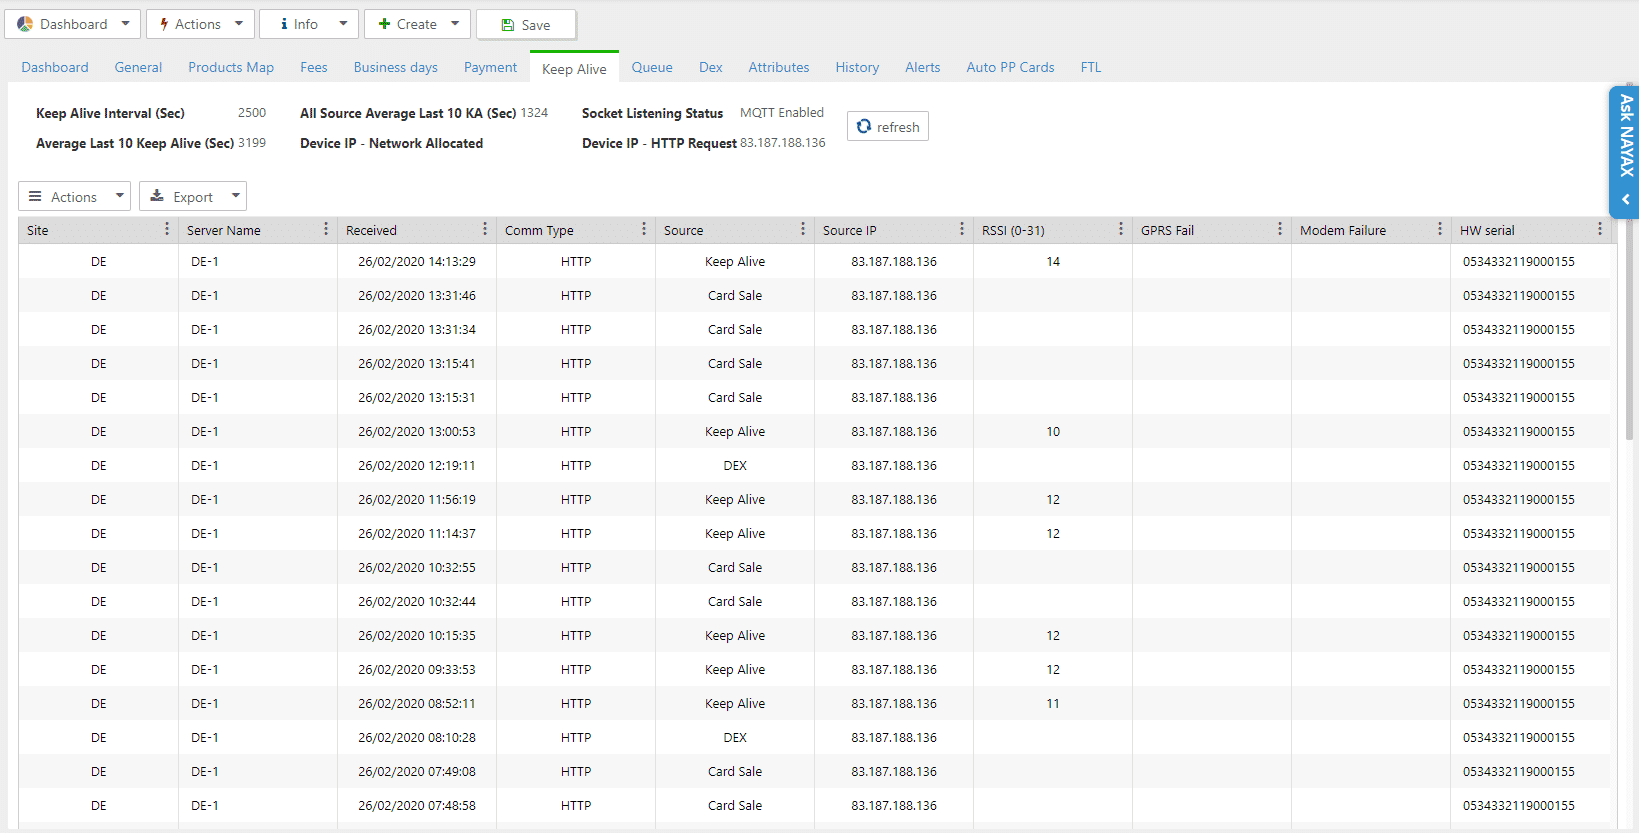
Image AttachedWhat is this tab?
This tab displays information on the "keep alive" from the machine.
Keep Alive is a transmission sent from the device to Nayax servers to update the device is "alive" and there are no communication issues.
To change the interval of the Keep Alive, go to General tab > Communication > Keep Alive Poll Interval (sec) and change the value. To save the changes, check the box appear on the left-hand side of this line, go to Actions > Update Queue.
Pro Tip: If there is no RSSI number it may indicate that the device is connected via Ethernet with LAN cable.
Queue
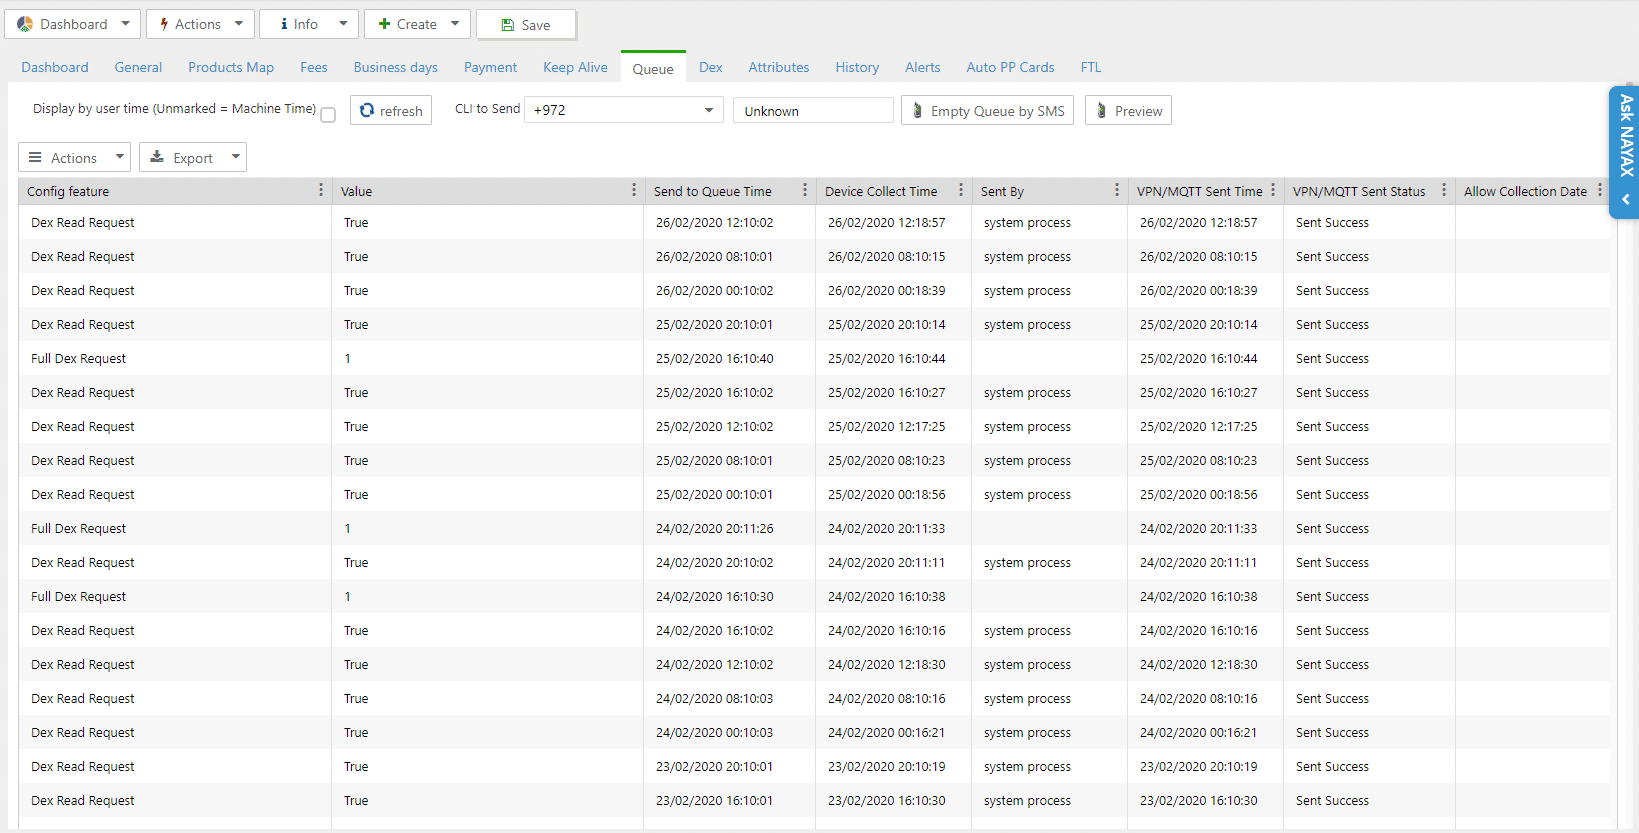
Image AttachedWhat is this tab?
This tab displays the queue of configurations sent to this machine.
The table displays:
Config feature - the configuration sent to the device
Value - The new value for the configuration
Sent to queue time - The timestamp this configuration was sent to the device
Device Collect time - The timestamp this configuration was collected by the device and updated in it.
Sent by - The user who made the configuration change.
Pro Tip: In order to know if the parameter was collected by the device press refresh until you get the collection time stamp.
DEX
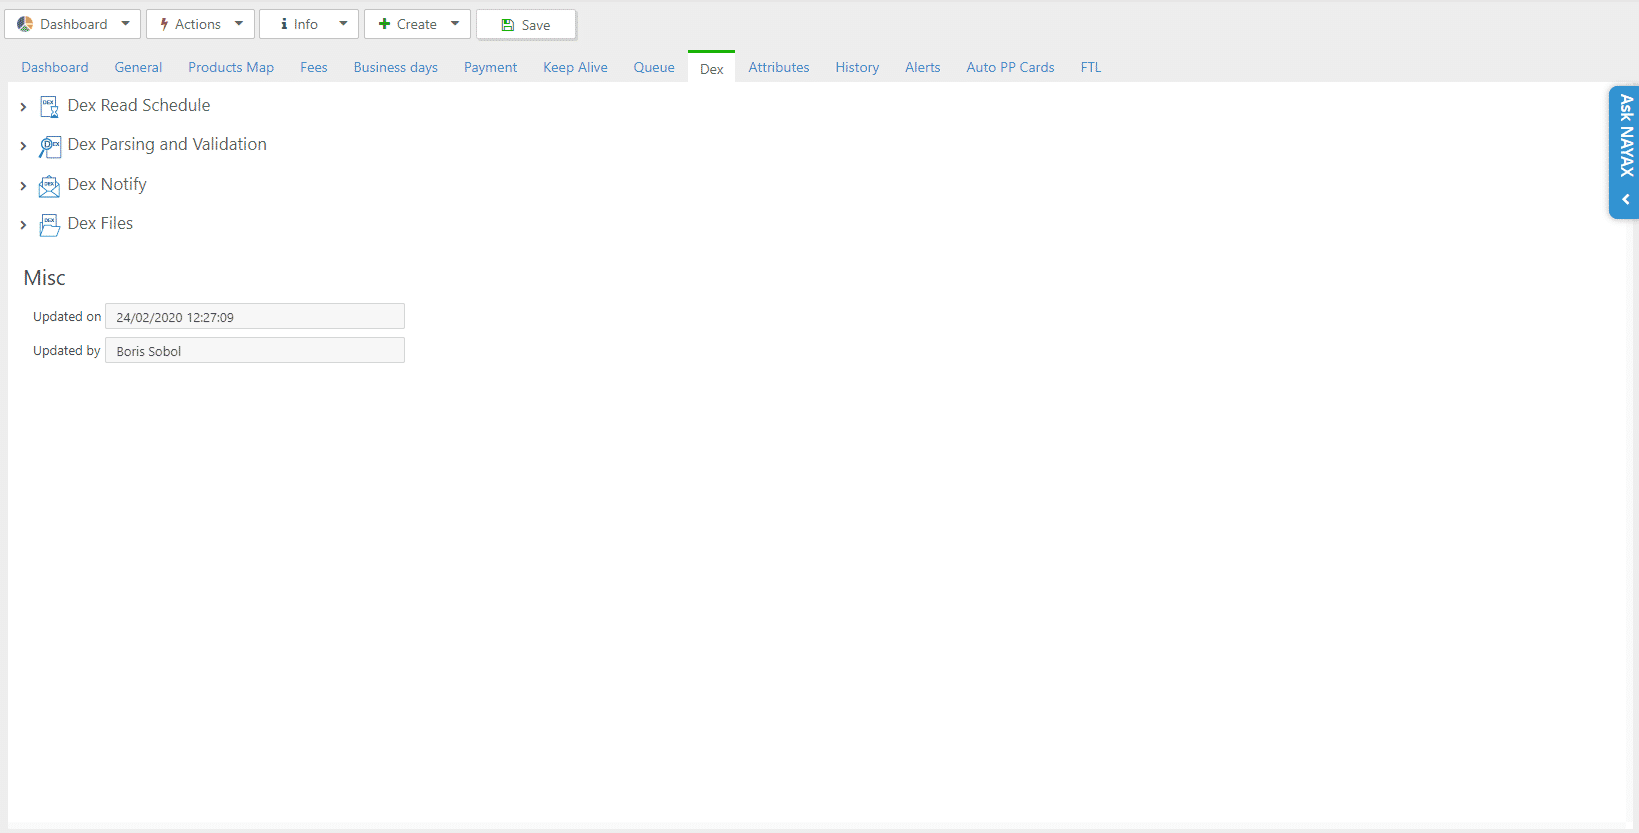
Image AttachedWhat is this Tab?
This tab allows you to set times for Dex reading and parsing.
Dex is an Audit file generated from MDB machines.
You will learn more about DEX in advanced lessons.
Set the time period to get the DEX file from this machine.
Set the time period to parse the DEX file received from this machine.
Check the relevant boxes to get notified on Dex read.
Read the Dex files retrieved from the device.
Attributes
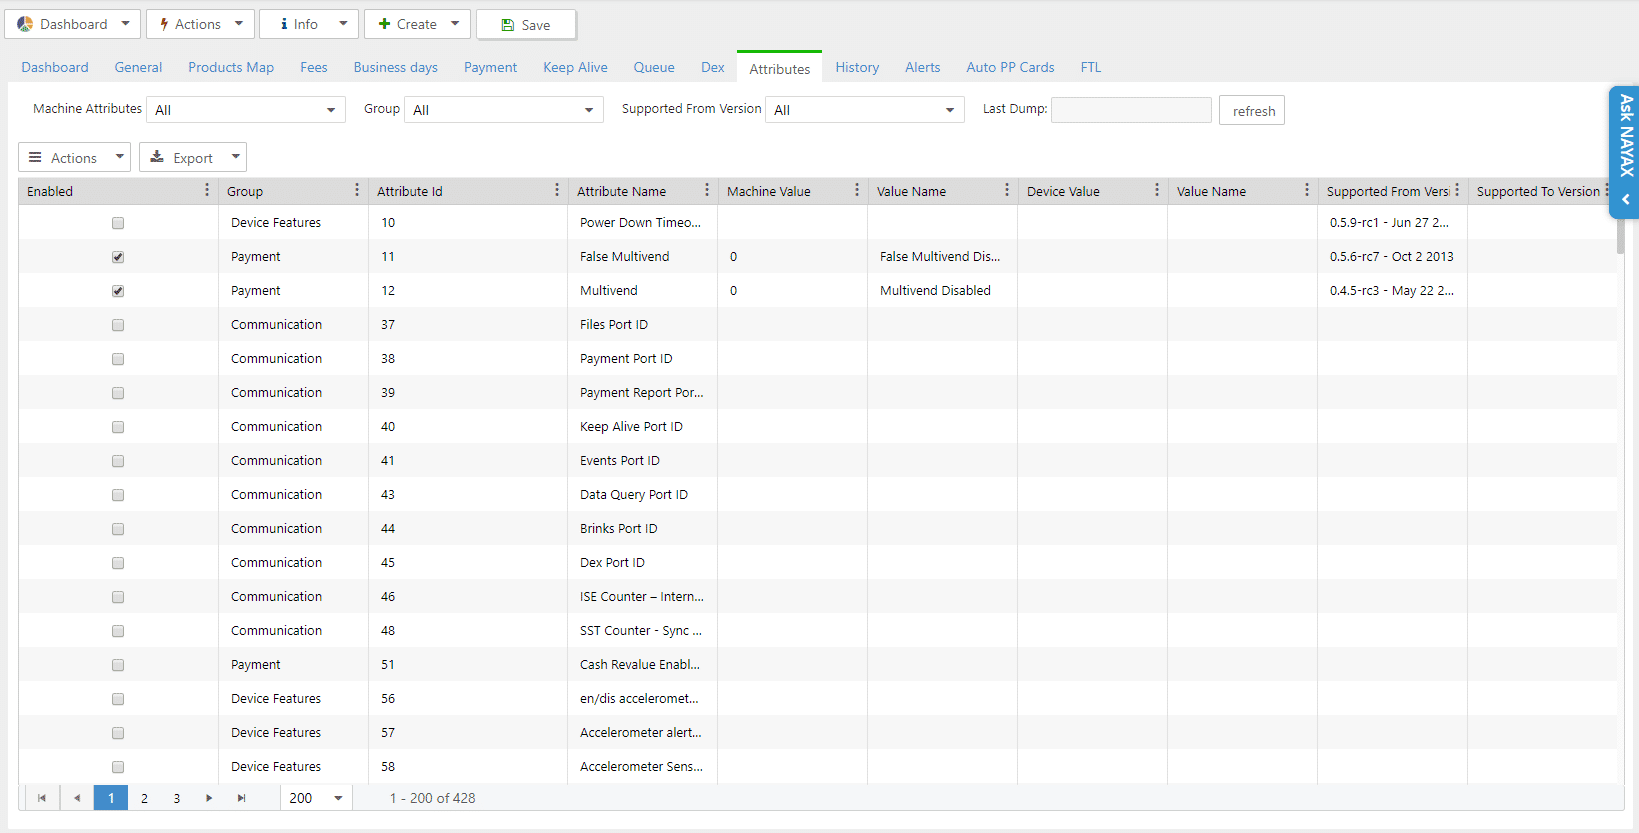
Image AttachedWhat is this Tab?
This tab allows you to set the attributes you can see and edit in the General tab.
To enable an attribute, check its box and click the Save button.
Pro Tip: in order to filter by group press on group > search for the necessary field.
History
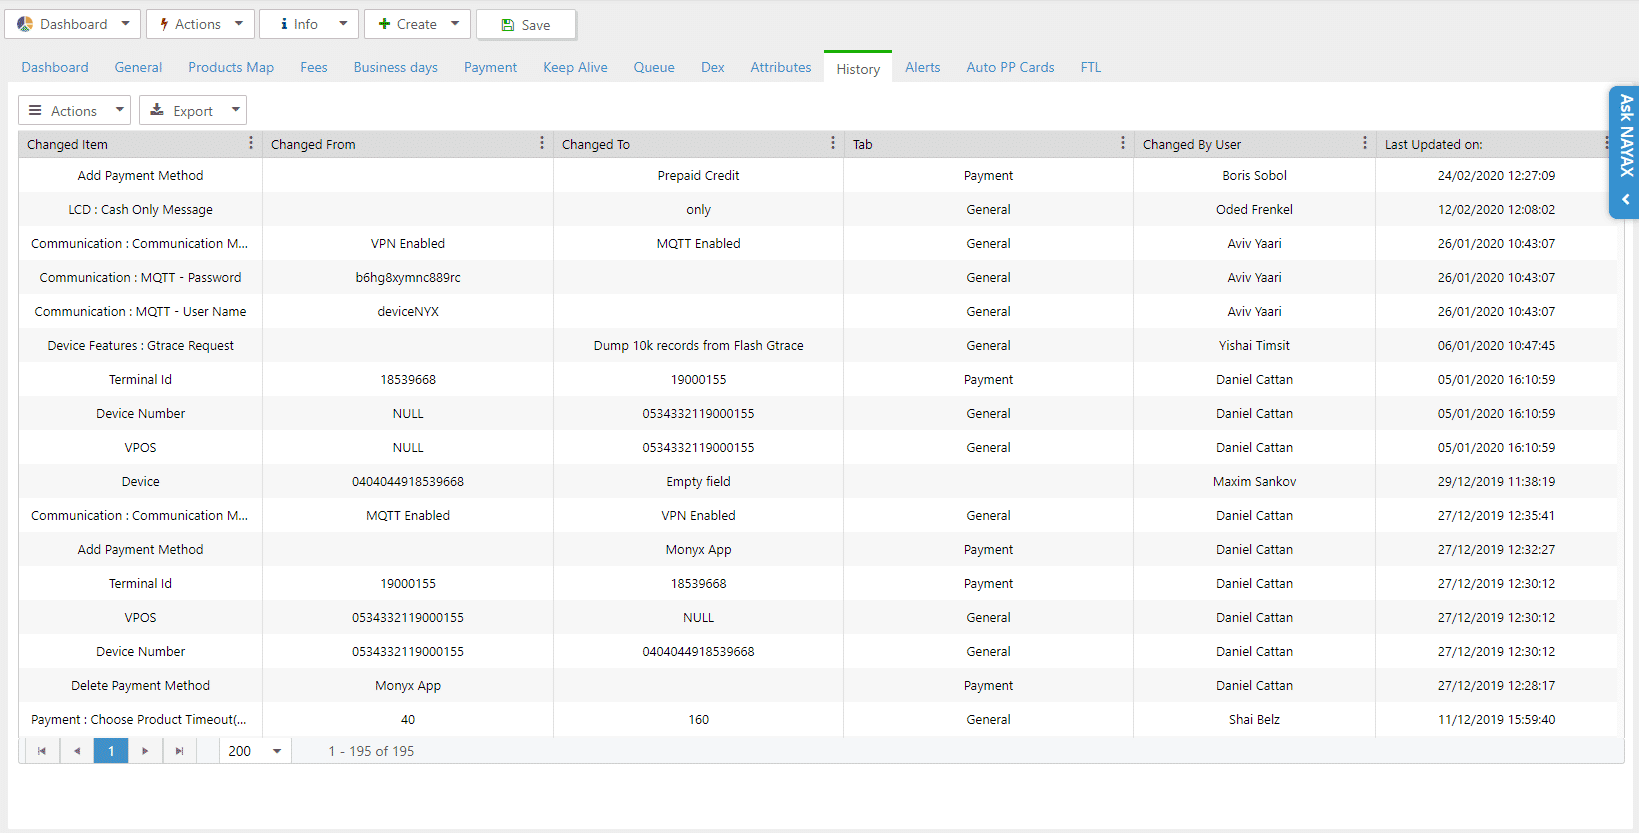
Image AttachedWhat is this Tab?
This tab displays the history of all the actions performed on this machine.
In the table, you will find information on the item, the previous and current value, the tab this item is located in, who changed it and when.
Alerts
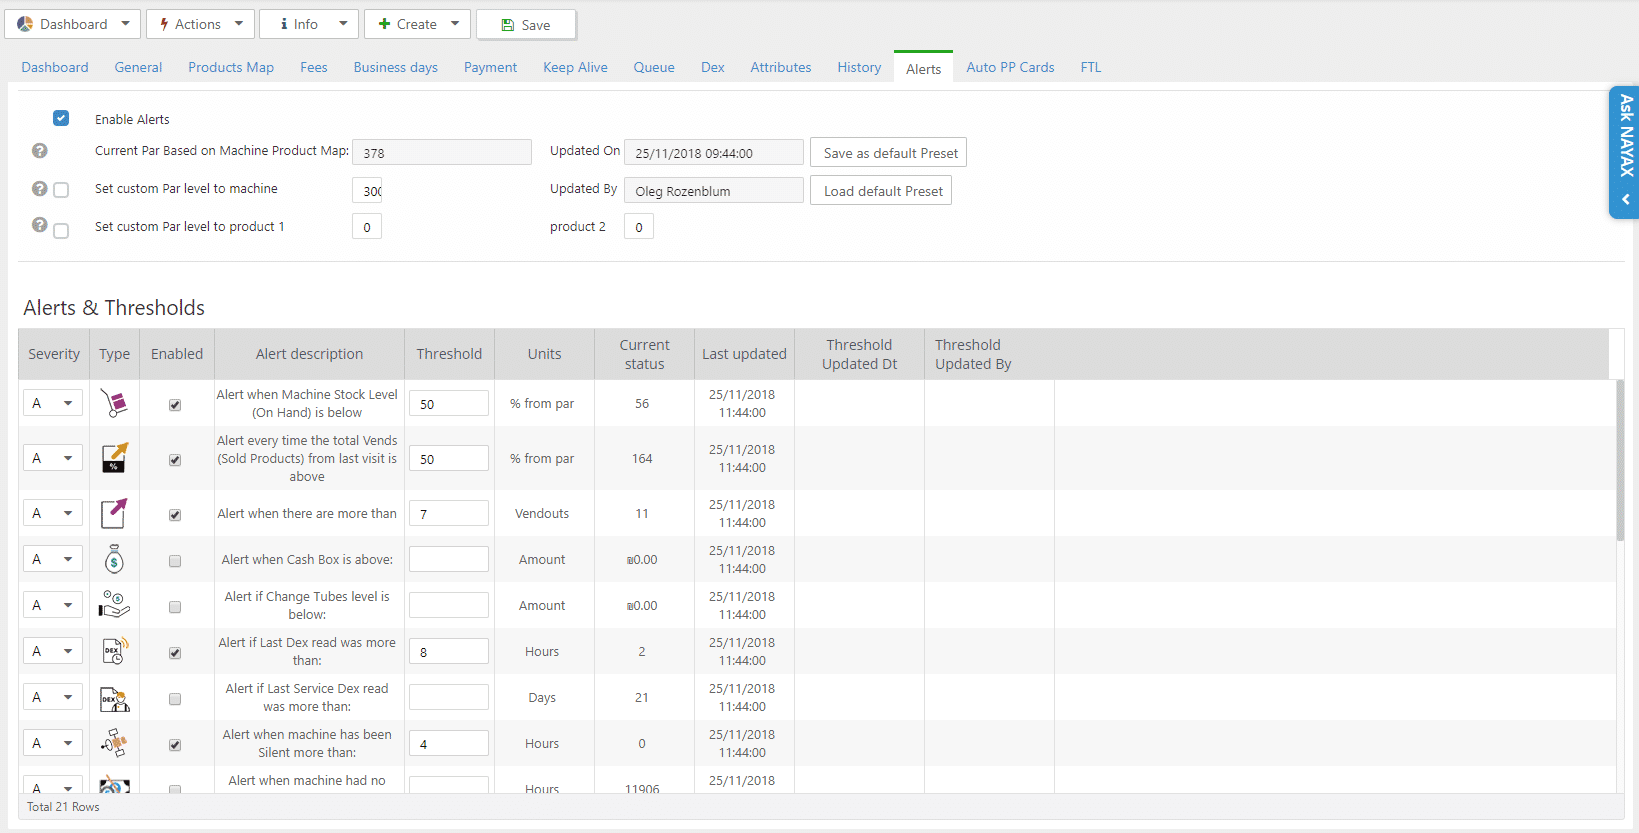
Image AttachedWhat is this Tab?
This tab allows you to configure specific thresholds that will trigger alerts for this machine.
To see the alerts for this machine by clicking Info > Last Alerts.
Auto PP Cards
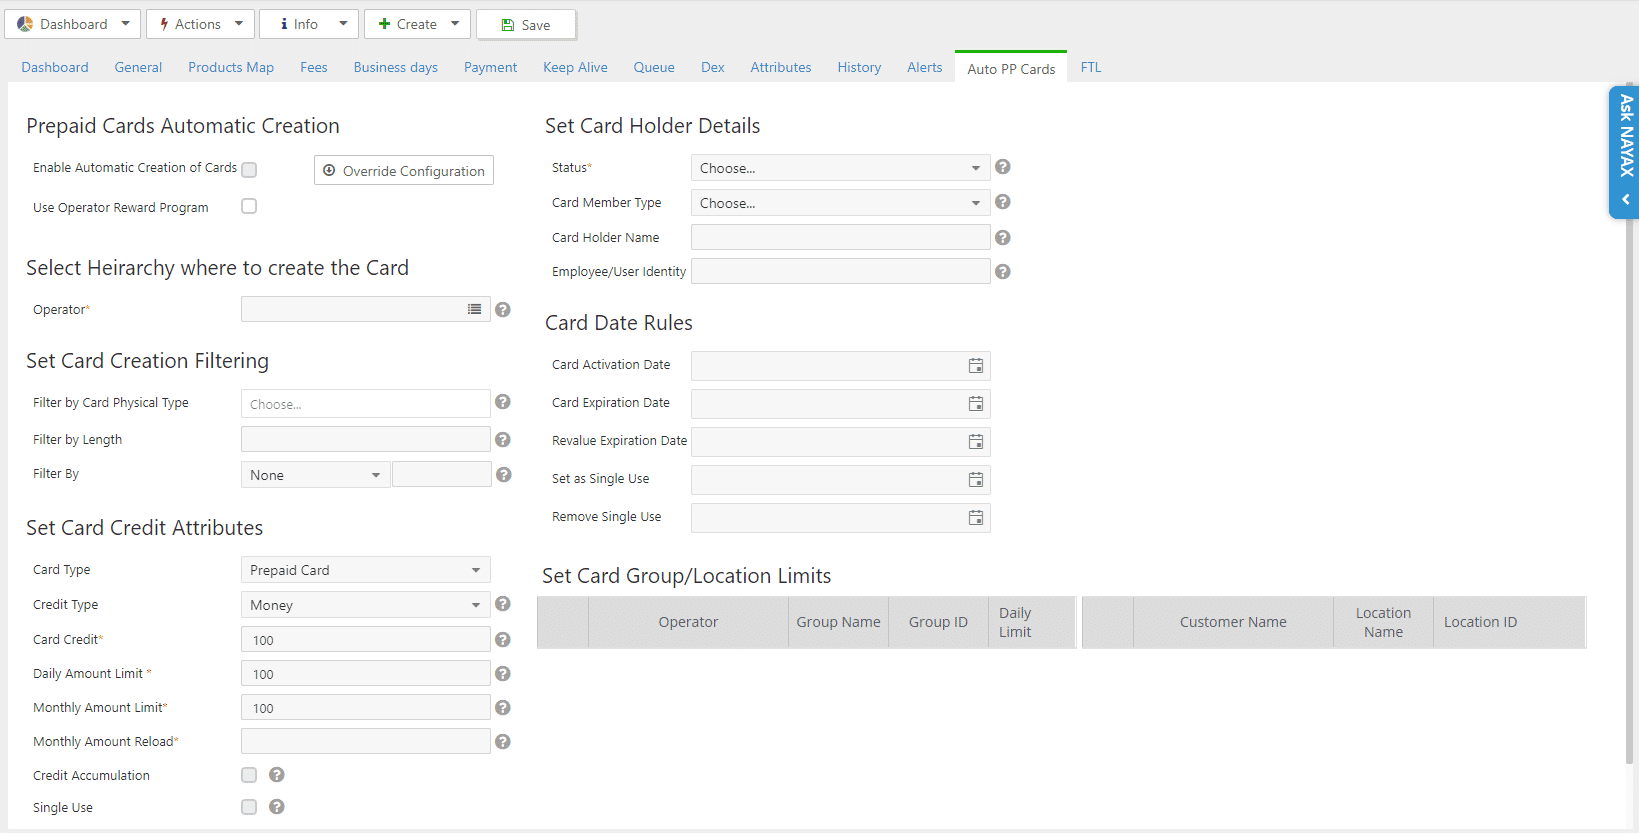
Image AttachedWhat is this Tab?
This tab allows you to enable automatic creation of PP (prepaid) cards on machines under this Operator.
Please note this tab is covered in the "Card management" lesson.
Dashboard
Image AttachedAdd Dashboard Widget - Click to add an information widget to the Widgets tab.
Reset Dashboard - Restores the Dashboard tab to its initial state.

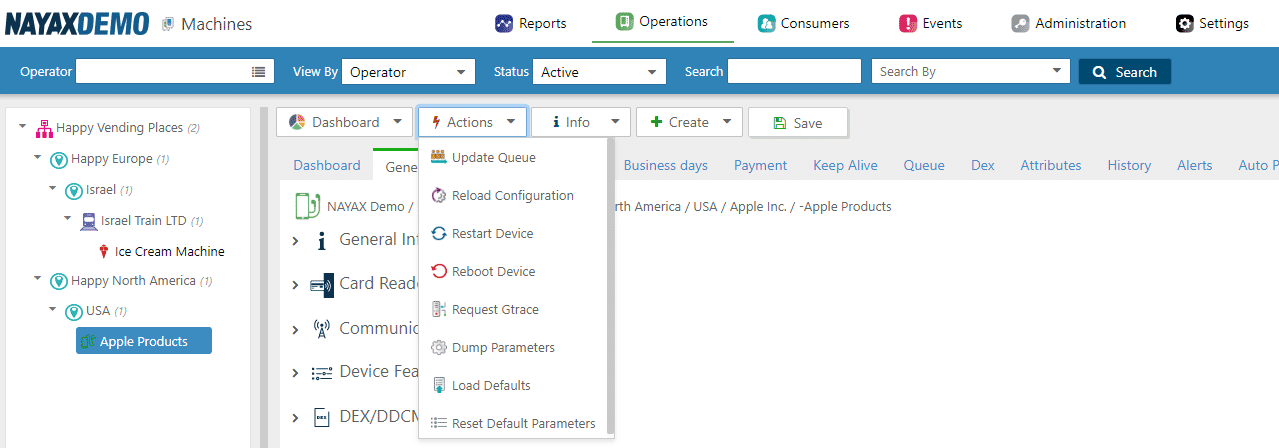
Actions
Image AttachedUpdate queue - Any updates that are selected with a checkmark are sent to the device's queue
Reload configuration - Sends the entire configuration settings of the General tab to the device's queue. Always send a "restart device" action after reloading.
Restart Device - Sends a remote restart to the device's queue.
Reboot Device - Sends power down type reboot and fully restarts the device from the beginning of the boot sequence. This is only recommended when Restart isn't helping resolve an issue.
Request Gtrace - Used by Nayax Tech Support to look deeper into the problems with devices/machines.
Dump parameters - Used by Nayax Tech Support. Sends the actual settings that the device currently has to the server for viewing.
Load Default - Used by Nayax Tech Support. Overrides the settings down in this machine section with a template of settings saved in the "Machine Model" under "General Information".
Reset Default Parameters - Used by Nayax Tech Support. Clears all settings on the device and restores it to its factory settings. Sends a reload configuration command for the device to run again.
Pro Tip: make sure to save after version update, if not, once the update is finished the device will downgrade to the version listed in the requested version.
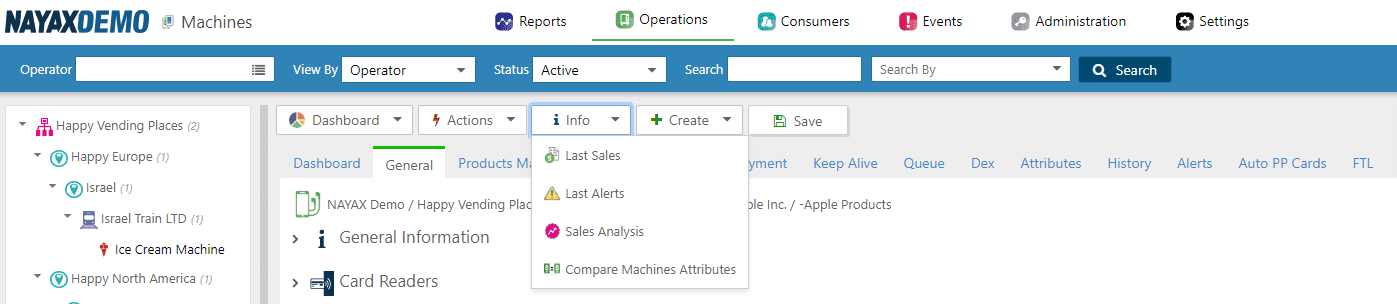
Info
Image AttachedLast sales - Shows the machine's most recent sales without running a report.
Last alerts - Shows the machine's most recent alert events without running a report.
Sales analysis - This brings you to Reports > sales analysis for this machine.
Compare machine's attributes - Using this, you can compare machine settings to any other machine your operator. Type the device serial number into "Machine A" and "Machine B", then click the "Compare" button.
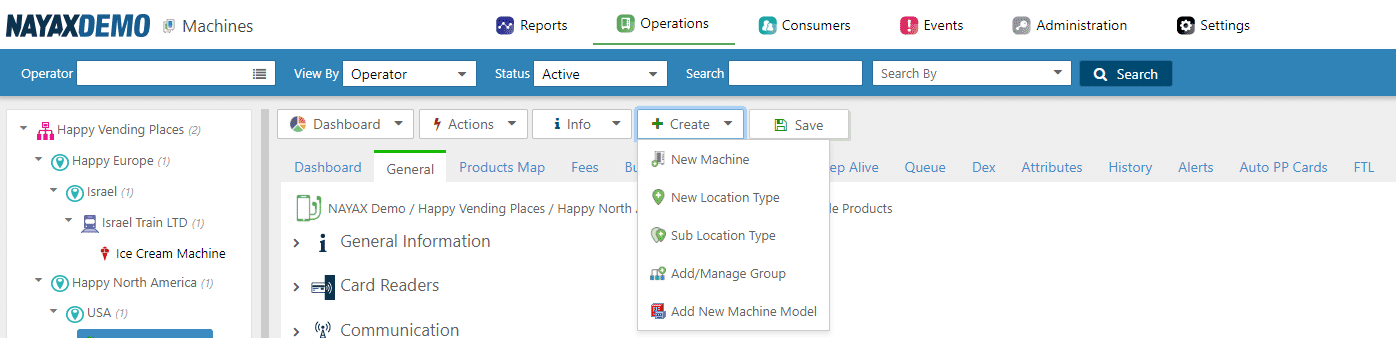
Create
Image AttachedNew machine - Creates a machine.
New Location Type - Creates a location you can add to the machines on your account that can appear in some sales report
Sub location type - Creates a sub-location.
Add/manage group - Creates a machine group that can be assigned to machines to help organize them into groups.
Add a new machine model - the machine model has a pre-configured template of settings from the General tab, allowing a user to set-up multiple machines with the same settings. If any setting appears misconfigured, a user can load these defaults from the actions button.
Thank you!
Did you find this article helpful?