How to View History Reports via Preset Tabs for a Charge Point Operator (CPO) | Administration
The History tab displays a complete log of operator activity, showing what was changed, where the change occurred, who made it, and when it happened.
Video Guide
00:01: The history tab shows the various actions taken by the operator. You can see which items have been modified, under which tab, who made the change, and when.
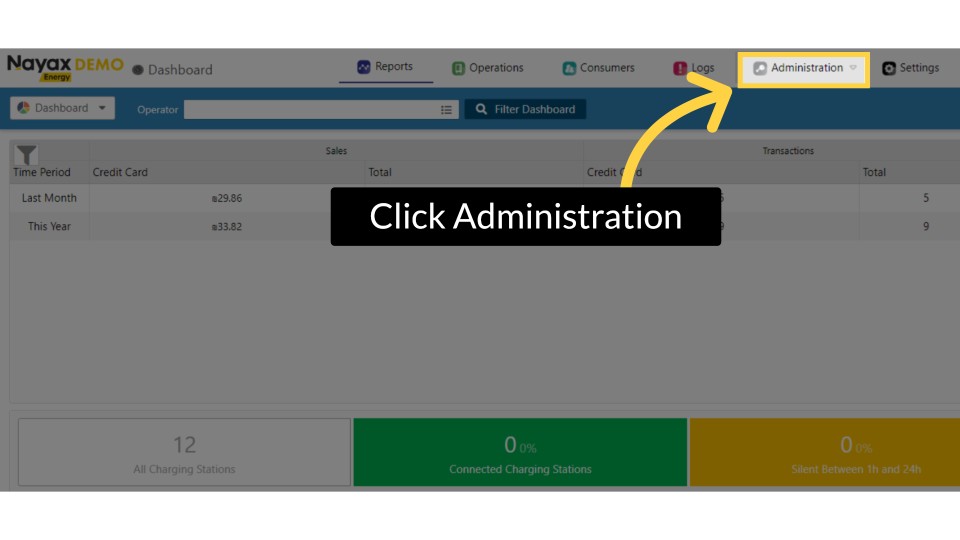
00:11: On the Dashboard of your Nayax Energy Core platform, click on the Administration tab.
00:17: Click on the Operator tab from the drop-down menu.
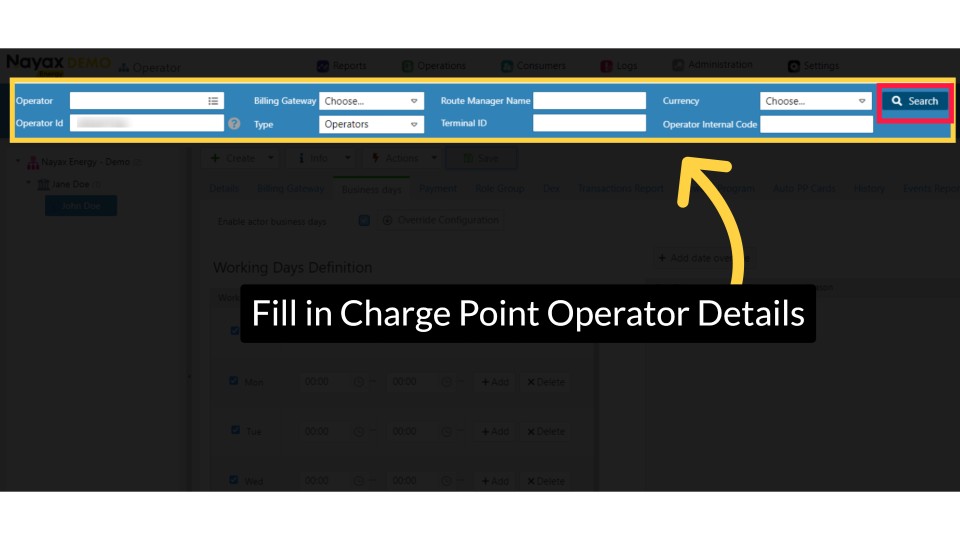
00:22: Type in your Charge Point Operator name and any other fields to locate your Charging Point. Click the search button as highlighted.
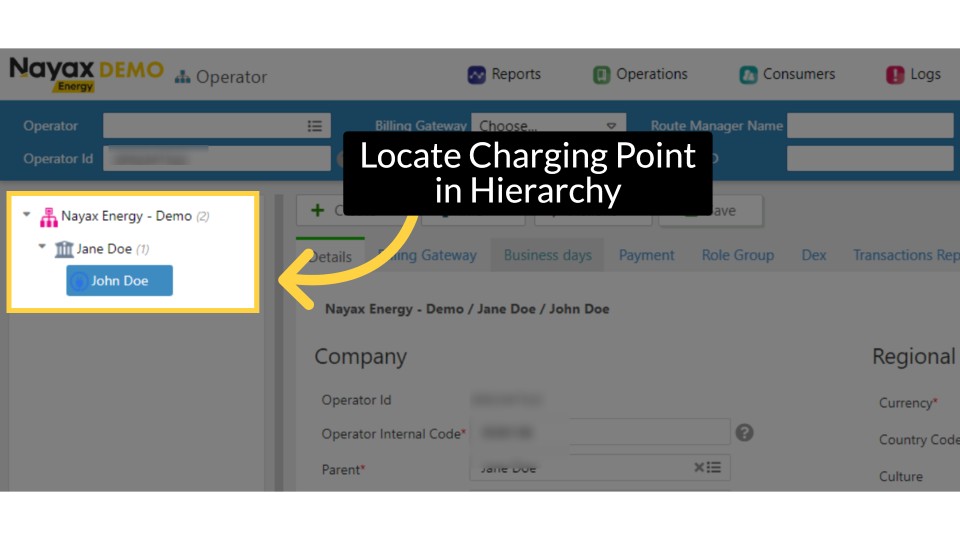
00:30: Locate and click on the charging point, from the hierarchy.
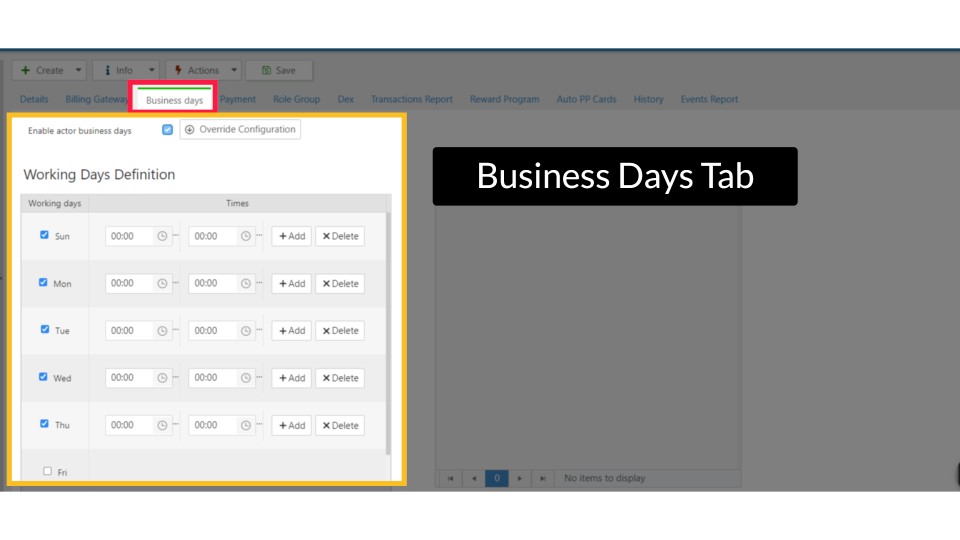
00:42: Click on the history tab button.
00:55: Set the time Interval of the history report you want to view.
01:01: Set the time Interval of the history report you want to set. Then, click on the search button, as highlighted in red on the visual.
01:09: The history report will be displayed, and you have the option to export it to Excel or PDF by clicking the Export button, as highlighted in RED.
Click Administration
Image AttachedOn the Dashboard of your Nayax Energy Core platform, click on the Administration tab.
Fill in Charge Point Operator Details
Image AttachedType in your Charge Point Operator name and any other fields to locate your Charging Point. Click the search button as highlighted.
Locate Charging Point in Hierarchy
Image AttachedLocate and click on the Charging Point from the hierarchy.
Click History Tab
Image AttachedClick on the History Tab button.
Set Time Interval
Image AttachedSet the time Interval of the history report you want to view.
Select Date Range
Image AttachedSet the time Interval of the history report you want to set. Then, click on the search button, as highlighted in RED on the visual.
Report Export Options
Image AttachedThe history report will be displayed, and you have the option to export it to Excel or PDF by clicking the Export button, as highlighted in RED.
Thank you!
Did you find this article helpful?