How to Create POS Presets | Company
After creating POS preset groups, create POS presets. From changing the order of how the categories are displayed to choosing how many products should appear in each row, these presets allow you to customize the layout of your POS.
Video Guide
Enable ‘Catalog Mode’ to set POS Presets.
To set up POS Presets, you must first enable the ‘Catalog Mode’ parameter.
Click here How to Enable 'Catalog' Mode | Administration for instructions, or continue if it’s already enabled.
This is a mandatory step!
Click Company Tab
Image Attached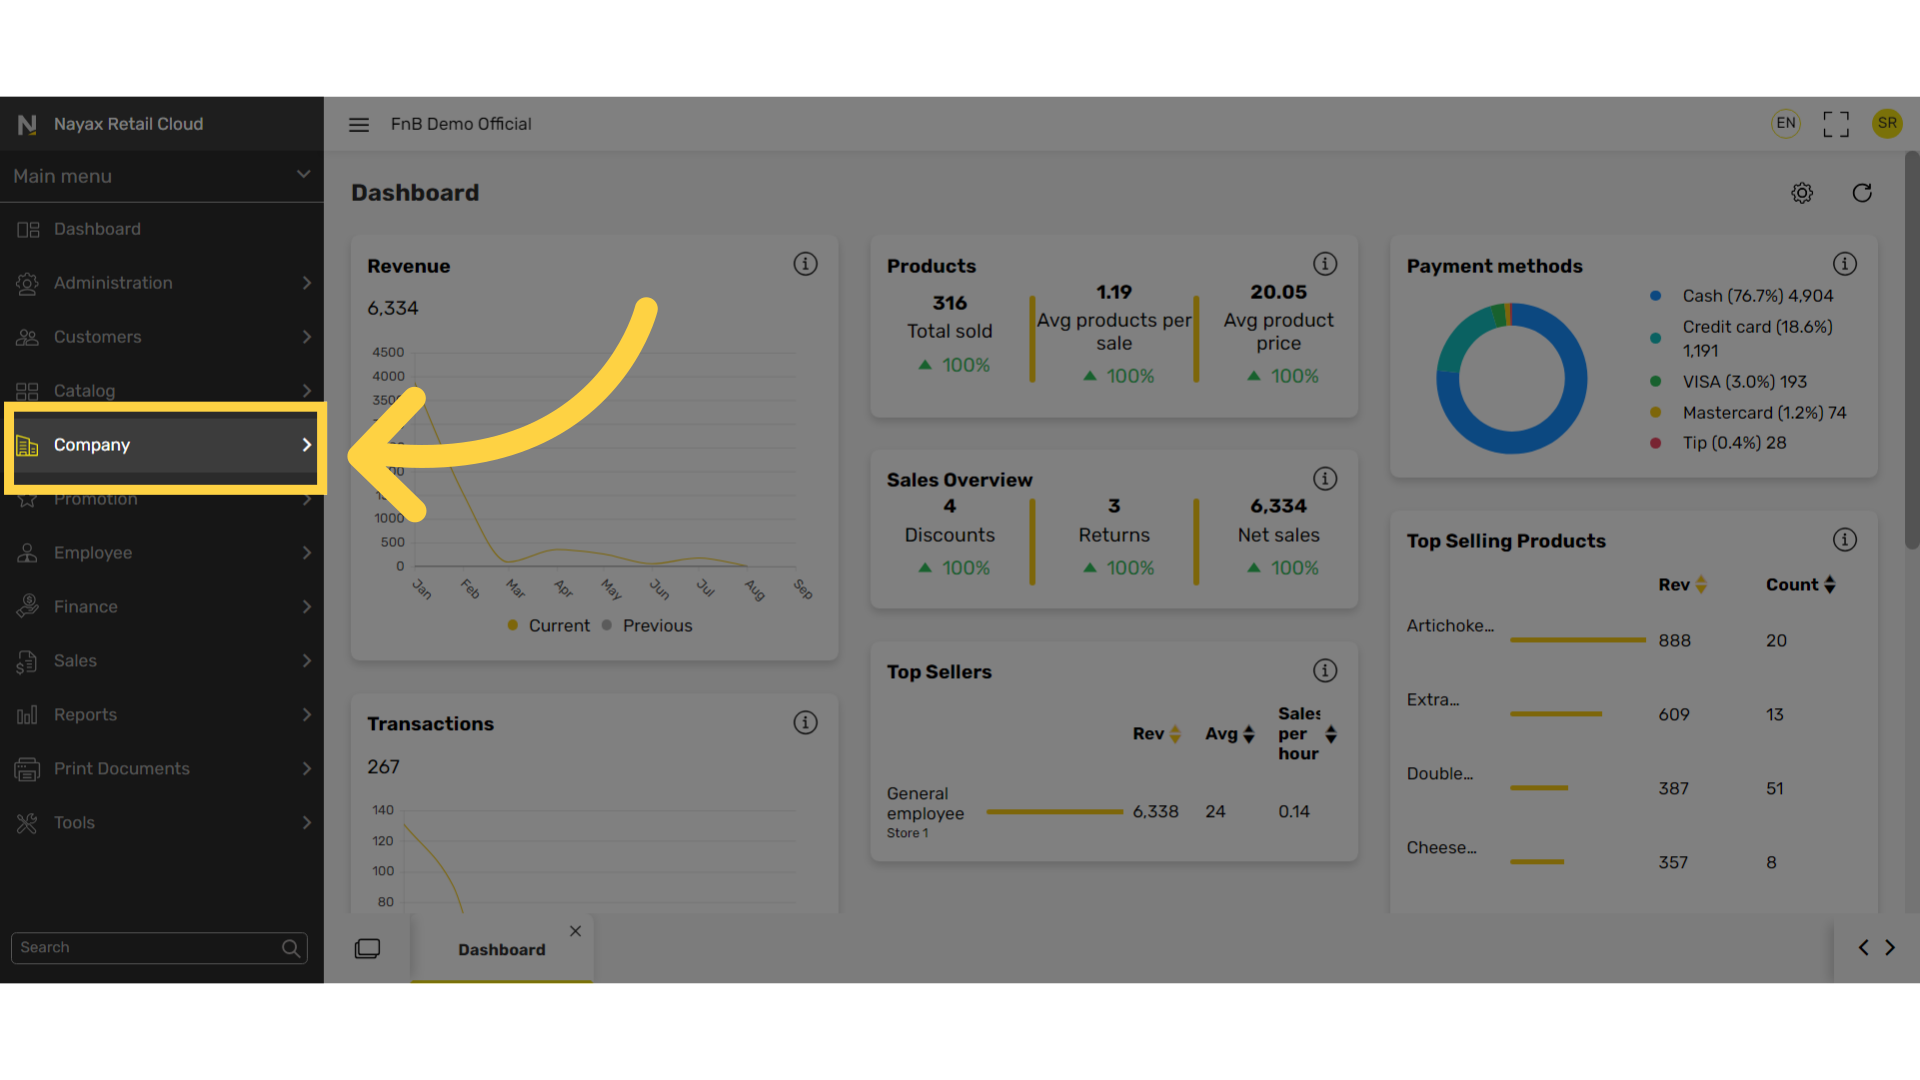
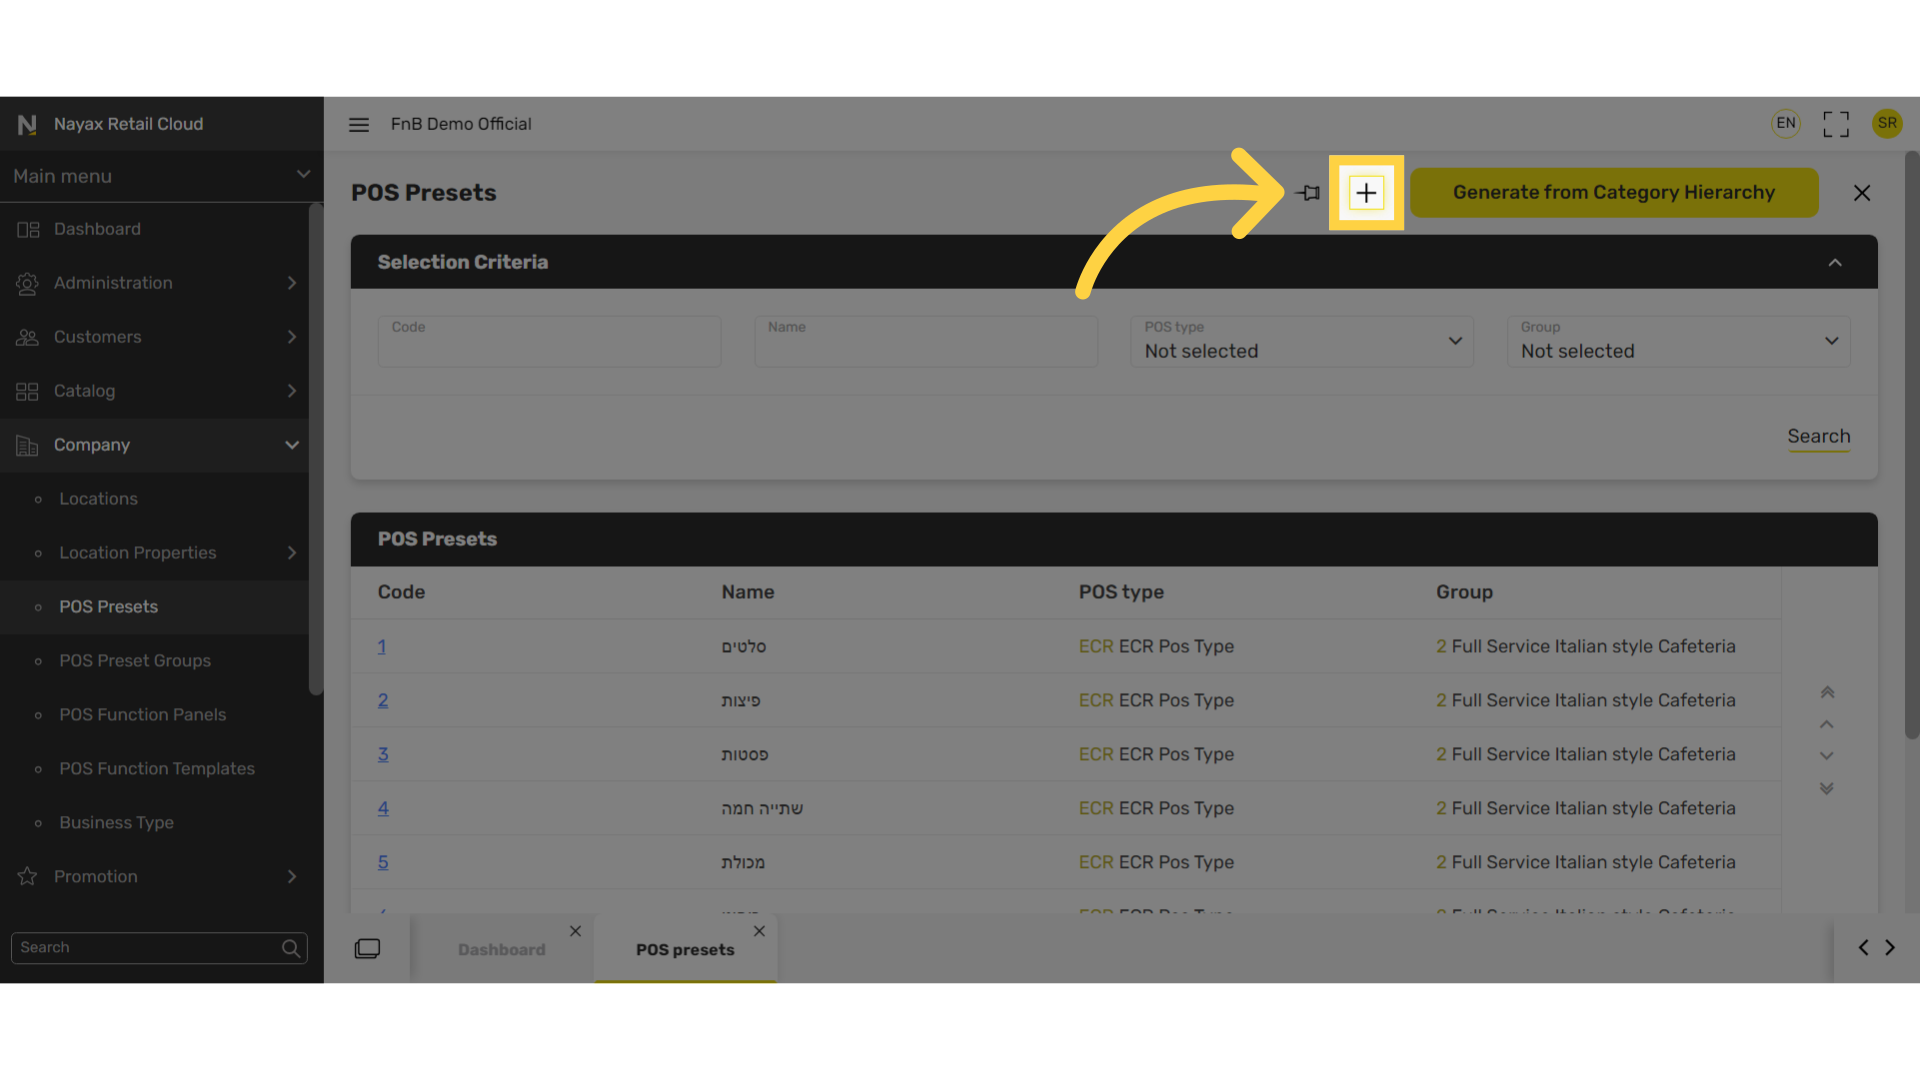
Click POS Presets
Image Attached

Click + Icon
Image Attached
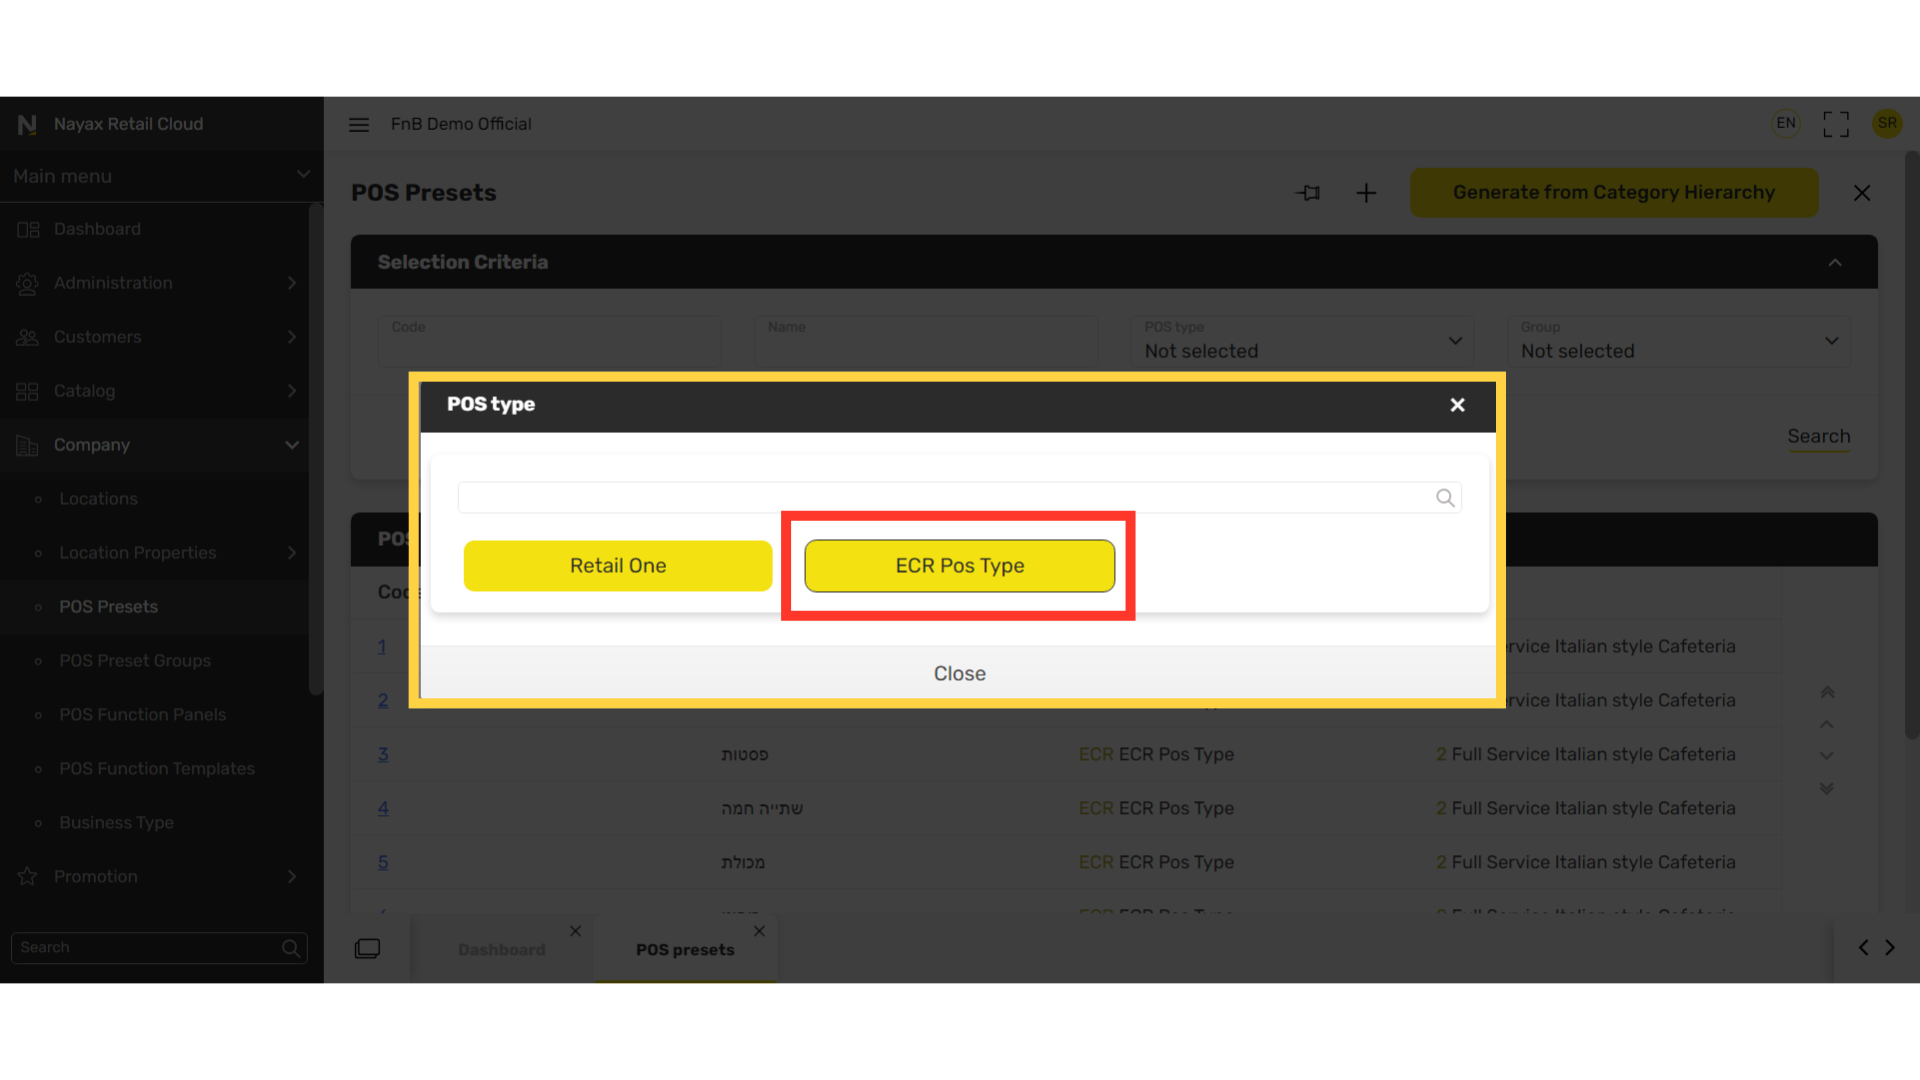
Select ECR POS Type
Image AttachedRetail One is currently not available on Retail Core.
Fill in Fields
Image Attached|
Fields |
Description |
|
Name |
Name of the category |
|
Group |
Select the POS Preset Group |
|
Columns |
The number of columns that will appear on the screen that will display the products. Note: If you look down at the General tab, to the right you can adjust the number of columns and see how it’ll be displayed. |

Click General Tab
Image Attached
Click Object Type
Image AttachedThe button settings will open. Click on Object type to reveal a drop down window.
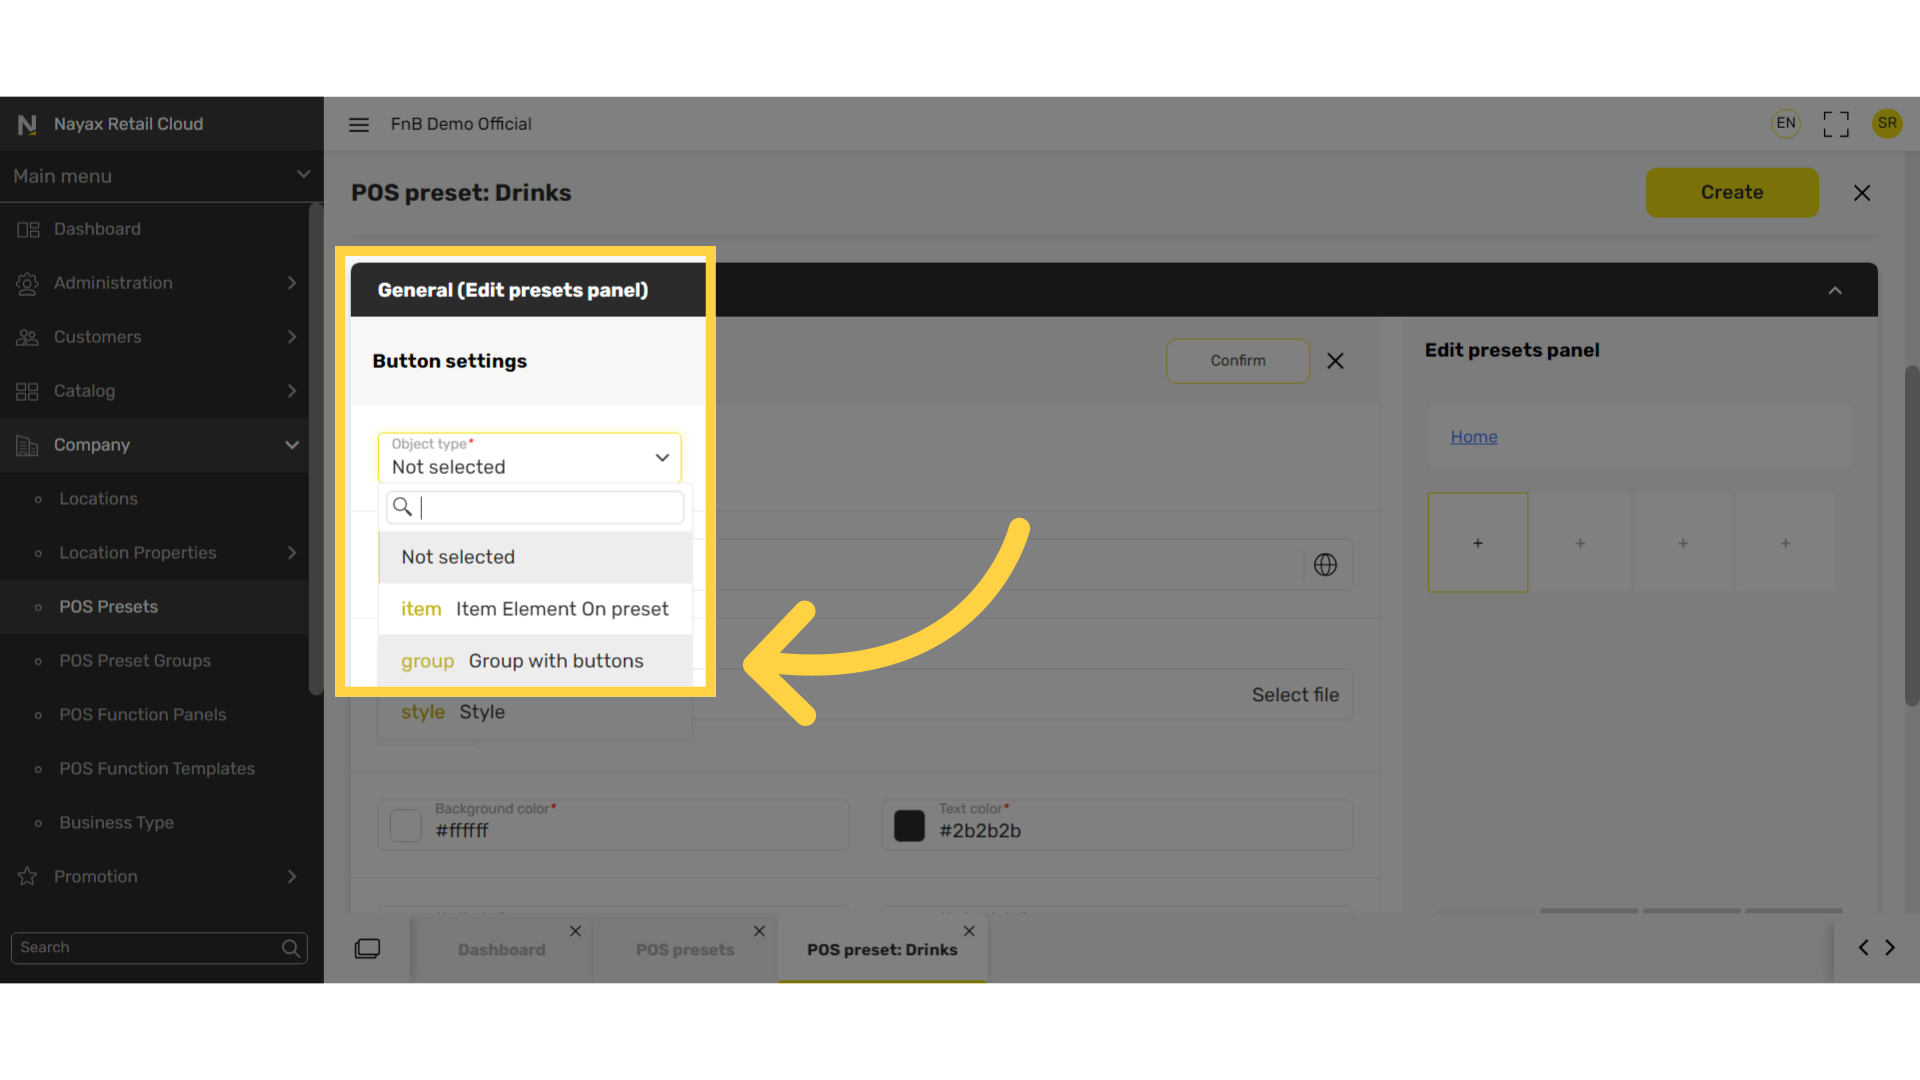
Select from the following three options based on your layout preference
Image AttachedGroup with buttons - create categories to group products for a more organized display.
Item element on preset - display each product individually on the POS display screen.
Style option is currently not available on Retail Core
Thank you!
Did you find this article helpful?