How to Create an Operator | Administration
Add a new operator to your Nayax Core hierarchy so you can manage accounts, assign machines, and configure regional and billing settings from one place.
Prerequisites
|
Prerequisites
|
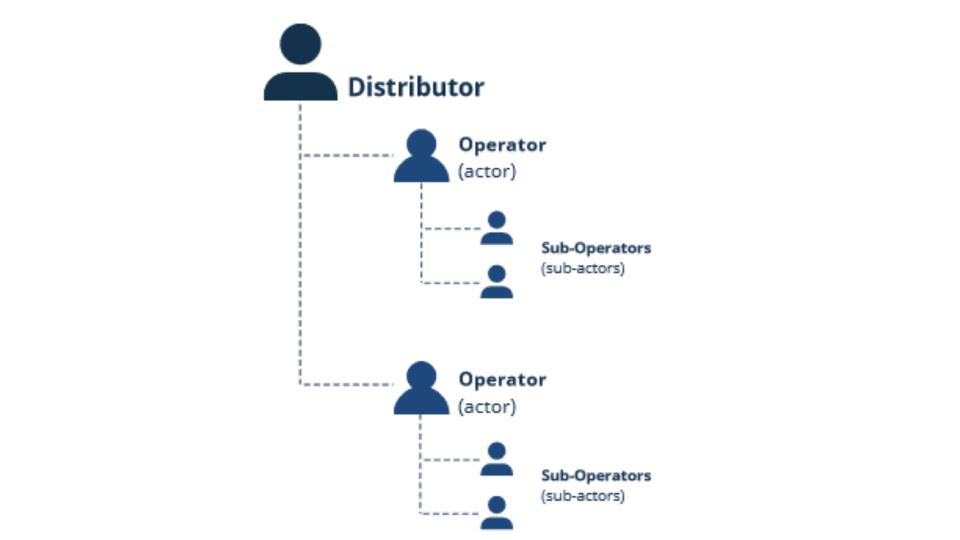
The Nayax Core Hierarchy
Image Attached
About the Nayax Hierarchy
Nayax Core organizes your business using a tree-like hierarchy with three levels:
- Distributors: The top level, representing your local Nayax branch or partner.
- Operators (Actors): Created by the distributor. This is where your business account lives.
- Sub-Operators (Sub-Actors): Created by the operator. Use these to represent areas, routes, or locations. Machines sit at the bottom of every sub-operator.
Video Guide
00:00: Learn to add a new operator to your Nayax Core hierarchy to manage accounts, assign
00:05: machines, and settings from one place.
00:07: The Nayax hierarchy is a three‑level, tree‑like structure: Distributors at the top,
00:12: followed by Operators, and Sub‑Operators such as routes
00:16: or locations. Machines are always placed at the lowest level, under sub‑operators.
00:21: From the dashboard of your Nayax Classic Core platform and select the Administration tab. Next, click on Operator in the drop-down menu.
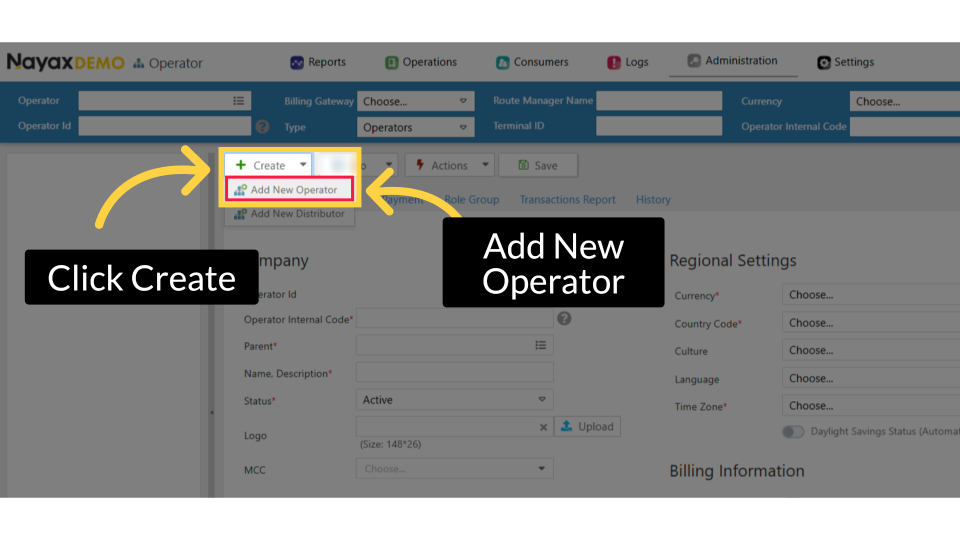
00:29: To create a new operator, click the Create button, then click 'Add New Operator', as
00:34: highlighted.
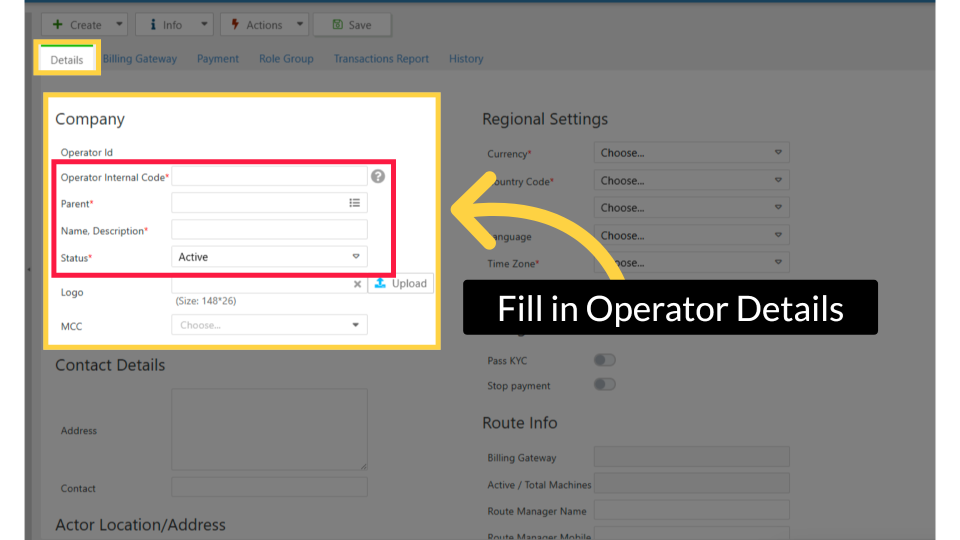
00:35: On the Details page, fill all required fields marked with an asterisk. Enter a unique
00:40: Operator
00:41: Internal Code, select the Parent for hierarchy, add the Name and Description from Nayax
00:46: Core, and set Status to Active.
00:47: Click Learn More for the full explanation in Nayax U.
00:52: Under Contact Details, enter the operator's address and contact information.
00:57: In regional settings, fill all required fields marked with an asterisk. Set the
01:02: Currency and Country for this new operator, then Culture, Language, and Time Zone.
01:06: If applicable, enable Daylight Savings and set it to Automatic. Click Learn More for
01:11: the full explanation in Nayax U.
01:14: In regional settings, fill all required fields marked with an asterisk. Set the
01:18: Currency and Country for this new operator, then Culture, Language, and Time Zone.
01:23: If applicable, enable Daylight Savings and set it to Automatic. Click Learn More for
01:28: the full explanation in Nayax U.
01:31: Add Route Information, optionally, enter the Route Manager Name and Mobile Number,
01:35: if applicable. Billing Gateway and Active or Total Machines will populate
01:40: automatically after saving.
01:41: If billing gateway details are missing, contact your distributor.
01:46: Now, go to and click the Billing Gateway tab at the top of the Operator Section.
01:51: On the Billing Gateway page, select the billing gateway from the Primary Billing
01:55: Gateway dropdown.
01:56: If you’re unsure which gateway to choose, contact your distributor; they can help
02:01: with the terms and configuration.
02:03: Click on the Save button to finish.
02:06: The new operator appears in the hierarchy tree on the left panel. You can now
02:10: assign machines, configure sub-operators, and manage settings for this operator.
Click Administration Tab
Image Attached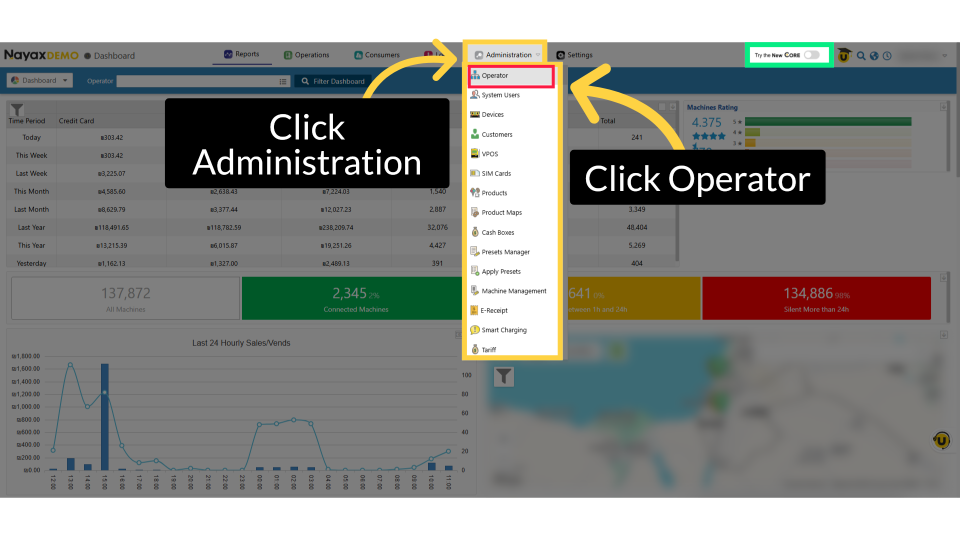
Click Create
Image AttachedTo create a new operator, click the Create button, then click 'Add New Operator', as highlighted.
Enter Operator's Company Details
Image AttachedFill in the following required fields under Company:
|
Field |
What to enter |
|
Operator Internal Code |
A unique internal code you use to identify this operator |
|
Parent |
The hierarchy level this operator belongs to (under the distributor, or under an existing operator/sub-operator) |
|
Name, Description |
The operator's name as it will appear in Nayax Core |
|
Status |
Select Active |
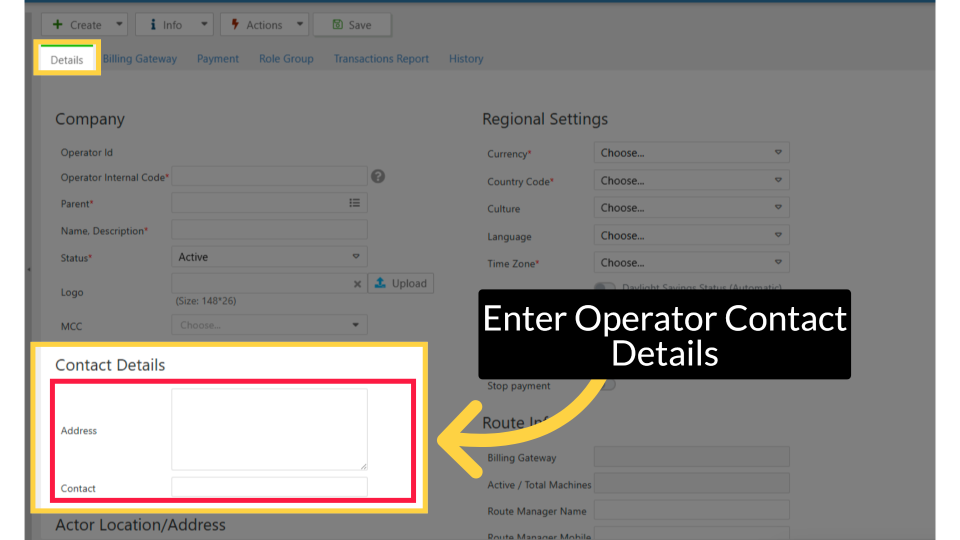
Enter Operator Contact Details
Image AttachedUnder Contact Details, enter the operator's address and contact information.
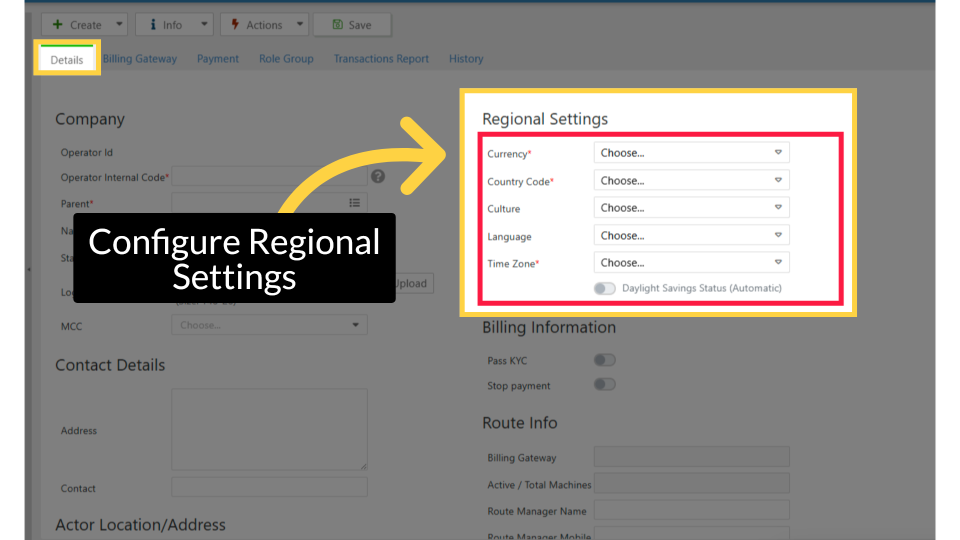
Configure Regional Settings
Image AttachedIn regional settings, fill all required fields marked with an asterisk. Complete the following:
|
Field |
What to enter |
|
Currency |
The currency this operator will accept |
|
Country Code |
The operator's country |
|
Culture |
Sets how numbers and prices are formatted (e.g., English – United States displays prices as 1,234.56; French – France displays them as 1 234,56) |
|
Language |
The display language for this operator |
|
Time Zone |
The time zone where this operator is located |
Tip: Enable Daylight Savings Status (Automatic) if the operator's region observes daylight saving time.
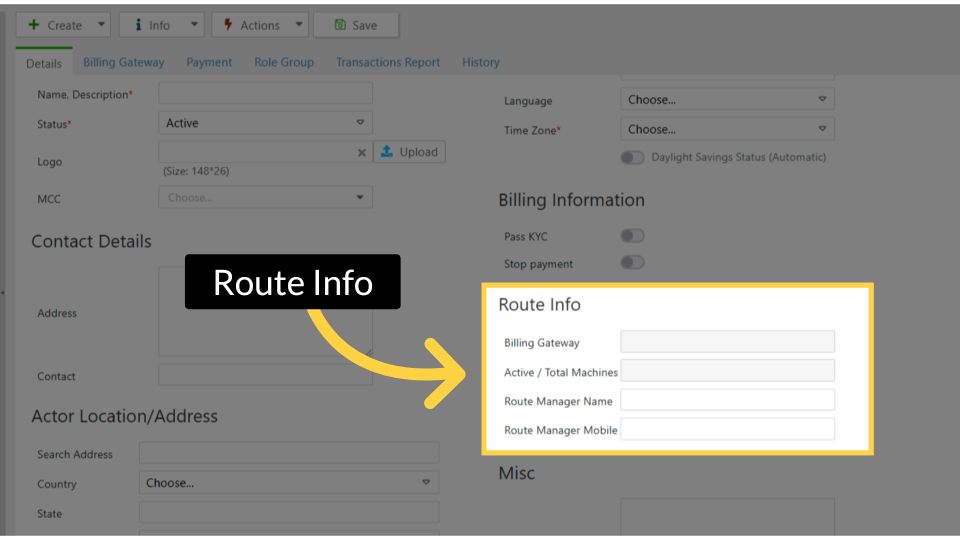
Add Route Information (optional)
Image AttachedUnder Route Info, enter the Route Manager Name and Route Manager Mobile number if applicable.
Note: Billing Gateway and Active/Total Machines are filled in automatically after you save.
If you don't have billing gateway details, contact your distributor.
Click Billing Gateway
Image AttachedNow, go to and click the Billing Gateway tab at the top of the Operator Section.
Set Billing Gateway
Image AttachedOn the Billing Gateway page, select the billing gateway from the Primary Billing Gateway dropdown. If you’re unsure which gateway to choose, contact your distributor; they can help with the terms and configuration.

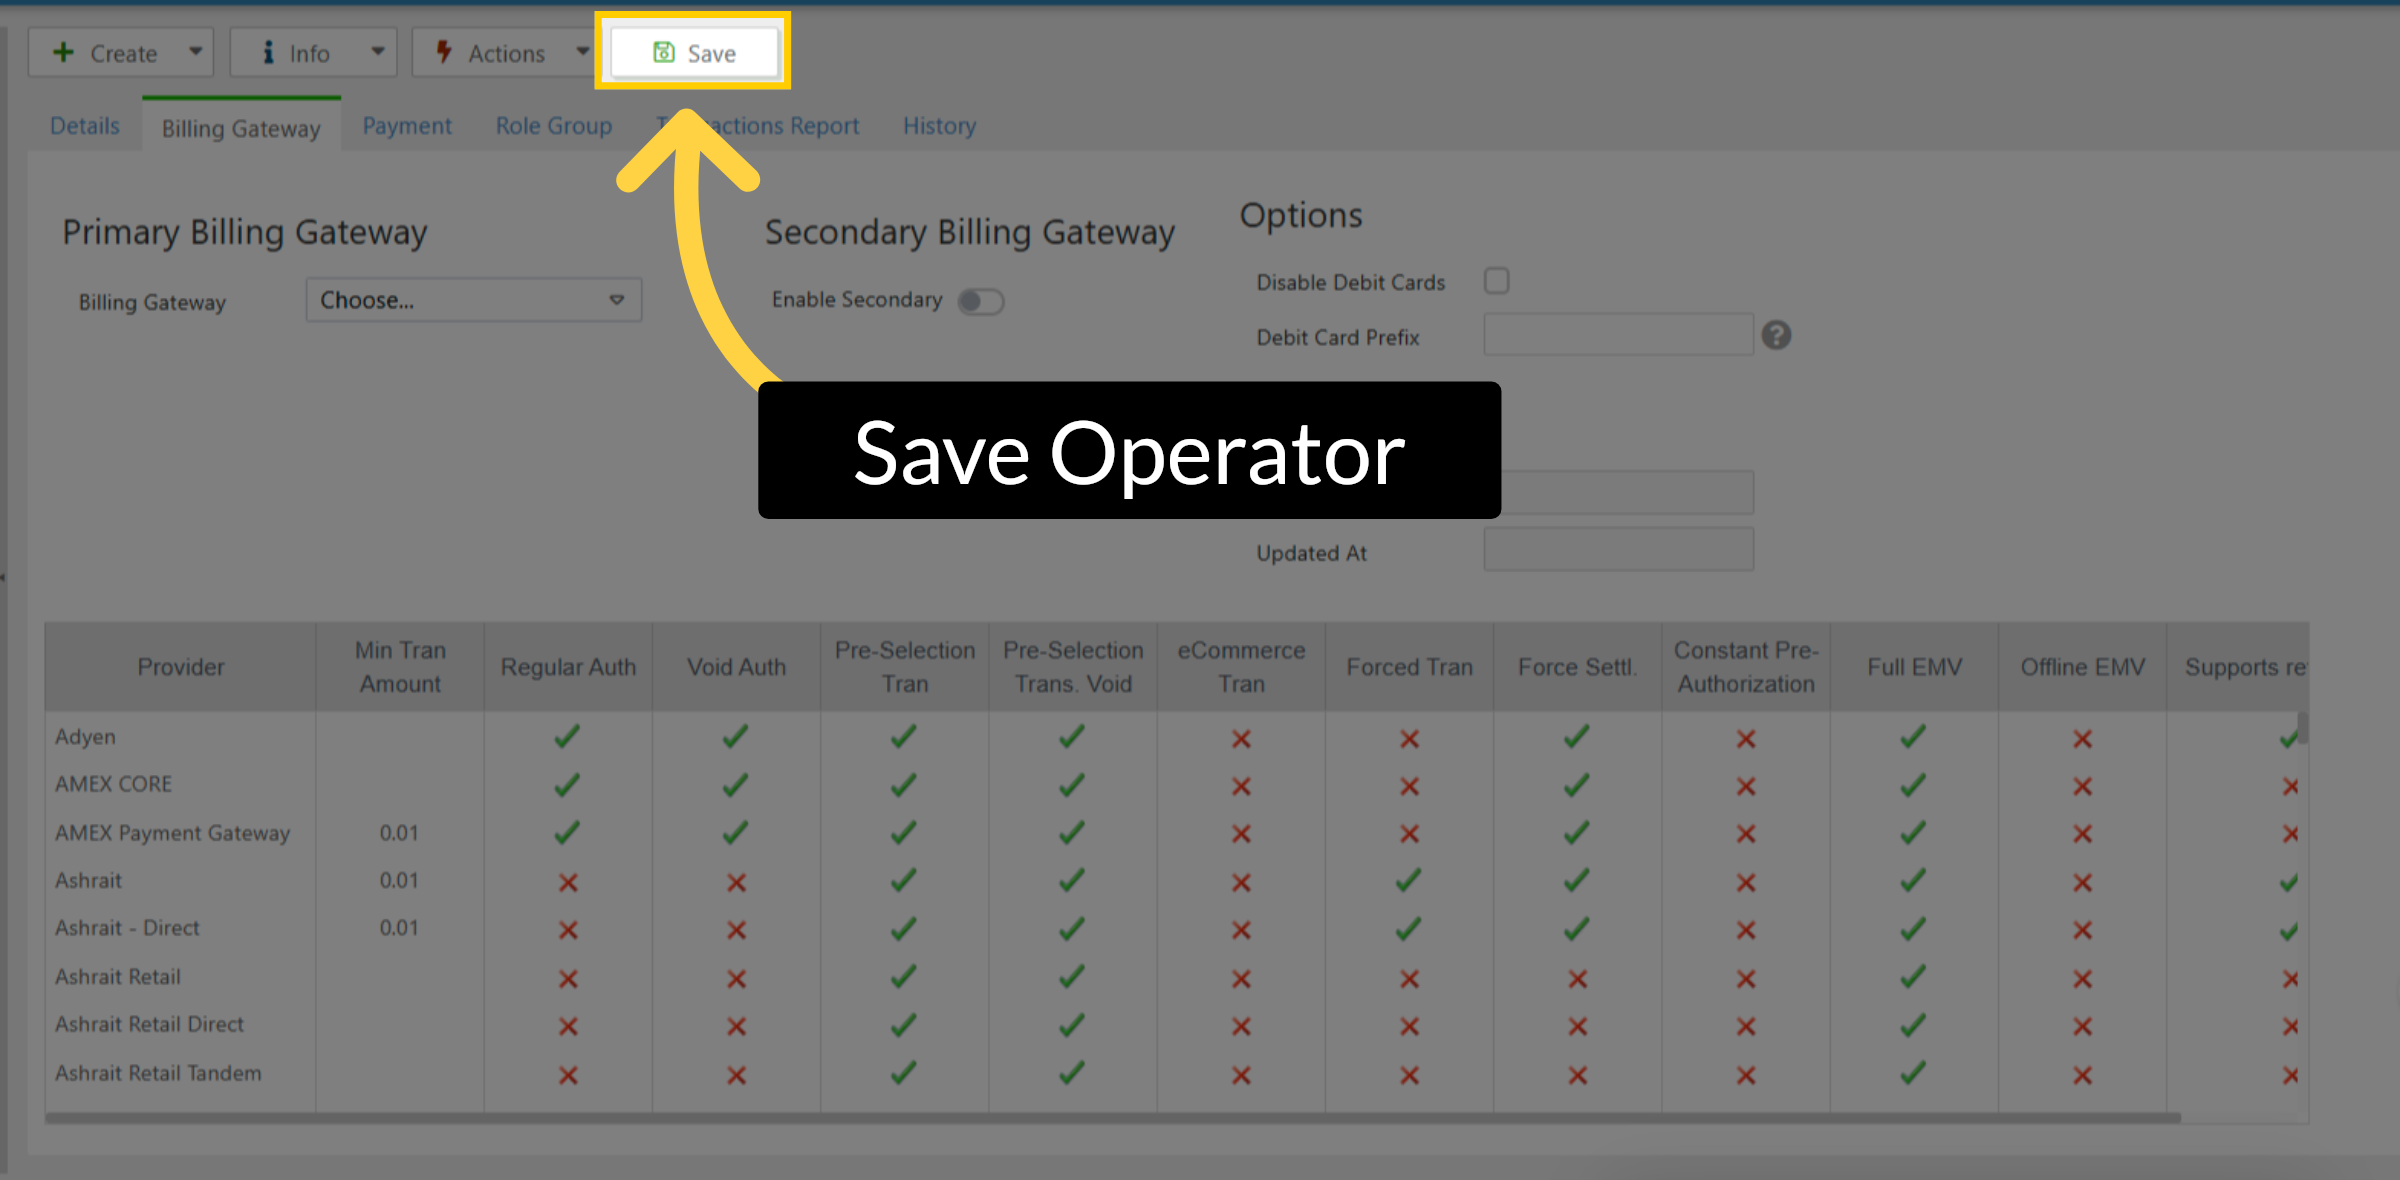
Click Save
Image AttachedClick on the Save button once ready to proceed and save this operator.
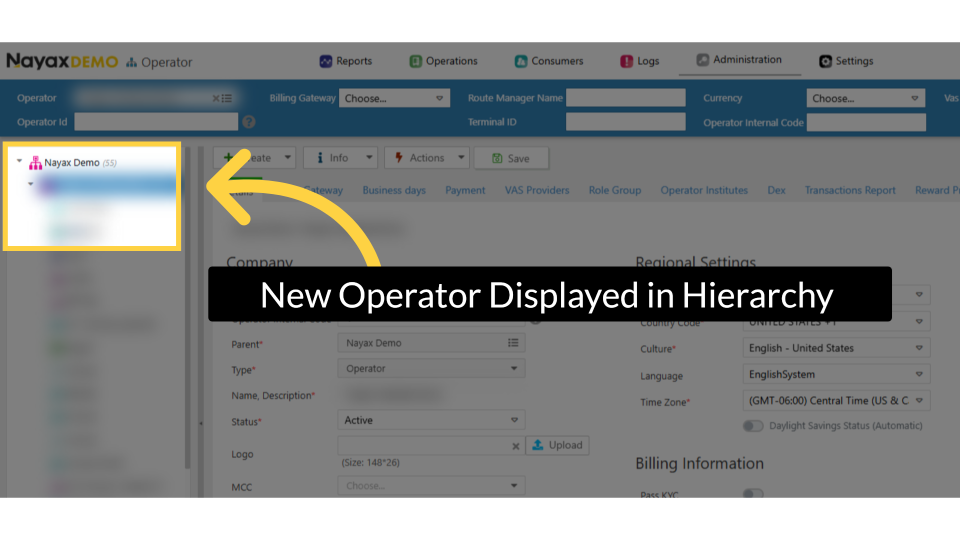
New Operator Displayed in Hierarchy
Image AttachedThe new operator appears in the hierarchy tree on the left panel. You can now assign machines, configure sub-operators, and manage settings for this operator.
Troubleshooting
Troubleshooting
|
Issue |
What to do |
|
Billing Gateway dropdown is empty |
Contact your distributor, they configure and assign billing gateways |
|
Required field error on save |
Check that Operator Internal Code, Name, Status, Currency, Country Code, and Time Zone are all filled in |
|
Operator not visible in hierarchy after saving |
Refresh the page and check the Parent field the operator may be nested under a different level than expected |
Thank you!
Did you find this article helpful?