How to Create a Product Group | Administration
Create a product group in Nayax Classic Core to organize products by category, streamline sales tracking, apply pricing rules, and unlock BI Module reporting in just a few steps.
Why Create a Product Group?
A Product Group lets you organize related products under a single category, making it faster to track sales, apply pricing rules, and manage discounts across your machines.
If you have access to the BI Module, product groups also enhance your reporting accuracy. You'll get clear insights into product performance by category, helping you make smarter, data-driven decisions.
Video Guide
00:00: This guide will walk you through creating your own product group within Nyx. 00:05: On the dashboard of your NYX core management Suite, click on the administration 00:09: tab. 00:10: Select the machines tab from the drop-down menu. 00:13: Initiate the creation process. 00:16: In the drop-down menu, click on ADD product. 00:19: Fill in the mandatory fields of operator and description of your product group. 00:23: It is important to be as detailed as possible. 00:26: When filling out the description 00:29: These fields are optional but you can enter any number as an identifier, 00:33: if needed. 00:35: You also have the option to upload a photo linked to your product group, providing 00:39: an additional visual identifiers for your product group. 00:44: To include vat information in your product group, click on ADD vat, 00:48: A pop-up will be displayed asking for the vat details. 00:51: Fill in the mandatory Fields as indicated in red. 00:54: Please note tax value will be taken as a percentage. 00:58: Click the add button once done filling in the relevant vat details. 01:02: Click save. 01:03: A pop-up will be displayed, confirming, your product group was successfully created. 01:08: Thank you for watching.
Click Administration
Image Attached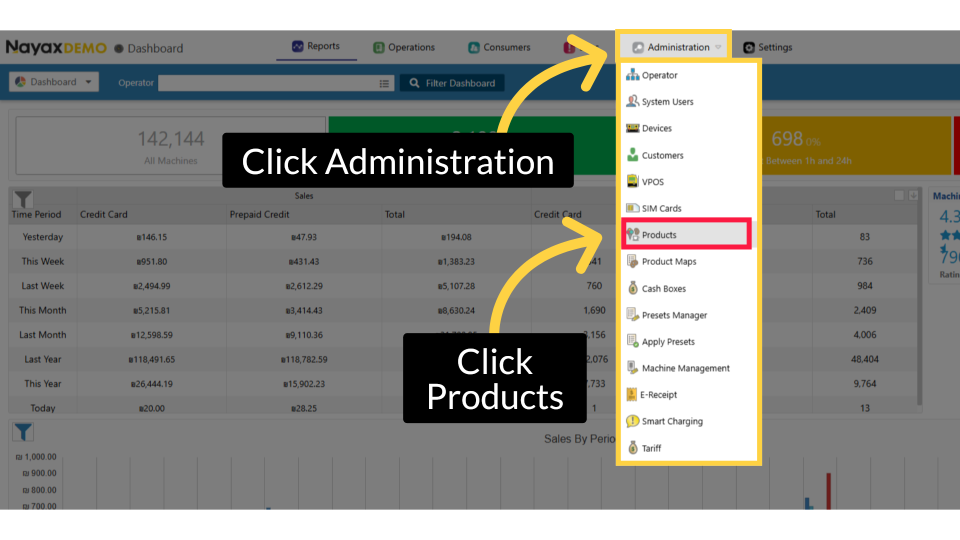
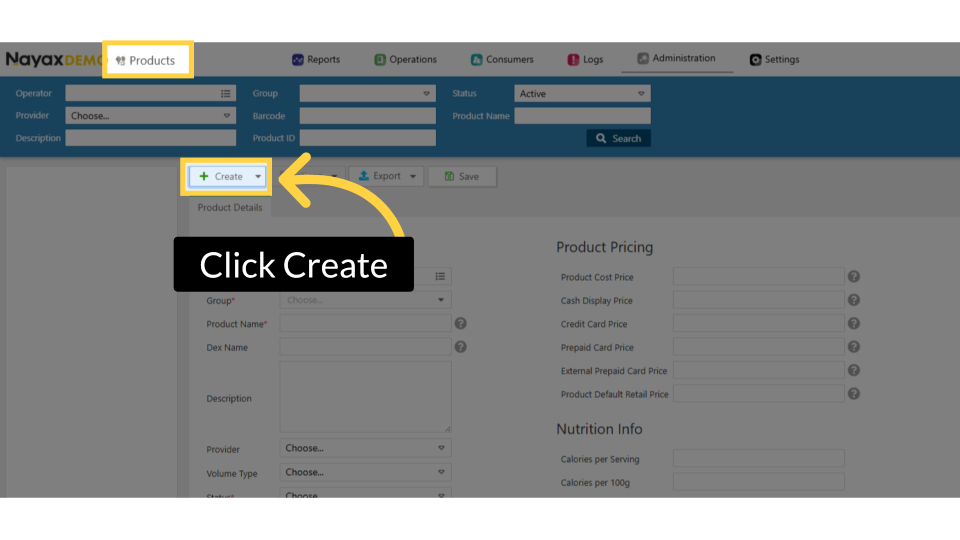
Click Create
Image AttachedOn the product page, click the Create button.
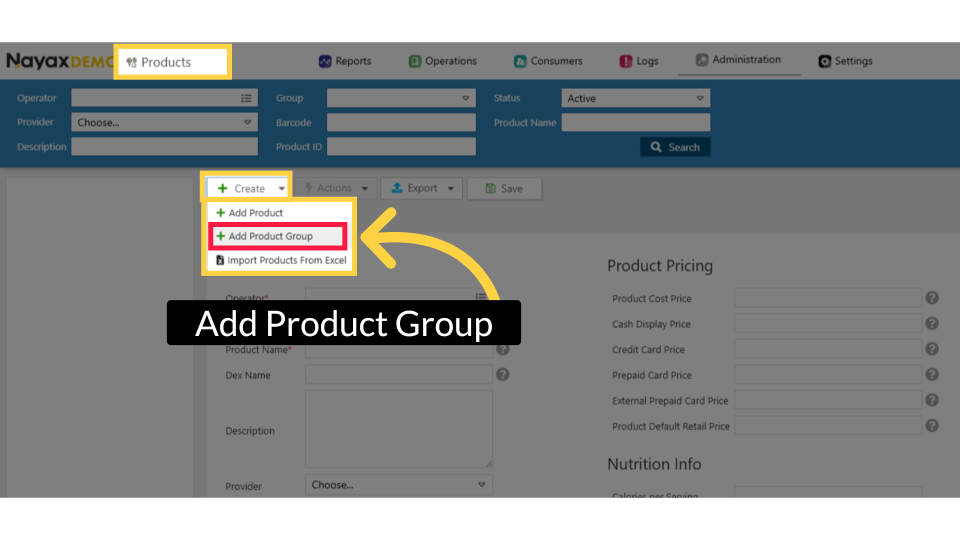
Add New Product Group
Image AttachedThen Click "Add Product Group" to begin defining a new group of products.
Add New Product Group
Image AttachedThen Click "Add Product Group" to begin defining a new group of products.
Choose Operator For Group
Image Attached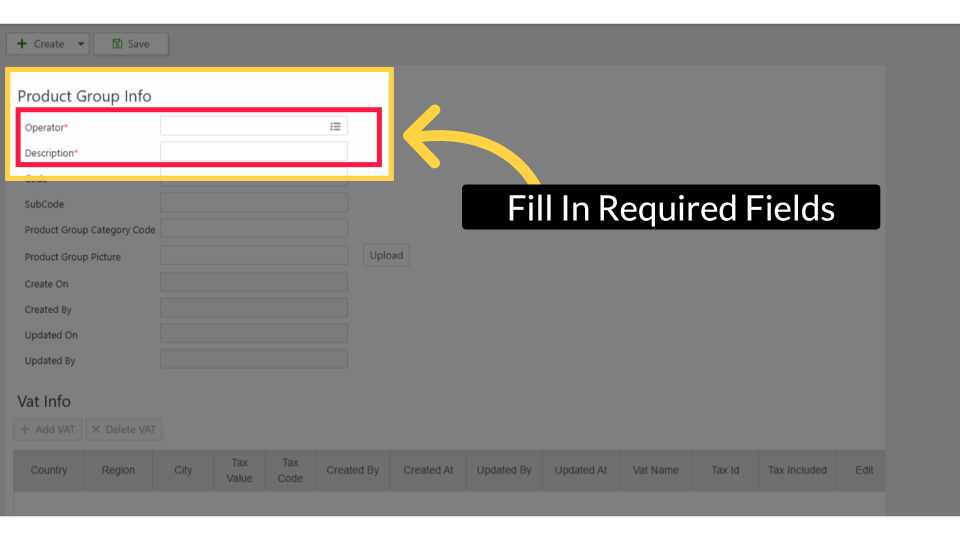
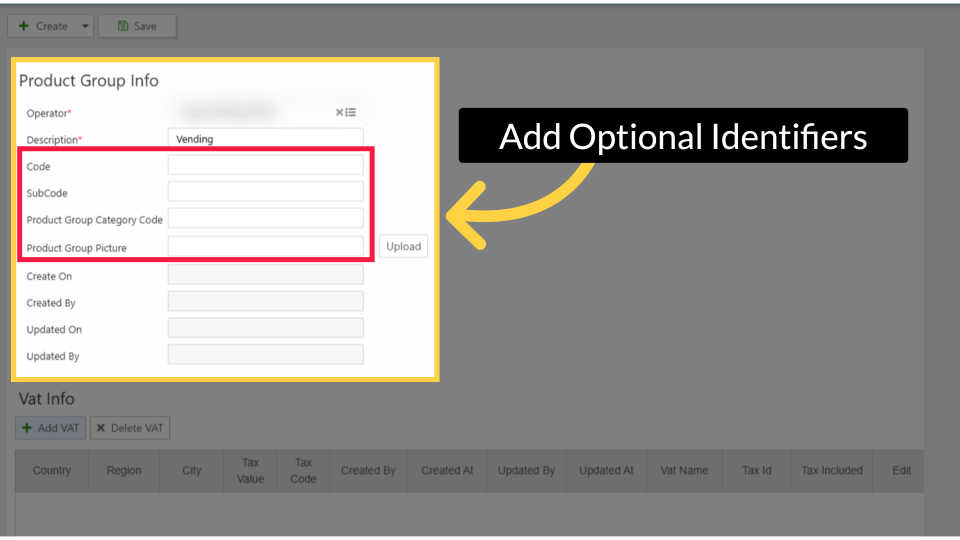
Add Optional Identifiers
Image AttachedYou can enter a numerical code to use as an internal identifier and optionally upload a photo to visually represent the product group. These additions help with organization and make the group easier for your team to recognize at a glance.
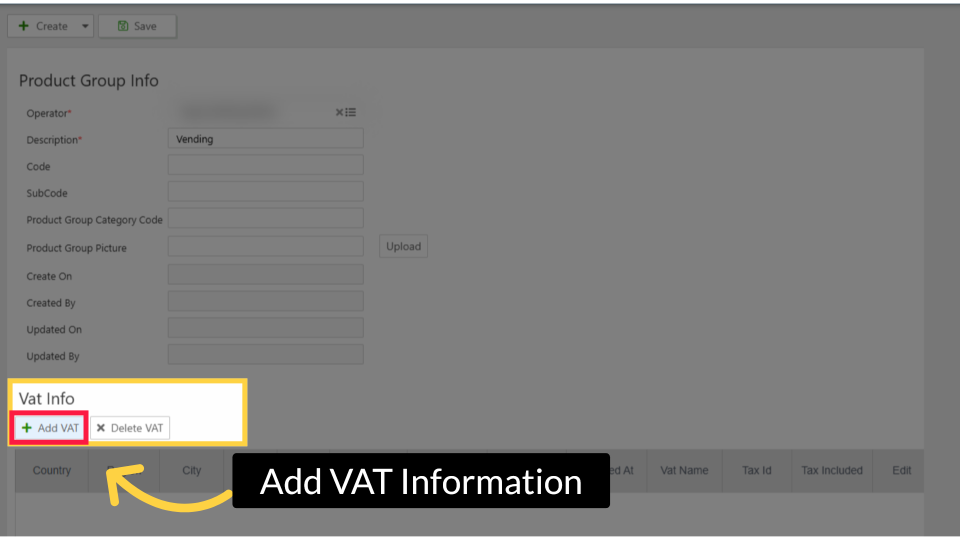
Add VAT Information (If Applicable)
Image AttachedConfigure tax details for this product group
SET (IF REQUIRED):
If VAT applies to this product group, click + Add VAT in the Vat Info section. A VAT Details dialog will open.
Complete all required fields (marked with an asterisk) and click + Add to save the VAT entry. The entry will then appear in the VAT table on the main form.
| Field | Requirement | Notes |
|---|---|---|
| Country Required | Select from list | The country where the VAT rate applies |
| Tax Value Required | Percentage (%) | Enter the tax rate as a percentage (e.g., 20 for 20%) |
| Tax Code Required | Free text | The tax code assigned to this rate |
| Vat Name Optional | Free text | A descriptive name for this VAT entry |
| Tax ID Optional | Free text | Your organization's tax identification number |
| Tax Included Optional | Checkbox | Check this if tax is already included in the product price |
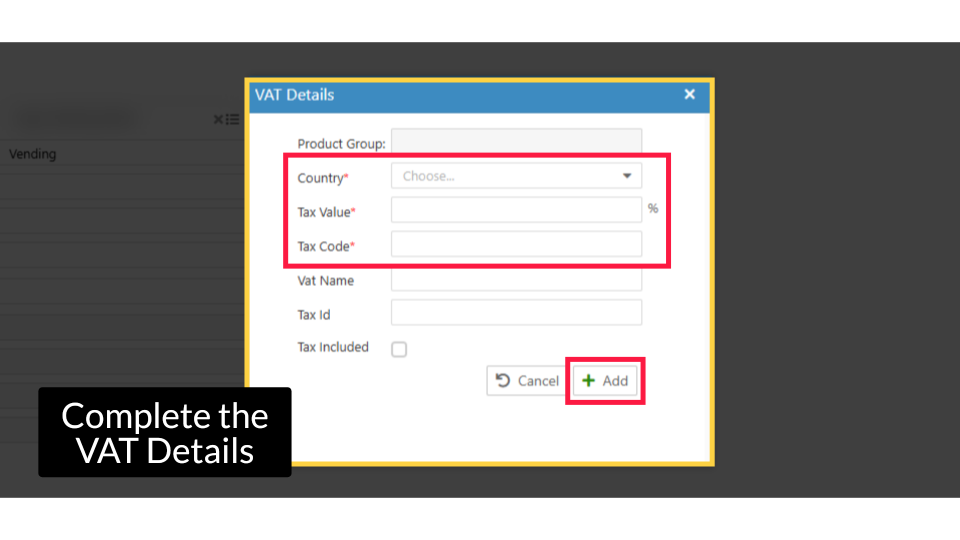
Complete the VAT Details
Image AttachedA VAT Details window will open. Fill in all required fields (marked with an asterisk) and any additional relevant information. Enter the tax value as a percentage.
When finished, click Add to save the VAT details.
Click Save
Image Attached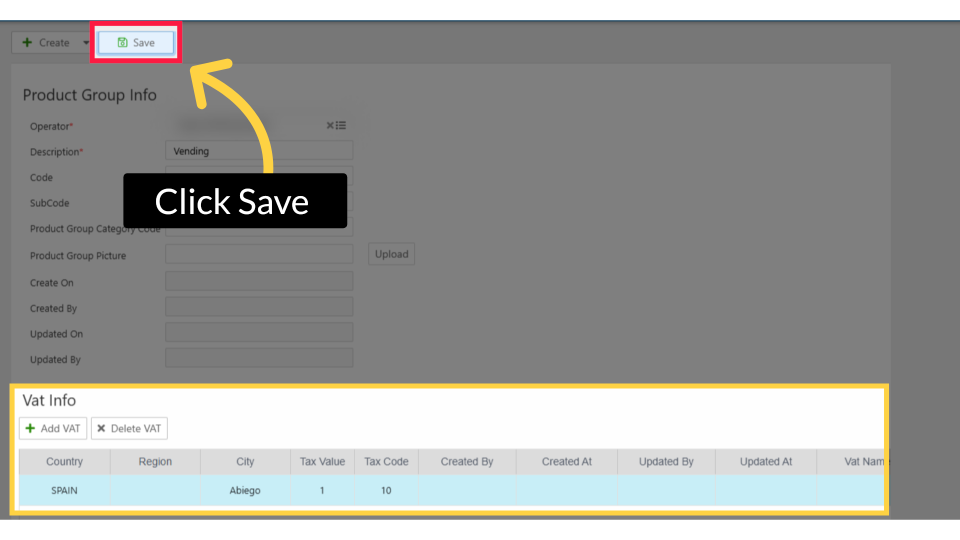
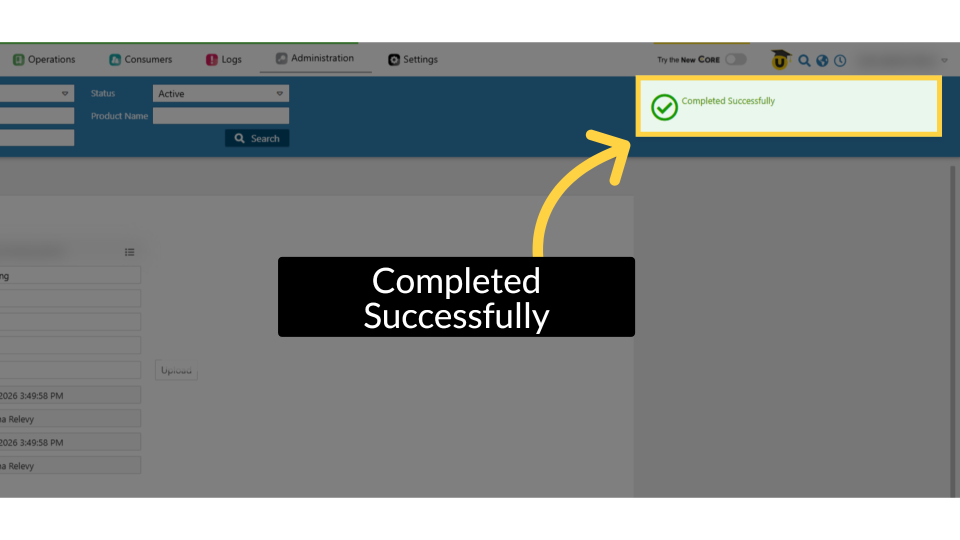
Completed Successfully
Image AttachedA confirmation pop-up will appear on screen, confirming that your product group has been created successfully. Your new group is now available across the platform for product assignment and reporting.
Thank you!
Did you find this article helpful?