
How to Connect and Assign a POS Device to your Machine | Operations
Assign your POS device to your machine in Nayax Core to activate cashless payments, unlock remote management, and gain full visibility into your machine's performance all from one platform.
Video Guide
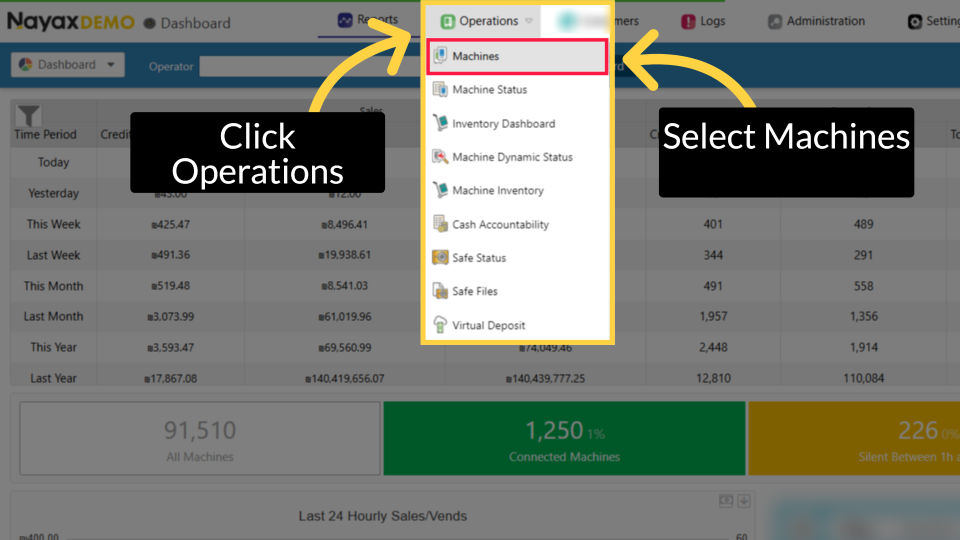
Click Operations
Image Attached
On the Dashboard of your Nayax Core platform, click on the operations tab and then on machines from the drop-down menu, as highlighted.
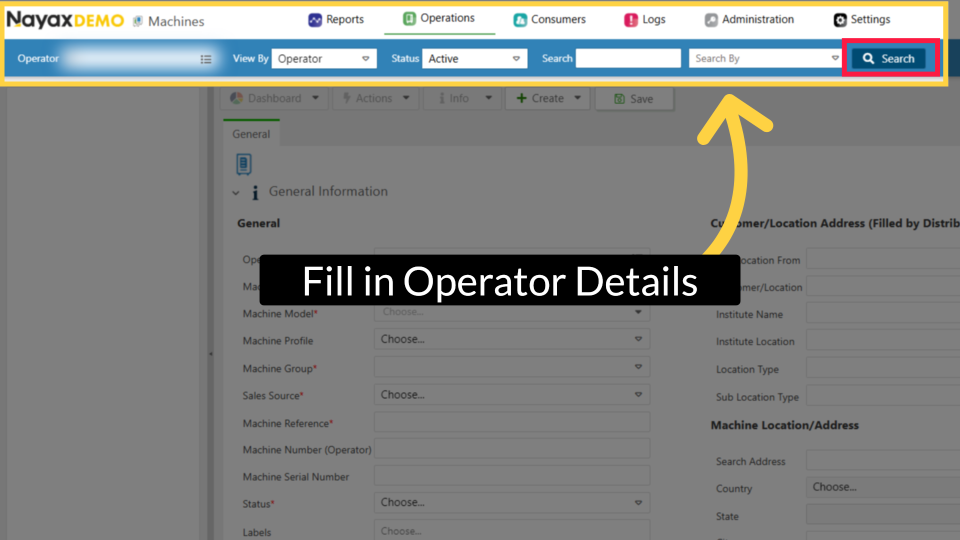
Fill in Operator Details
Image AttachedFill in your operator's name and other fields, then click the highlighted search button.
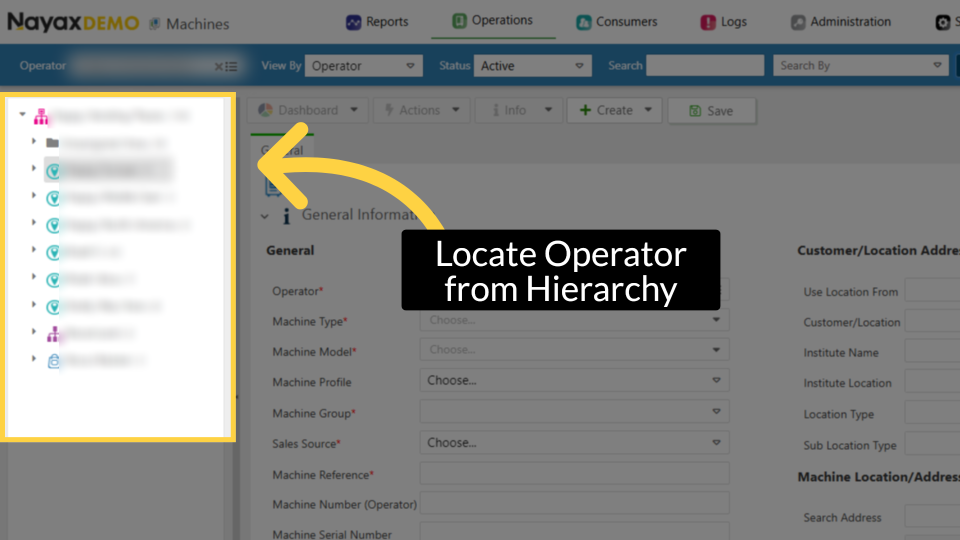
Locate Operator from Hierarchy
Image Attached
Locate and click on the operator machine from the hierarchy.
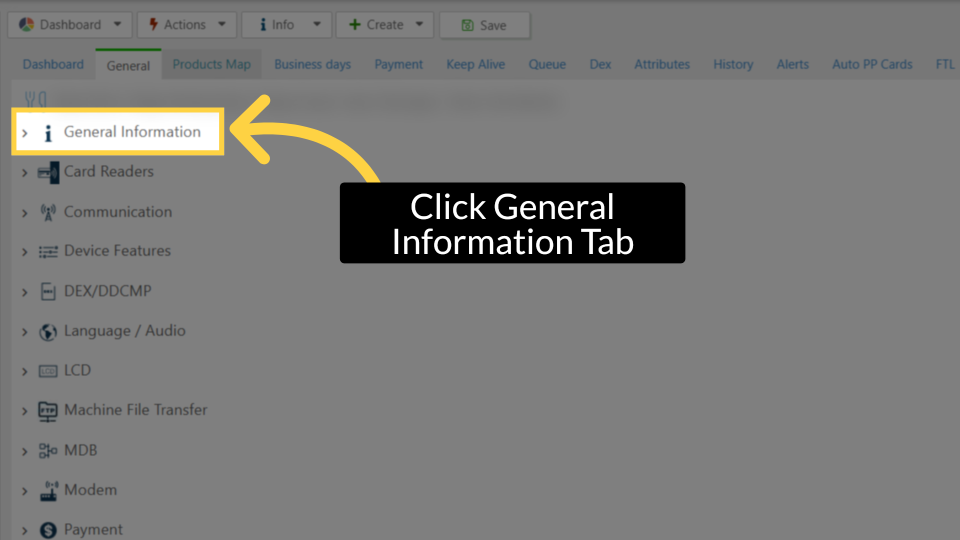
Click General Information
Image AttachedClick on the General Information tab to open.
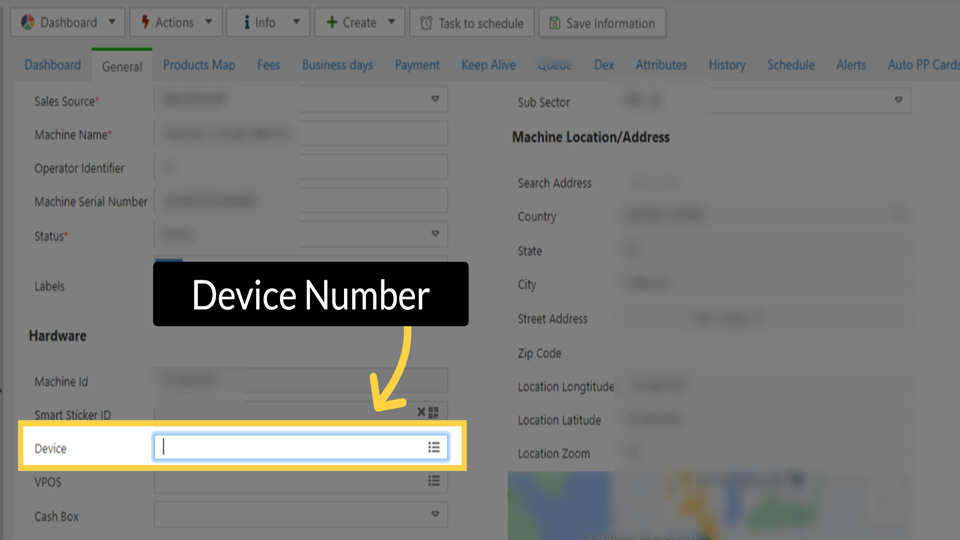
Device Number
Image AttachedFill in the device number.
Please note: When you fill in the device serial number, you need to select it from the drop-down menu, it won't allow you to save the information.
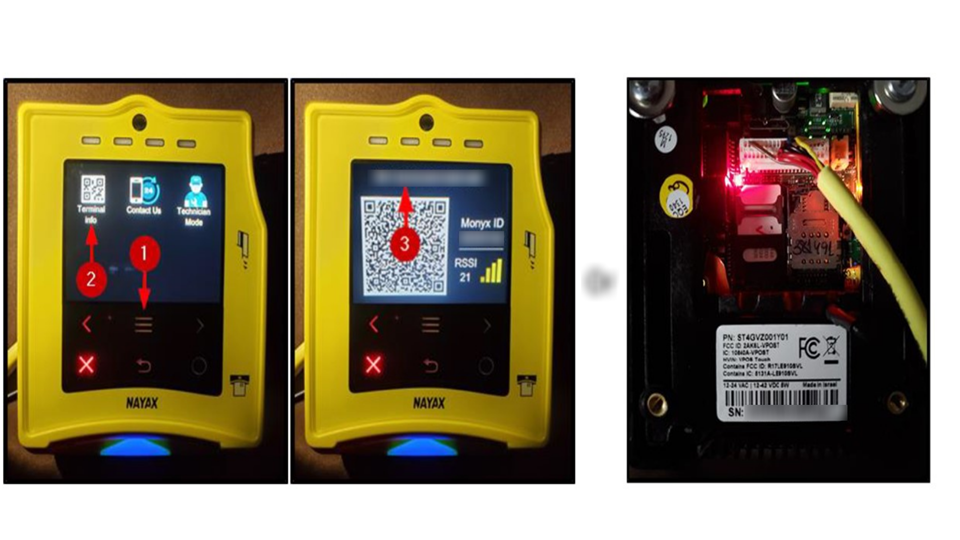
Locate Serial Number
Image AttachedPlease Note: Depending on the device
- The serial number can also be found on the sticker on the back of the device and on the box the device was shipped in.
- The best place to confirm the serial number is on the display of the device while it’s powered on.
- This will ensure that there is no mix-up with another serial number.
- If you don't see your device serial number, contact your local distributor or Nayax Support for assistance.
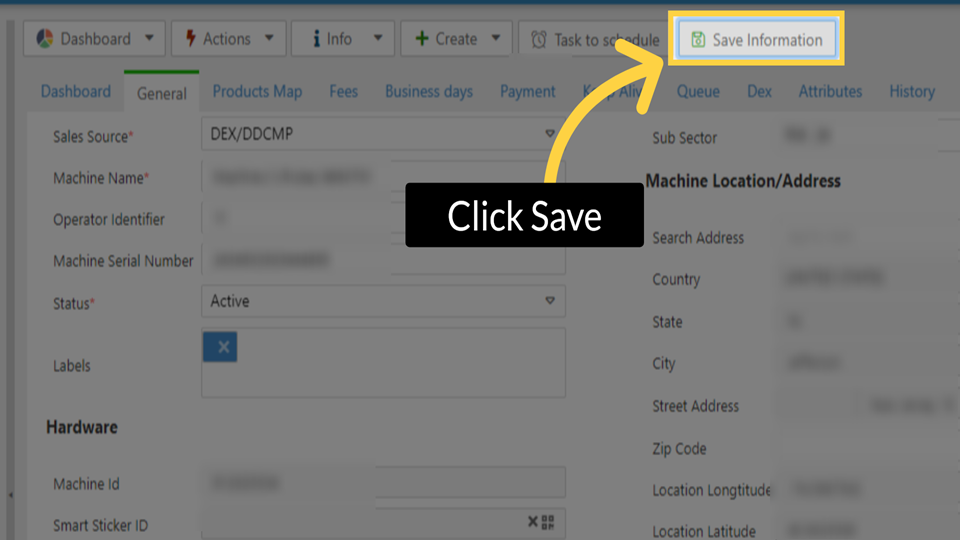
Click Save Information
Image Attached
Don't forget to save your changes!
You'll see the device status update to Active in the machine record
Do you need to deactivate your old POS?
Set a device as inactive to prevent future billing of the card reader when not in use How to Set a Device to Inactive | Administration.
Thank you!
Did you find this article helpful?