
How to Configure Dynamic e-Receipt for VPOS Media Devices Machine Level | Operations
Enable Dynamic eReceipt on VPOS Media 4 and VPOS Media 4 Mini, configure the receipt button, QR code display, and vend flow settings in Nayax Core.
What Is Dynamic eReceipt?
What Is Dynamic eReceipt?
Dynamic eReceipt lets customers receive a digital receipt after a successful transaction, delivered via an on-screen button, a QR code, or both. No paper printing required.
Machine-level configuration involves setting three attributes across two groups in Nayax Core, plus enabling eReceipt on the Payment tab.
| Attribute ID | Attribute Name | Group |
|---|---|---|
| 76 | Vend Flow Options | VPOS Touch |
| 1220 | Receipt Button Display Duration | Print Receipt Format |
| 1221 | Receipt QR Display Duration | Print Receipt Format |
Video Guide
00:00: Learn how to enable a digital receipt button and/or QR code on VPOS Media 4 and VPOS
00:05: Media 4 Mini devices so
00:07: customers can receive their receipt after a transaction.
00:11: On your Nayax Classic Core dashboard, click the Operations tab in the top navigation.
00:16: From the dropdown menu, select Machines.
00:19: Type your operator name in the search field and fill in any additional filter fields
00:23: to narrow down the results. Click the Search button to load your machine list.
00:29: In the hierarchy panel on the left,
00:30: locate and click on the machine
00:32: you want to update.
00:34: On the machine record page, click on "Attributes" to view and edit machine attribute
00:39: settings.
00:40: Click the Groups field to scroll through all attributes filtered by category.
00:44: For the E receipt, we will add the attribute under the Print Receipt Format tab.
00:49: After locating the attribute, select the checkbox in the Enable column. Then
00:53: configure Receipt Button Display Duration (Attribute 1220) and Receipt QR Display
00:59: Duration (Attribute
01:00: 1221). Click the 'Learn More' link to view a full explanation in Nayax U.
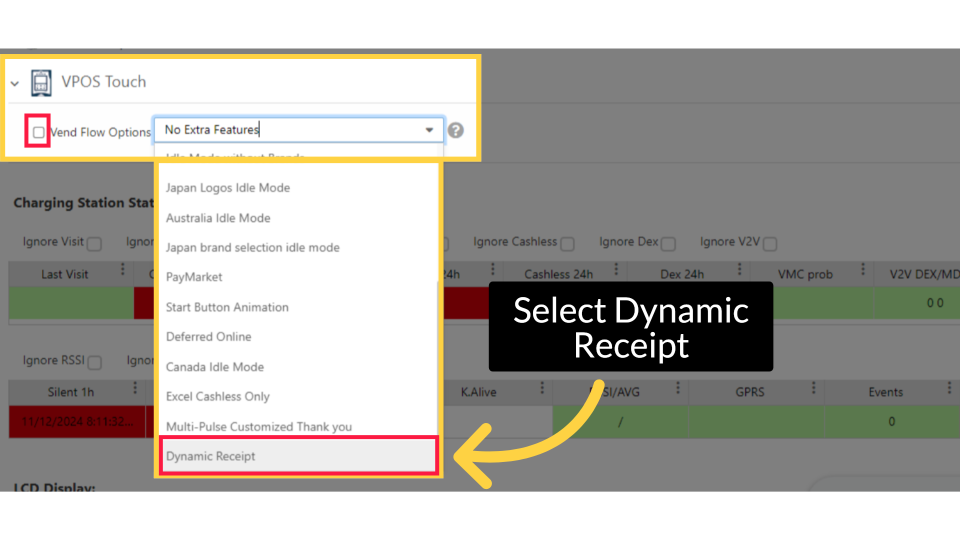
01:06: Finally, set Attribute 76 under the VPOS Touch category to enable the Vend Flow Options
01:12: for the Dynamic Receipt, and click the Enabled column check box for the
01:16: attribute.
01:17: Click "Save" to apply and save the current machine configuration changes.
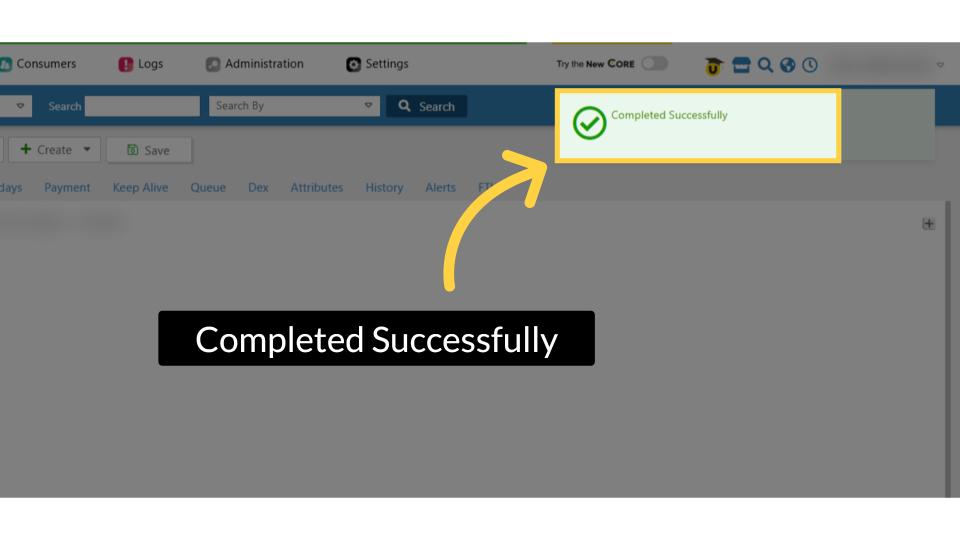
01:22: A confirmation that your attributes have been saved will appear as a 'Completed
01:26: Successfully' message.
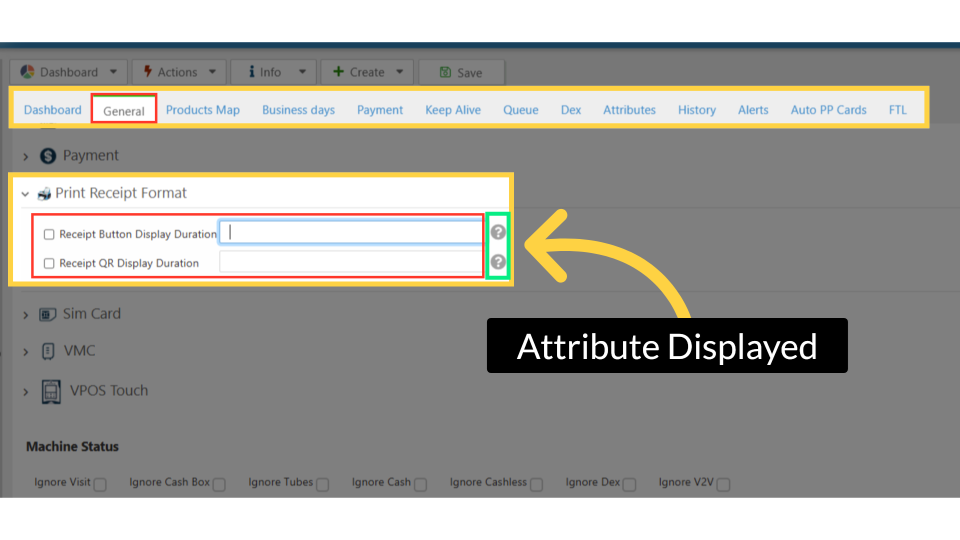
01:28: Now, return to the General tab, and the attribute is displayed under its group tab.
01:32: The Attributes feature includes a tooltip
01:35: highlighted in GREEN that explains the field options.
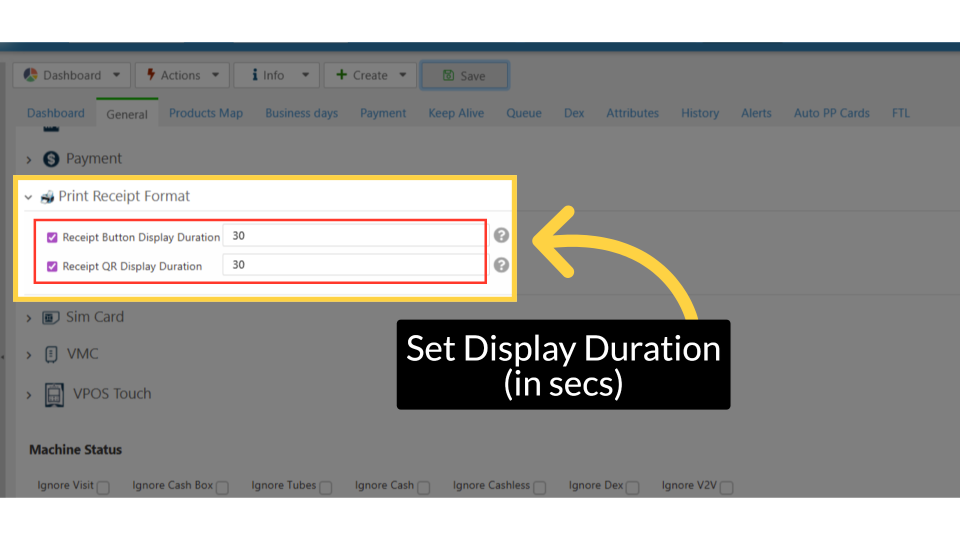
01:38: In the fields, specify the duration you want the button to remain displayed: set
01:43: it to 0 to bypass the button and proceed directly to the QR. Either
01:48: a duration of 1–60 seconds can be set to display the button before advancing.
01:53: Click "Save" to store the updated configurations.
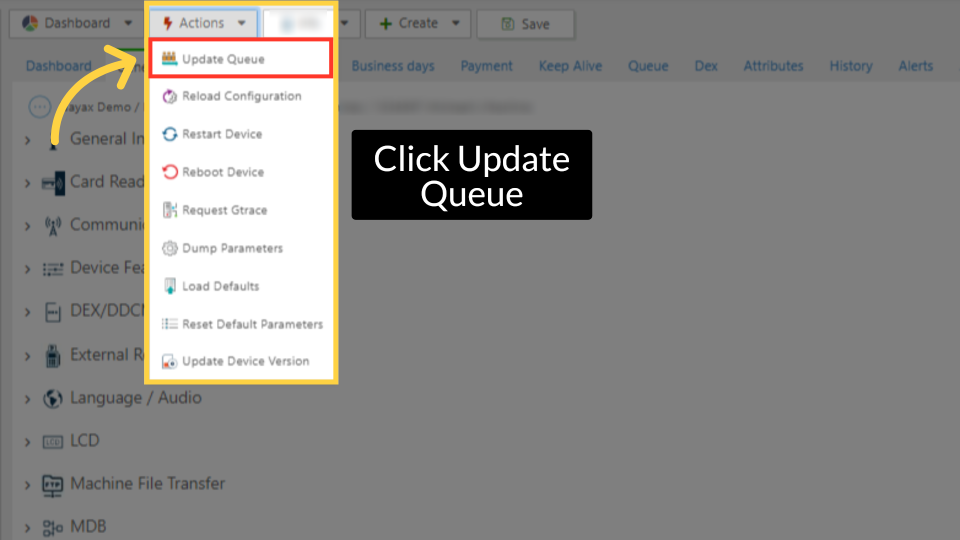
01:56: You can also initiate an immediate update by clicking the Actions button and
02:01: selecting 'Update Queue' from the dropdown menu.
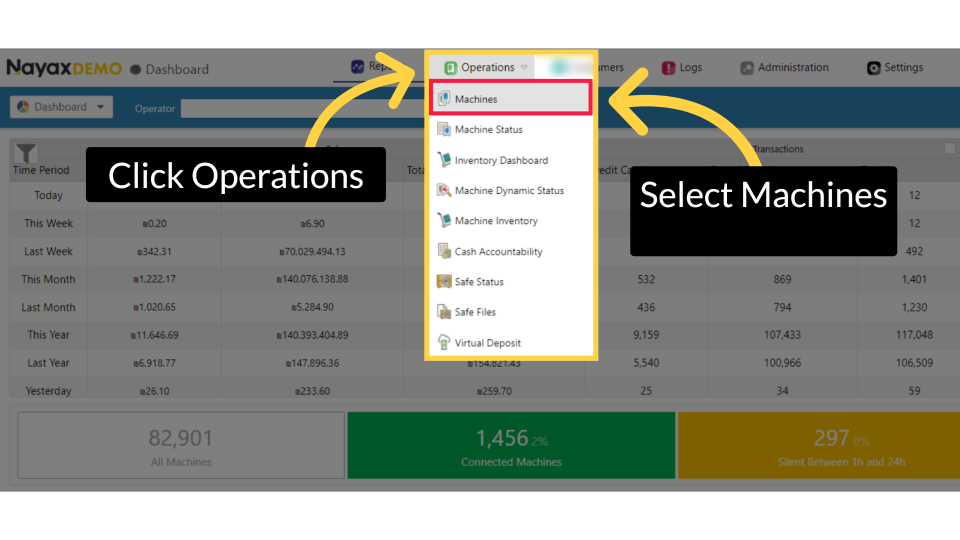
Click Operations
Image AttachedOn your Nayax Classic Core dashboard, click the Operations tab in the top navigation. From the dropdown menu, select Machines.
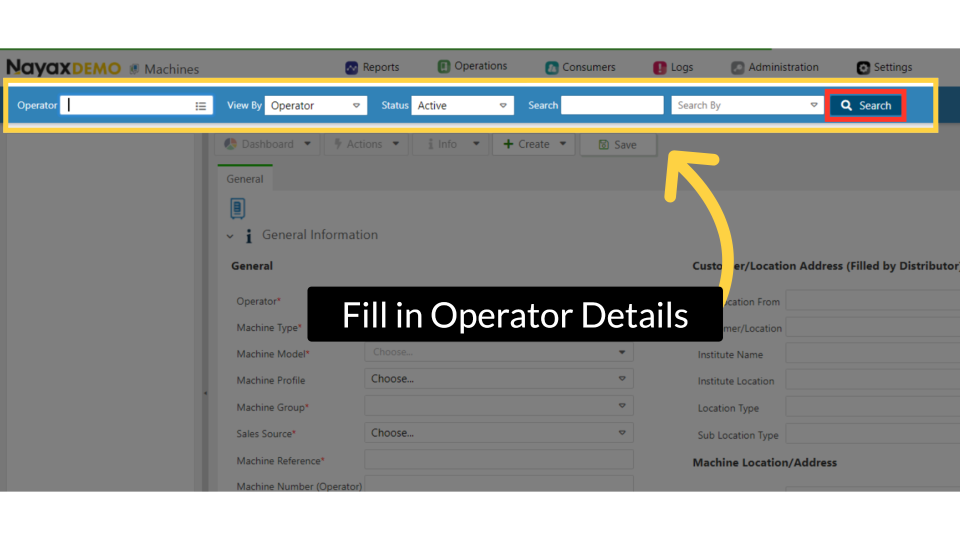
Fill in Operator Details
Image AttachedType your operator name in the search field and fill in any additional filter fields to narrow down the results. Click the Search button to load your machine list.
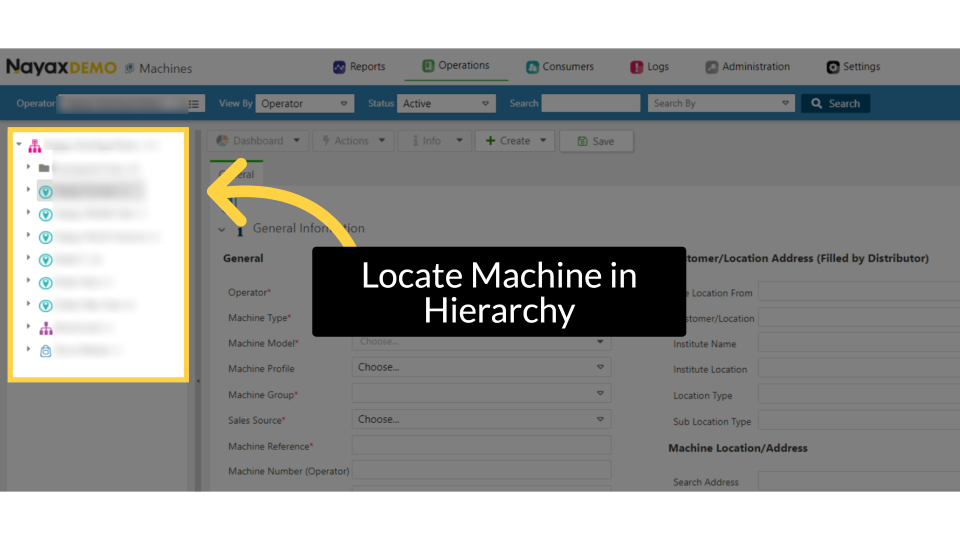
Locate Machine in Hierarchy
Image AttachedIn the hierarchy panel on the left, locate and click on the machine you want to update.
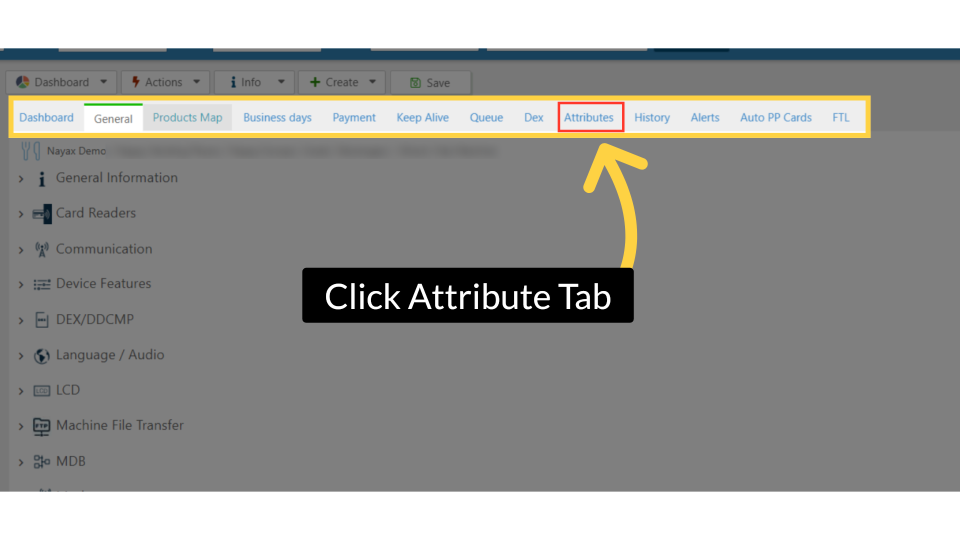
Click Attribute Tab
Image AttachedOn the machine record page, click on "Attributes" to view and edit machine attribute settings.
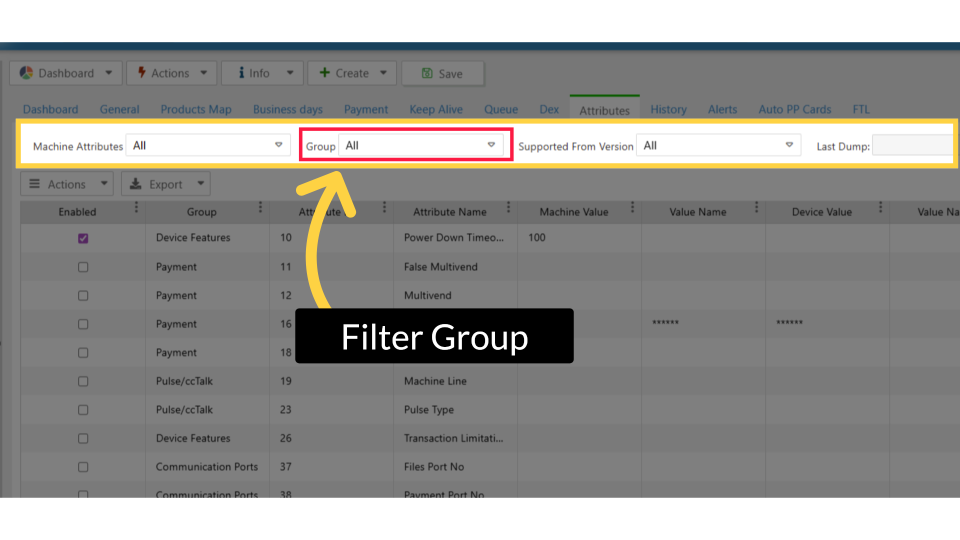
Filter Group
Image AttachedClick the Groups field to scroll through all attributes filtered by group. For the E receipt, we will add the attribute under the Print Receipt Format group.
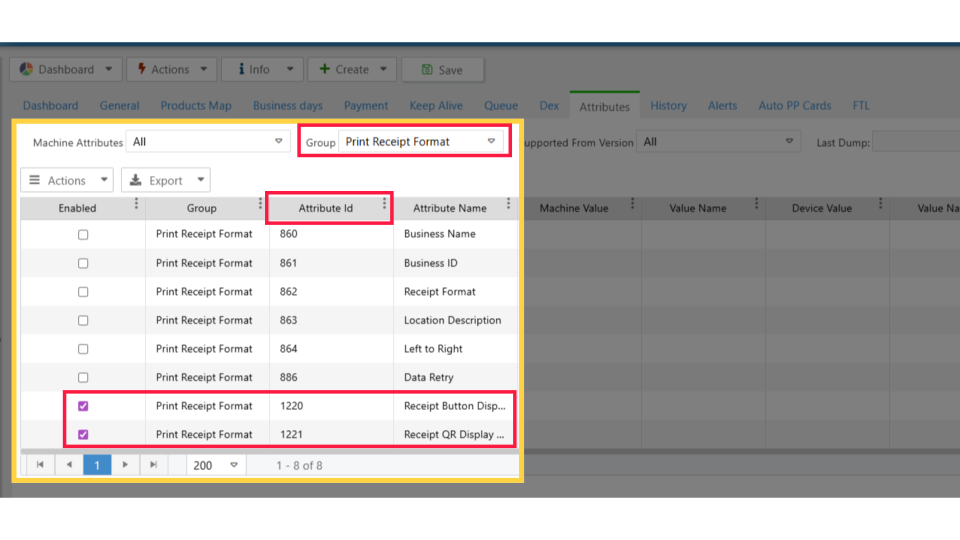
Enable Attribute
Image AttachedAfter locating the attribute, select the checkbox in the Enable column. Then configure Receipt Button Display Duration (Attribute 1220) and Receipt QR Display Duration (Attribute 1221).
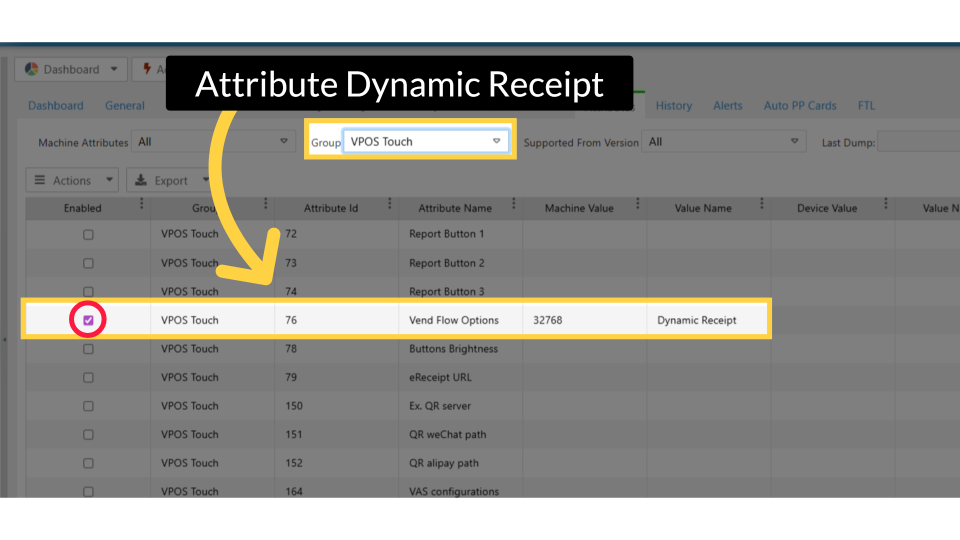
Attribute Dynamic Receipt
Image AttachedFinally, set Attribute 76 under the VPOS Touch group to enable the Vend Flow Options for the Dynamic Receipt, and click the Enabled column check box for the attribute.
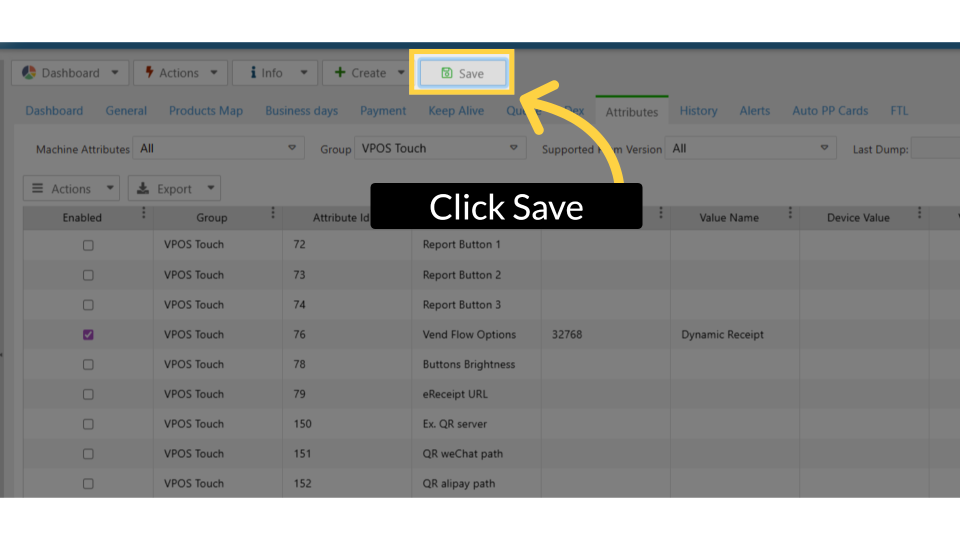
Save Machine Settings
Image AttachedClick "Save" to apply and save the current machine configuration changes.
Completed Successfully
Image AttachedA confirmation that your attributes have been saved will appear as a 'Completed Successfully' message.
Attribute Displayed
Image AttachedNow, return to the General tab to set the duration for the e-Receipt attributes; the attribute is displayed under its group tab.
Please note: The Attributes fields include a tooltip highlighted in GREEN that explains the field options.
Set Display Duration (in secs)
Image AttachedIn the fields, specify the duration you want the button to remain displayed: set it to 0 to bypass the button and proceed directly to the QR.
Either a duration of 1–60 seconds can be set to display the button before advancing.
Select Dynamic Receipt
Image AttachedStill in the General tab, click VPOS Touch to open the section. Then, in the Vend Flow Field, select Dynamic Receipt from the drop-down menu and check the box (highlighted in Green) to enable it.
Click Save
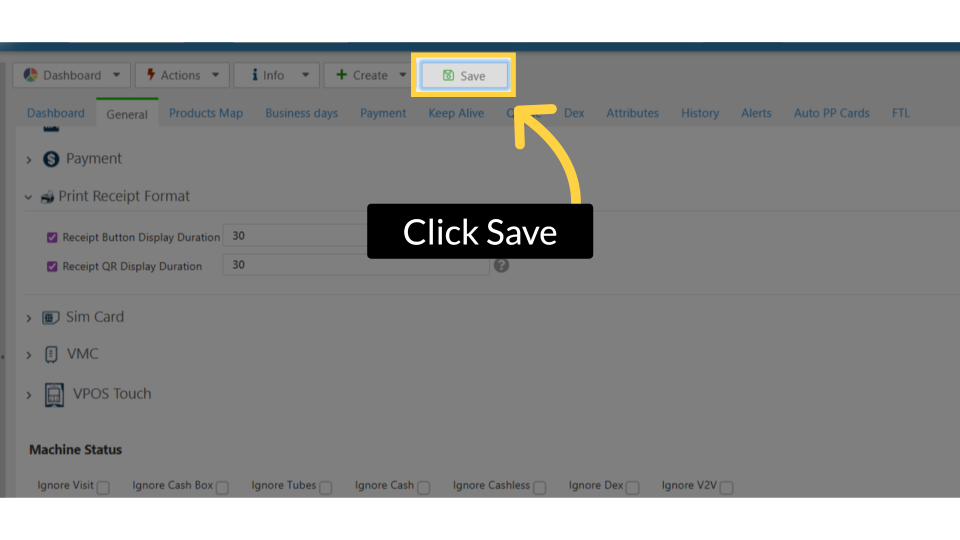
Image AttachedClick "Save" to store the updated configurations.
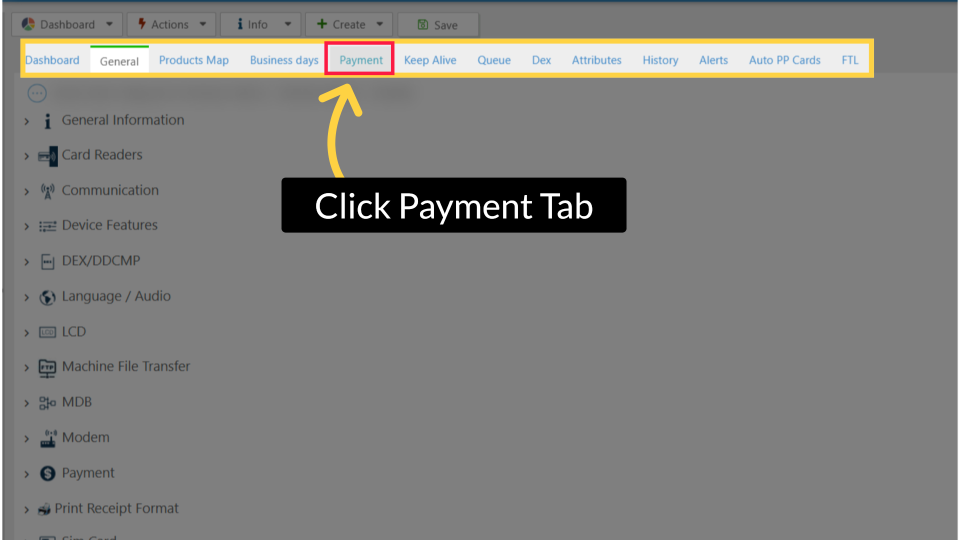
Click Payment Tab
Image AttachedTo complete these settings, it still needs to be enabled on the payment side.
Click on the Payment tab to view and enable e-receipt on the transaction end.
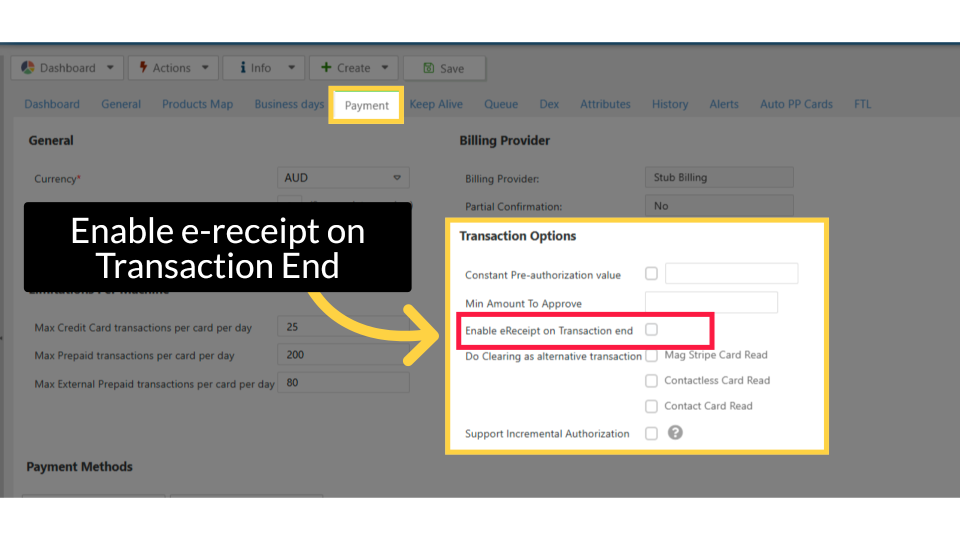
Enable e-receipt on Transaction End
Image AttachedClick on the checkbox to ‘Enable e-receipt on Transaction end’ in the Payment section.
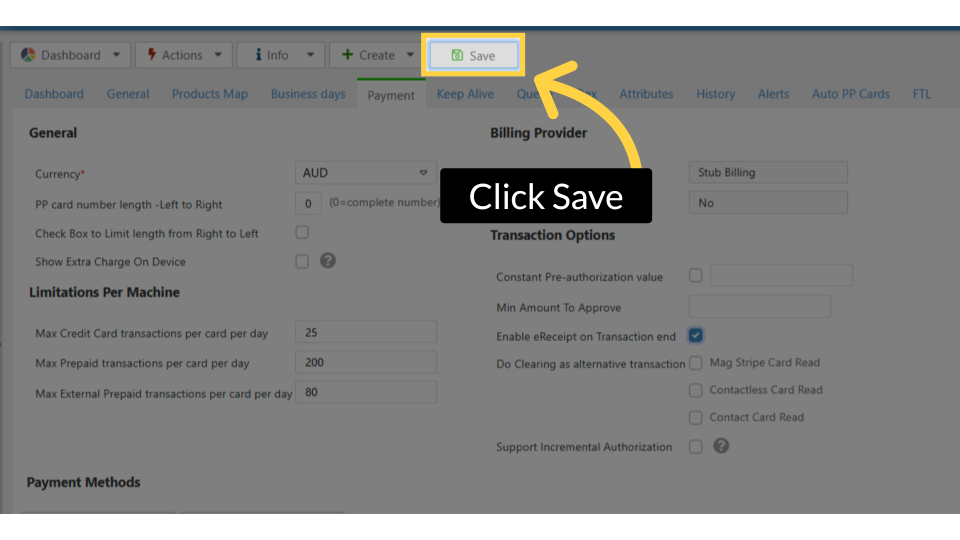
Click Save
Image AttachedClick "Save" to apply and save all changes to the Machine's payment settings.
Click Actions
Image AttachedYou can also initiate an immediate update by clicking the Actions button and selecting 'Update Queue' from the dropdown menu.
Thank you!
Did you find this article helpful?