How to Pulse Wizard Configurations in Nayax Core | Linear Mode
Pulse for machines protocol is an electrical pulse that is a brief surge of voltage or current used to send signals, control devices, or transmit data. It can be positive or negative and is defined by its duration and frequency.
What is Pulse Wizard Feature?
Pulse Wizard simplifies device configuration in Pulse Mode with an intuitive, self-service interface.
Key benefits:
- Live device simulation shows your configuration in real-time
- Complete control over pricing and device settings
- Faster setup with fewer errors
- Optimized pricing to boost transactions and revenue
Whether you're configuring new devices or updating existing ones, Pulse Wizard makes it easy to get up and running quickly.
What are the Pre-Requisites to use this Feature?
Before you can use the Pulse Wizard feature, you'll need to complete a few setup steps.
What You'll Need
1. Link your device to your virtual online machine
Make sure your physical device is connected to your virtual machine online before proceeding.
2. Access the new Nayax Core platform (Image Attached)
The Pulse Wizard feature is only available in the new version of Nayax Core. Log in to ensure you're using the updated platform.
3. Verify your permissions
If you've completed steps 1 and 2 but still don't see the Pulse Wizard feature, you may need additional permissions. Contact your local support team and ask them to enable the "VMO Pulse Operator" permission for your account in Nayax Core.
Important Note
When you configure your machine to use Pulse mode, it will replace your current communication mode (such as MDB, Marshall, or CCI). Make sure you're ready to switch before proceeding with the configuration.
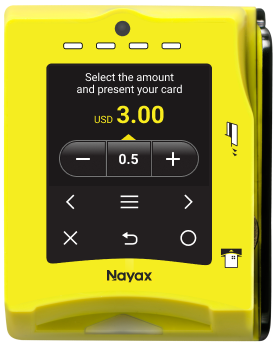
What is Linear Configuration?
Image Attached-
Price pre-selected by customer
Video Guide
00:00: This guide will walk you through configuring linear modeon the Pulse Wizard feature for your device using Nayax Core.
00:08: This feature is available exclusively on New Core. To access the New Nayax
00:12: Core platform, click the 'Try New Core' toggle button as highlighted.
00:18: On the dashboard of your New Nayax Core platform, click on the Operations tab,
00:22: then click on Machines from the drop-down menu.
00:25: Enter your operator's name or Machine ID in the search field. Once located, select
00:30: it.
00:32: In the main section, click the settings tab.
00:36: The machine page will open. From the sidebar menu,
00:38: click on Pulse as highlighted.
00:42: The Pulse page will open. First, we set the pricing mode. For this setting, we will select the 'Linear' mode.
00:48: Please fill out the fields in the pricing section. Be aware that the first four fields are mandatory and must not be left empty.
00:55: Next, in the timer settings, select "Yes" if your machine has an external increment button. If not, select "No."
01:03: Fill in the active and inactive time. An active time, defines the interval
01:07: between pulses.
01:09: The Cash Report Options section is optional; however, it helps configure the sending of cash reports, including cash transactions.
01:17: The advanced settings allow you to configure the inhibit feature for your Pulse settings.
01:22: Finally, this section allows you to configure the processing of messages that are visible to your customers. Use the VPOST device, highlighted in red, to preview how the messages will appear.
01:34: When you are ready to save your configured pulse settings, click the yellow save button
01:38: to apply the changes.
01:40: A pop-up confirmation will appear for you to confirm that your parameters will be updated to apply your Pulse settings immediately. You can choose to click the 'Update' button to update immediately or click the 'Later' button to schedule the update for a later time.
01:55: A confirmation that your Pulse configuration has been updated will appear as
01:59: a 'Updated Successfully' message.
00:00: This guide will walk you through configuring linear modeon the Pulse Wizard feature for your device using Nayax Core.
00:08: This feature is available exclusively on New Core. To access the New Nayax
00:12: Core platform, click the 'Try New Core' toggle button as highlighted.
00:18: On the dashboard of your New Nayax Core platform, click on the Operations tab,
00:22: then click on Machines from the drop-down menu.
00:25: Enter your operator's name or Machine ID in the search field. Once located, select
00:30: it.
00:32: In the main section, click the settings tab.
00:36: The machine page will open. From the sidebar menu,
00:38: click on Pulse as highlighted.
00:42: The Pulse page will open. First, we set the pricing mode. For this setting, we will select the 'Linear' mode.
00:48: Please fill out the fields in the pricing section. Be aware that the first four fields are mandatory and must not be left empty.
00:55: Next, in the timer settings, select "Yes" if your machine has an external increment button. If not, select "No."
01:03: Fill in the active and inactive time. An active time, defines the interval
01:07: between pulses.
01:09: The Cash Report Options section is optional; however, it helps configure the sending of cash reports, including cash transactions.
01:17: The advanced settings allow you to configure the inhibit feature for your Pulse settings.
01:22: Finally, this section allows you to configure the processing of messages that are visible to your customers. Use the VPOST device, highlighted in red, to preview how the messages will appear.
01:34: When you are ready to save your configured pulse settings, click the yellow save button
01:38: to apply the changes.
01:40: A pop-up confirmation will appear for you to confirm that
01:43: your parameters will be updated to apply your single price Pulse
01:47: settings immediately. You can choose to click the 'Update' button to update immediately
01:51: or click the 'Later' button to schedule the update for a later time.
01:56: A confirmation that your Pulse configuration has been updated will appear as
02:00: a 'Updated Successfully' message.
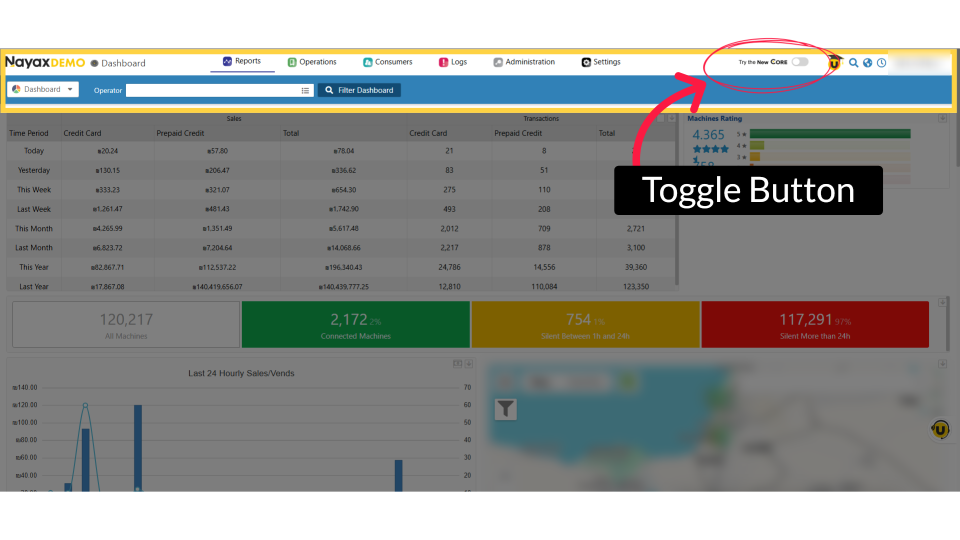
Exclusively on New Core
Image AttachedThis feature is available exclusively on New Core. To access the New Nayax Core platform, click the 'Try New Core' toggle button as highlighted.
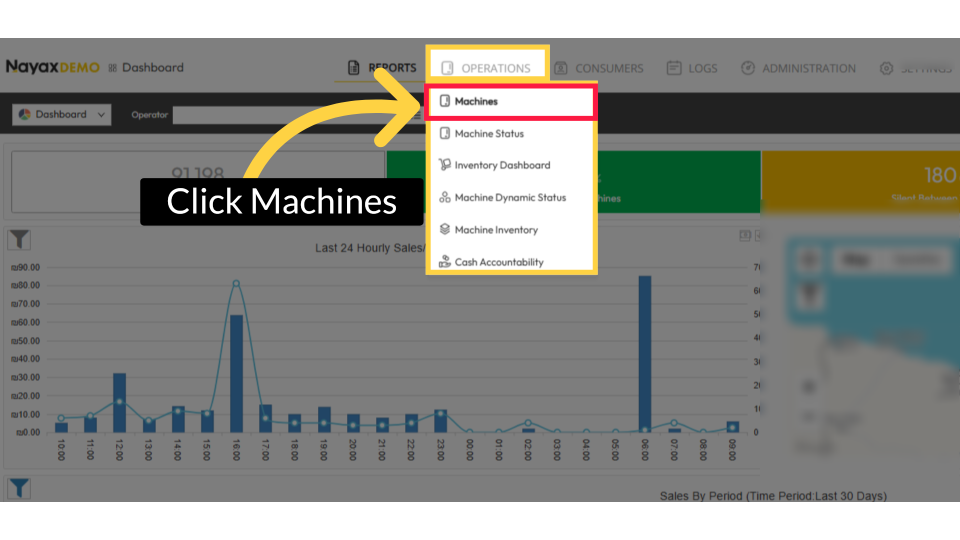
Click on Machines
Image AttachedOn the dashboard of your New Nayax Core platform, click on the Operations tab, then click on Machines from the drop-down menu.
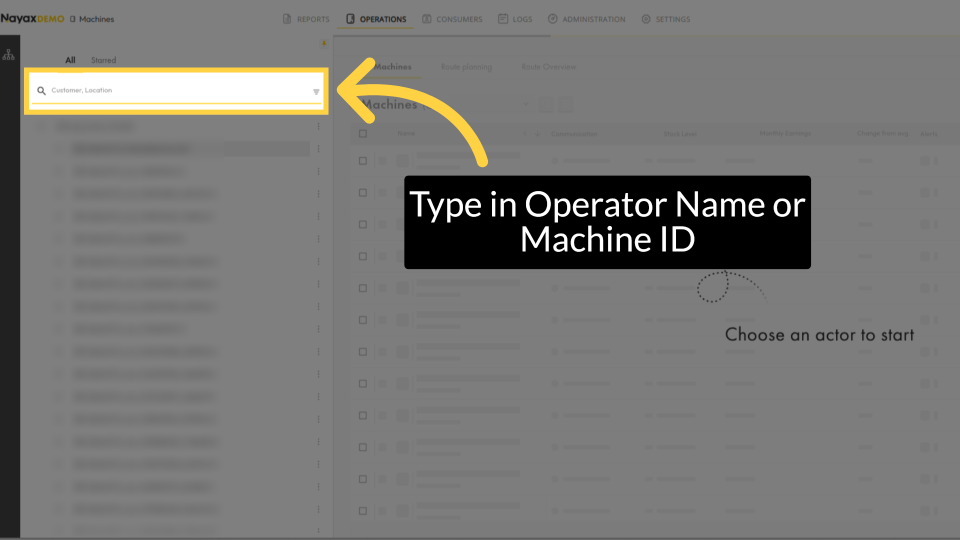
Type in Operator Name or Machine ID
Image AttachedEnter your operator's name or Machine ID in the search field. Once located, select it.
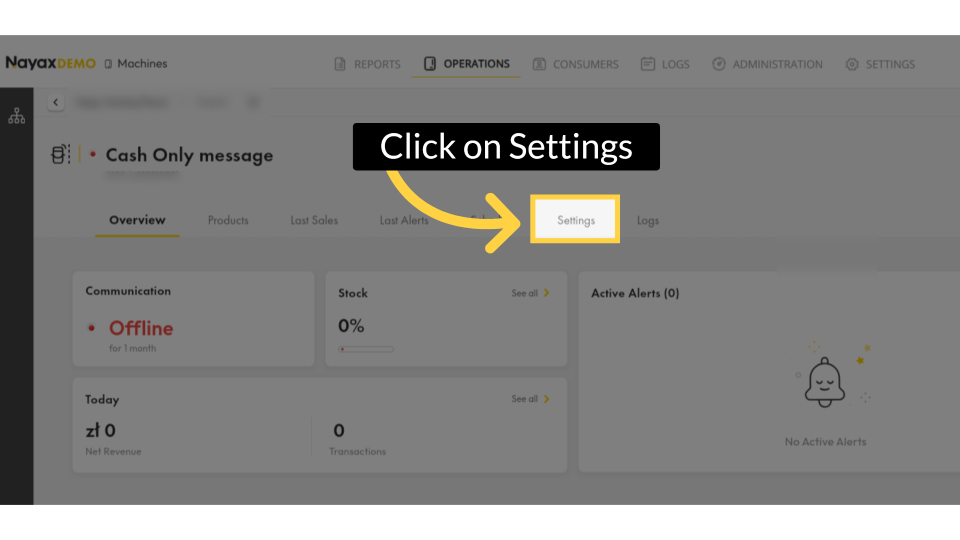
Click on Settings
Image AttachedIn the main section, click the settings tab.
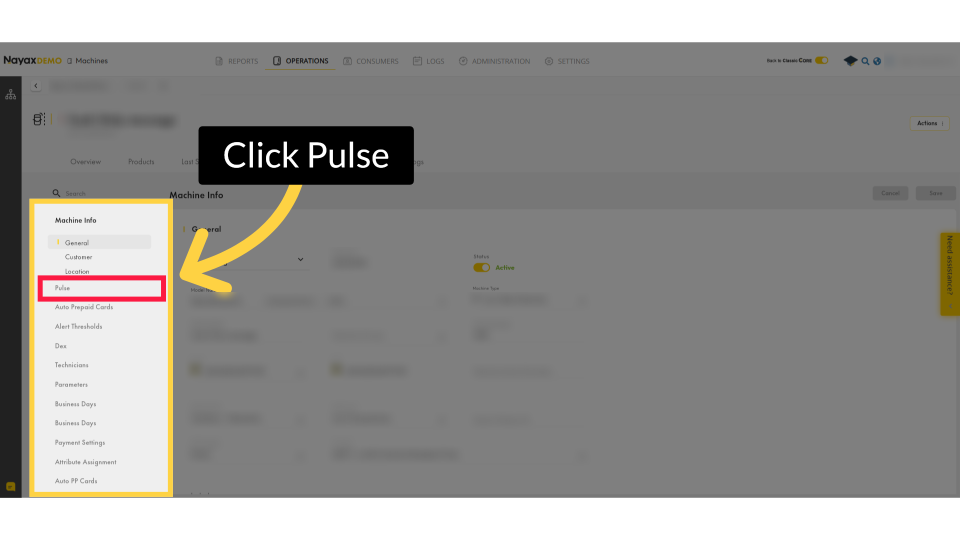
Click Pulse
Image AttachedThe machine page will open. From the sidebar menu, click on Pulse as highlighted.
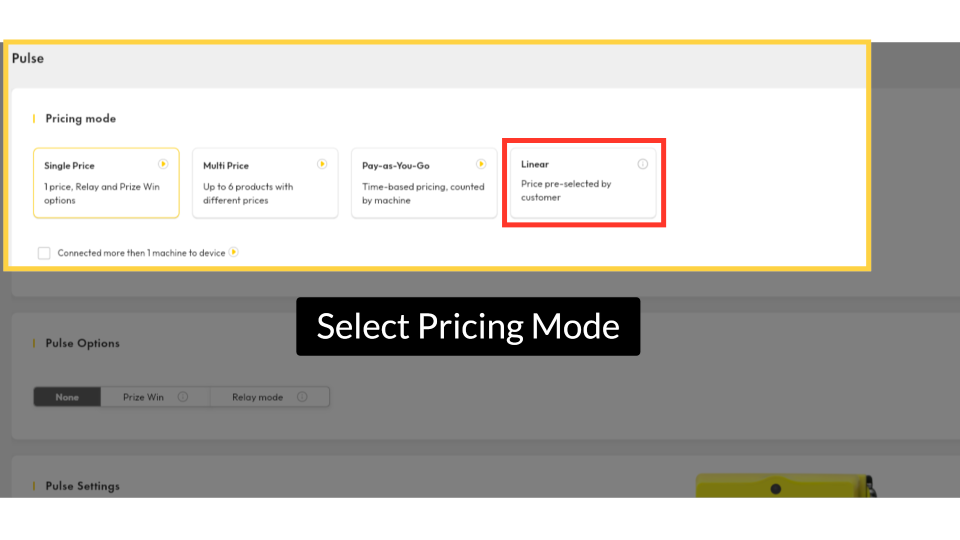
Select Pricing Mode
Image AttachedThe Pulse page will open. First, we set the pricing mode. For this setting, we will select the 'Linear' mode.
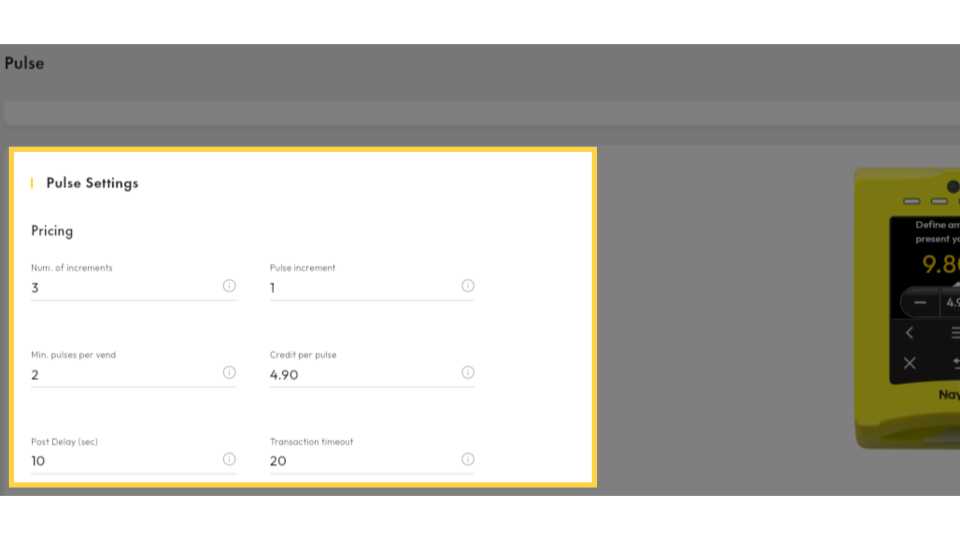
Set Pricing
Image AttachedPlease fill out the fields in the pricing section. Be aware that the first four fields are mandatory and must not be left empty.
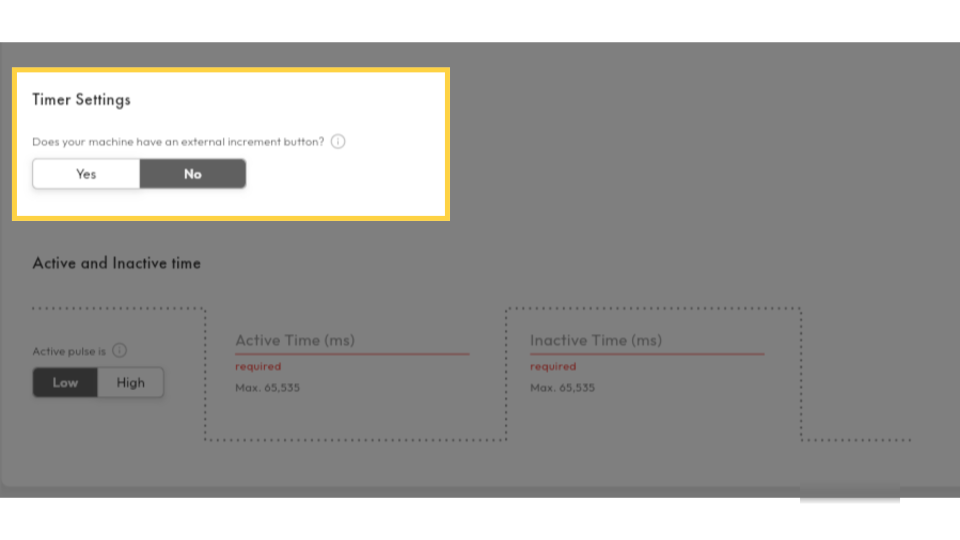
Set Timer
Image AttachedNext, in the timer settings, select "Yes" if your machine has an external increment button. If not, select "No."
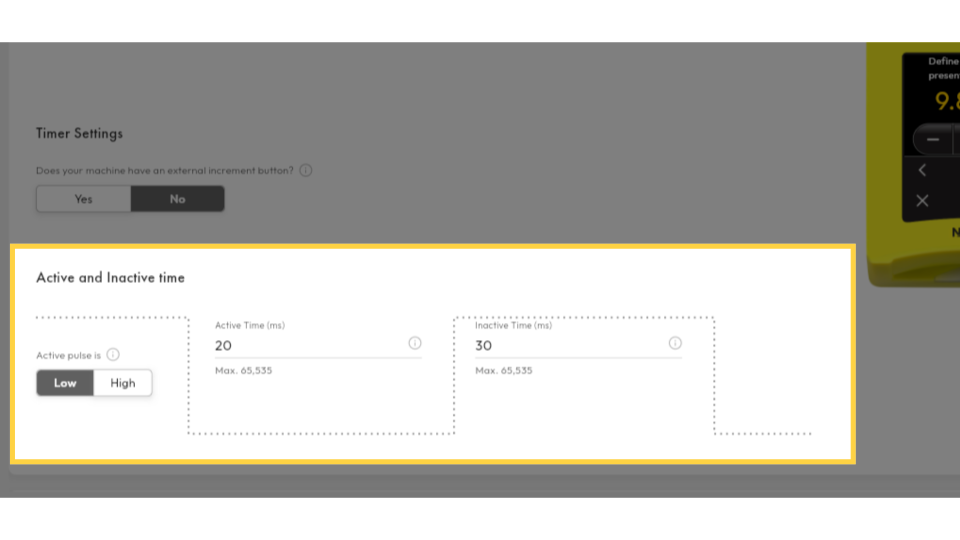
Set Active and Inactive Intervals
Image AttachedFill in the active and inactive time. Inactive time defines the interval between pulses.
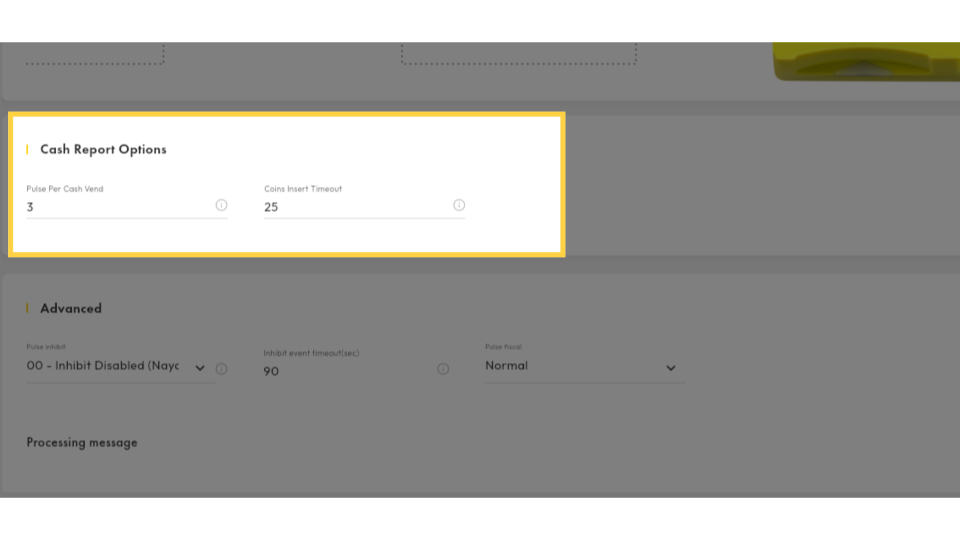
Configure Cash Report
Image AttachedThe Cash Report Options section is optional; however, it helps configure the sending of cash reports, including cash transactions.
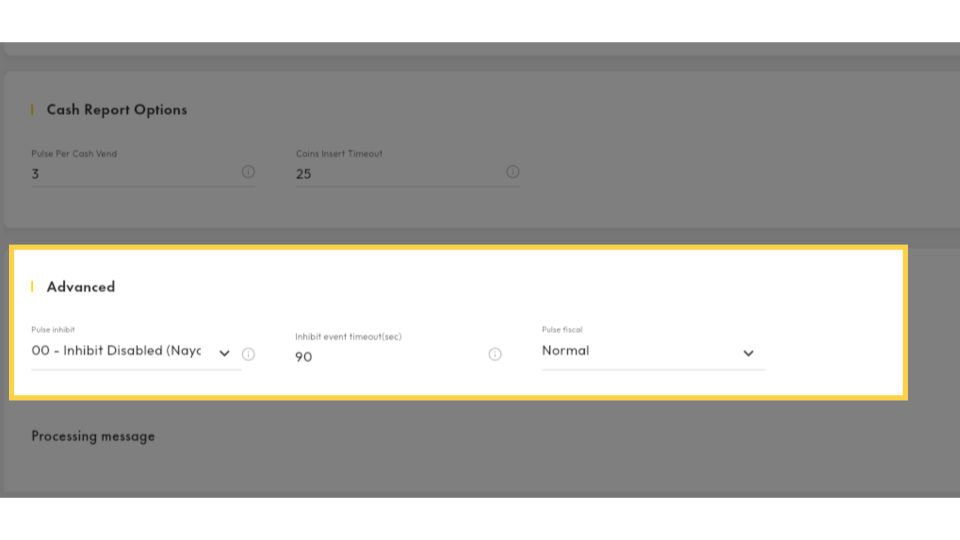
Advanced Settings
Image AttachedThe advanced settings allow you to configure the inhibit feature for your Pulse settings.
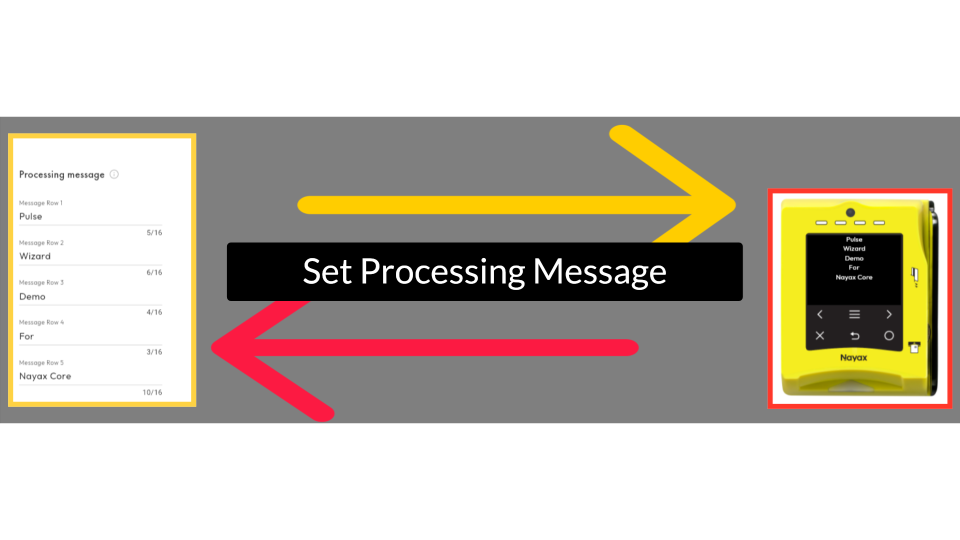
Set Processing Message
Image AttachedFinally, this section allows you to configure the processing of messages that are visible to your customers. Use the VPOST device, highlighted in red, to preview how the messages will appear.
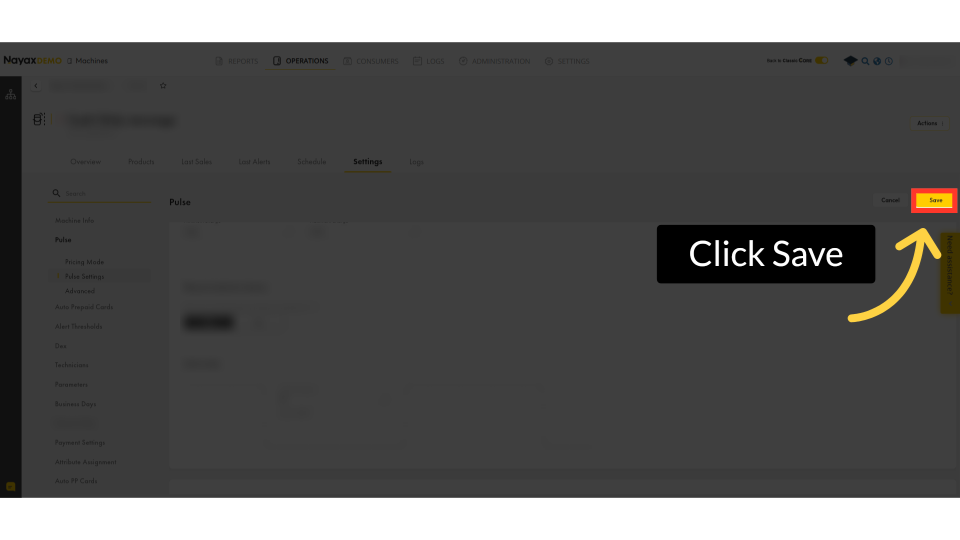
Click Save
Image AttachedWhen you are ready to save your configured pulse settings, click the yellow save button to apply the changes.
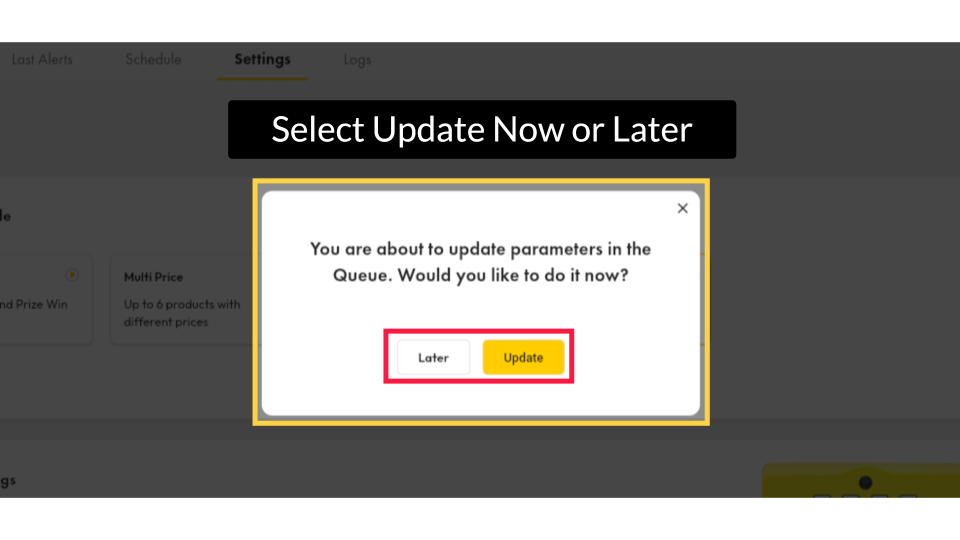
Select Update Now or Later
Image AttachedA pop-up confirmation will appear for you to confirm that your parameters will be updated to apply your Pulse settings immediately. You can choose to click the 'Update' button to update immediately or click the 'Later' button to schedule the update for a later time.
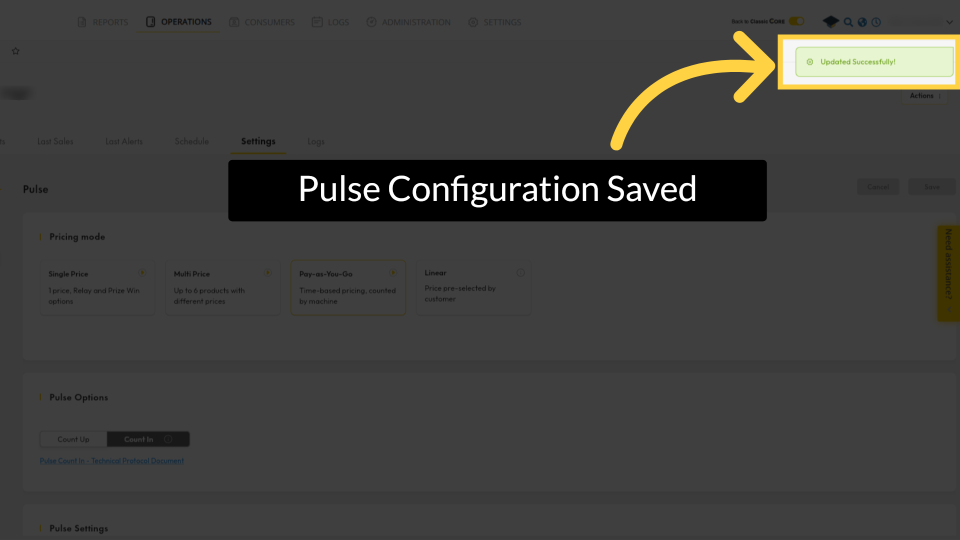
Pulse Configuration Saved
Image AttachedA confirmation that your Pulse configuration has been updated will appear as a 'Updated Successfully' message.
Thank you!
Did you find this article helpful?