How to Set Charger to Available or Unavailable | Operations
This step-by-step guide will walk you through the process of how to set a Charger to Available or Unavailable.
1
Video Guide
2
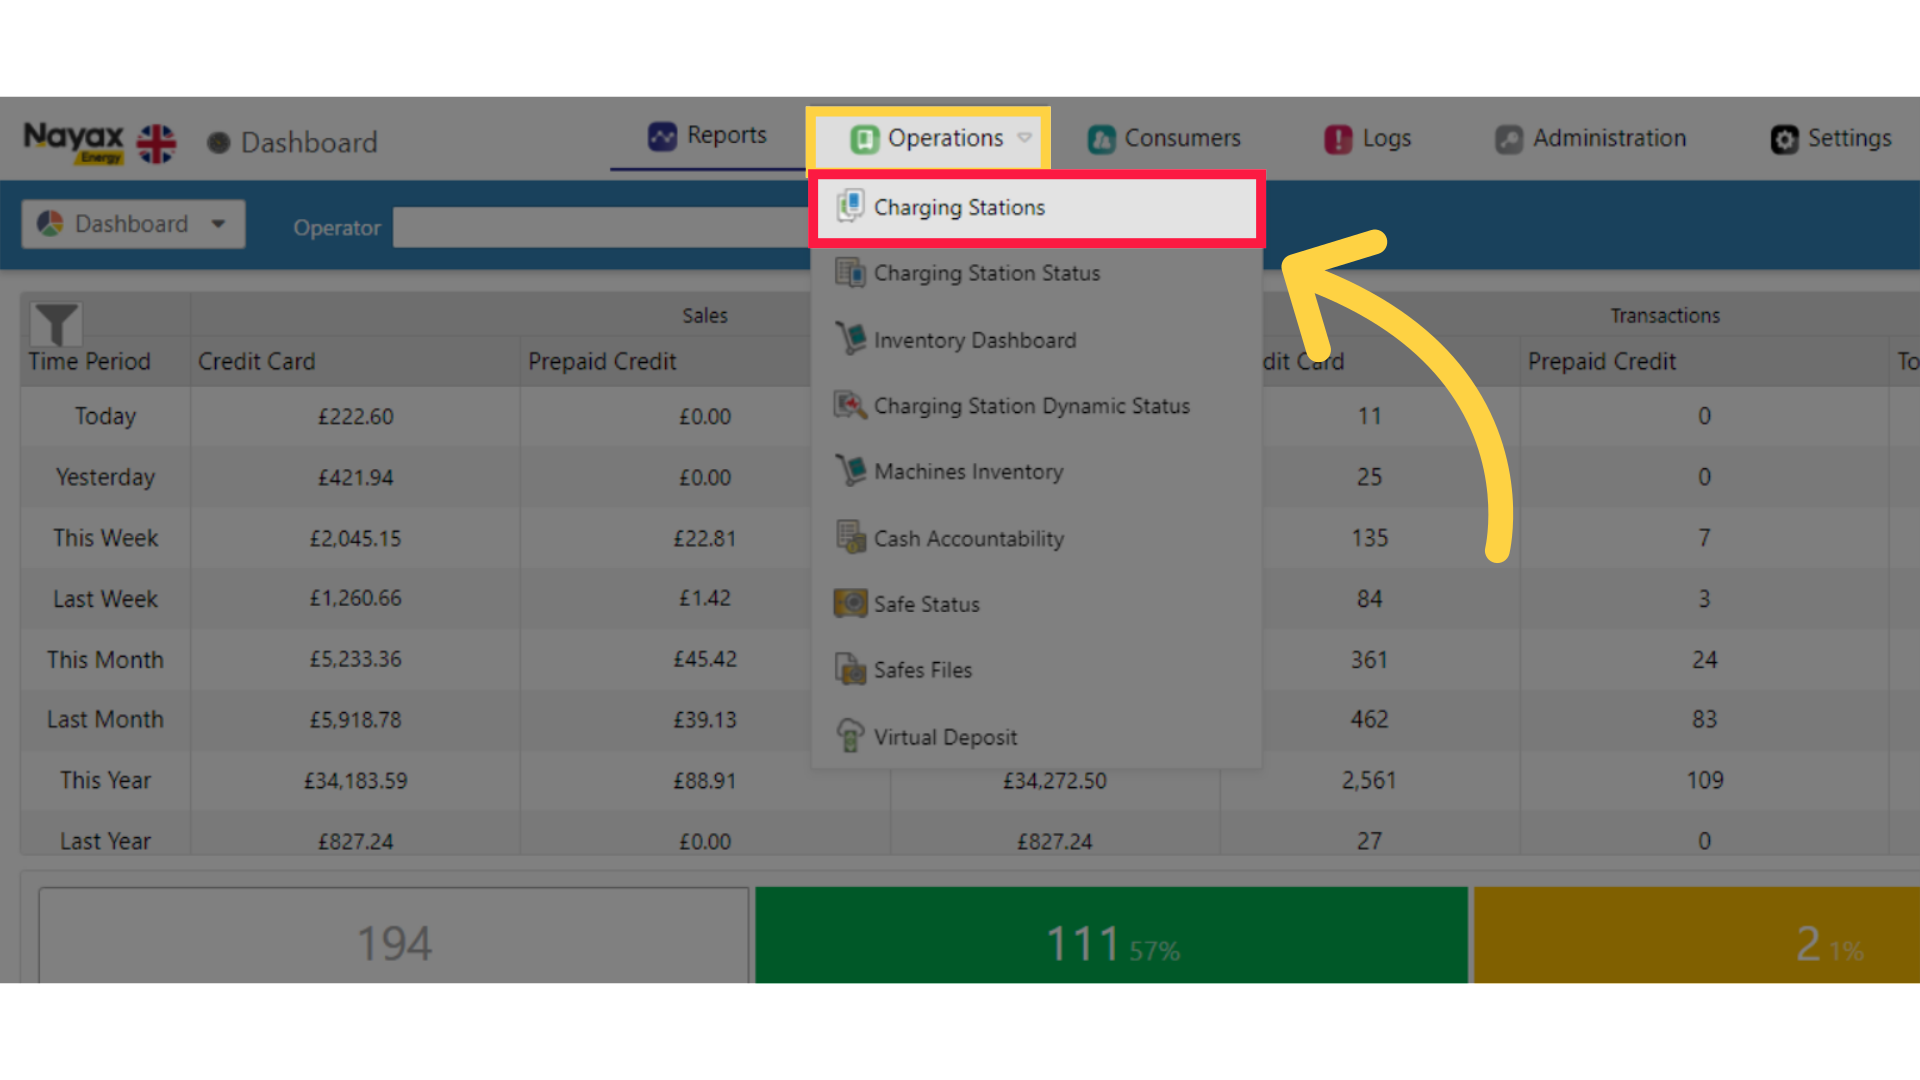
Click Operations
Image Attached
On the Dashboard of your Nayax Energy Core management suite click on the Operations tab. and then click on Charging Stations from the drop down menu as highlighted in RED on the visual.
3
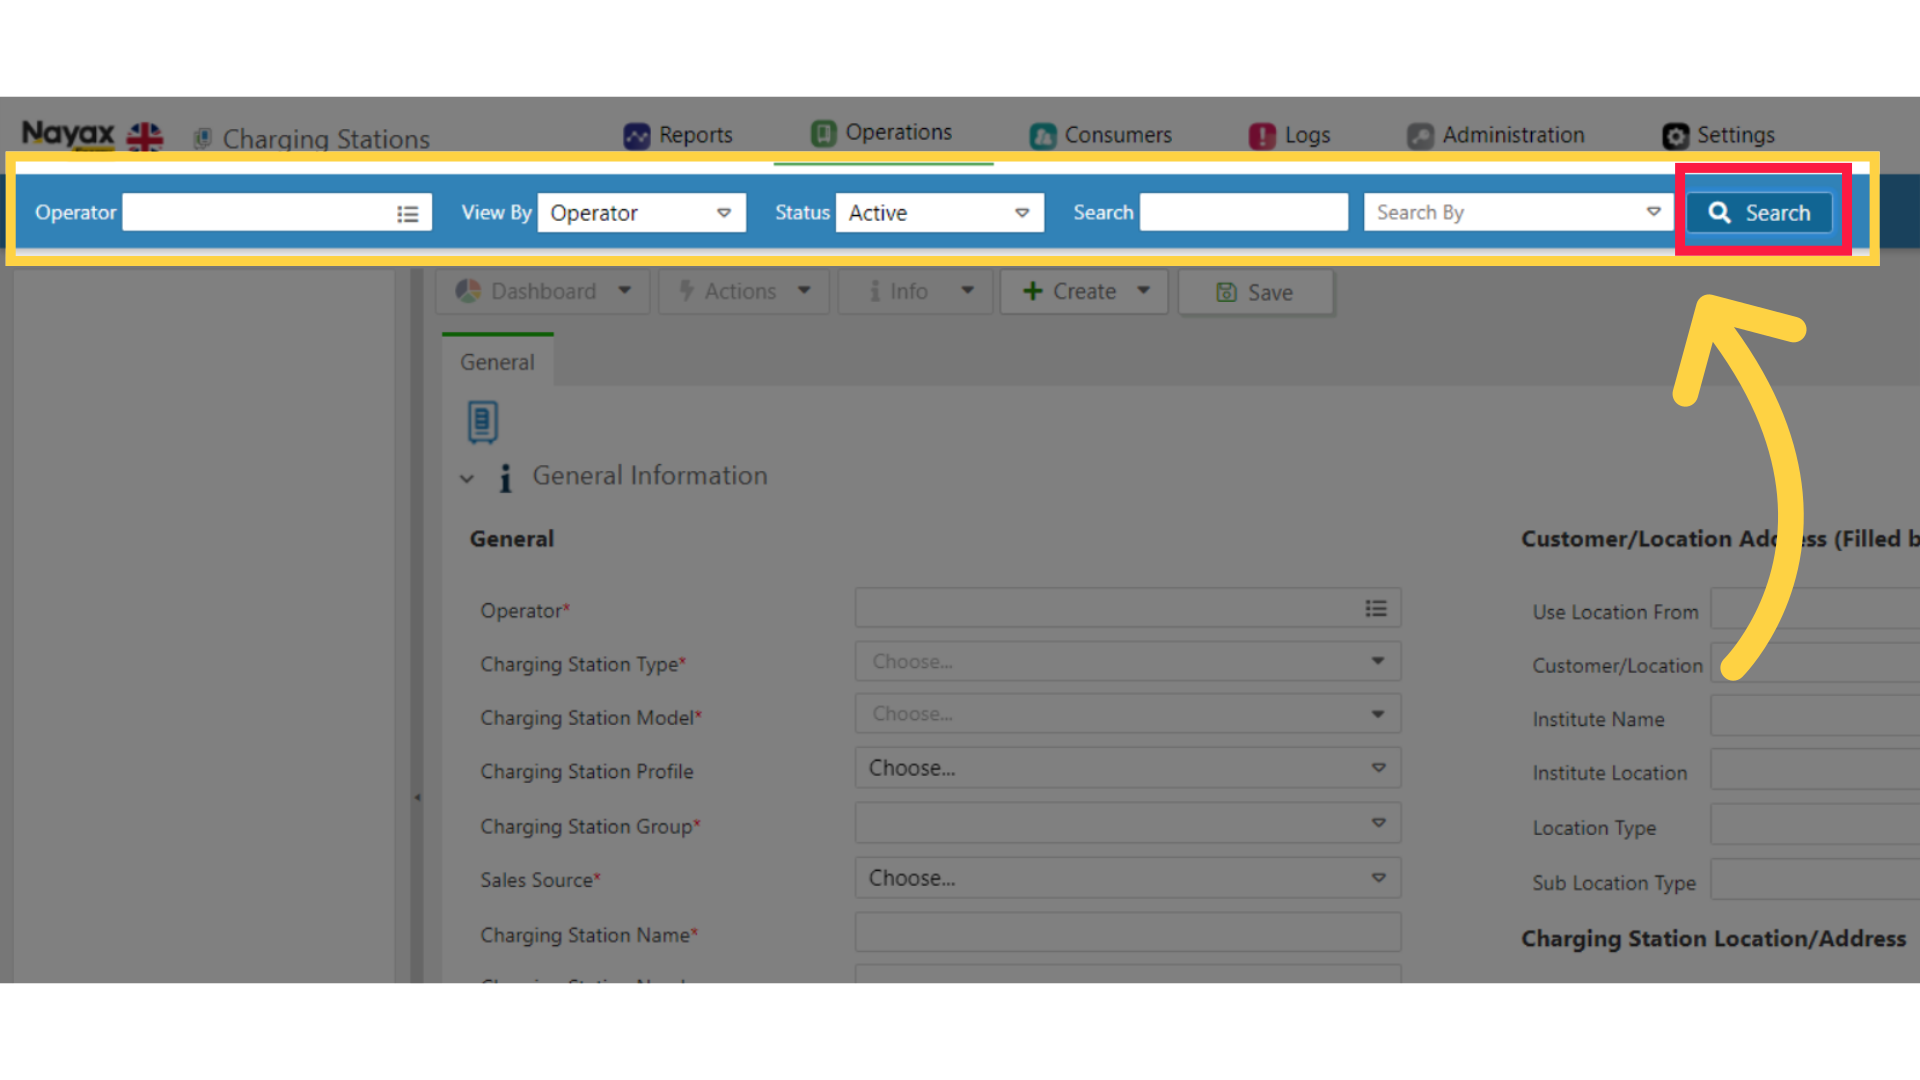
Fill in Charge Point Operator Details
Image Attached
Type in your Charge Point Operator name and any other fields to locate your Charging Point. Click search button as highlighted in RED on the visual.
Pro Tip: You can search without typing a name of a Charge Point Operator and leaving this field blank. In this case, the data displayed will be all the CPOs and or sub-operators you have permission to view.
4
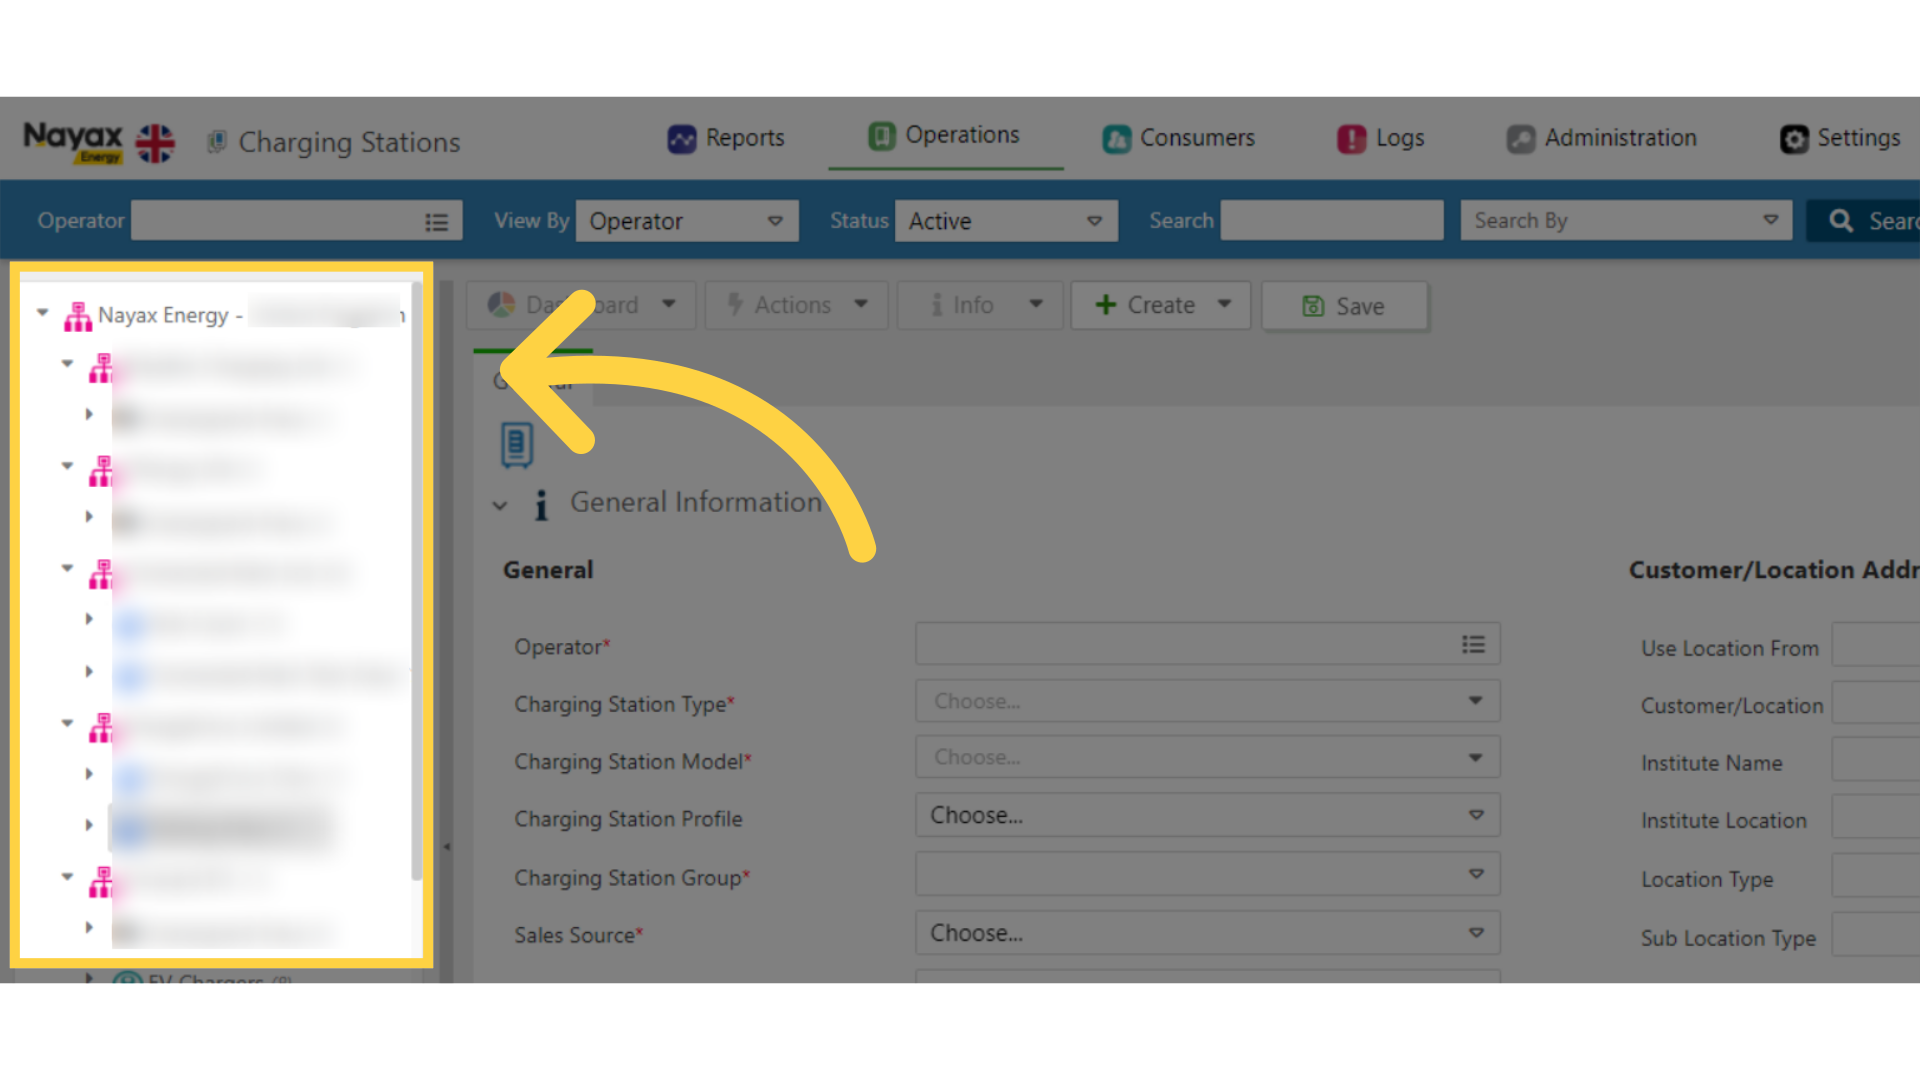
Locate Charging Point in Hierarchy
Image AttachedLocate and click on the Charging Point from the hierarchy.
5
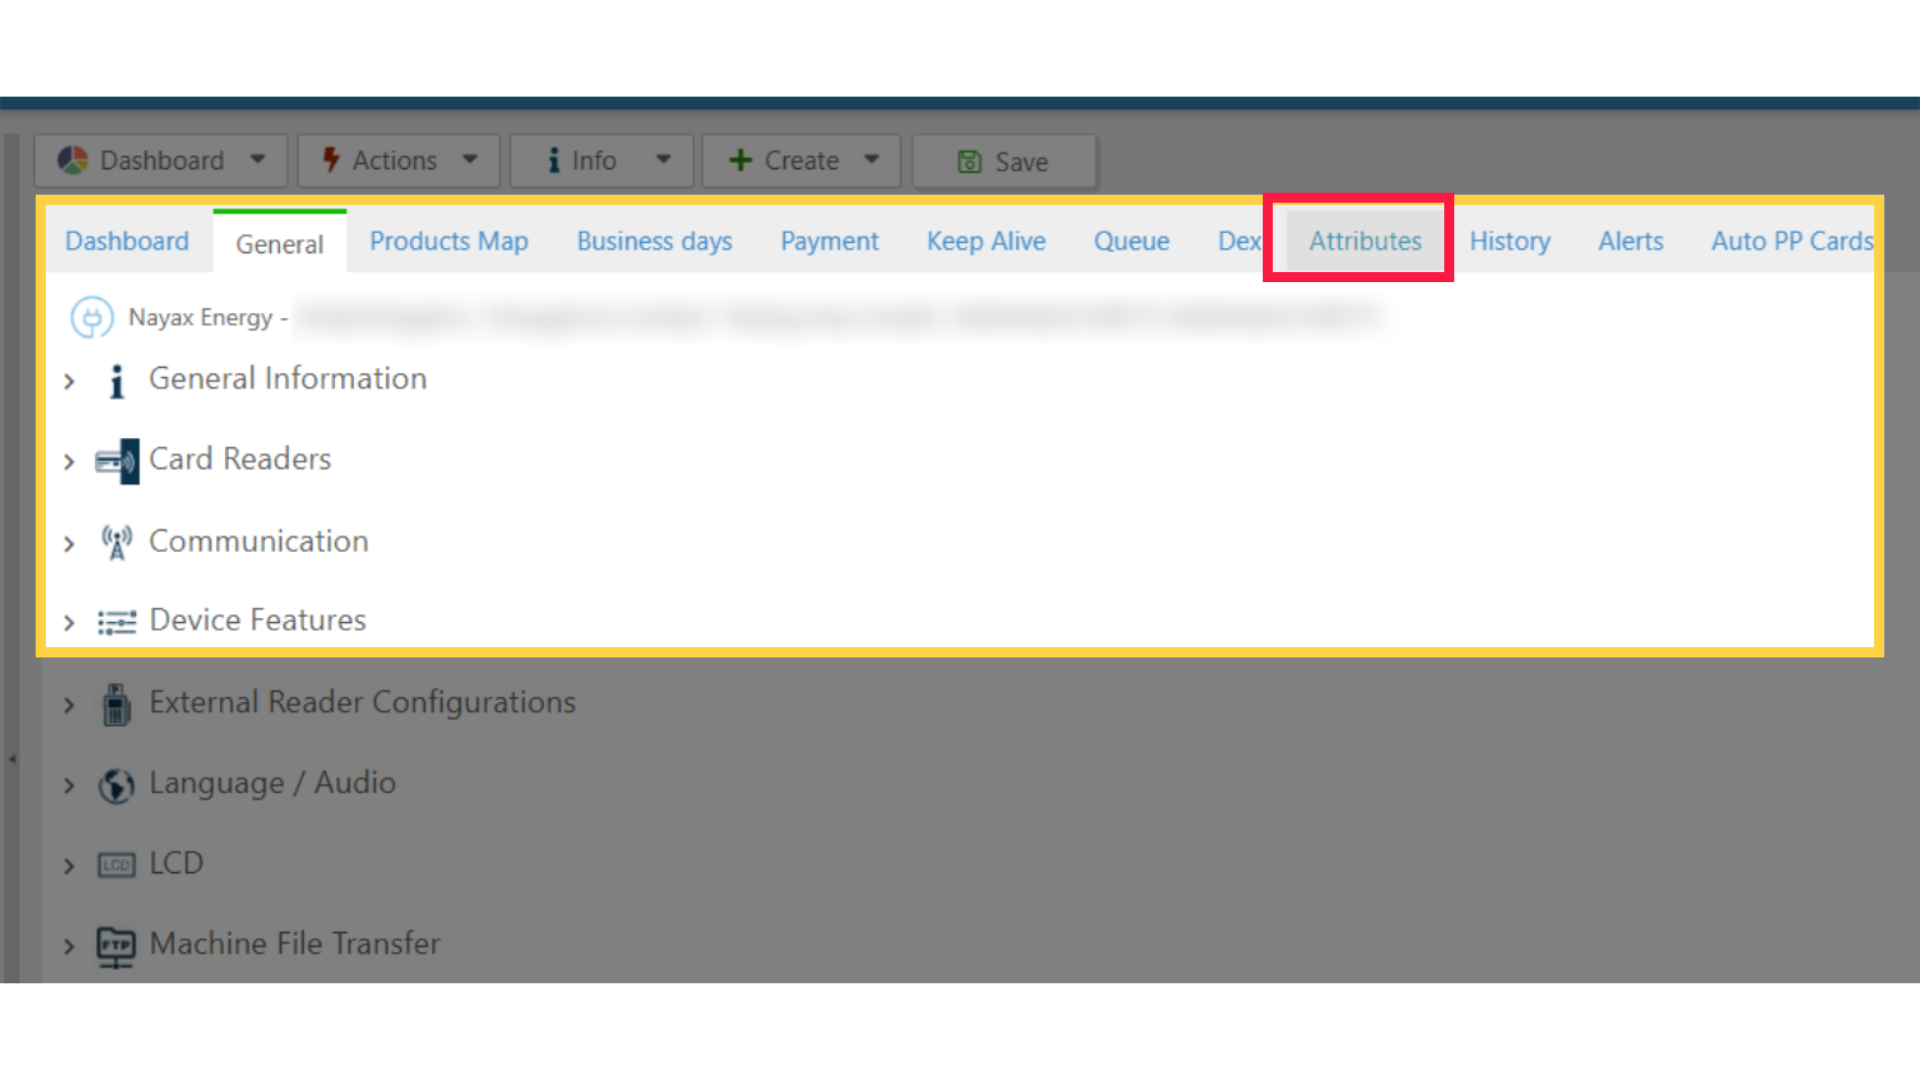
Click Attributes Tab
Image Attached
On the main General section click on the Attributes tab as highlighted in RED on the visual.
6
Click on EV Charger
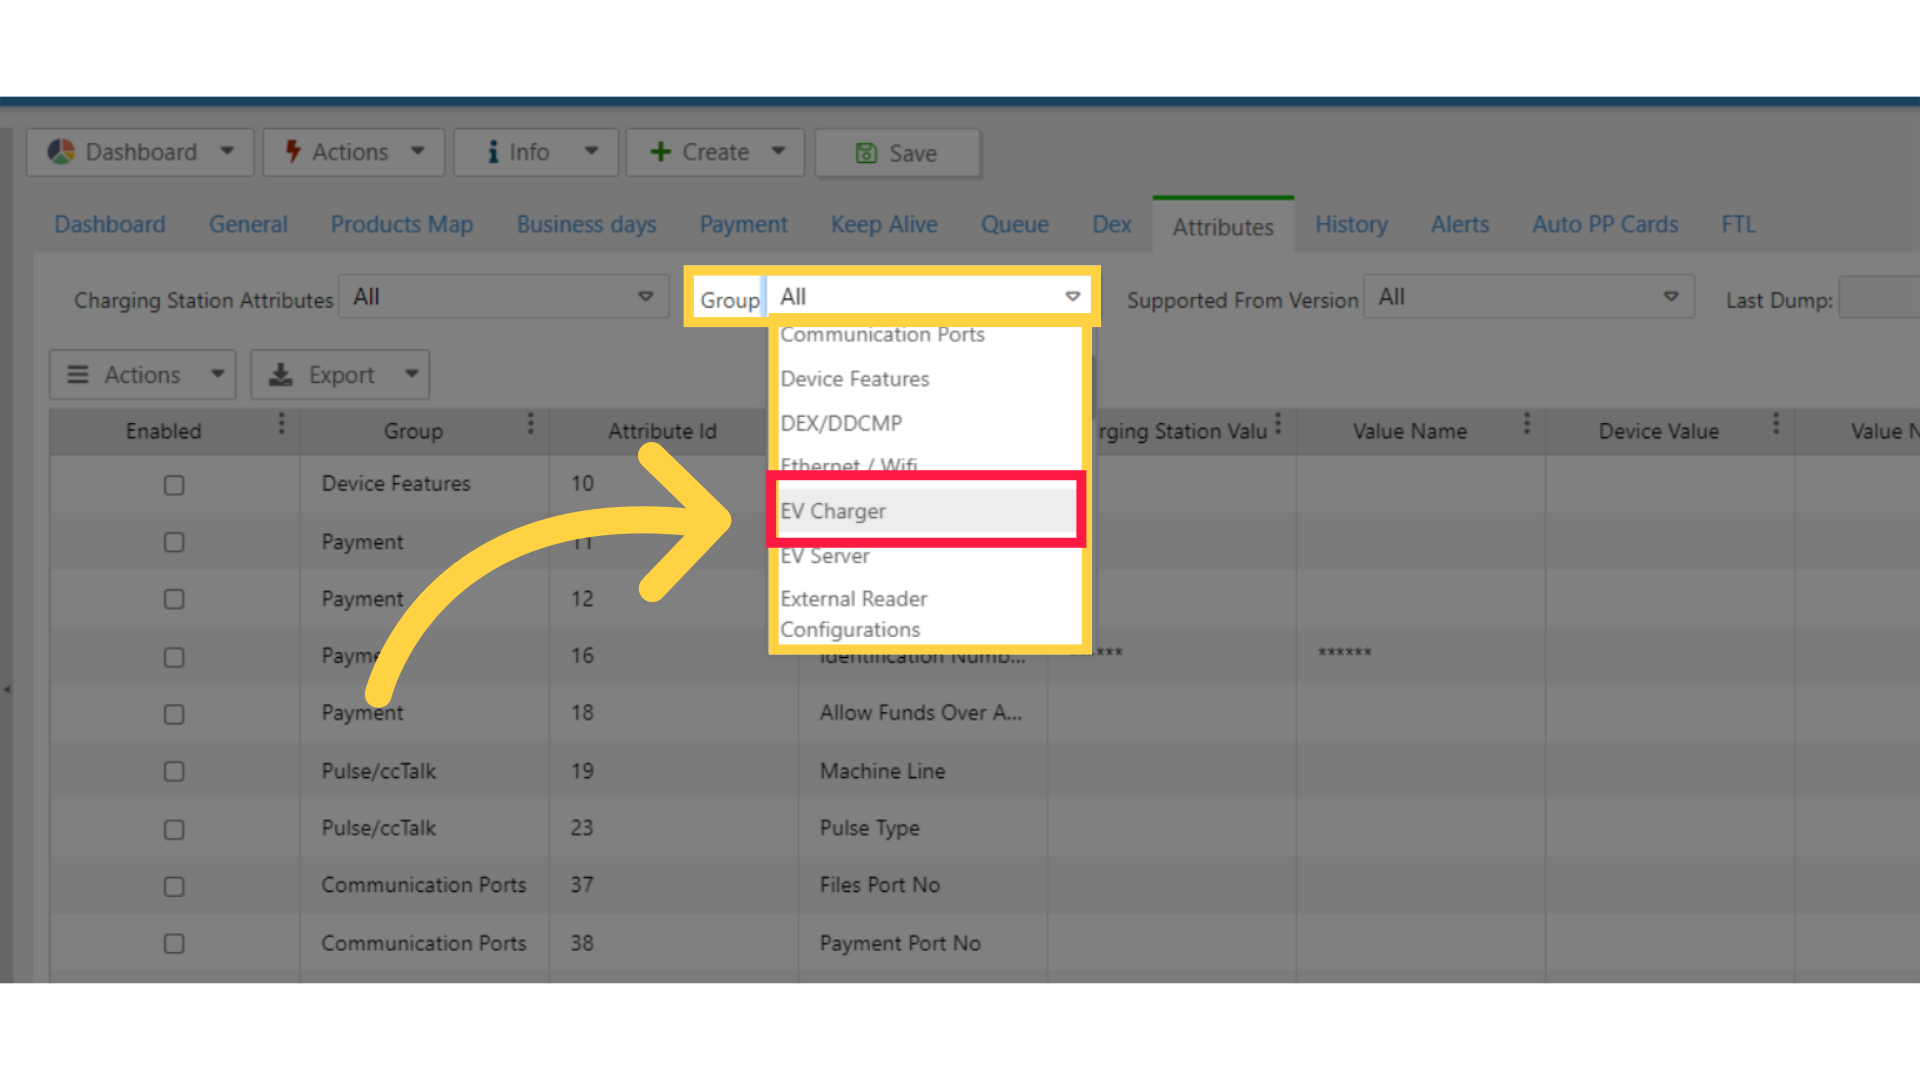
Image Attached
Filter the Attributes by click on the group tab and select EV Charger from the drop down menu as highlighted in RED on the visual this will display the attributes relevant for EV Chargers.
7
Check Attributes
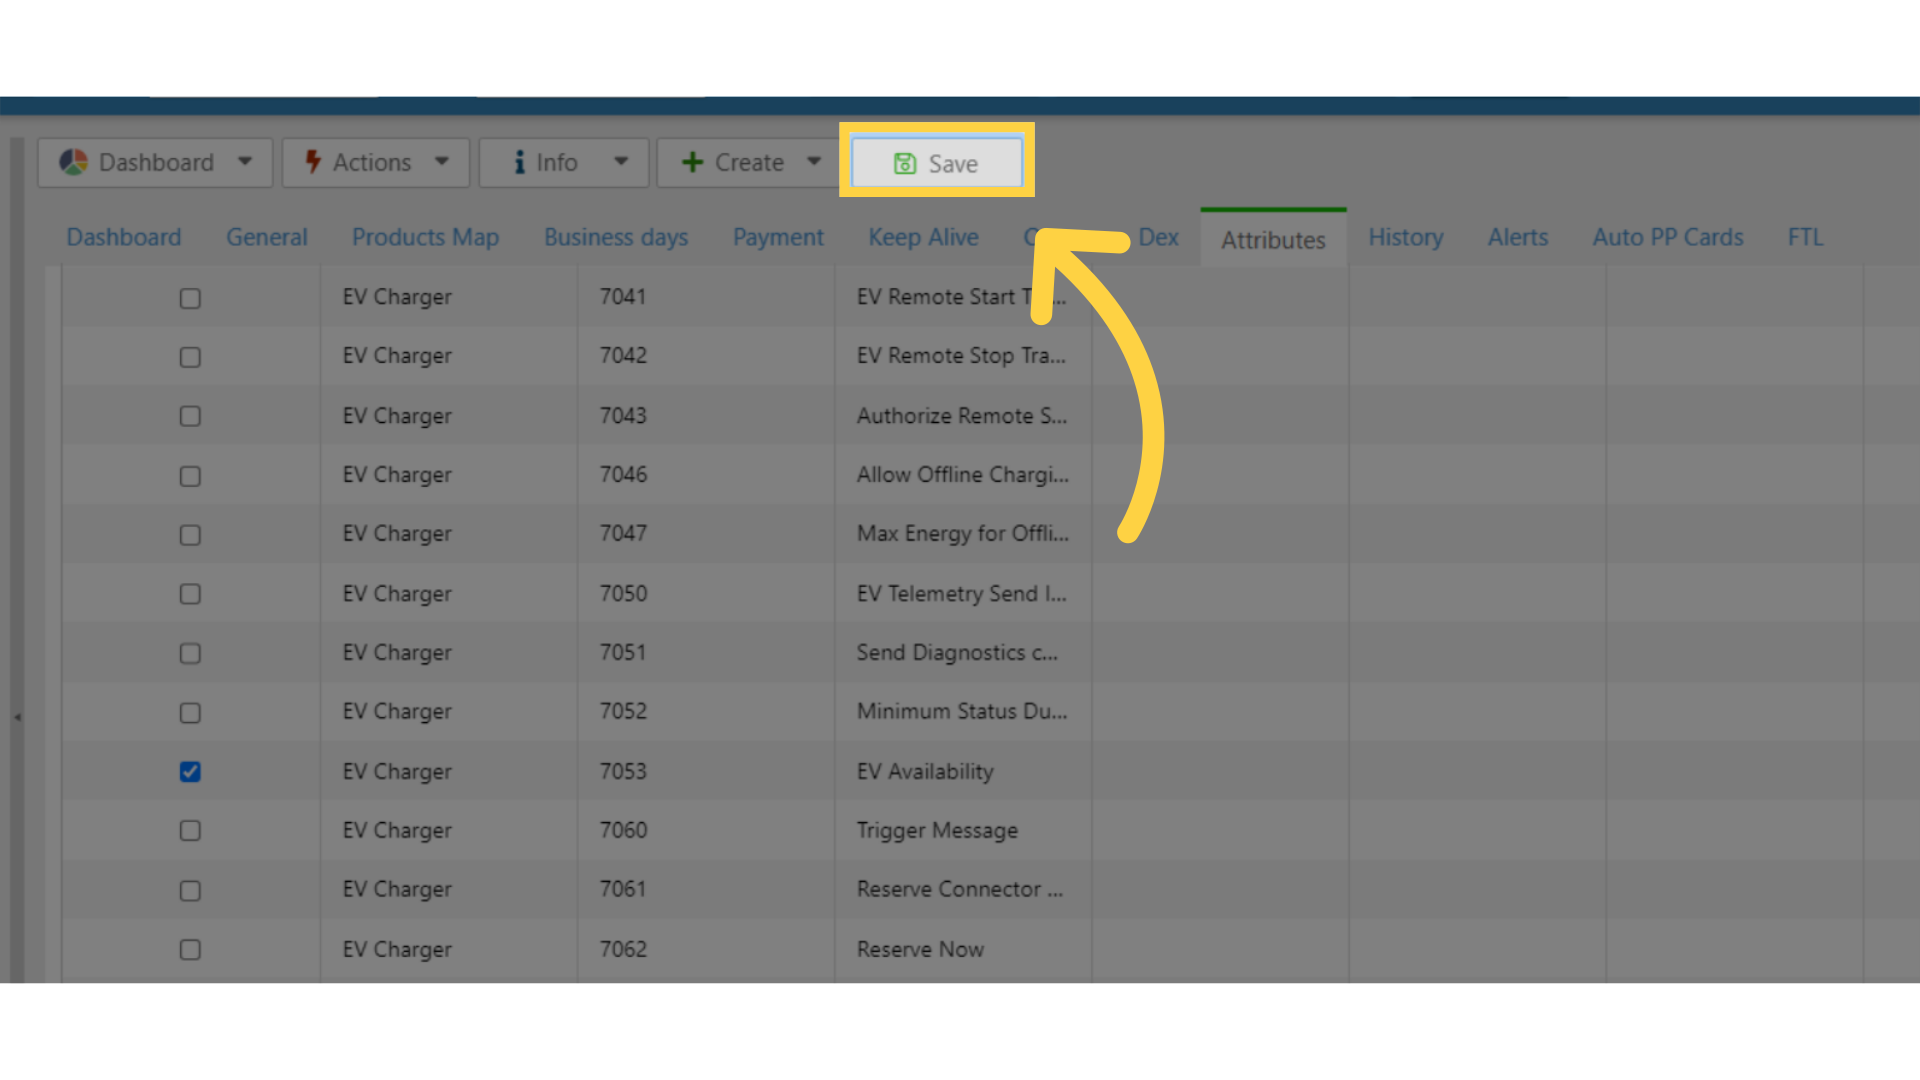
Image Attached
We need to enable the specific attribute ID 7053 EV Availability, which is highlighted in RED in the visual. Click on the checkbox to activate it, as highlighted in GREEN.

8
Click Save
Image AttachedClick save the changes made.
9
Click EV Charger
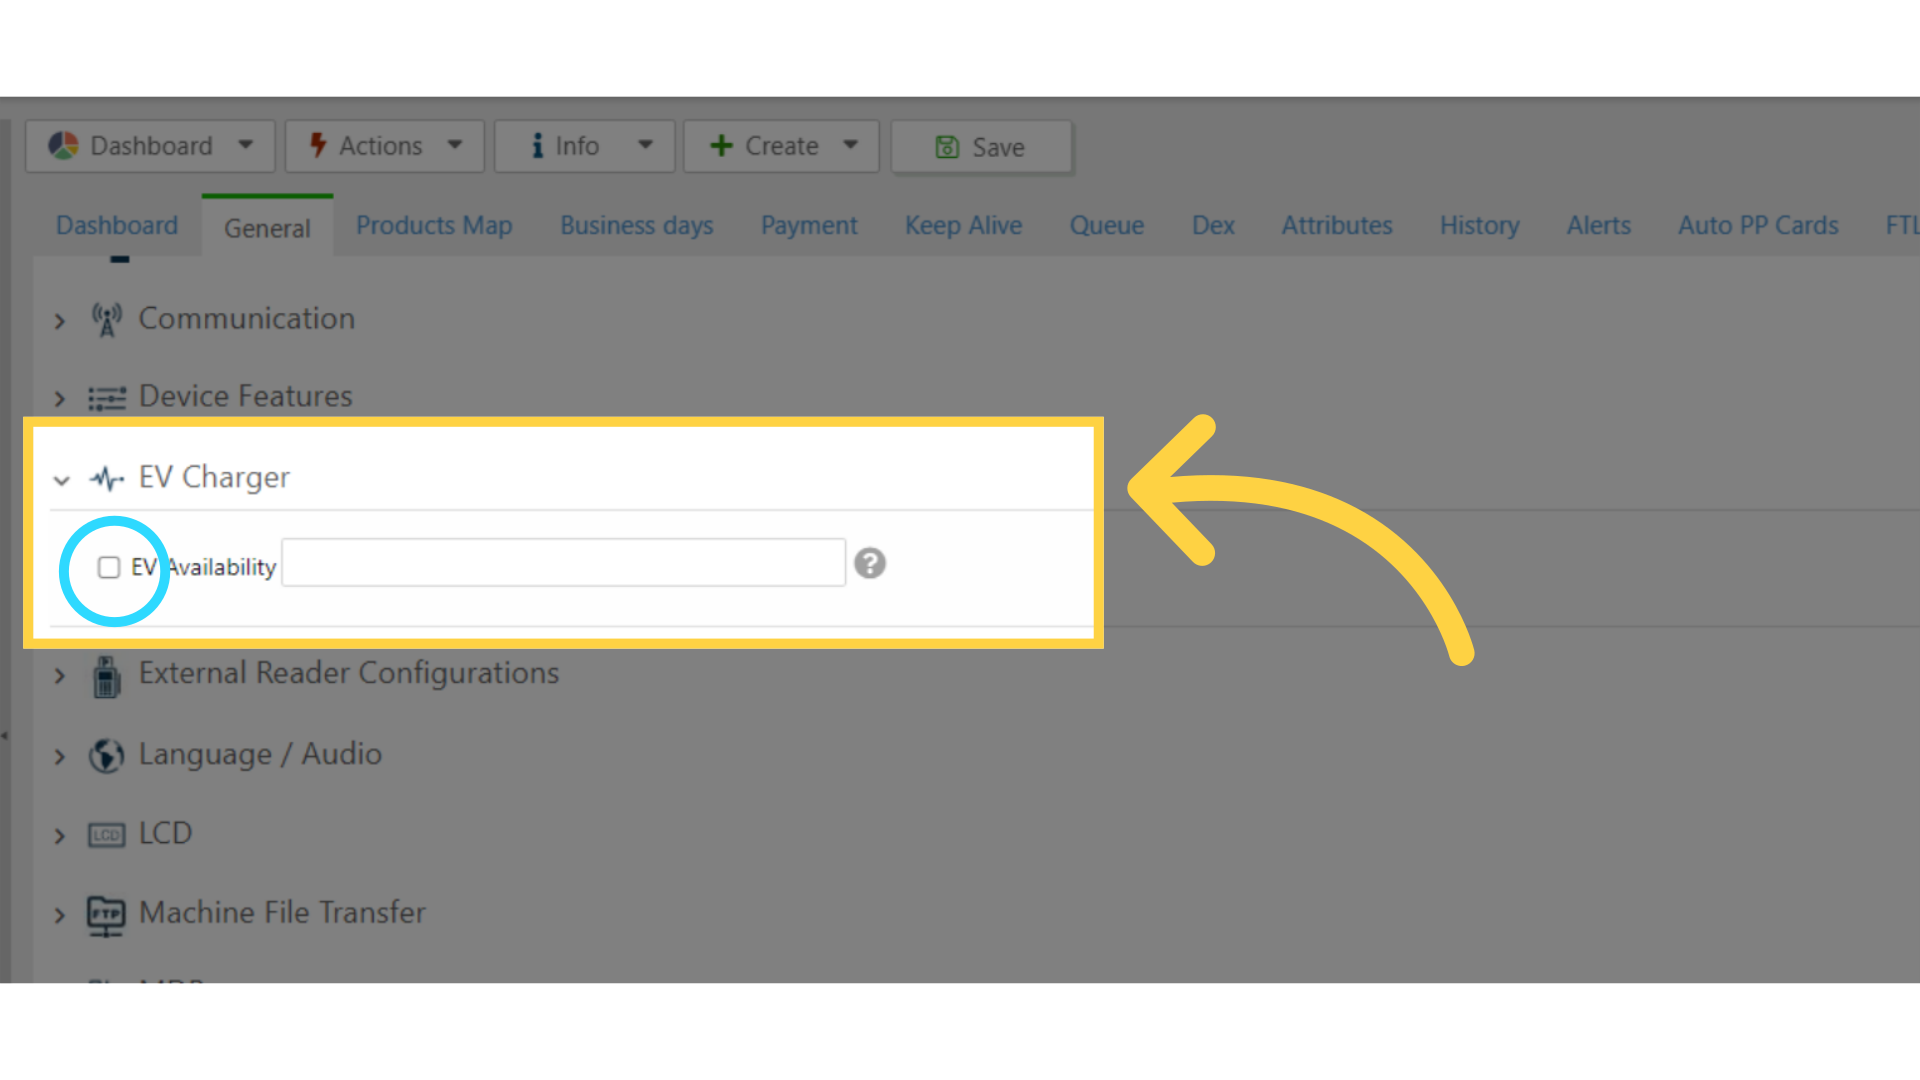
Image Attached
Then click on the general tab and scroll and click on the EV Charger settings as highlighted in RED on the visual.

10
Send the Actions
Image AttachedTo enable the EV Availability, Input :
The Digit 1 for available AVAILABLE or The Digit 2 for NOT available
Then click on the checkbox located to the left of the attribute as highlighted in BLUE on the visual.
11
Click on Save - Click on Actions - Update Queue
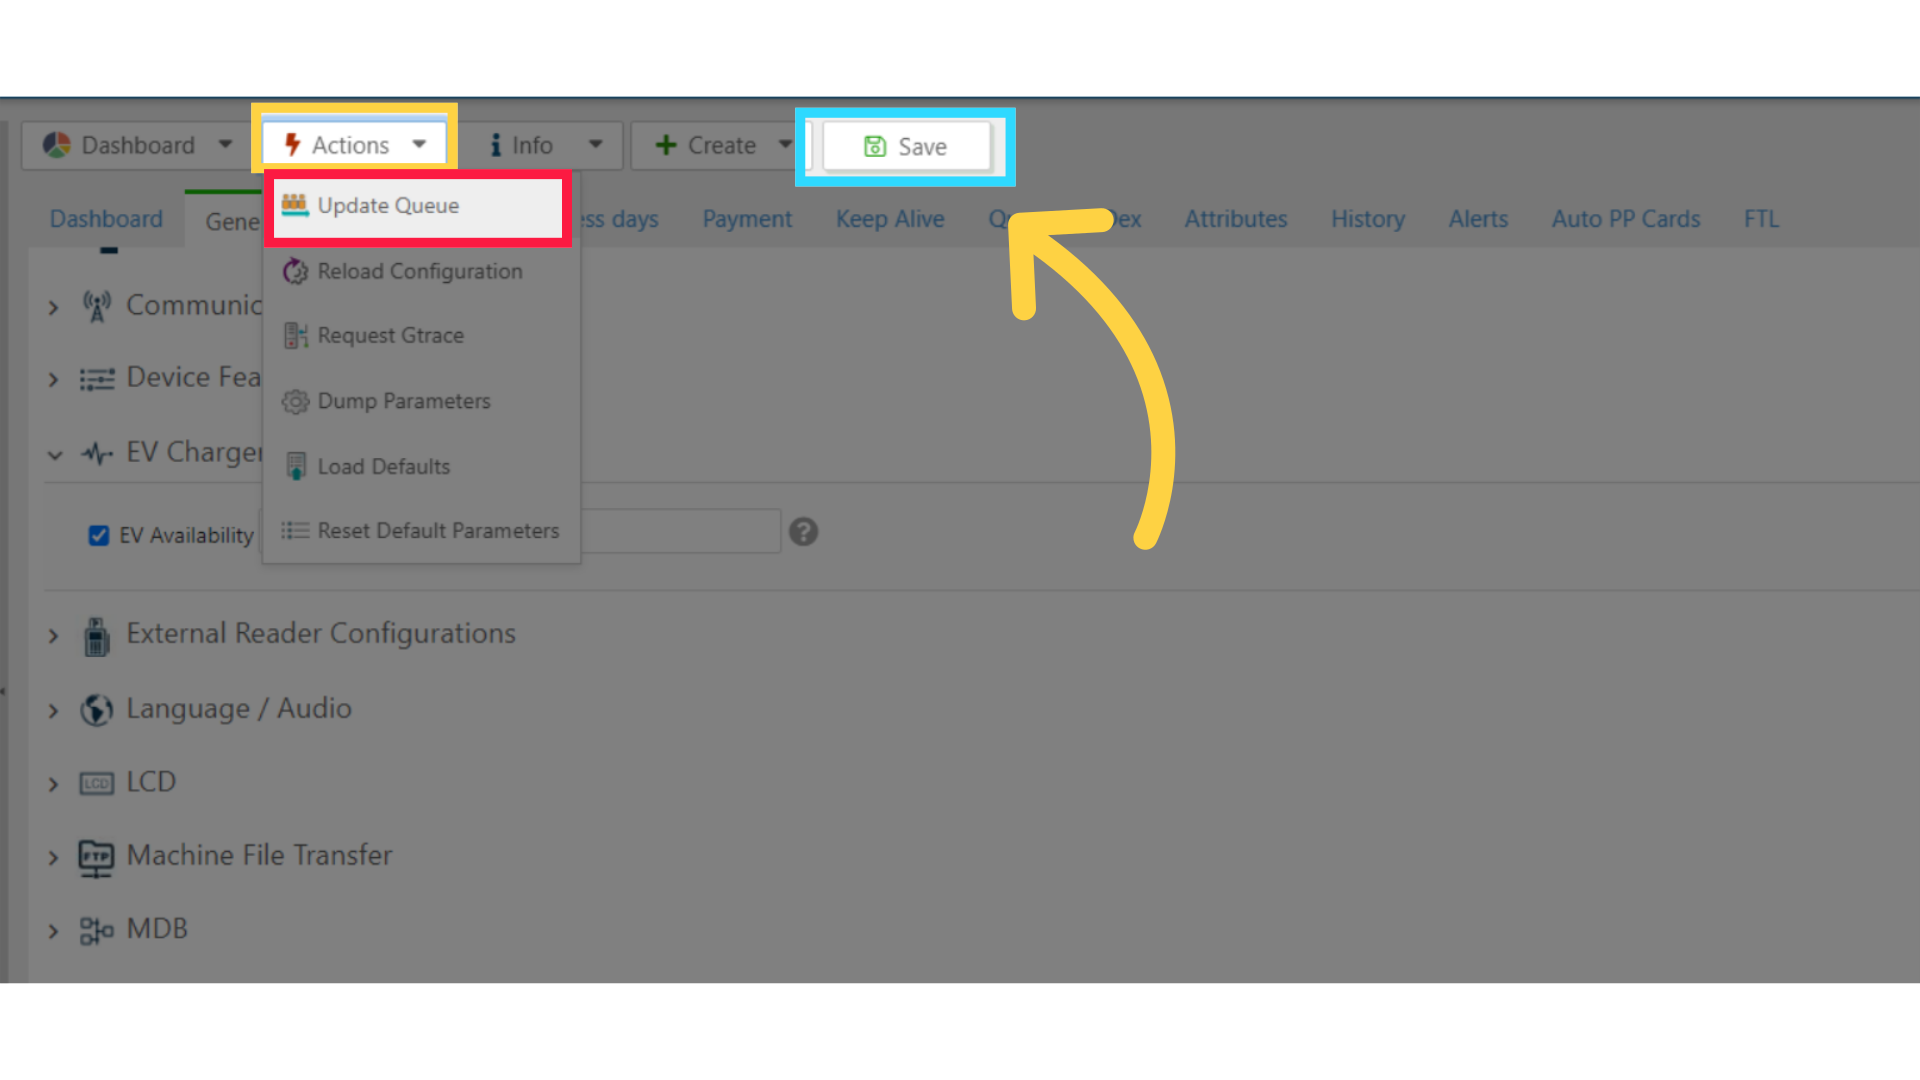
Image Attached
Click on the save button to save your progress as highlighted in BLUE on the visual.
Then click on the Actions button and click Update Queue as highlighted in RED on the visual.
We hope this guide was able to walk you through the process, we ask you to please help us help you by leaving feedback!
Thank you!
Did you find this article helpful?