How to Configure an E-Receipt Machine Level | Operations
This guide walks you through the process of activating and configuring E-Receipt functionality on your machine. Follow these steps carefully to ensure proper setup.
1
Please Note
Configuration must be completed at two levels.
Please refer to this guide: How to Configure an E-Receipt Operator Level | Administration to enable e-receipts on both the machine and the device for proper functionality.
2
Video Guide
3
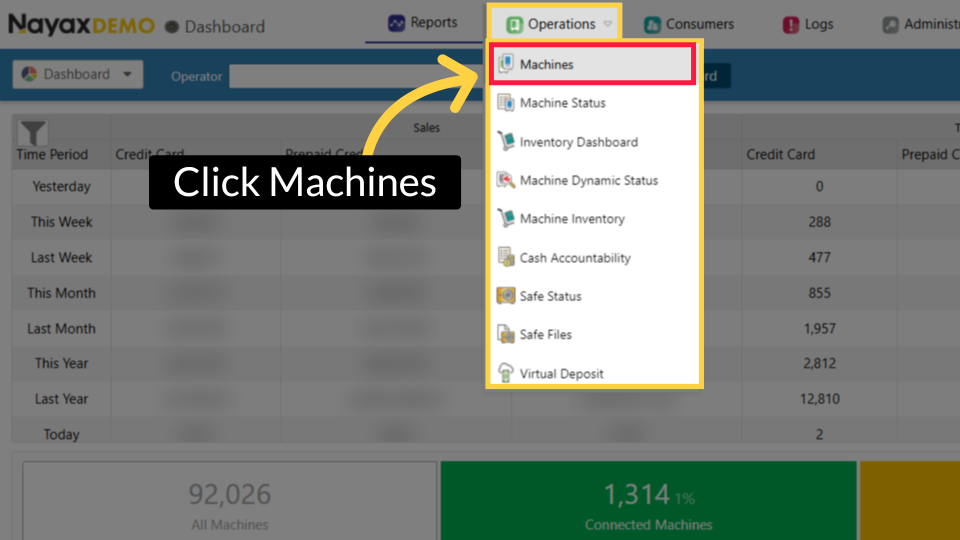
Click Machines
Image Attached
On the Dashboard of the Nayax Core platform, click on the Operations tab. Then click on "Machines" from the drop-down menu.
4
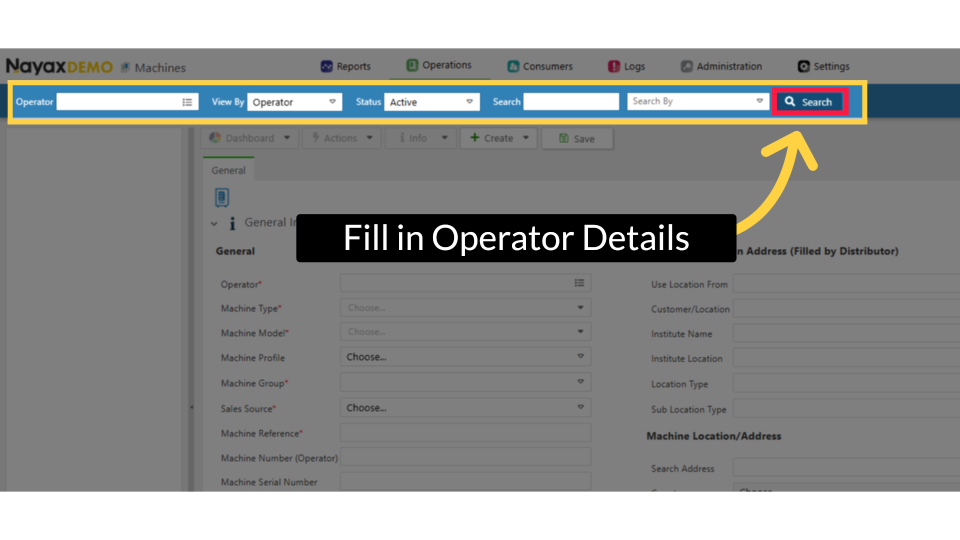
Fill in Operator Details
Image Attached
To locate your machine, type in your Operator name and any other fields. Then click the search button.
5
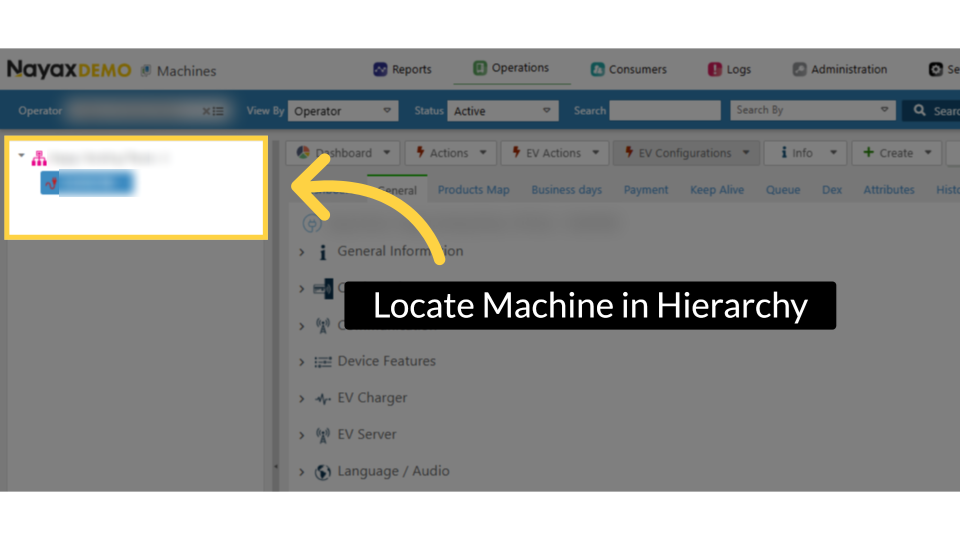
Locate Operator Machine
Image Attached
Locate and click on the Charging Point from the hierarchy.
6
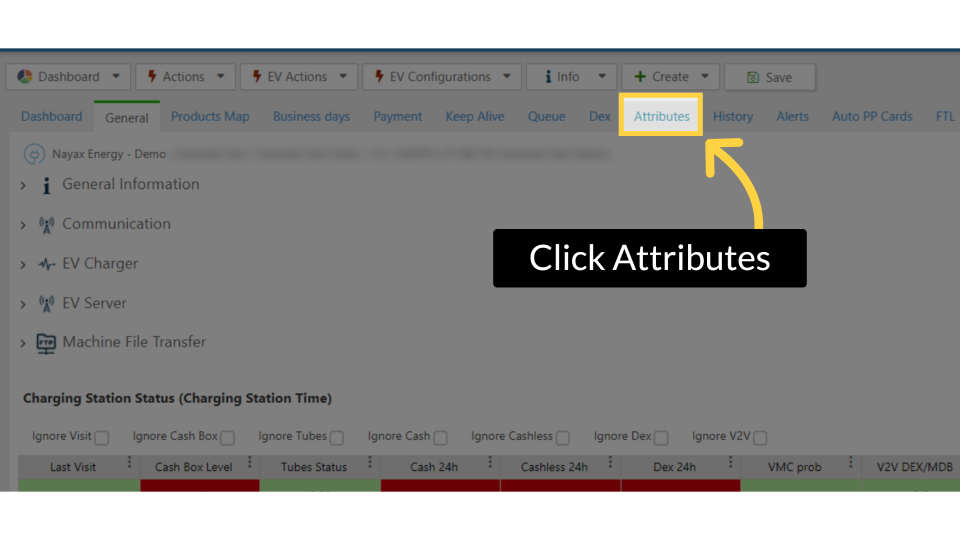
Click Attributes
Image AttachedClick on the Attributes Tab.
7
Click Print Receipt Format
Image Attached
Under the Group field, click on and select the Print Receipt Format option from the drop-down menu, as highlighted in RED.
8
Click on Checkbox to Enable
Image Attached
Scroll search for the attributes Receipt Button Display Duration with attribute ID 1220 and Receipt QR Display Duration with attribute ID 1221 and click on the checkbox to enable these attributes as highlighted in RED on the visual.
|
Attribute ID
|
Attribute Name
|
|
1220
|
Receipt Button Display Duration
|
|
1221
|
Receipt QR Display Duration
|

9
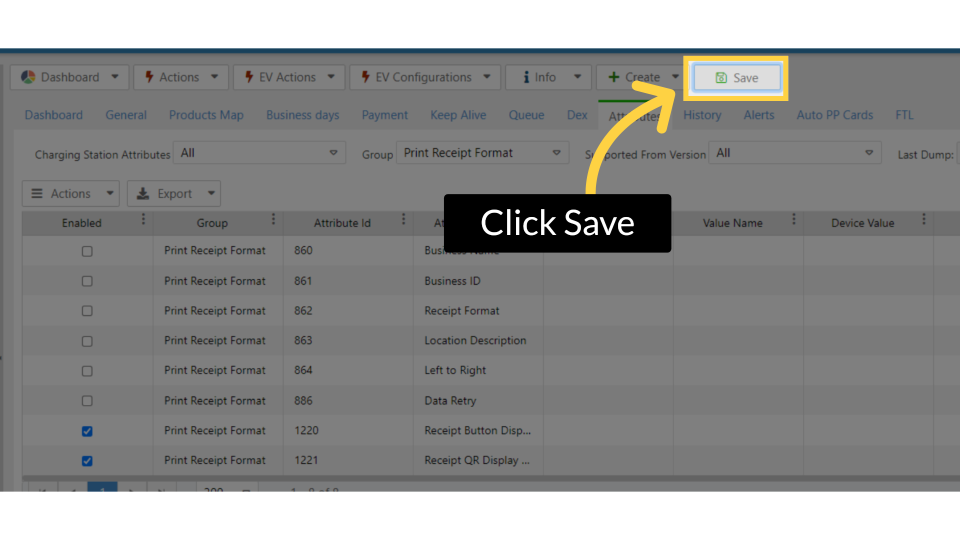
Click Save
Image Attached
Click on the save button to save your progress.
10
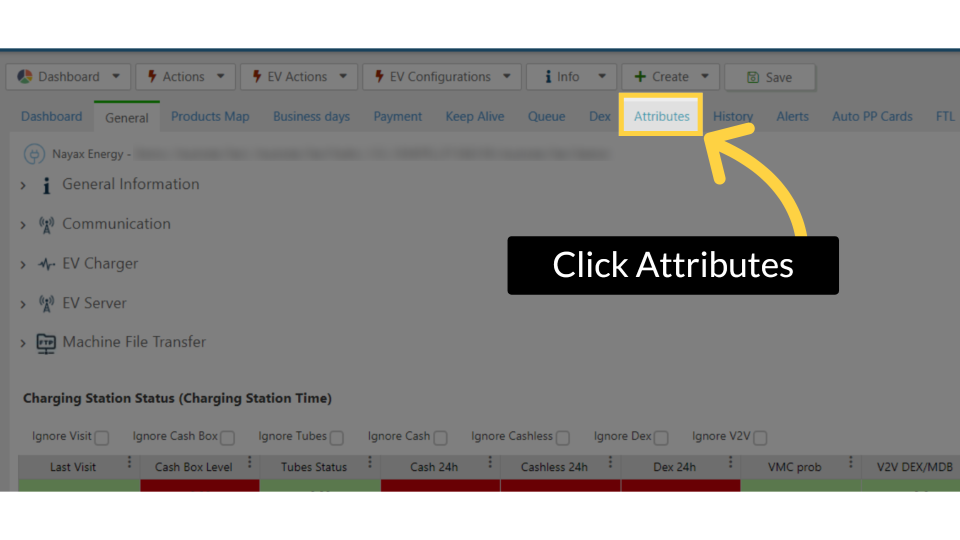
Click Attributes
Image Attached
Now to add Attributes to VPOS Touch Section Click on the Attributes Tab again.
11
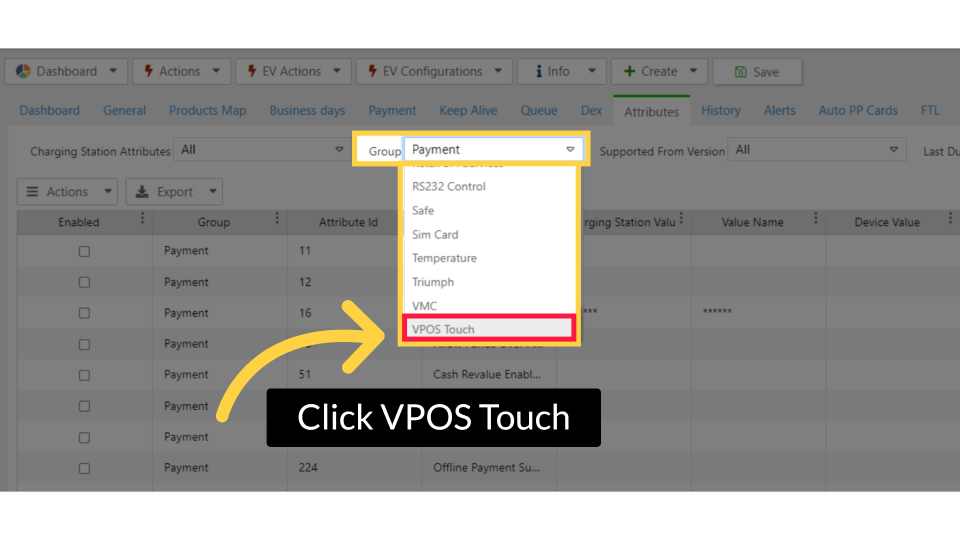
Click VPOS Touch
Image AttachedUnder the Group field, click on and select the VPOS Touch option from the drop-down menu, as highlighted in RED.
12
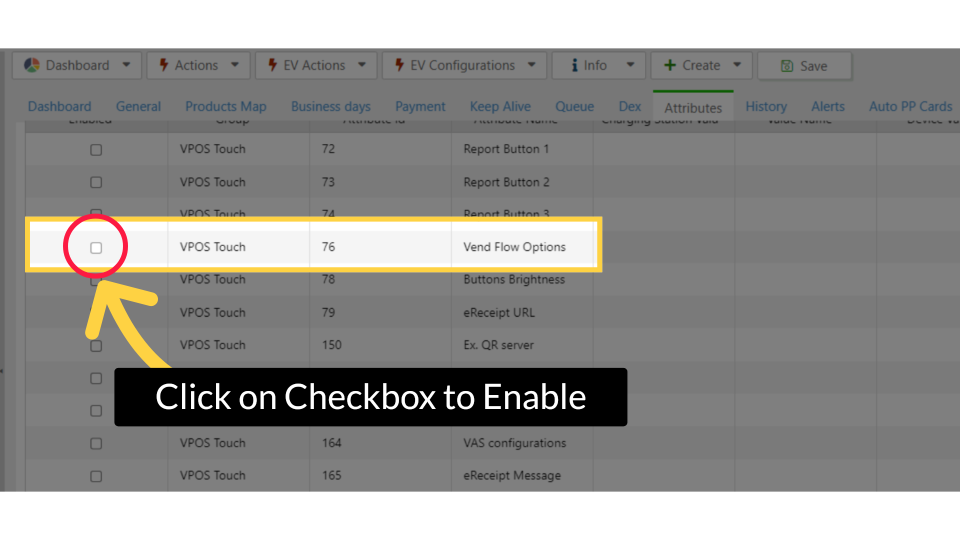
Click on Checkbox to Enable
Image Attached
Scroll search for the attributes Vend Flow Options with attribute ID 76 and click on the checkbox to enable these attributes as highlighted in RED on the visual.
|
Attribute ID
|
Attribute Name
|
|
76
|
Vend Flow Options
|
13
Click Save
Image AttachedClick on the save button to save your progress.

14
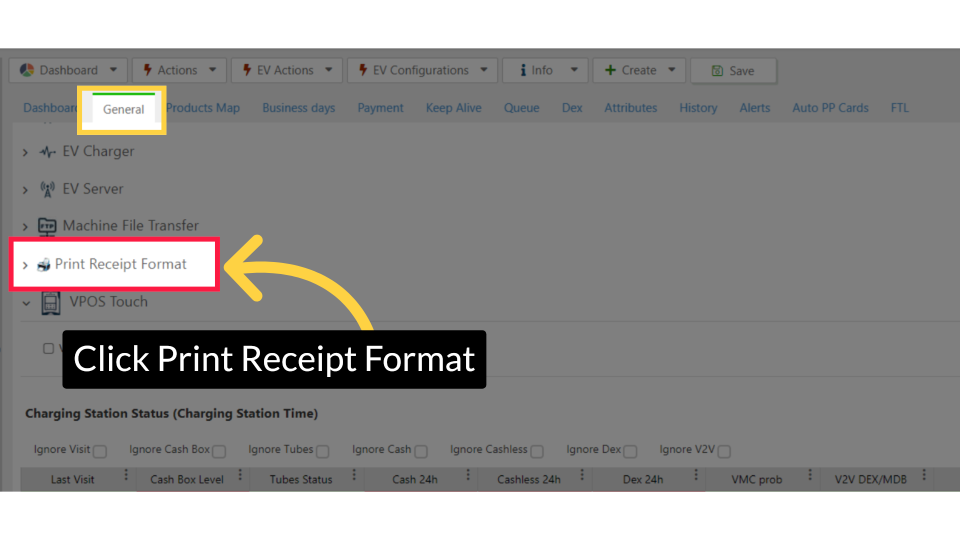
Click Print Receipt Format
Image Attached
Now we need to Configure the machine Settings from the General Tab and then Click on the Print Receipt Format option as highlighted in RED on the visual.
15
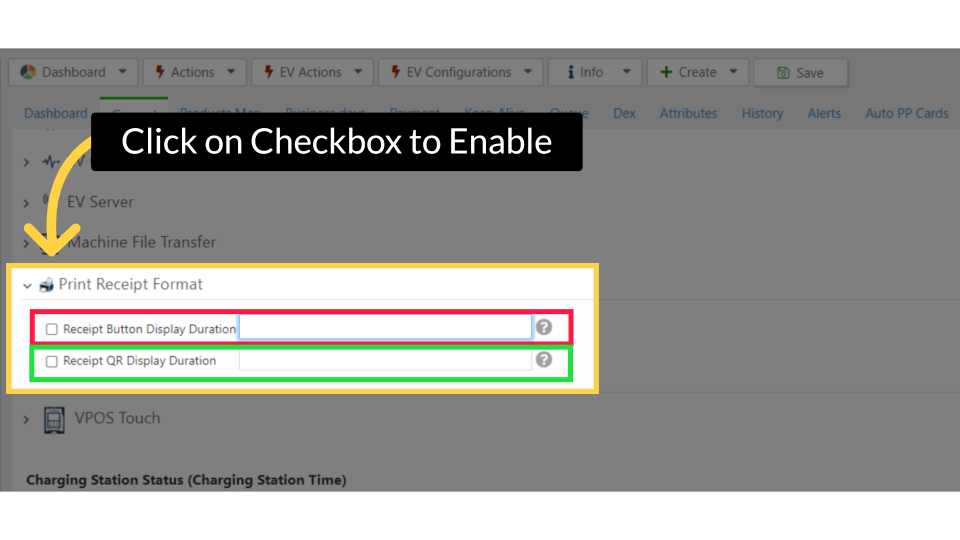
Click on Checkbox to Enable
Image Attached
For Receipt Button Display Duration as highlighted in RED on the visual enter the number of seconds you want this button to be displayed on the VPOST Touch's screen. We recommend configuring it to be visible for 15 seconds.
For Receipt QR Display Duration as highlighted in GREEN on the visual enter the number of seconds you want this button to be displayed on the VPOST Touch's screen. We recommend configuring it to be visible for 60 seconds.
16
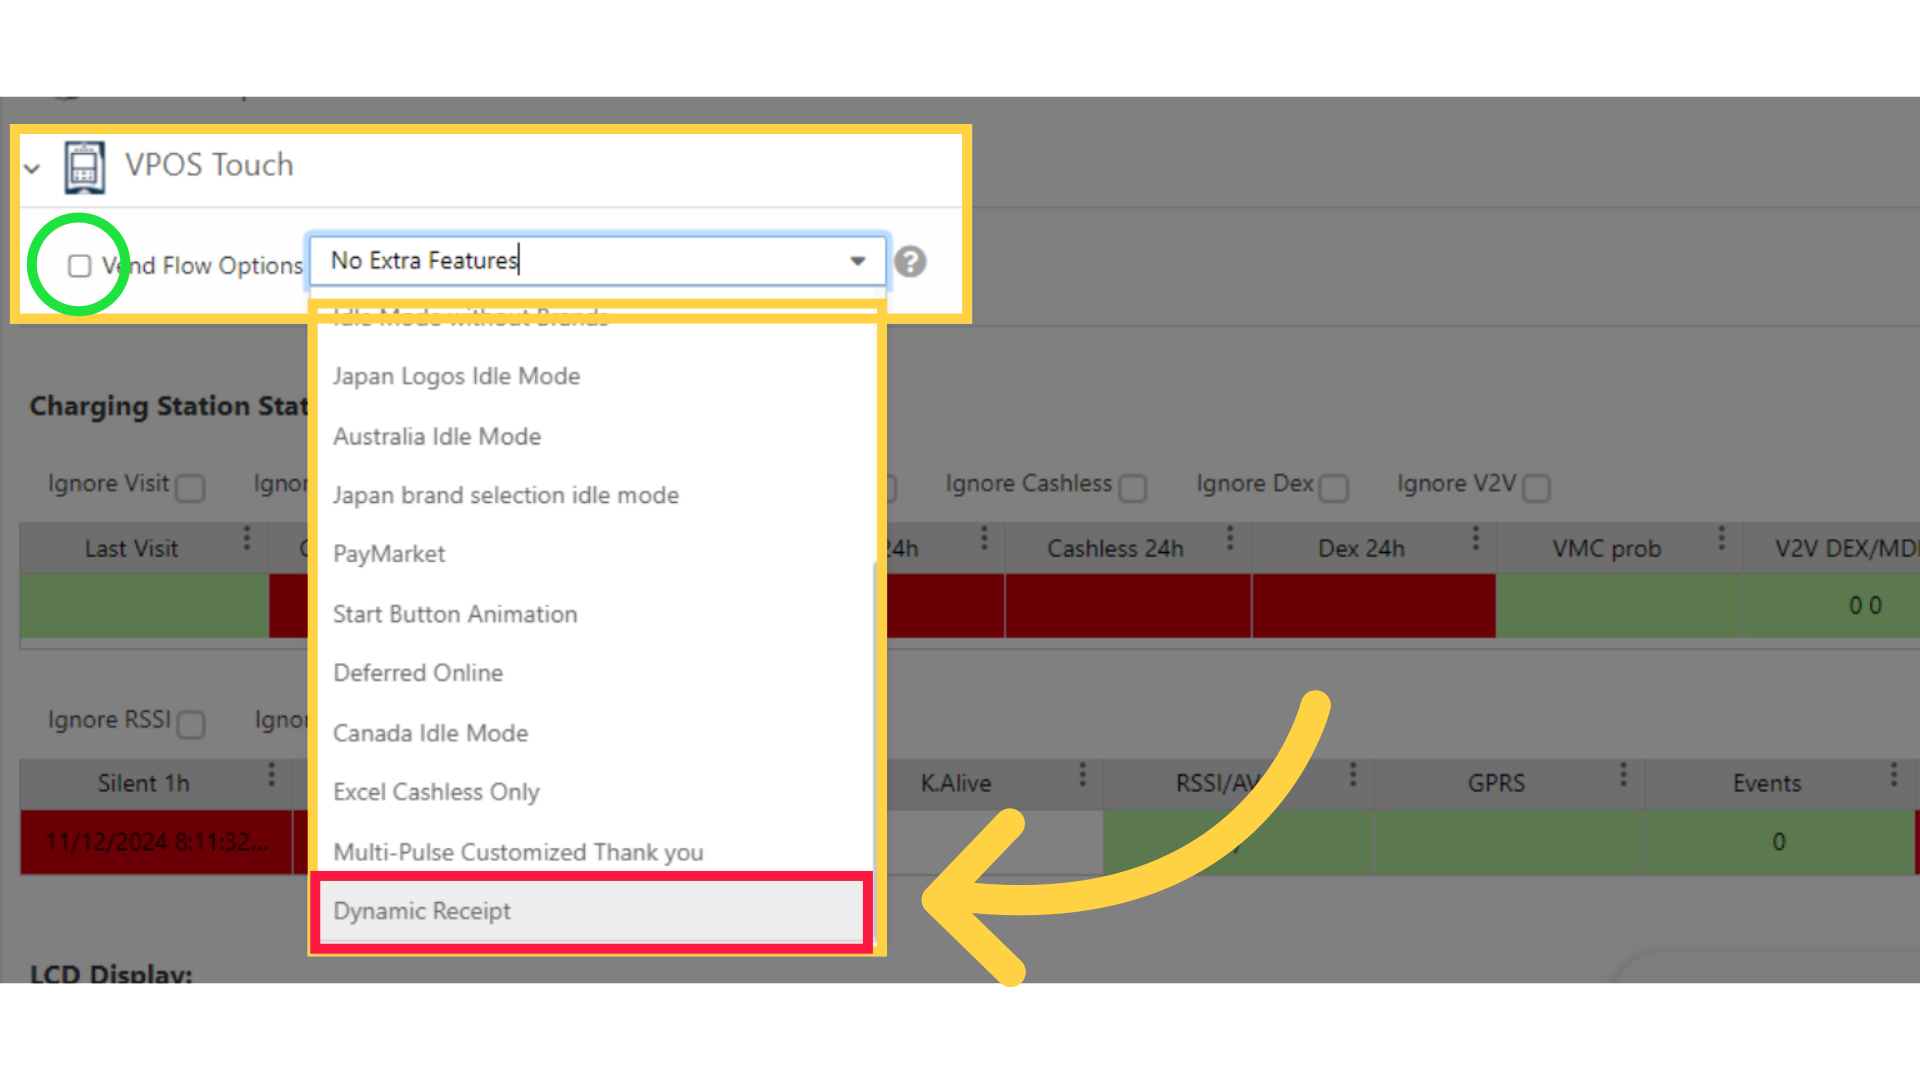
Click Dynamic Receipt
Image Attached
Still on the General Tab Click open the VPOS Touch tab and in the Vend Flow Options choose Dynamic Receipt option as highlighted in RED on the visual and click on the checkbox as highlighted in GREEN on the visual.
17
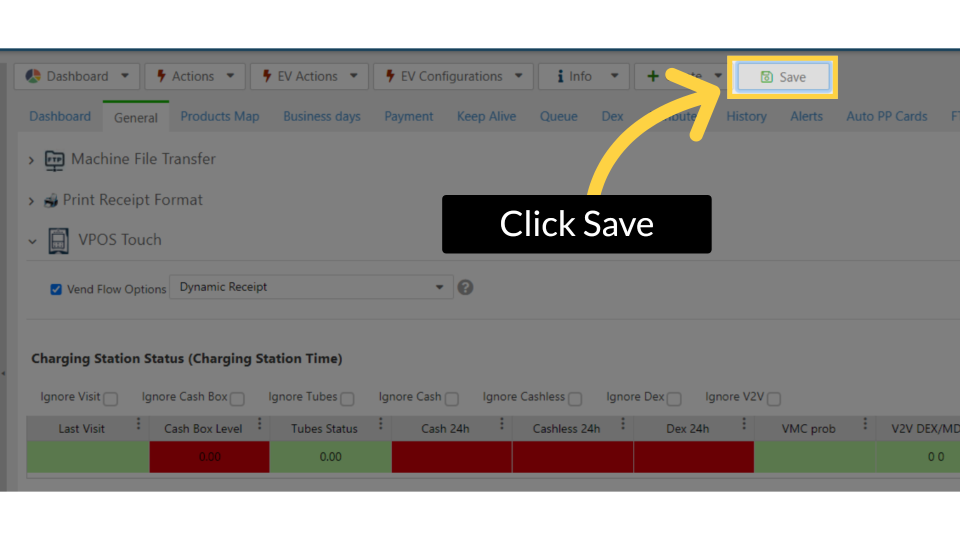
Click Save
Image Attached
Click on the save button to save your progress.
18
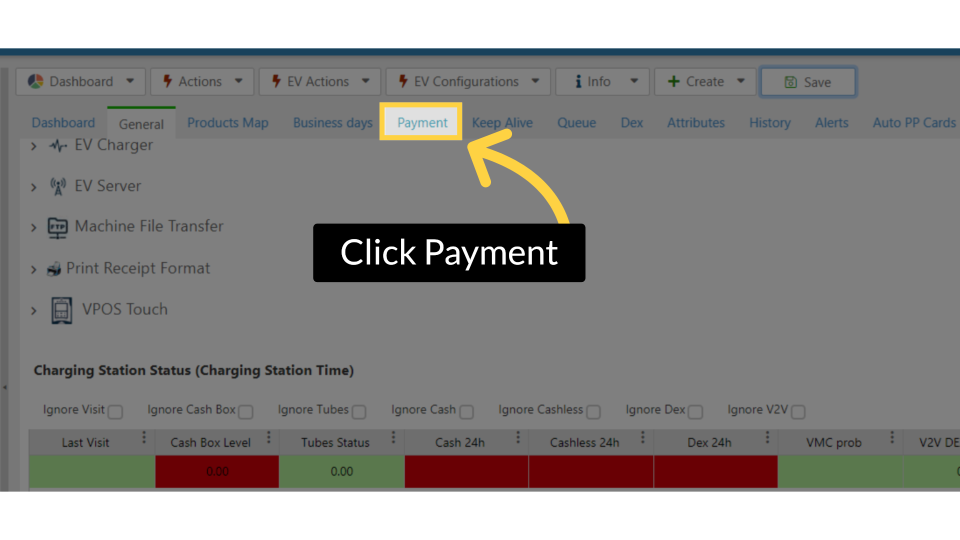
Click Payment
Image Attached
Click on the Payment Tab.
19
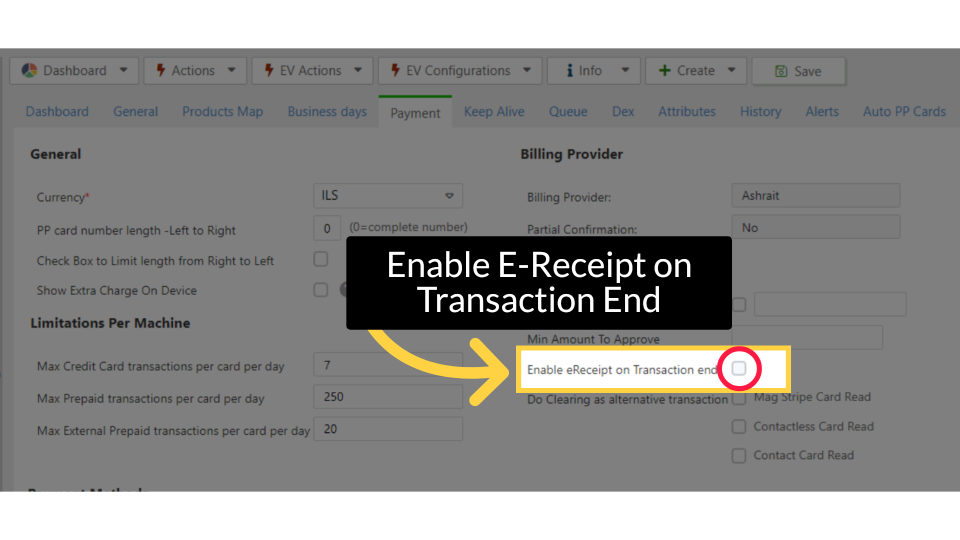
Enable E-Receipt on Transaction End
Image Attached
Locate Enable e-Receipt on Transaction end and Check the box to activate as highlighted in RED.
20
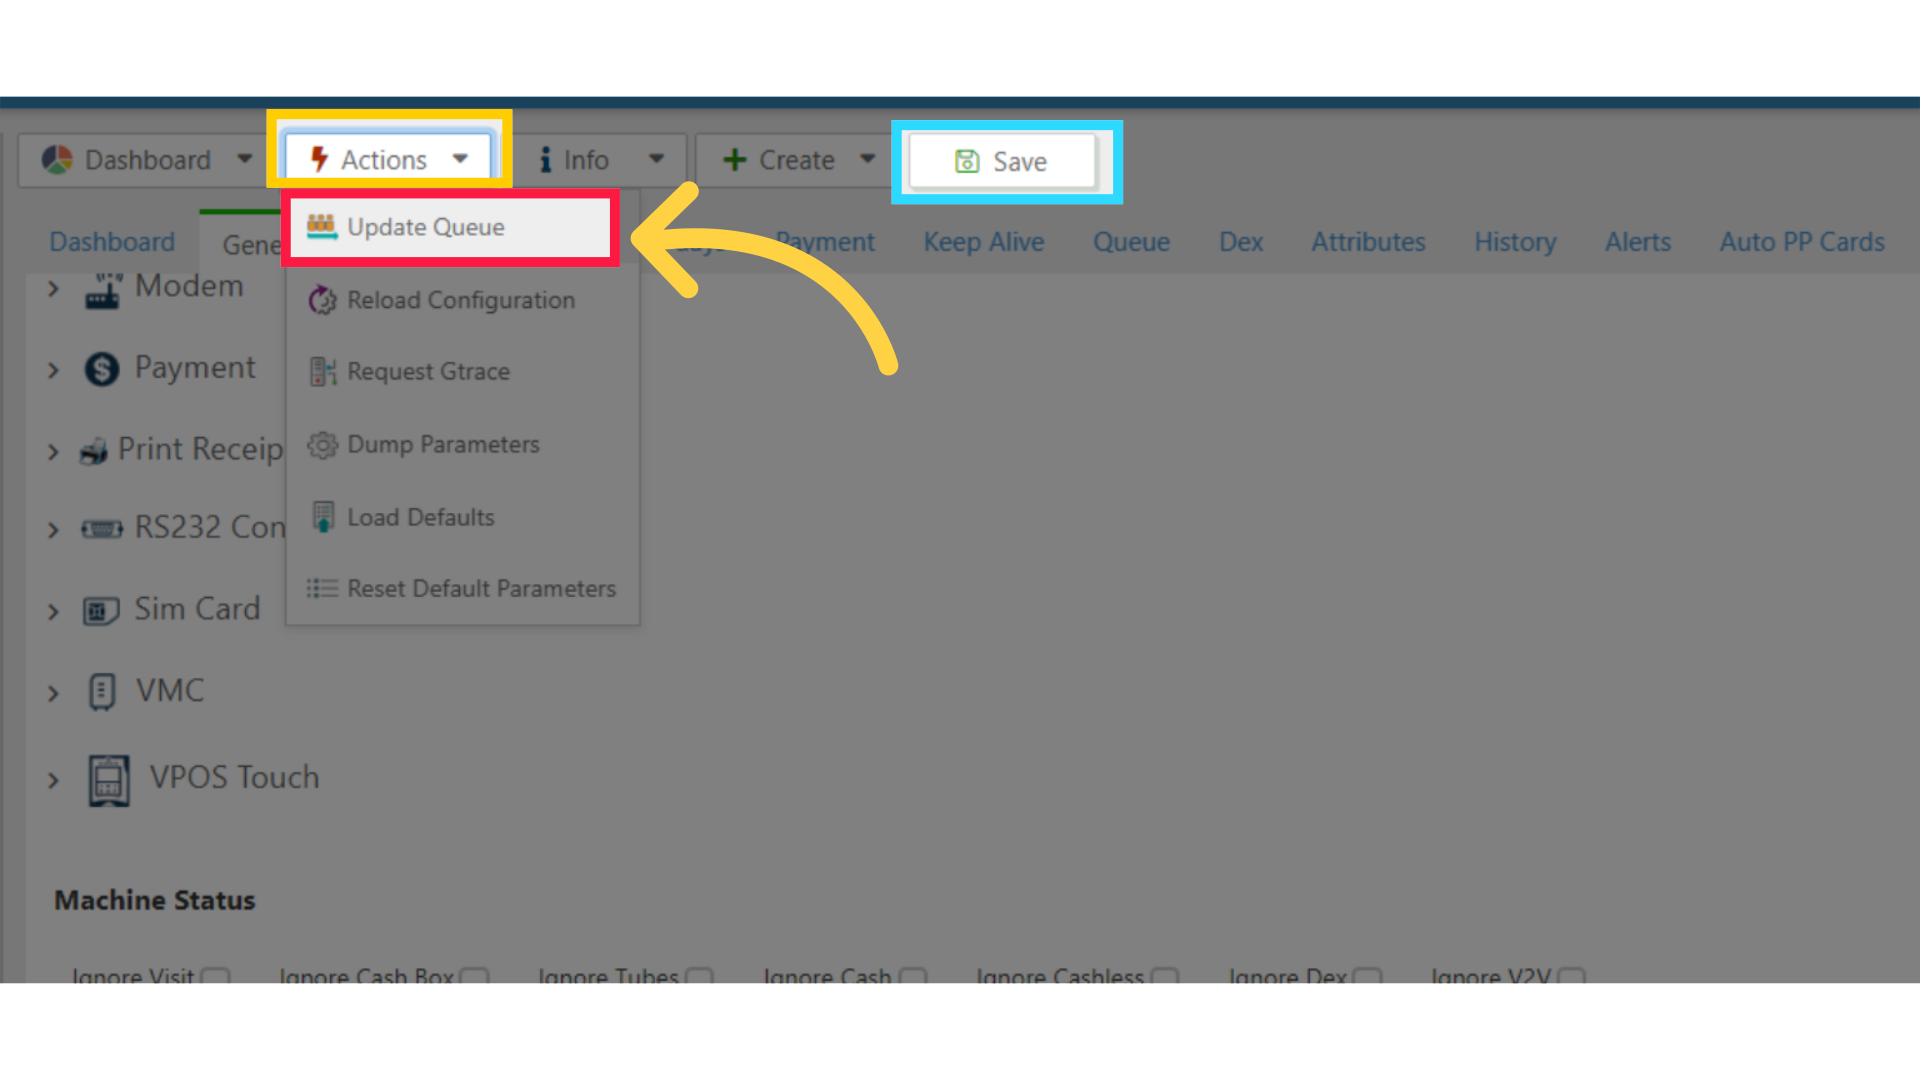
Click Actions and Update Queue
Image Attached
Then scroll to the Actions button and click Update Queue as highlighted in RED.
Thank you!
Did you find this article helpful?