How to Configure an E-Receipt Operator Level | Administration
Set up and customize your Nayax E-Receipt at the operator level in Classic Core. Configure merchant details, invoice text, and footer, and preview before saving. Must also be enabled at the machine level.
Please Note!
Configuration must be completed at two levels.
Please refer to this guide: How to Configure an E-Receipt Machine Level | Operations to enable e-receipts on both the machine and the device for proper functionality.
Video Guide
00:00: Send customers a branded digital receipt
00:02: after purchases. Learn how to configure your E-Receipt in Nayax Classic Core, from
00:07: entering operator details to customizing invoice layout and previewing
00:11: what customers see.
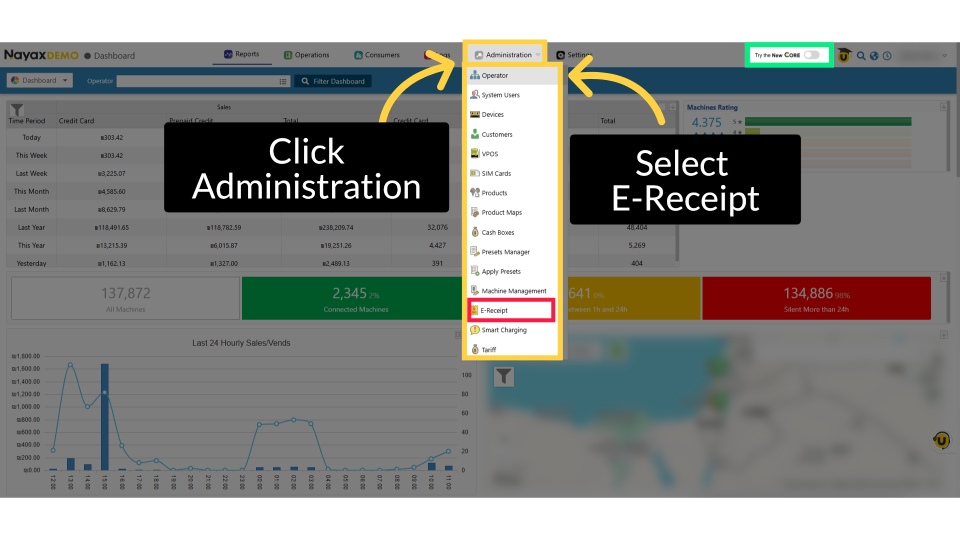
00:13: From the dashboard of your Nayax Classic Core platform and select the Administration tab. Next, click on Operator in the drop-down menu.
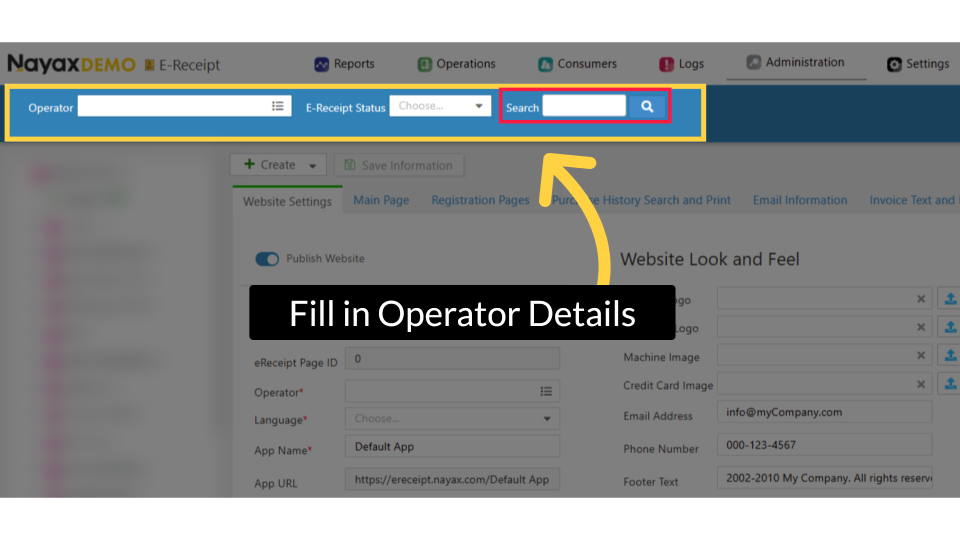
00:21: To locate your machine, type in your Operator name.
00:24: Then click the search button.
00:26: Locate and click on your operator and machine within the hierarchy tree.
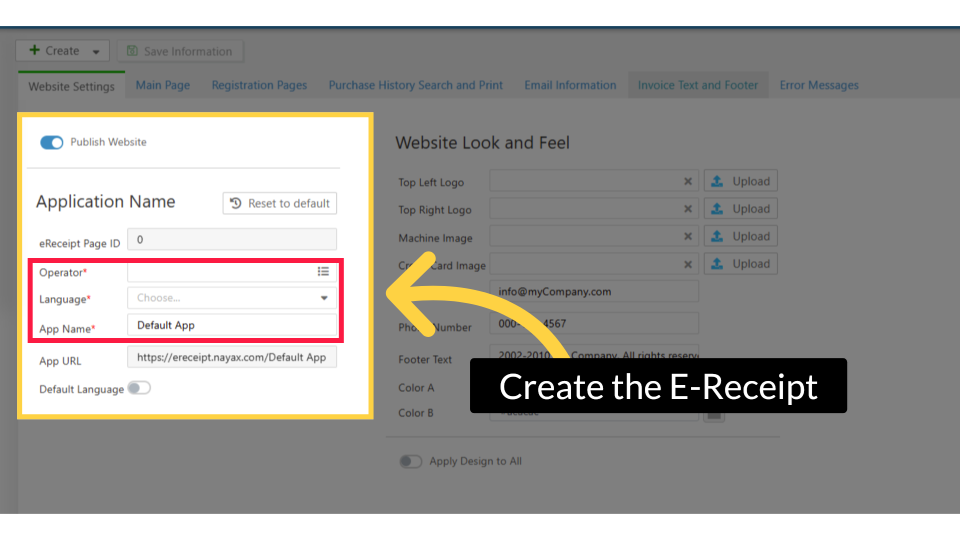
00:31: In this section, you only need to input the information highlighted with a
00:00: This tutorial guides you through configuring e-receipt options and machine settings in
00:04: the Nayax platform.
00:06: From the dashboard of your Nayax Classic Core platform and select the Administration tab. Next, click on Operator in the drop-down menu.
00:14: To locate your machine, type in your Operator name.
00:17: Then click the search button.
00:19: Locate and click on your operator and machine within the hierarchy tree.
00:24: In this section, you only need to input the information highlighted with a
Click Administration Tab
Image AttachedFrom the dashboard of your Nayax Classic Core platform and select the Administration tab. Next, click on Operator in the drop-down menu.
Fill in Operator Details
Image AttachedTo locate your machine, type in your Operator name. Then click the search button.
Locate Operator in Hierarchy
Image AttachedLocate and click on your operator and machine within the hierarchy tree.
Create the E-Receipt
Image AttachedIn this section, you only need to enter the information highlighted in RED with an asterisk marked as mandatory.
Click Save Information
Image AttachedClick on the save button to save your progress.
Click Invoice Text and Footer
Image AttachedNow, to customize the receipt, click on the Invoice Text and Footer Tab.
Customize the E-Receipts Information
Image AttachedEach section of the E-Receipt can be customized to meet your specific needs.
Preview E-Receipts
Image AttachedYou can preview the E-Receipt by clicking the "Show Preview" button to see how it will appear to customers.
E-Receipt Preview
Image AttachedIn the preview, an example of the E-Receipt will appear, allowing you to select each section to view the settings location on the E-Receipt page within the system.
Click Save Information
Image AttachedClick on the save button once you are ready to save your E-receipt.
Thank you!
Did you find this article helpful?