How to Configure an Existing Charging Station to VPOS Media 4 Mini | Operations
1
Video Guide
2
Click Operations
Image Attached
On the Dashboard of your Nayax Core platform, click on the Operations tab. Then click on "Machines" from the drop-down menu.

3
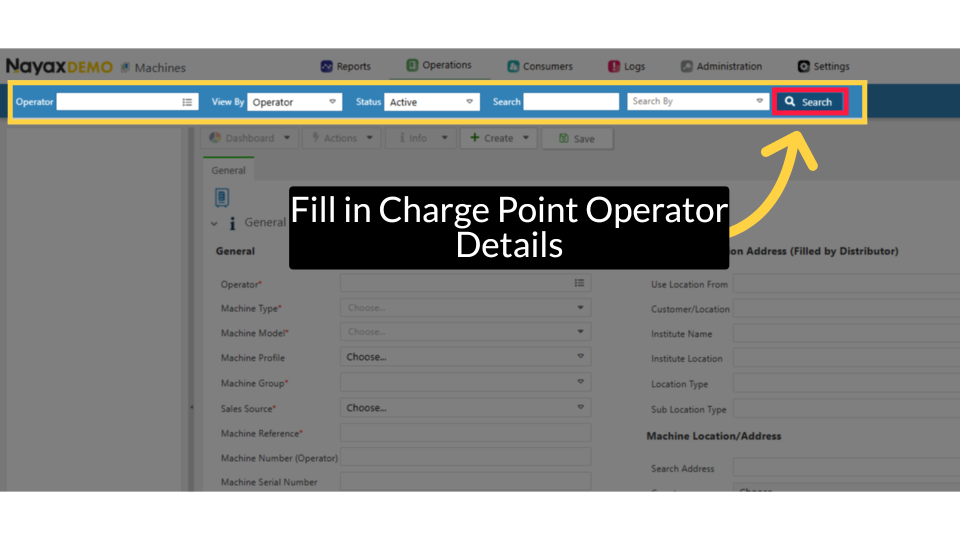
Fill in Charge Point Operator Details
Image AttachedType in your Charge Point Operator name and any other fields to locate your Charging Point. Click search button as highlighted.
4
Locate Charging Point in Hierarchy
Image AttachedLocate and click on the Charging Point from the hierarchy.

5
Confirm OCPP Charging Station Selection
Image Attached
For Machine type select OCPP Charging Station from the drop-down menu.

6
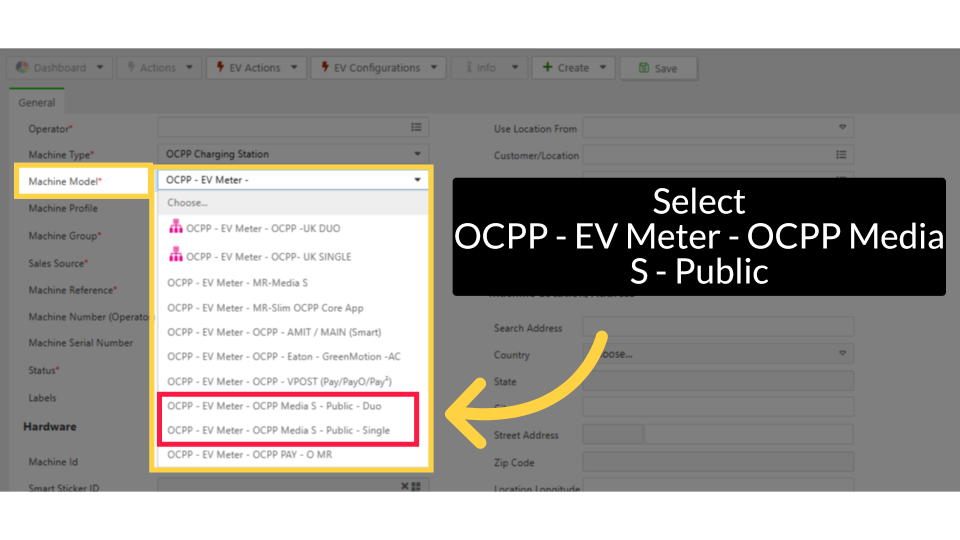
Charging Station Model
Image AttachedFor the Charging Station Model, select the option that matches your charger and payment device.
For VPOS Media S, select OCPP Media S Public Single or Duo from the drop-down menu, as highlighted.
7
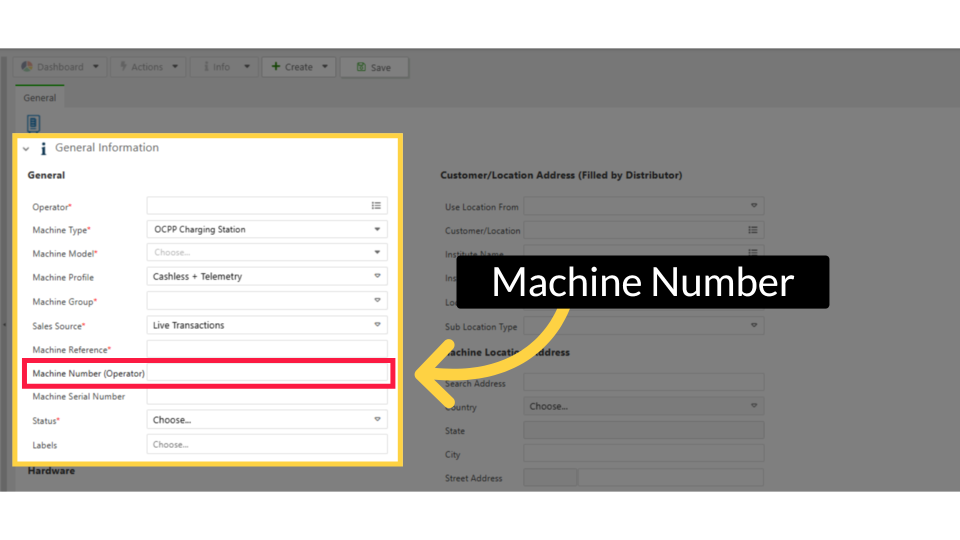
Machine Number
Image AttachedFor Machine Number, input the Device Number. This is a sticker on the edge of the VPOS media device.
8
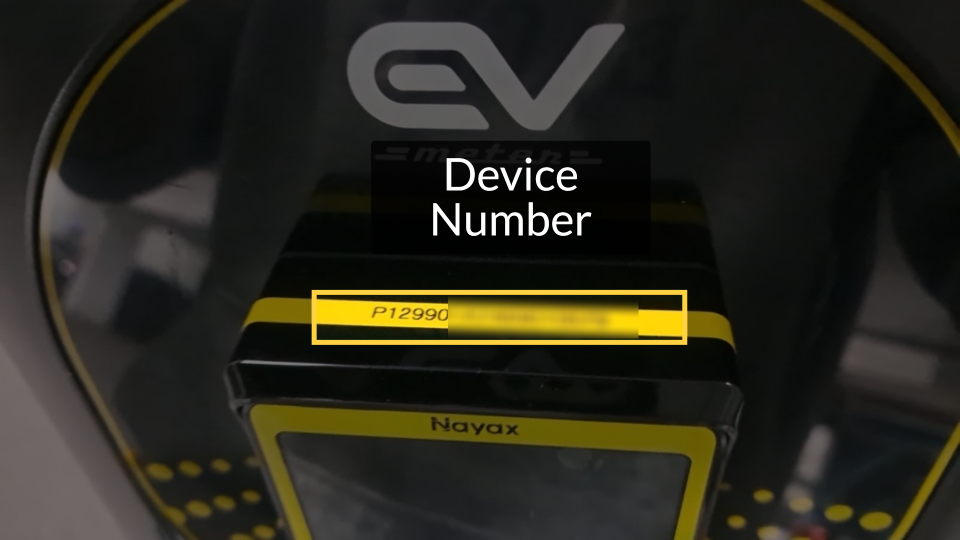
Device Number
Image AttachedDevice Number: This is a sticker located on the edge of the VPOS media device, as highlighted.
9
Click Save
Image AttachedClick on the save button to save your progress.

10
Click Load Defaults
Image AttachedTo update the changes, click on the Actions Tab and then select Load Defaults from the drop-down menu, as highlighted.

Thank you!
Did you find this article helpful?
Related articles
How to Configure Plug and Charge | OperationsHow to Activate a Public or Multi-Residential EV Meter Pay / Pay² Charging Station | VPOS Media 4 MiniHow to Create a New Charging Station with VPOS Media 4 Mini | OperationsHow to Start and Stop your EV Charging Session for Multi-Residential | VPOS Media 4 Mini