How to Change Meter Values Interval | Operations
Adjusting meter value intervals is crucial for maintaining accurate monitoring and billing of your EV charging station. This guide will provide you with straightforward instructions to change these intervals using the Nayax Core.
1
Video Guide
2
Types of Meter Values
There are two types of meter values that you can adjust their intervals.
- Meter Value Clock Align - Set in minutes and appear regardless of an open charging session.
name in the reports: Sample Clock - EV Telemetry - set in seconds and appears only in an open charging session.
name in the reports: Sample Periodic
3
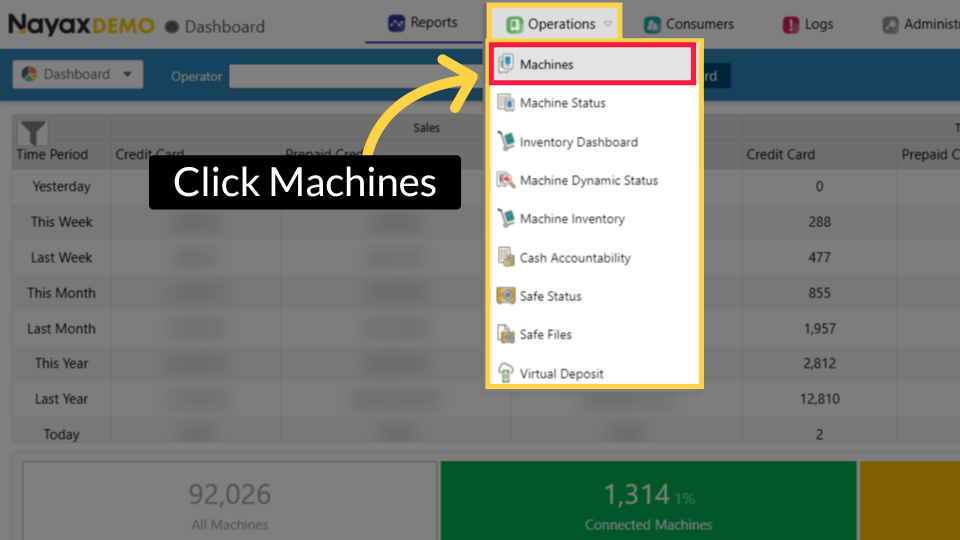
Click Operations
Image Attached
On the Dashboard of the Nayax Core platform, click on the Operations tab. Then click on "Machines" from the drop-down menu.
4
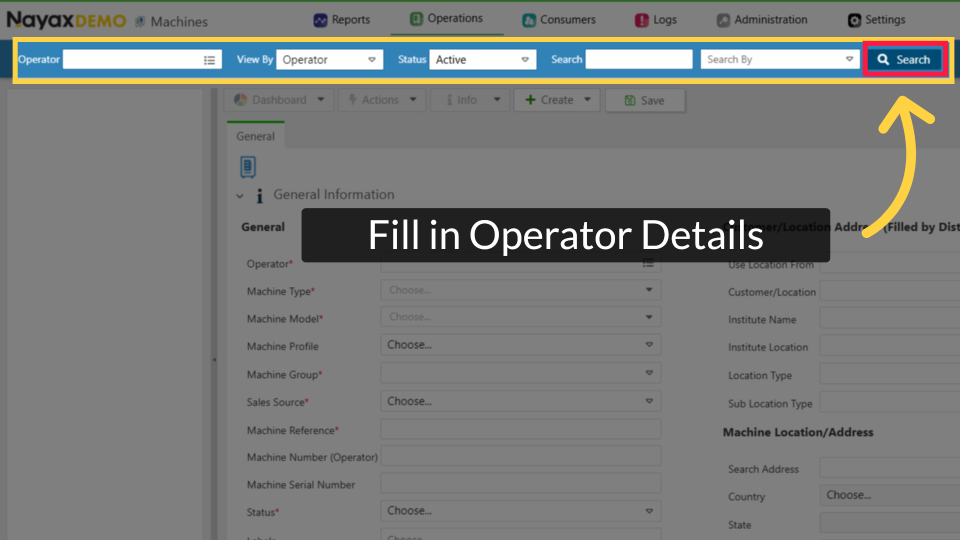
Fill in Charge Point Operator Details
Image Attached
Type in your Charge Point Operator name and any other fields to locate your Charging Point. Click the search button as highlighted in RED on the visual.
Pro Tip: You can search without typing the name of a Charge Point Operator and leaving this field blank. In this case, the data displayed will include all CPOs and sub-operators for which you have permission to view.
5
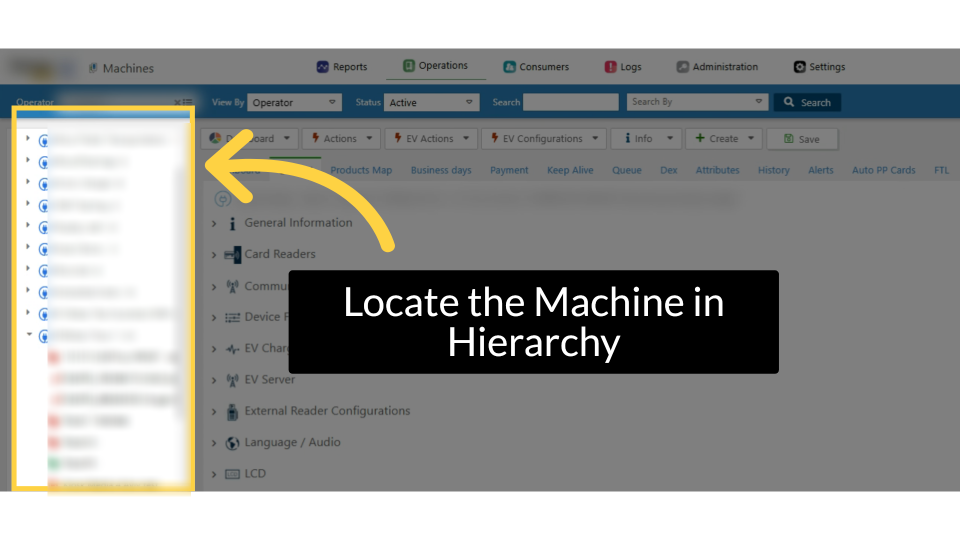
Locate Charging Point in Hierarchy
Image AttachedLocate and click on the Charging Point from the hierarchy.
6
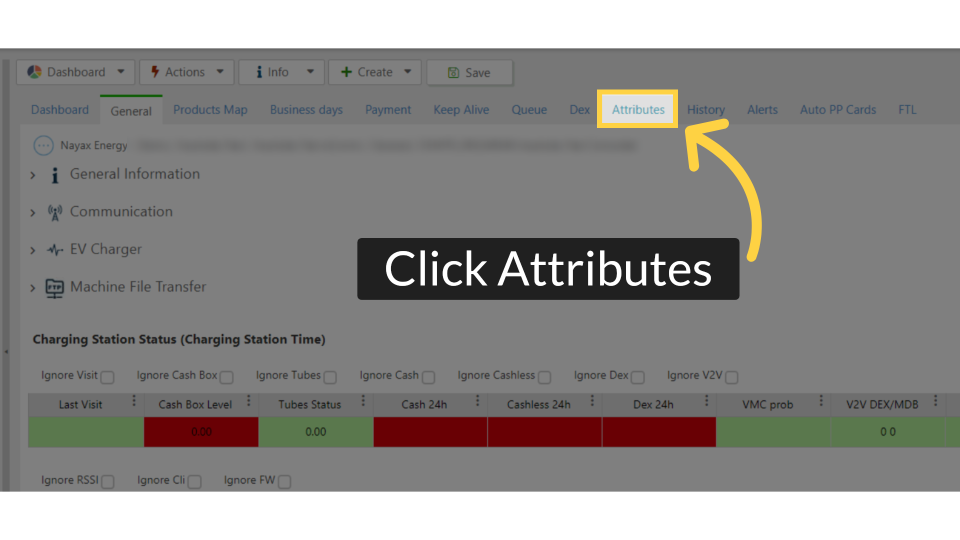
Click Attributes
Image AttachedClick on the Attributes Tab.
7
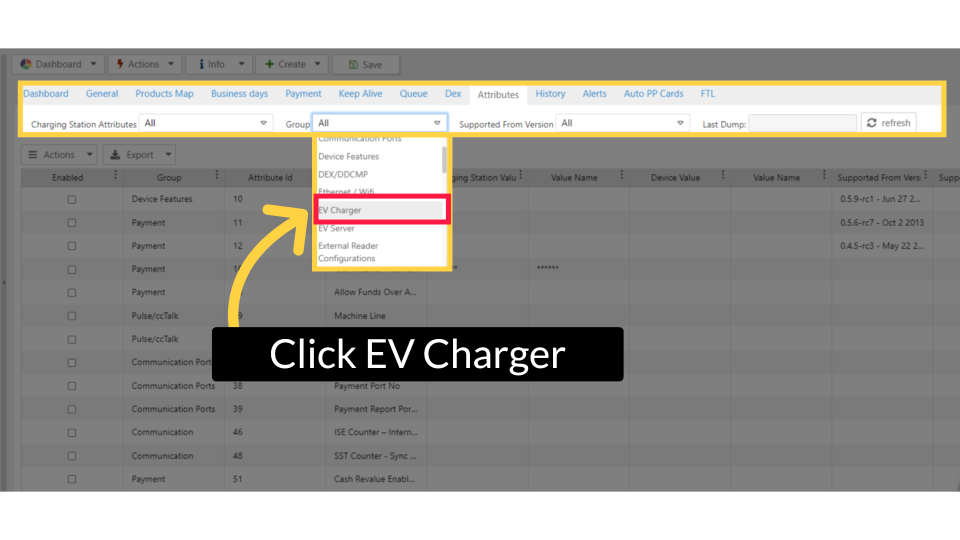
Click EV Charger
Image Attached
Under the Group field click on and select the EV Charger option from the drop down menu as highlighted in RED in the visual.
8
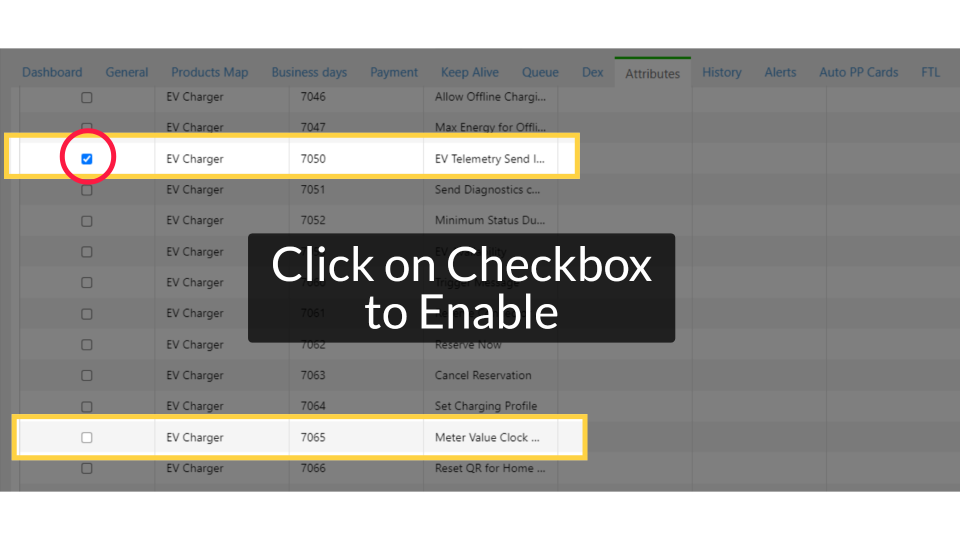
Click on Checkbox to Enable
Image AttachedScroll search for the attributes EV Telemetry Send Interval with attribute ID 7050 and Meter Value Clock Align Interval with attribute ID 7065 and click on the checkbox to enable these attributes as highlighted in RED on the visual.
9
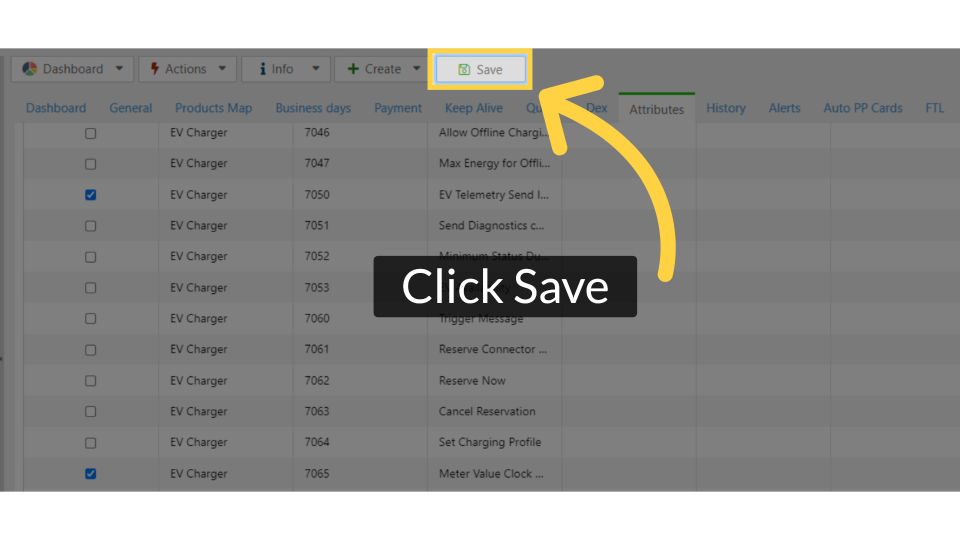
Click Save
Image AttachedClick on the save button to save your progress.
10
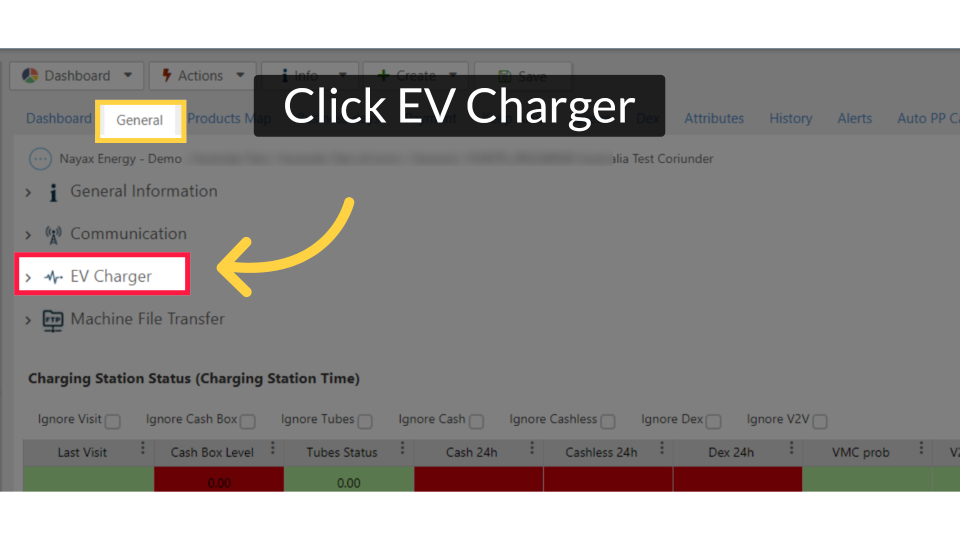
Click EV Charger
Image Attached
Click on the General Tab and then Click on the EV Chargers option as highlighted in RED on the visual.
11
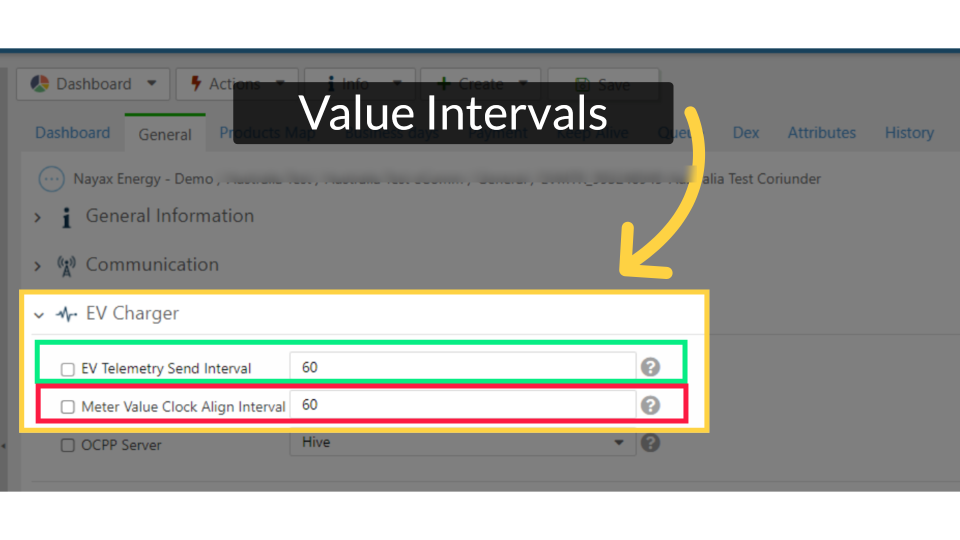
Click on Checkbox to Enable
Image AttachedWe recommend setting the Clock Align to 30 minutes and the EV telemetry to 60 seconds
In the example, you can see the charger is set to receive meter values in a charging session every 1 minute highlighted in GREEN and meter value every 1 hour highlighted in RED on the visual.
|
Name of attribute
|
value intervals
|
|
EV Telemetry Send Interval
|
Seconds
|
|
Meter Value Clock Align Interval
|
Minutes
|
12
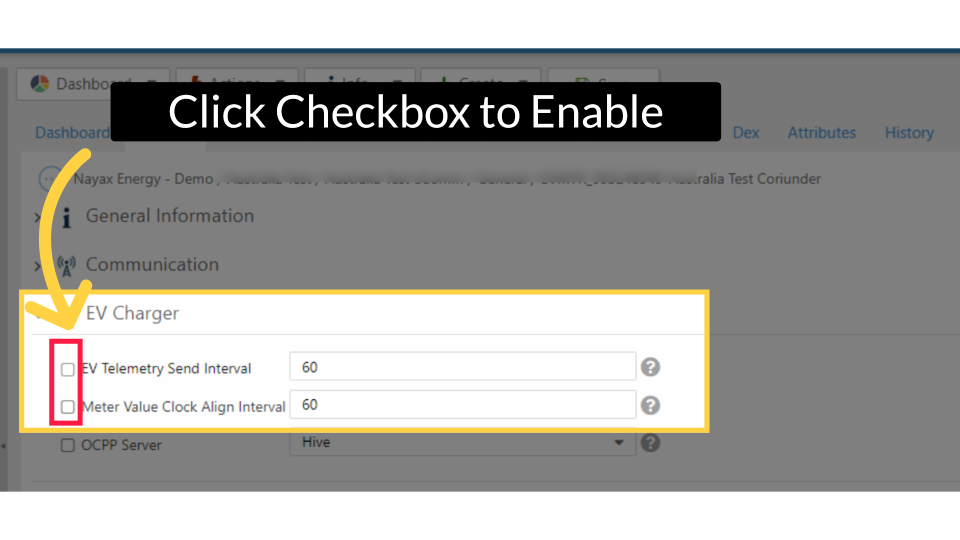
Click Checkbox to Enable
Image Attached
Click on the checkboxes once you have set your preferences to enable them as highlighted in RED.
13
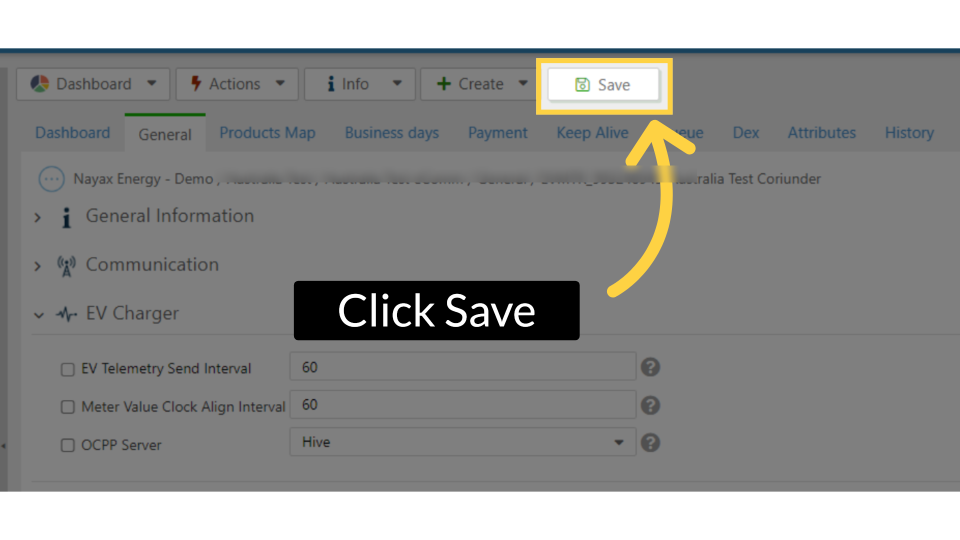
Click Save
Image AttachedClick on the save button to save your progress.
14
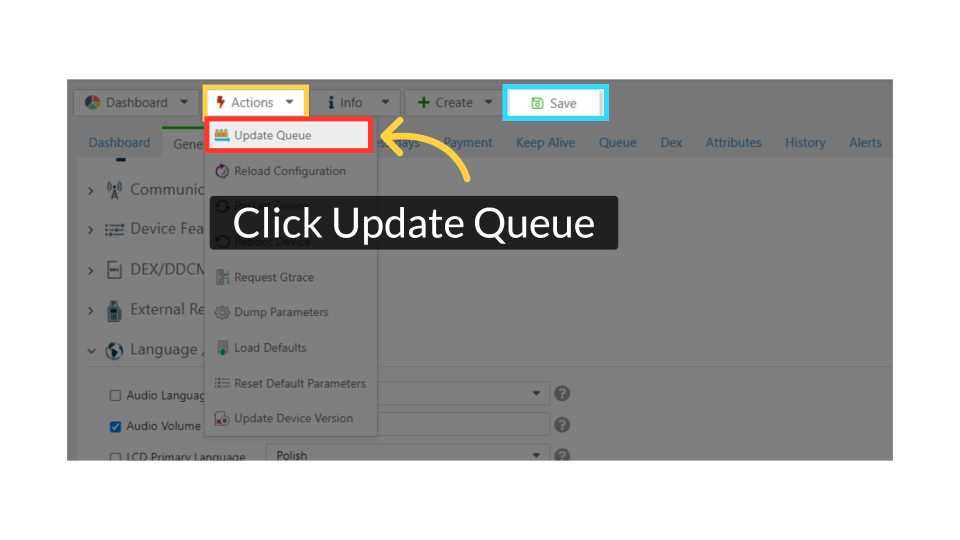
Click Actions and Update Queue
Image Attached
Then, scroll to the Actions button and click 'Update Queue' as highlighted in RED on the visual. Next, click the Save button to save your changes, as highlighted in BLUE on the visual.
15
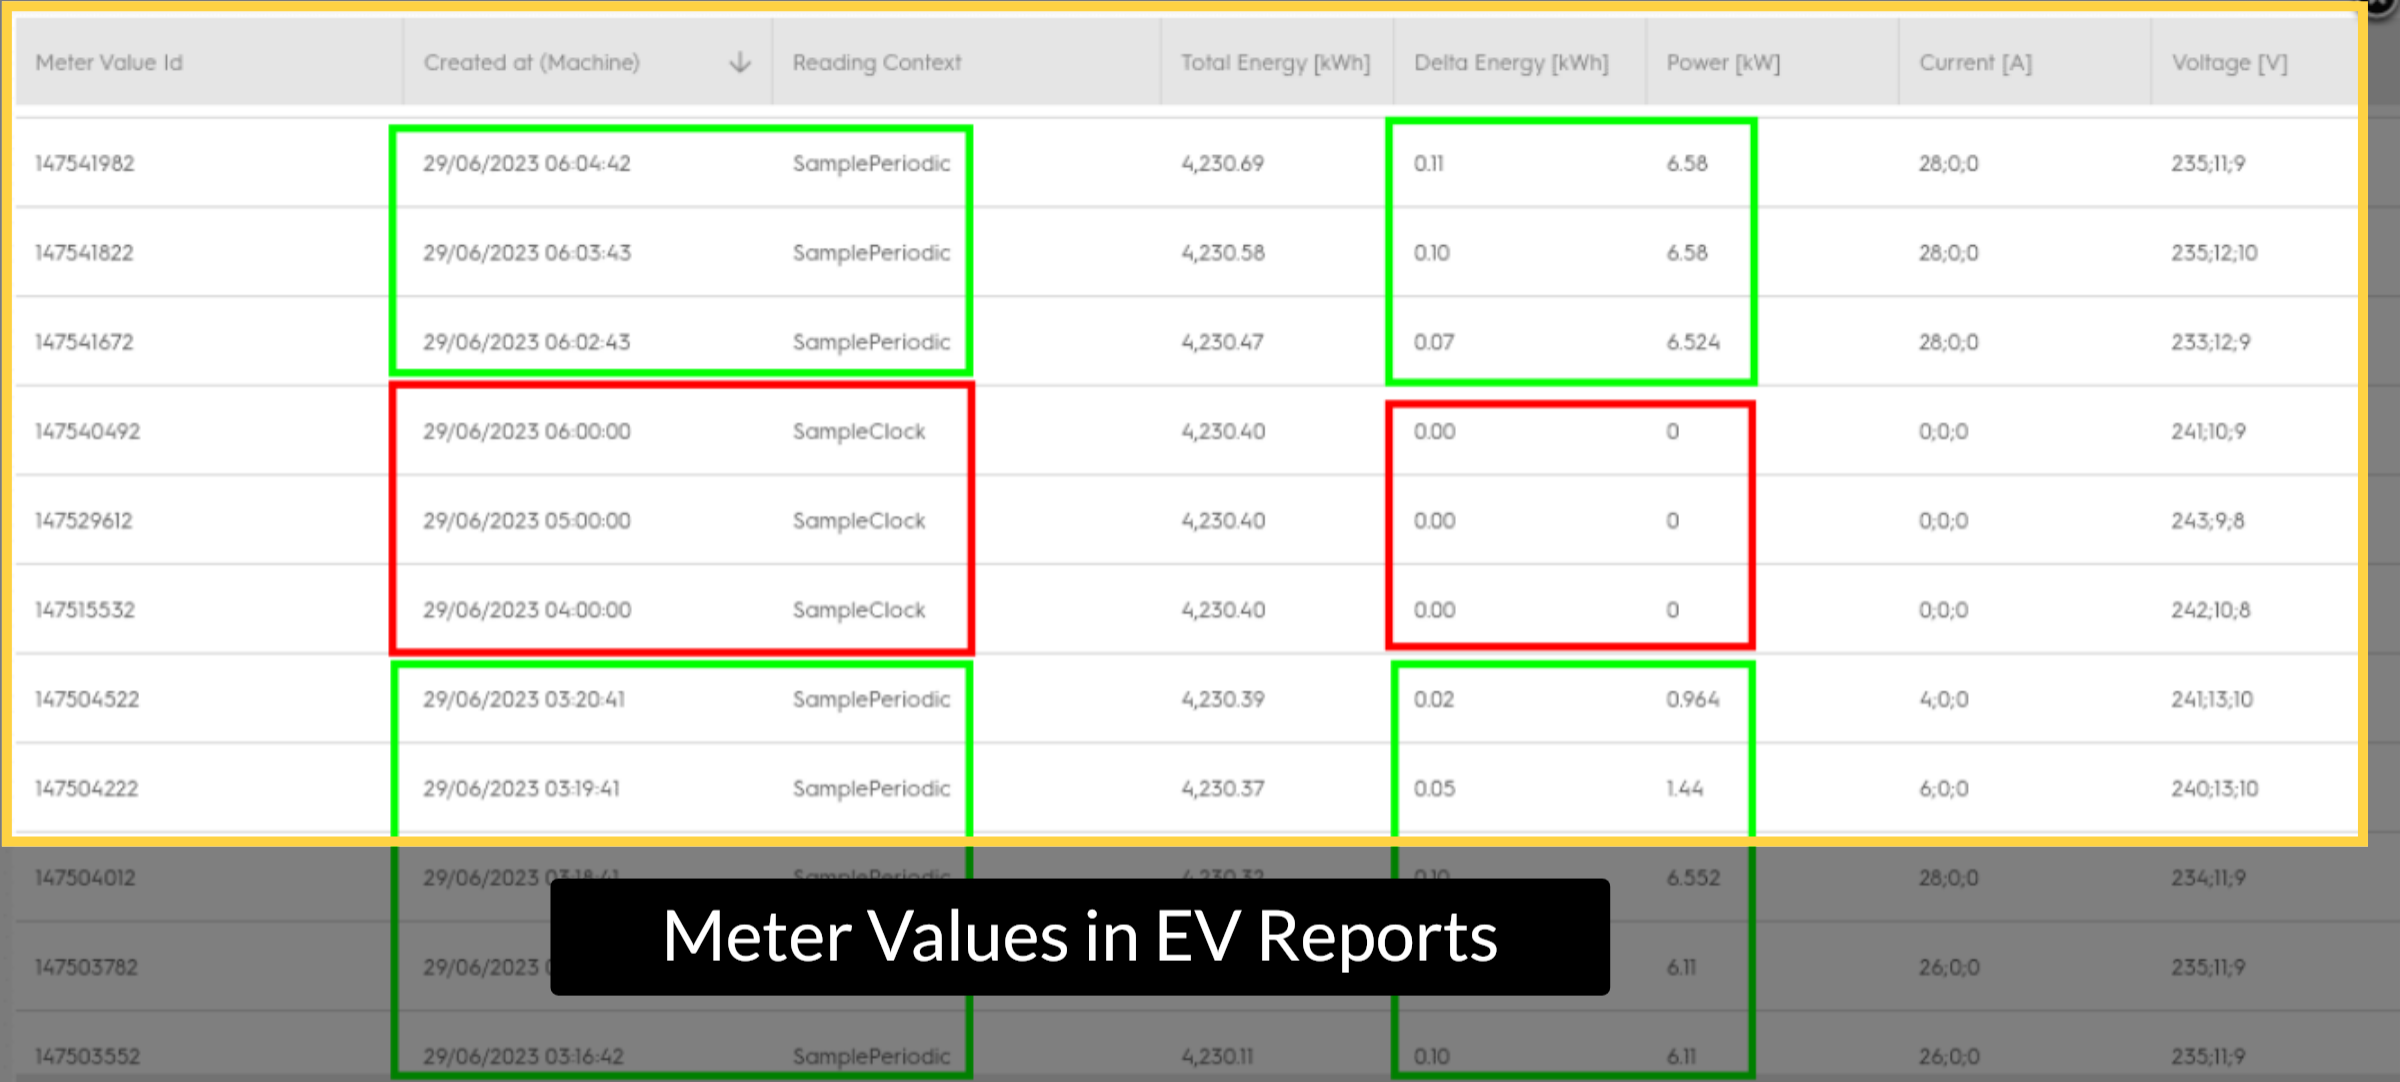
Meter Values in EV Reports
Image Attached
In this visual you can see meter values in the EV reports showing the difference between the two:
Green - EV Telemetry
Red - Clock Align
Green - EV Telemetry
Red - Clock Align
Thank you!
Did you find this article helpful?