How to Change a Device Language and Audio Display | Operations
How to change the audio and display language on your device in Nayax Core making your machine accessible for all regions.
1
Video Guide
2
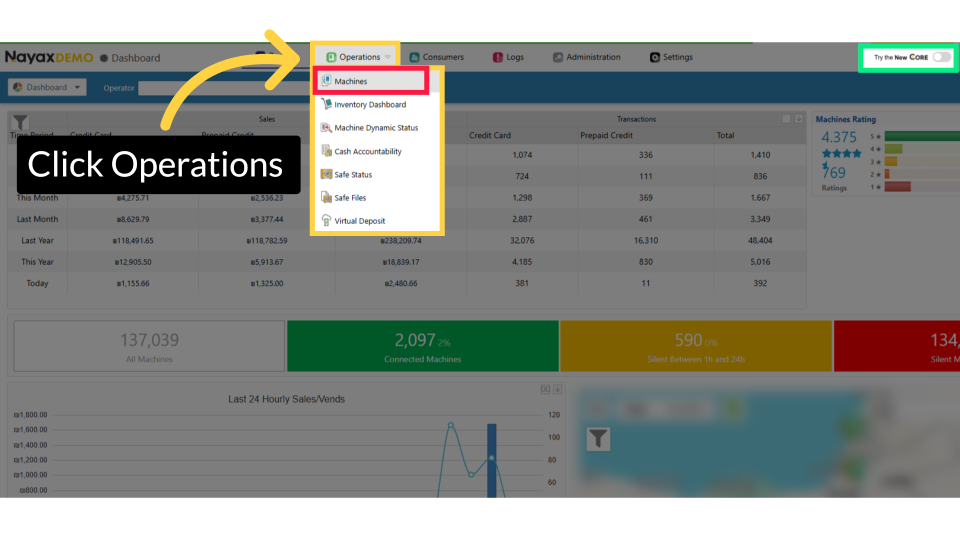
Click Operations
Image AttachedFrom the dashboard of your Nayax Classic Core platform and select the Operations tab. Next, click on machines in the drop-down menu.
3
Click Machines
Image Attached
Click on the Machines tab from the dropdown menu.
4
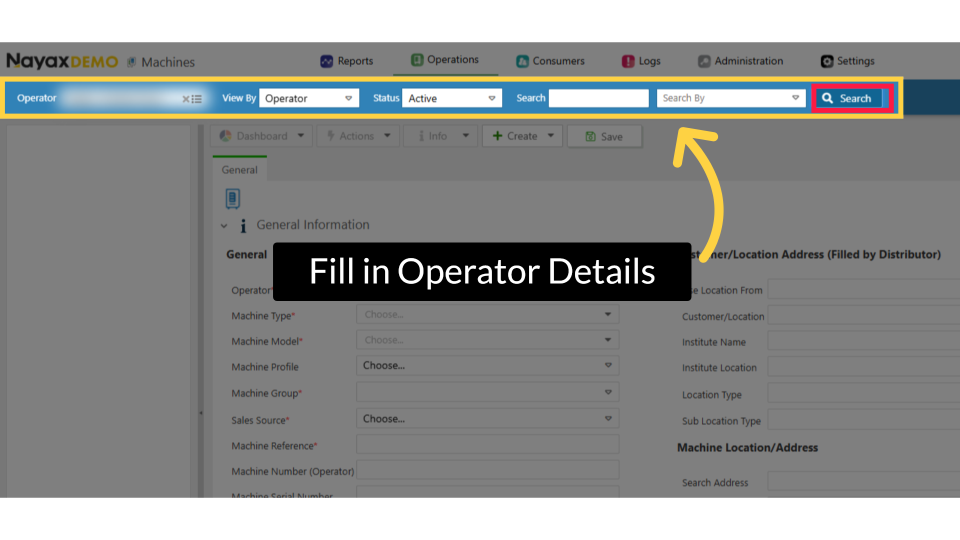
Fill in Operator Details
Image Attached
Enter your Operator's name along with any additional fields to find your machine, then click the search button highlighted in RED.
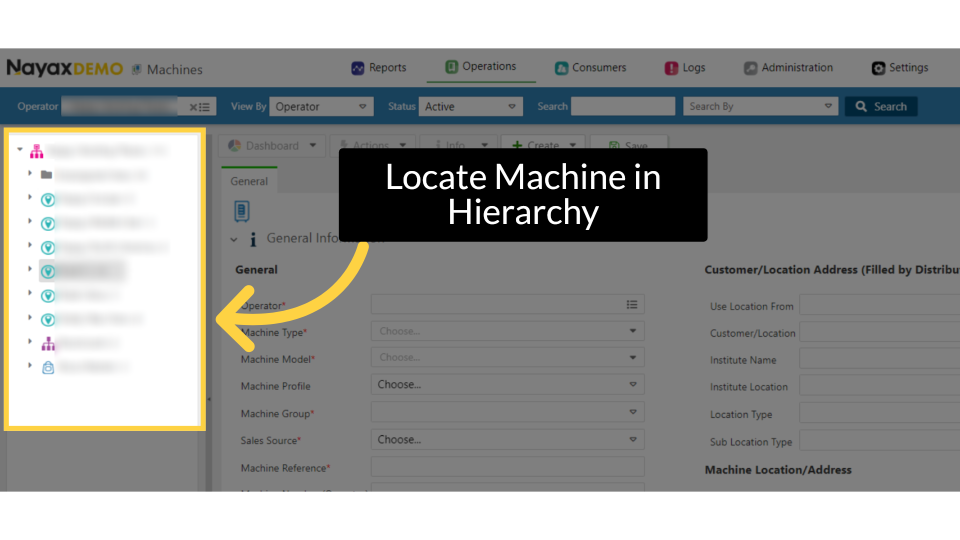
5
Locate Operator in Hierarchy
Image Attached
Locate and click on the machine from the hierarchy.
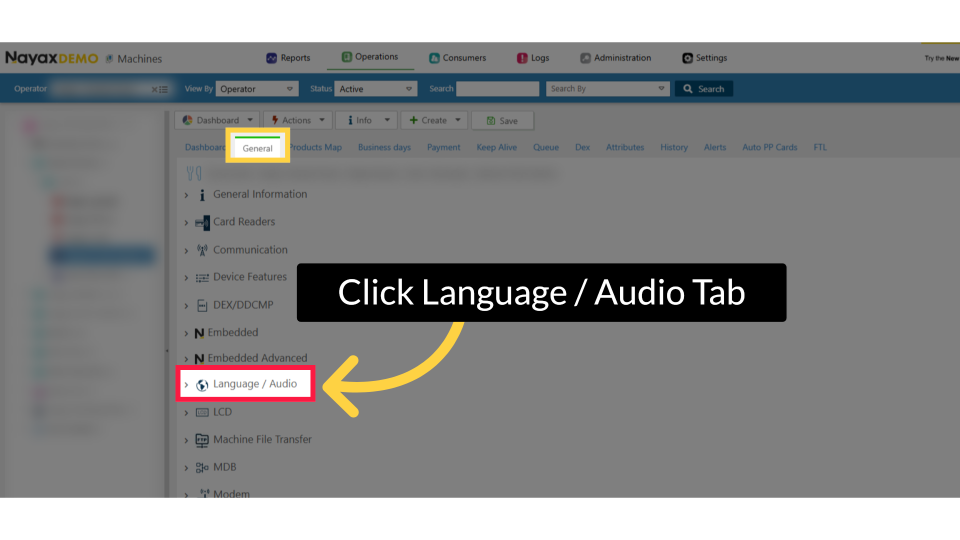
6
Click Language / Audio Tab
Image Attached
From the main general page, click on the Language / Audio to open.
7
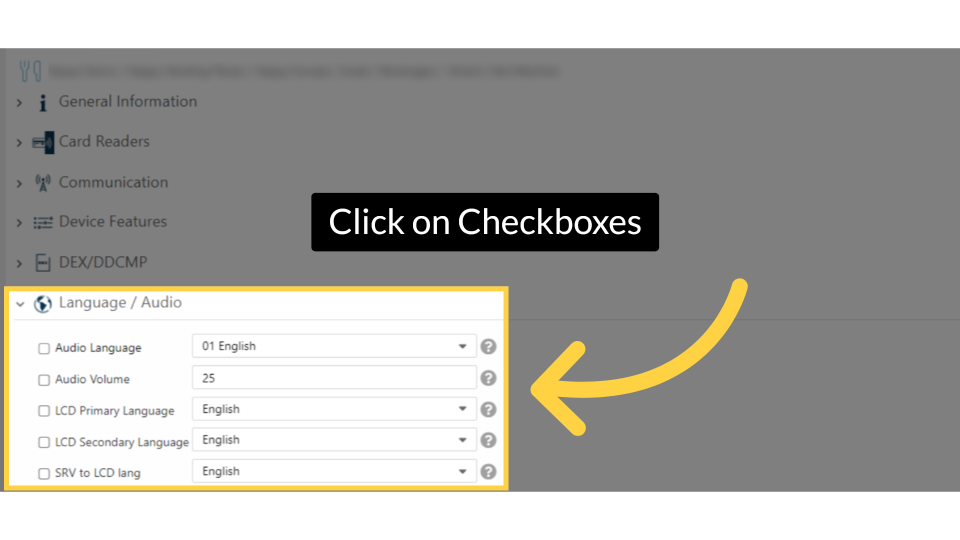
Click on Checkboxes
Image Attached
Enable the parameters you want by clicking on their checkboxes.
Enable the parameters you want by clicking on their checkboxes. If parameters aren't displayed, define them in the attributes section. Click here to Learn How to Add Attributes to a Machine
8
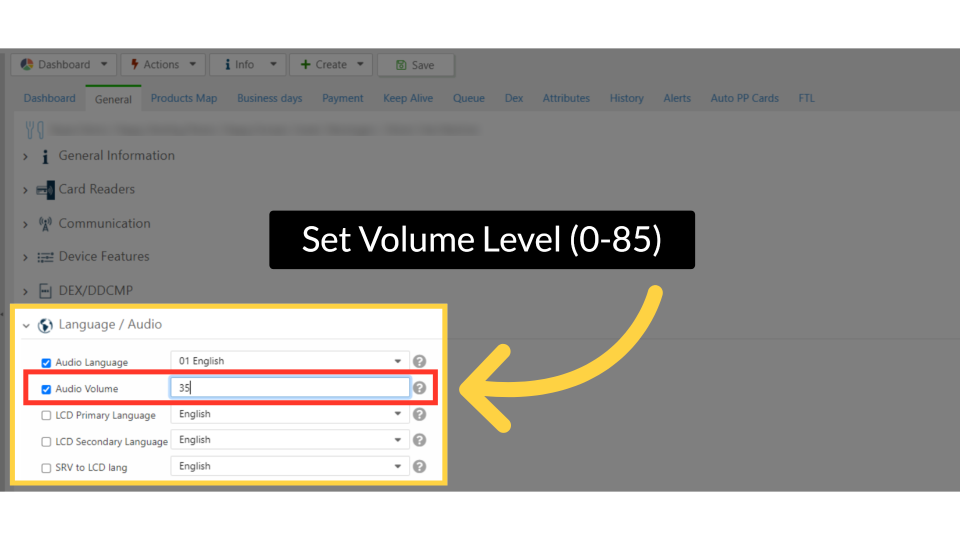
Set Volume Level (0-85)
Image Attached
Audio volume: sets the device's volume. Type a number in this attribute between 0 (mutes the device) and 85 (sets the volume to the highest).
9
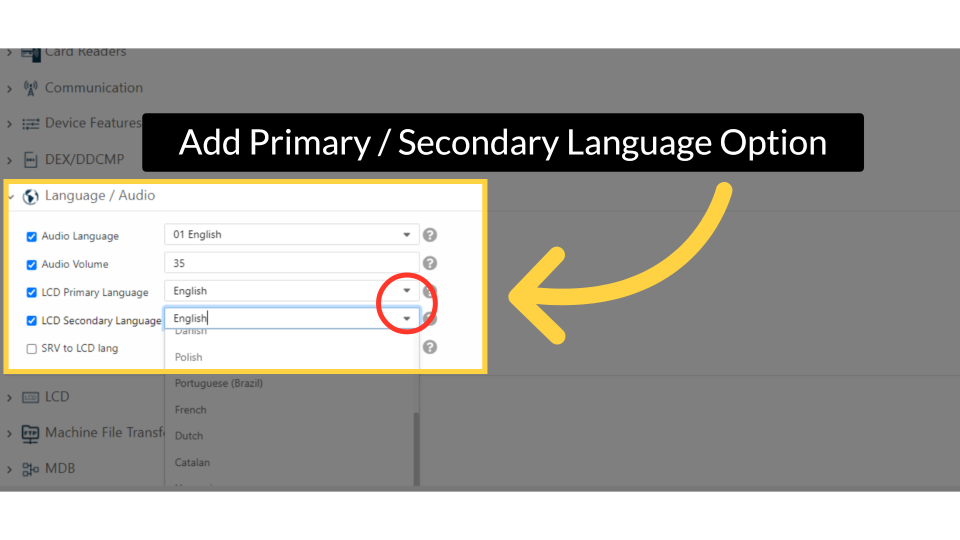
Add Primary / Secondary Language Option
Image Attached
You can also add the primary and secondary languages for your machine by clicking the arrow highlighted in RED, which opens a drop-down menu of supported Nayax languages.
10
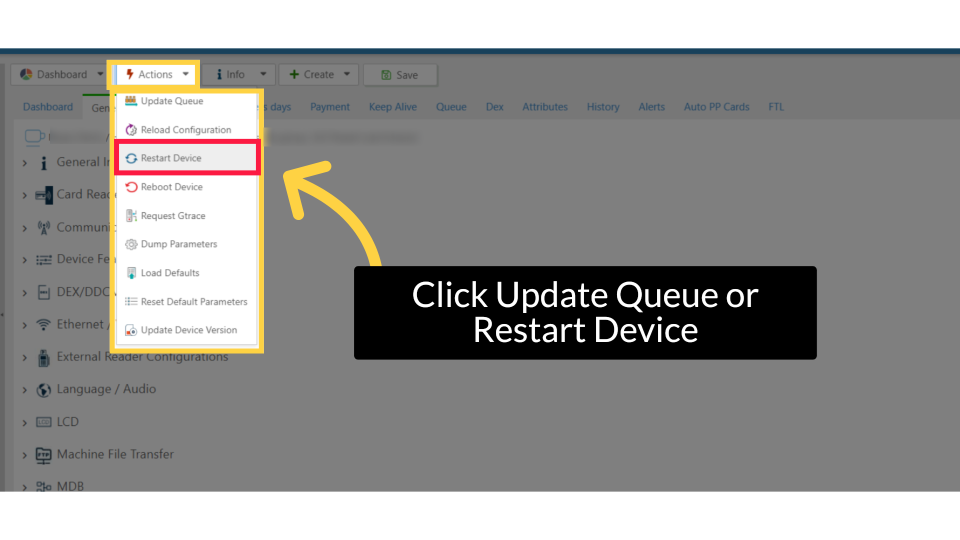
Click Update Queue or Restart Device
Image Attached
Open the Action drop‑down, then select Update Queue to queue the new attributes, or choose Restart Device for an immediate update.
11
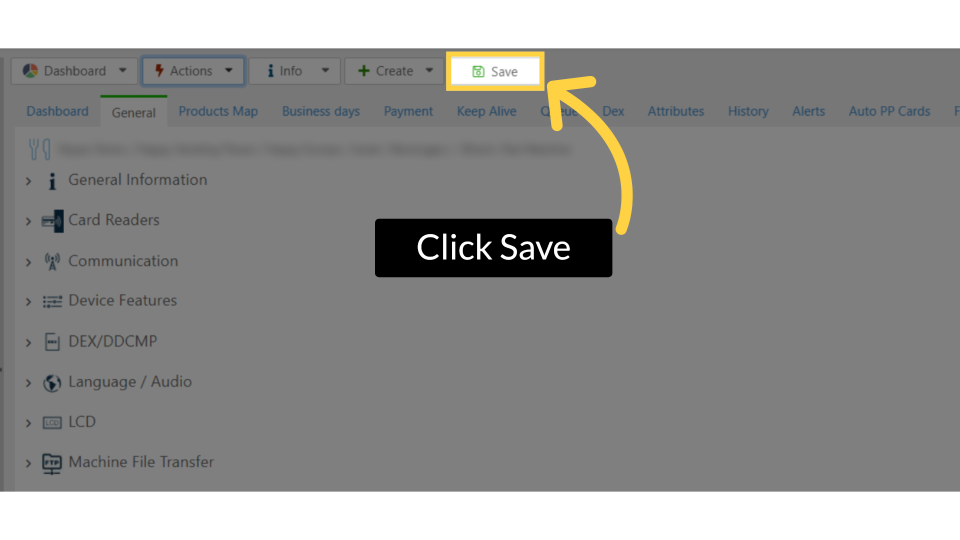
Click Save
Image AttachedDon't forget to save the changes when done.
Thank you!
Did you find this article helpful?