
How to Add a Logo to the Receipt | Administration
To add a logo to the printed receipt, follow these steps:
Video Guide
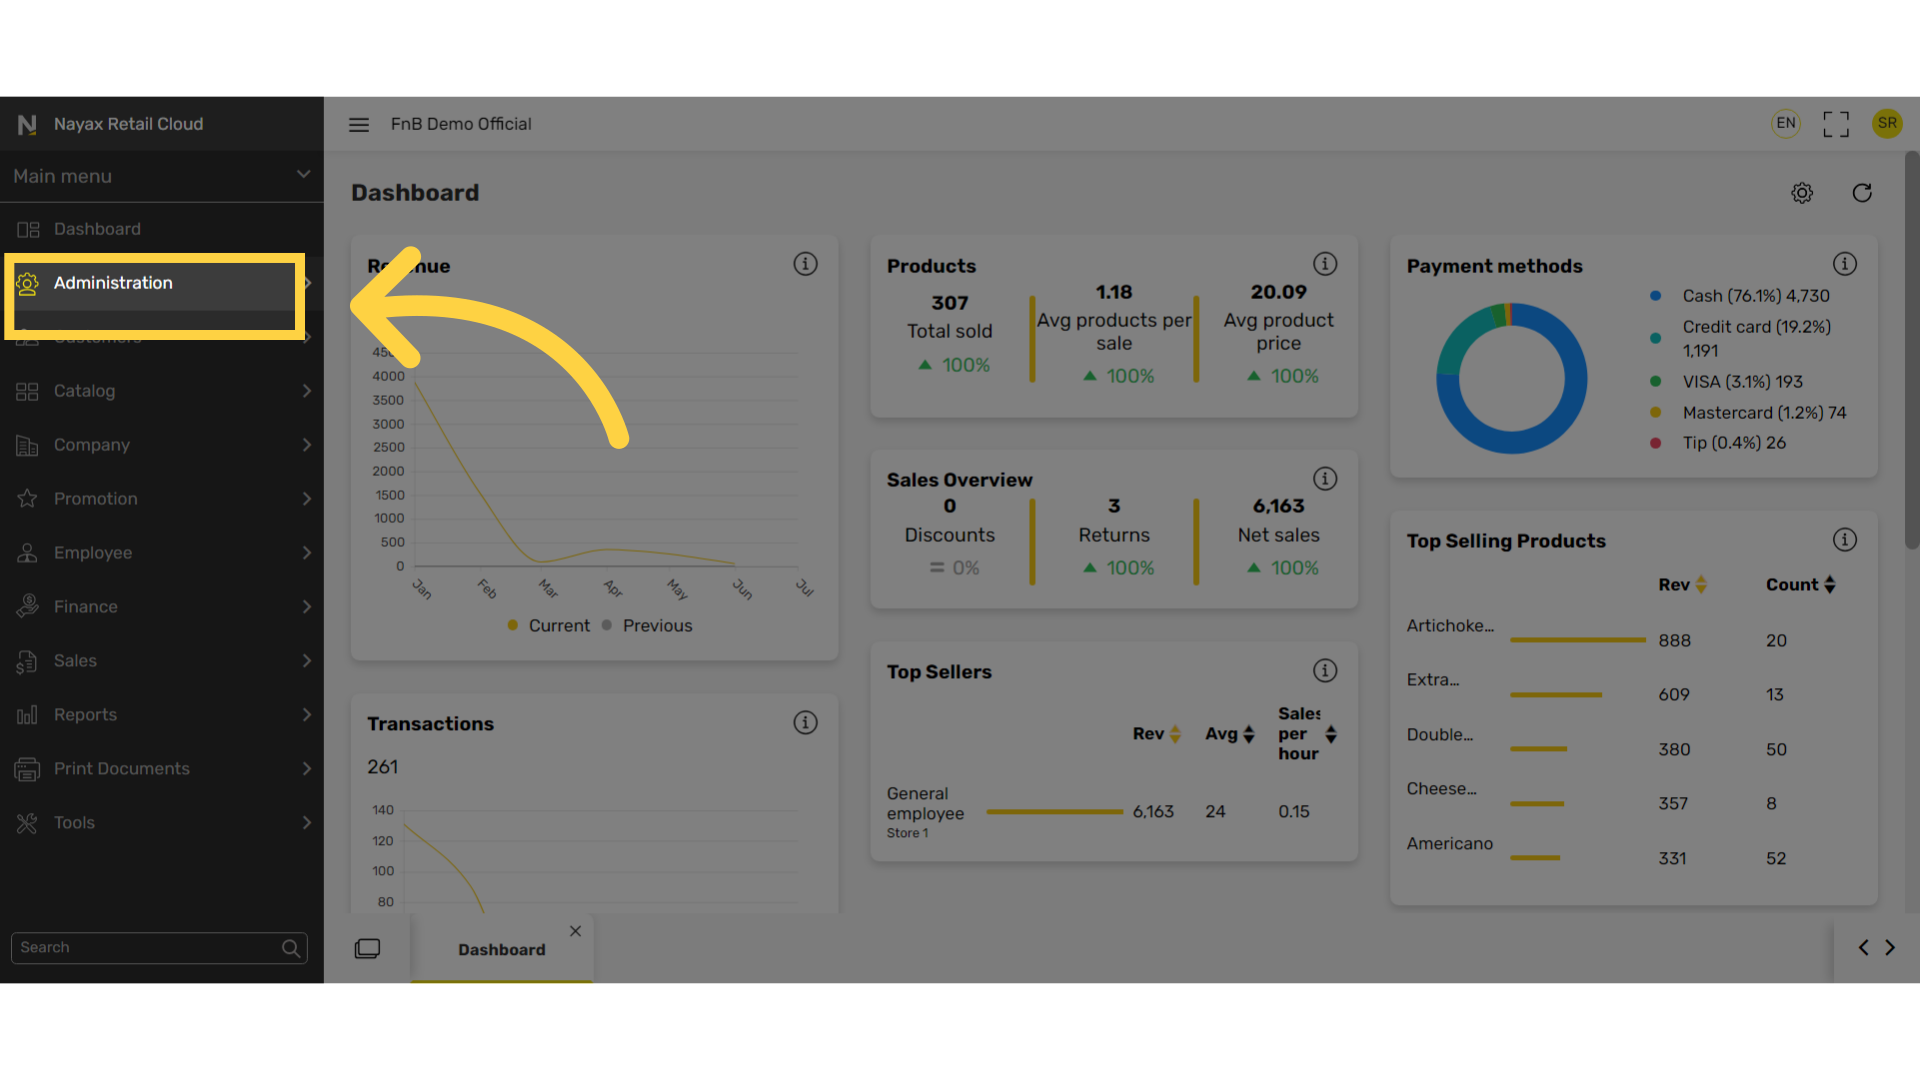
Click Administration Tab
Image AttachedOn the dashboard of your Retail Core management suite click the Administration tab.
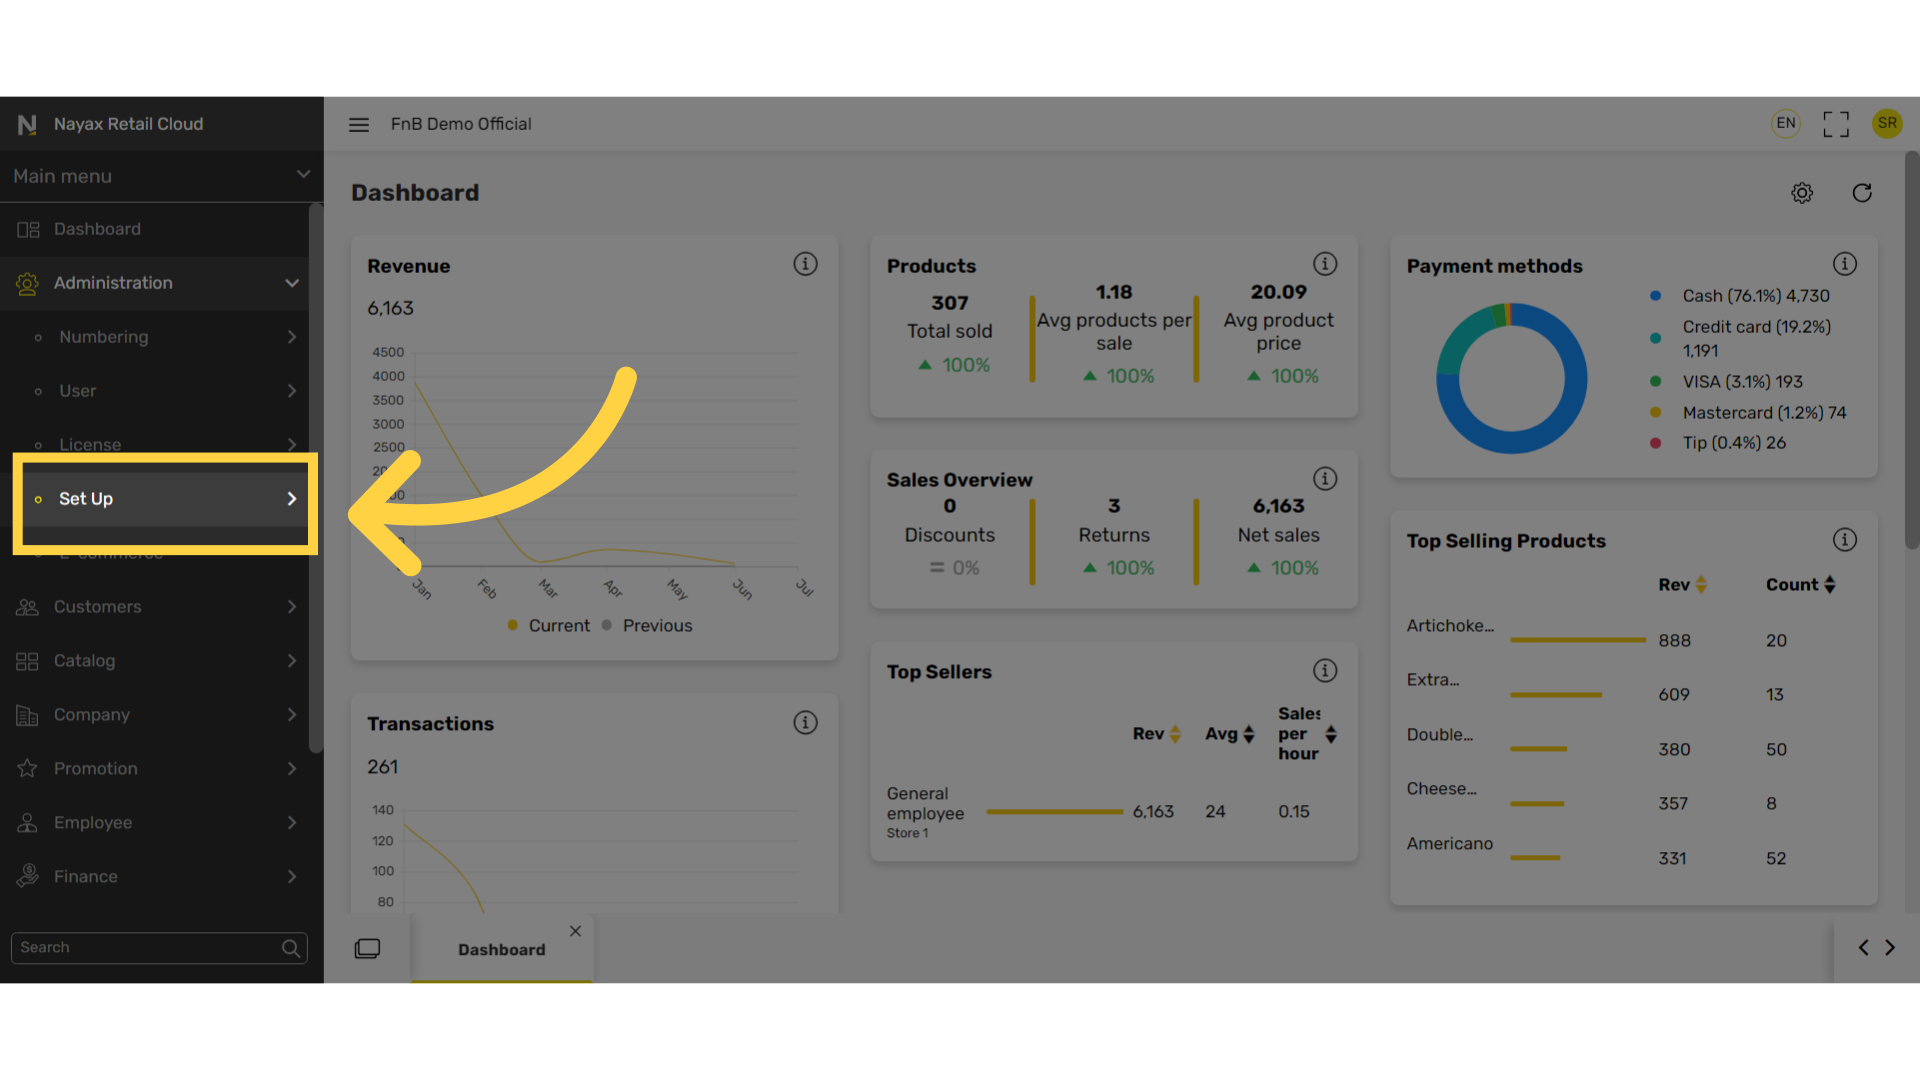
Click Setup
Image AttachedIn the sub-menu, click on Setup.
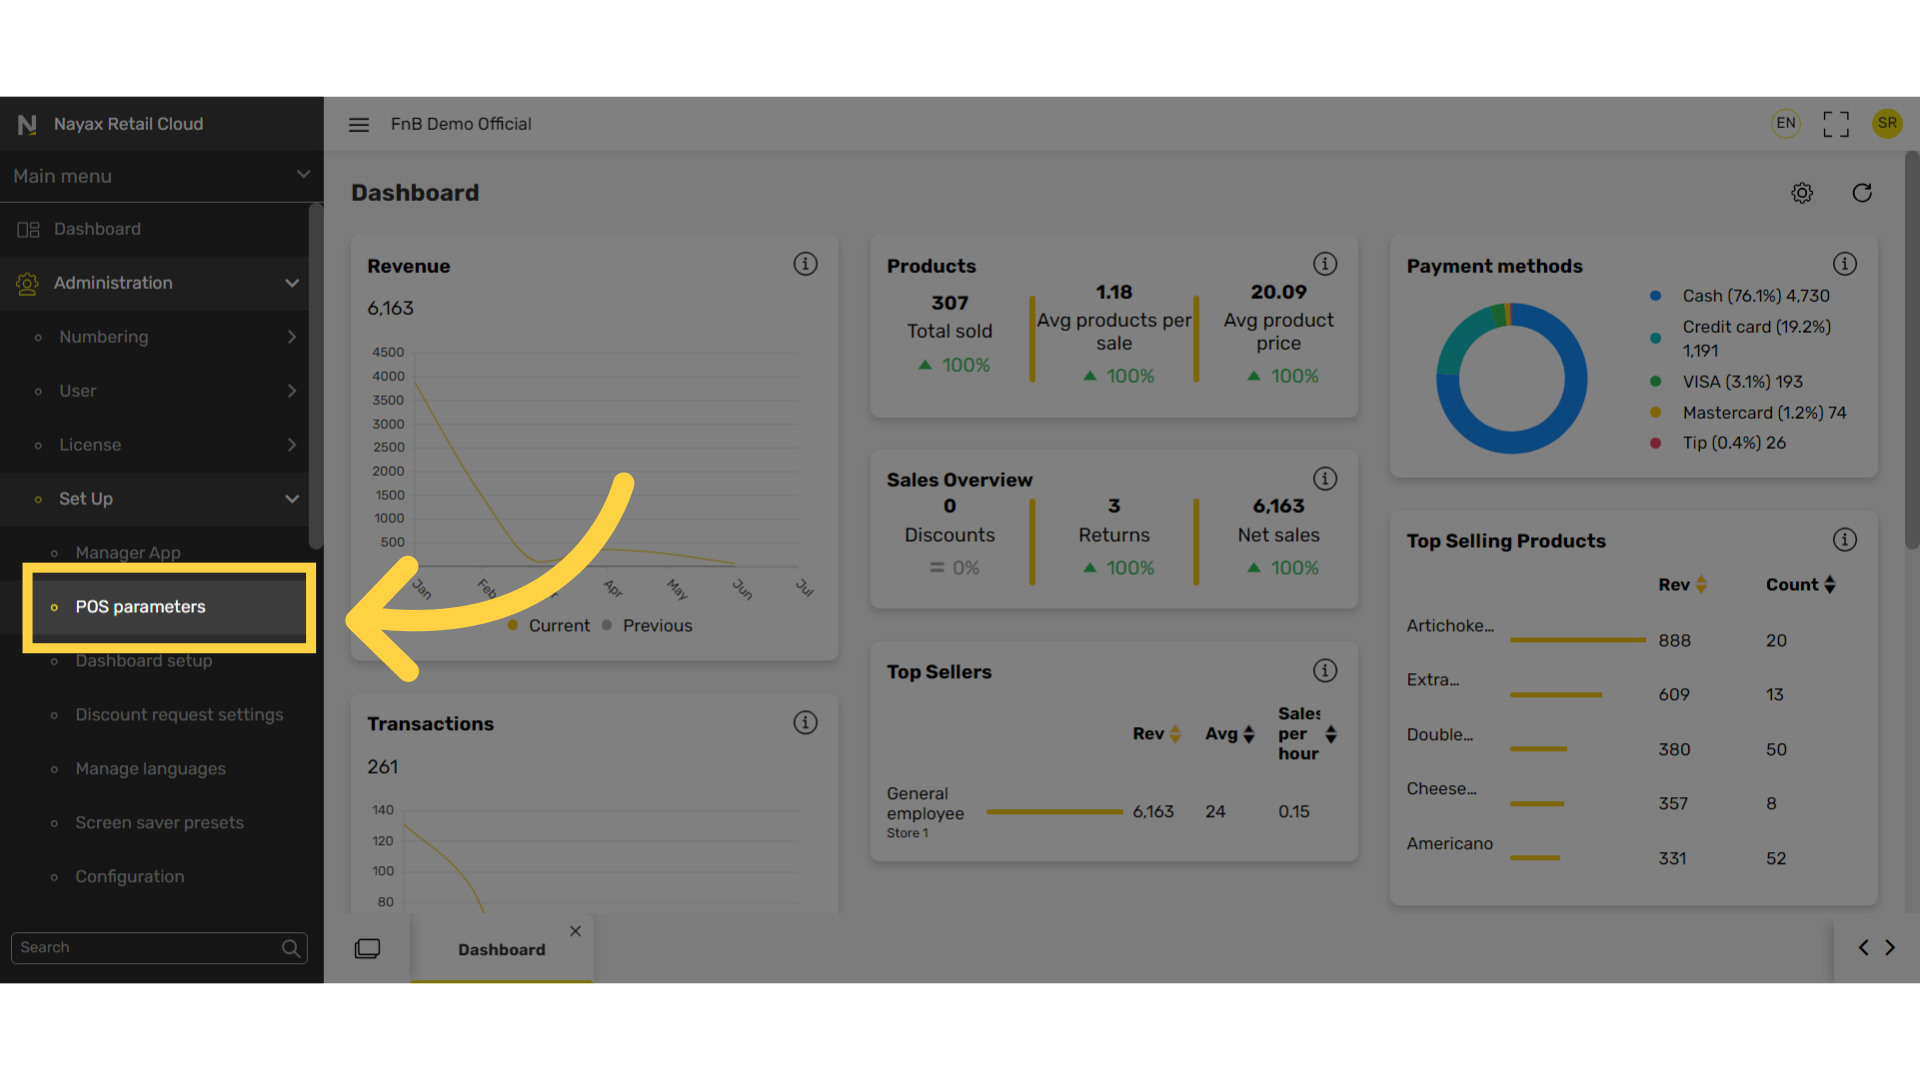
Click POS Parameters
Image AttachedIn the sub-menu, click on POS Parameters.
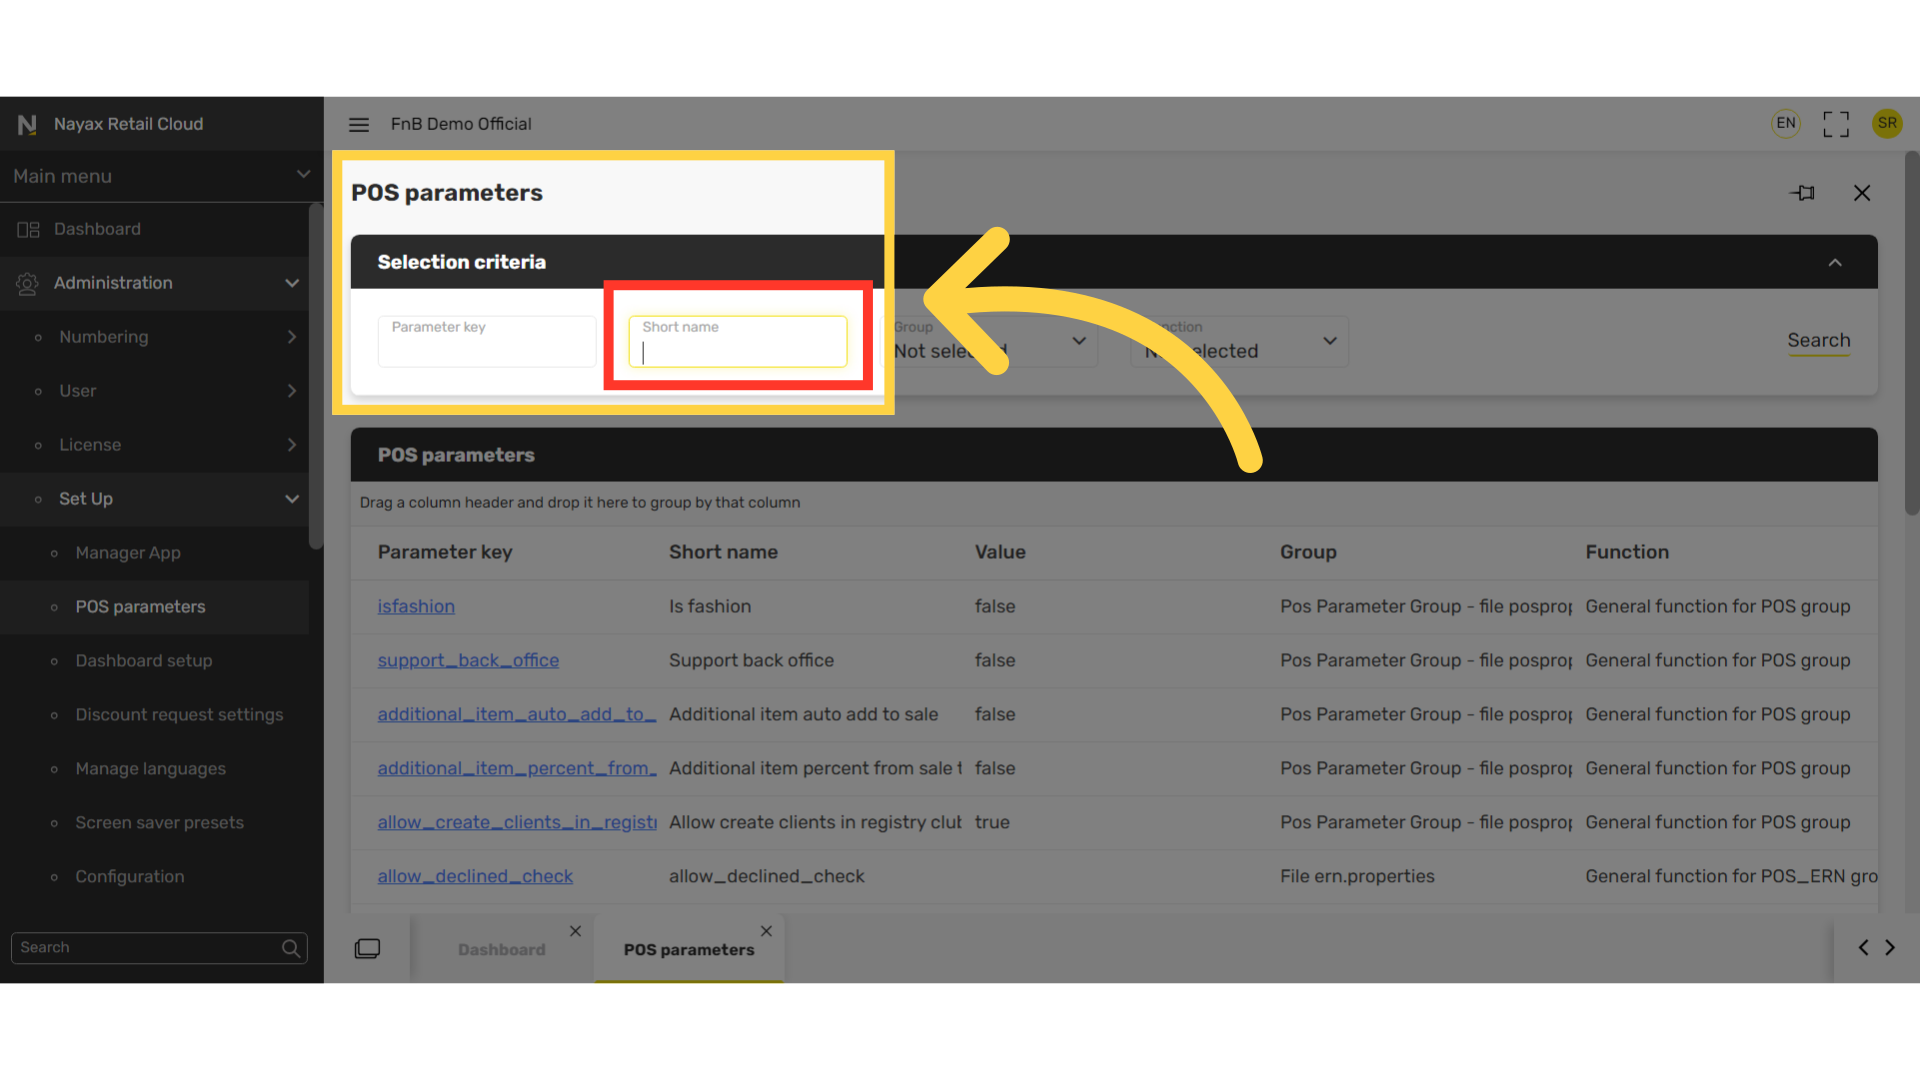
Search for "Business image URL"
Image Attached
Search in the Short name field Business image URL as highlighted in RED on the visual.
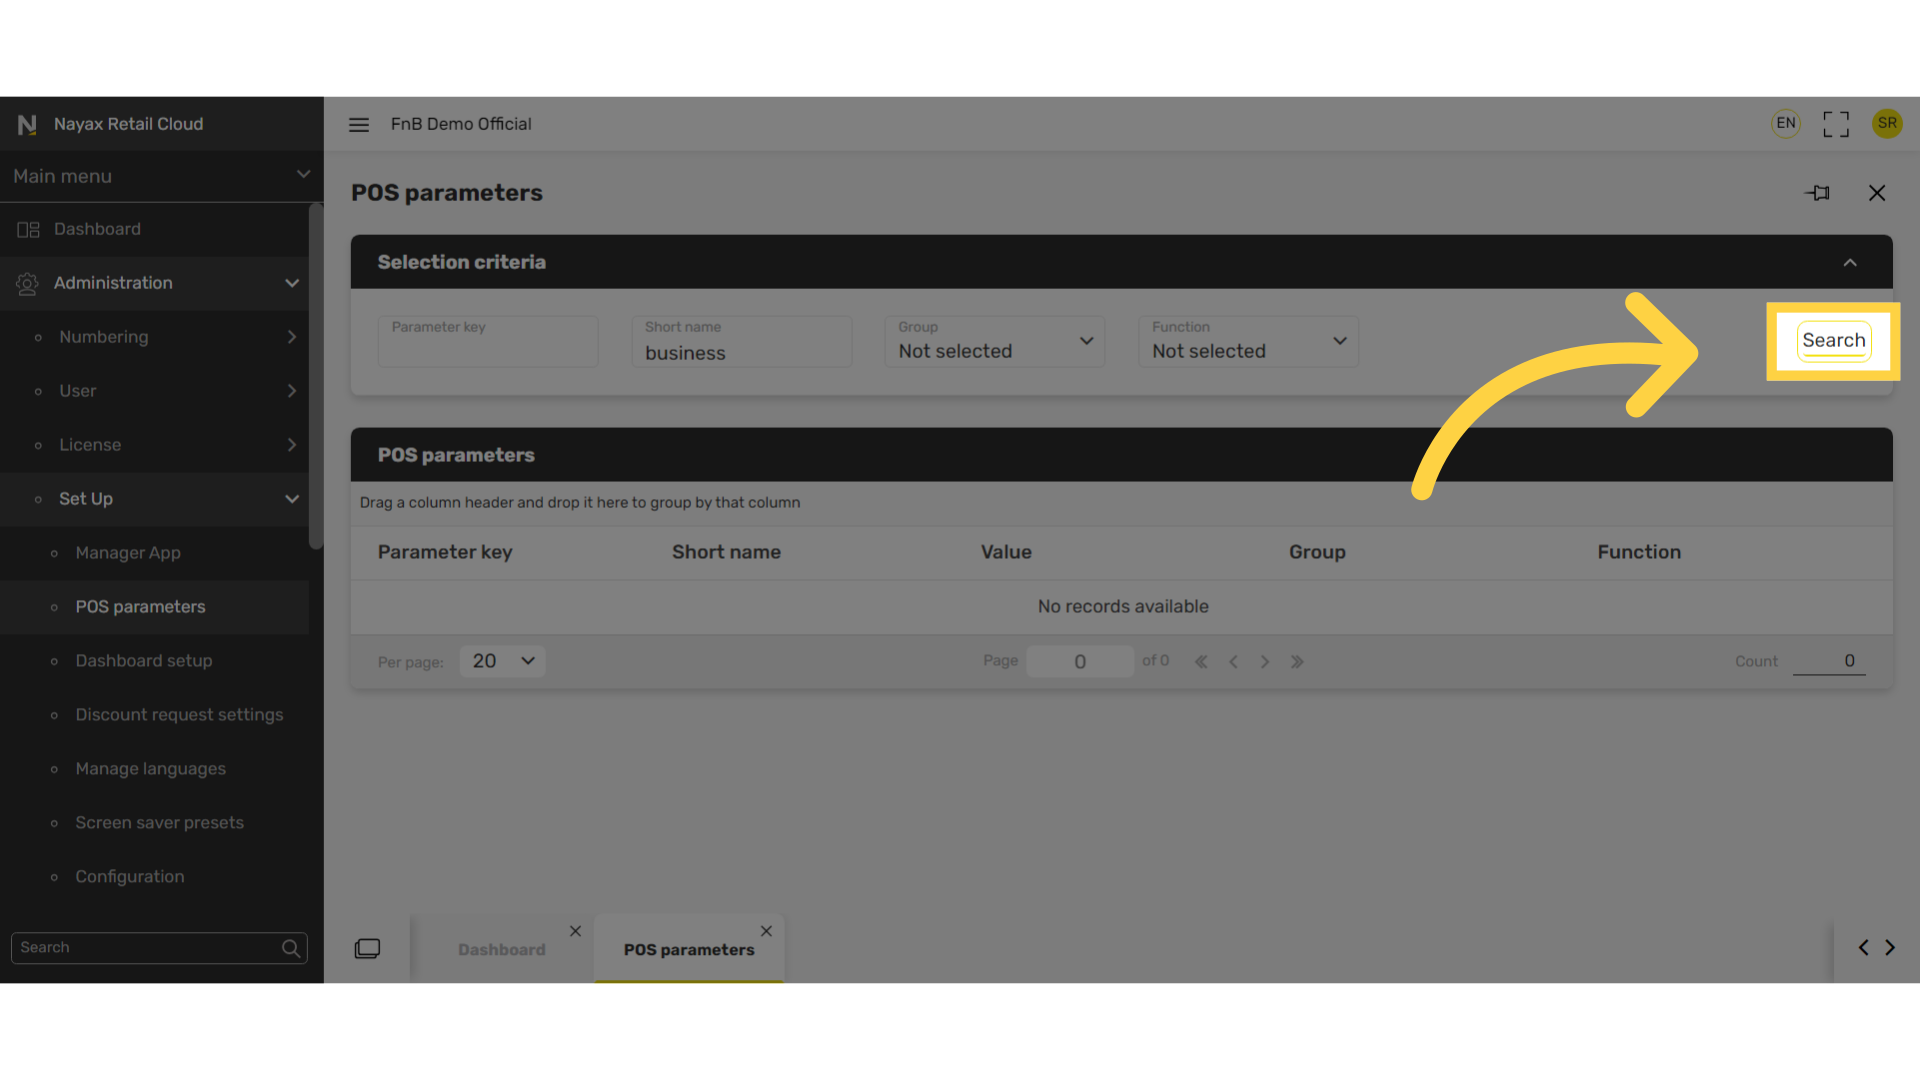
Click Search
Image AttachedClick search.
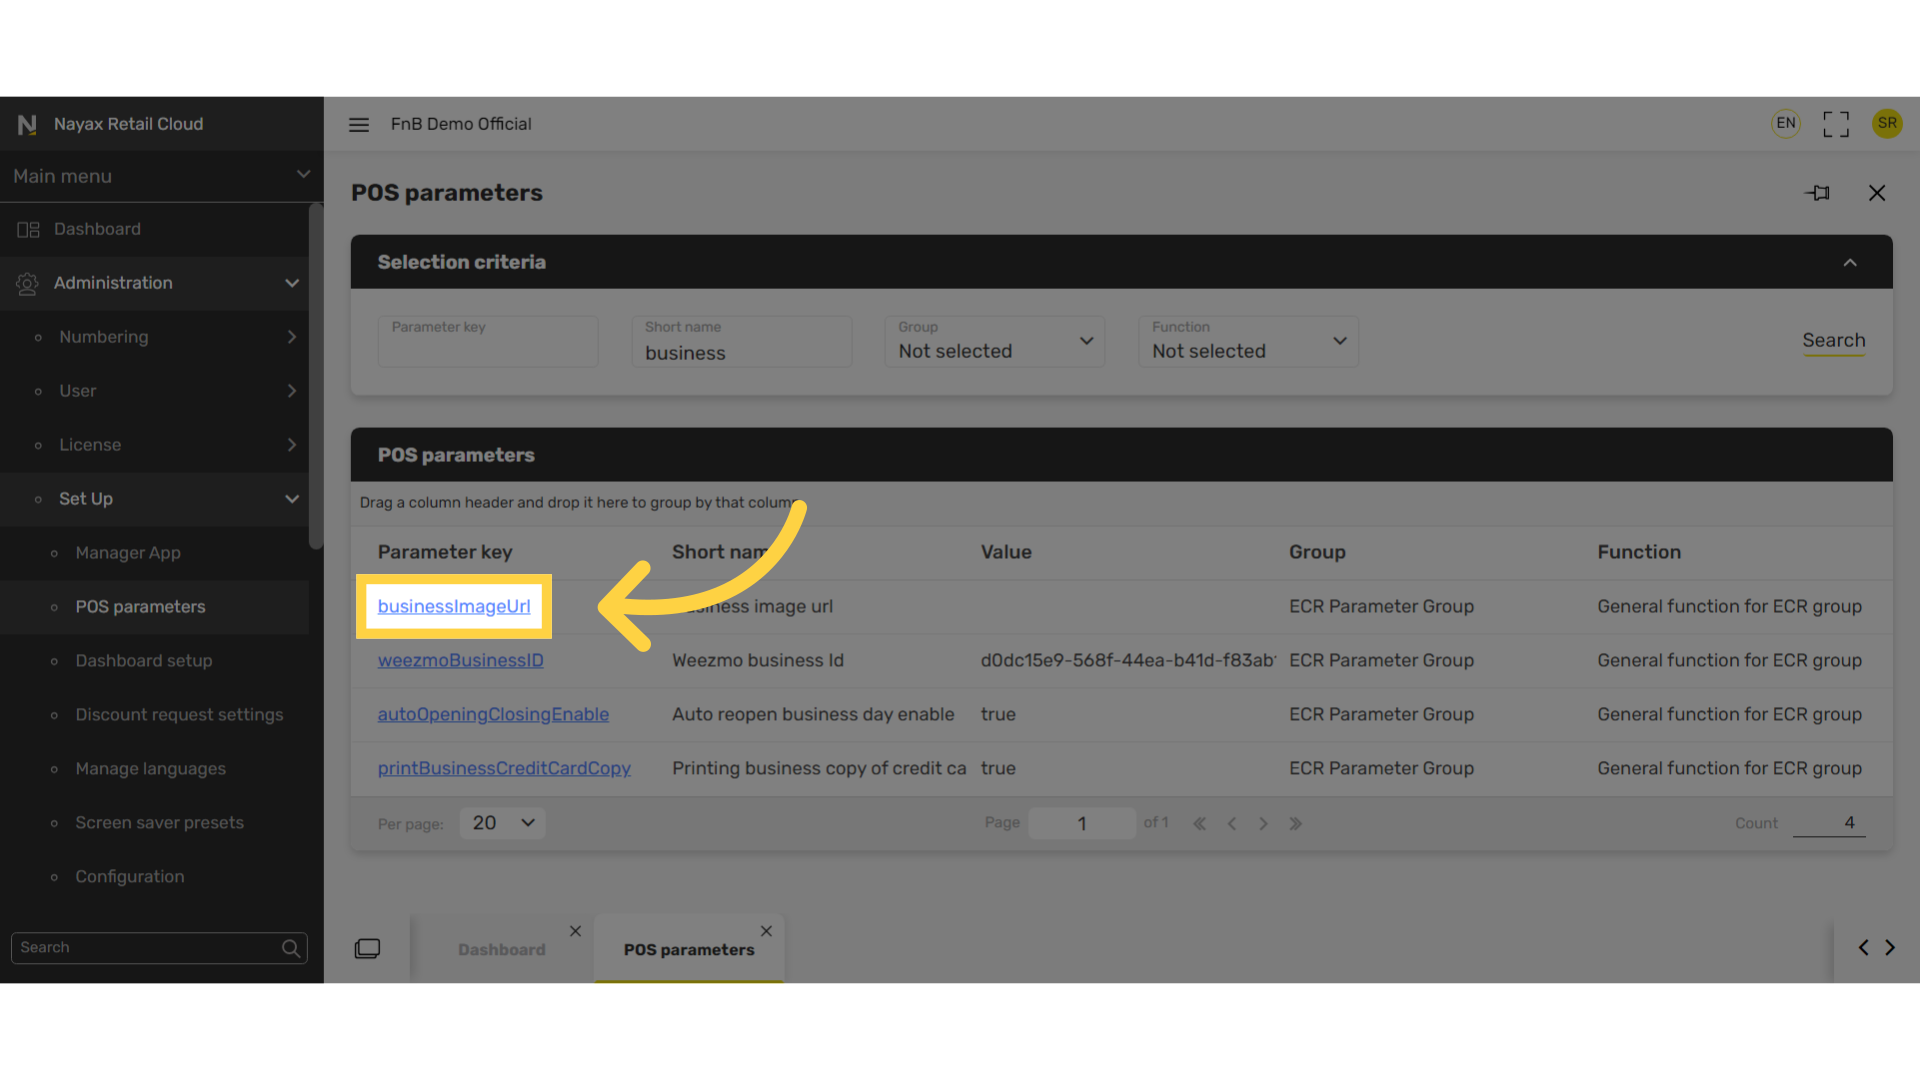
Click Business Image URL Link
Image AttachedClick highlighted business image URL link.
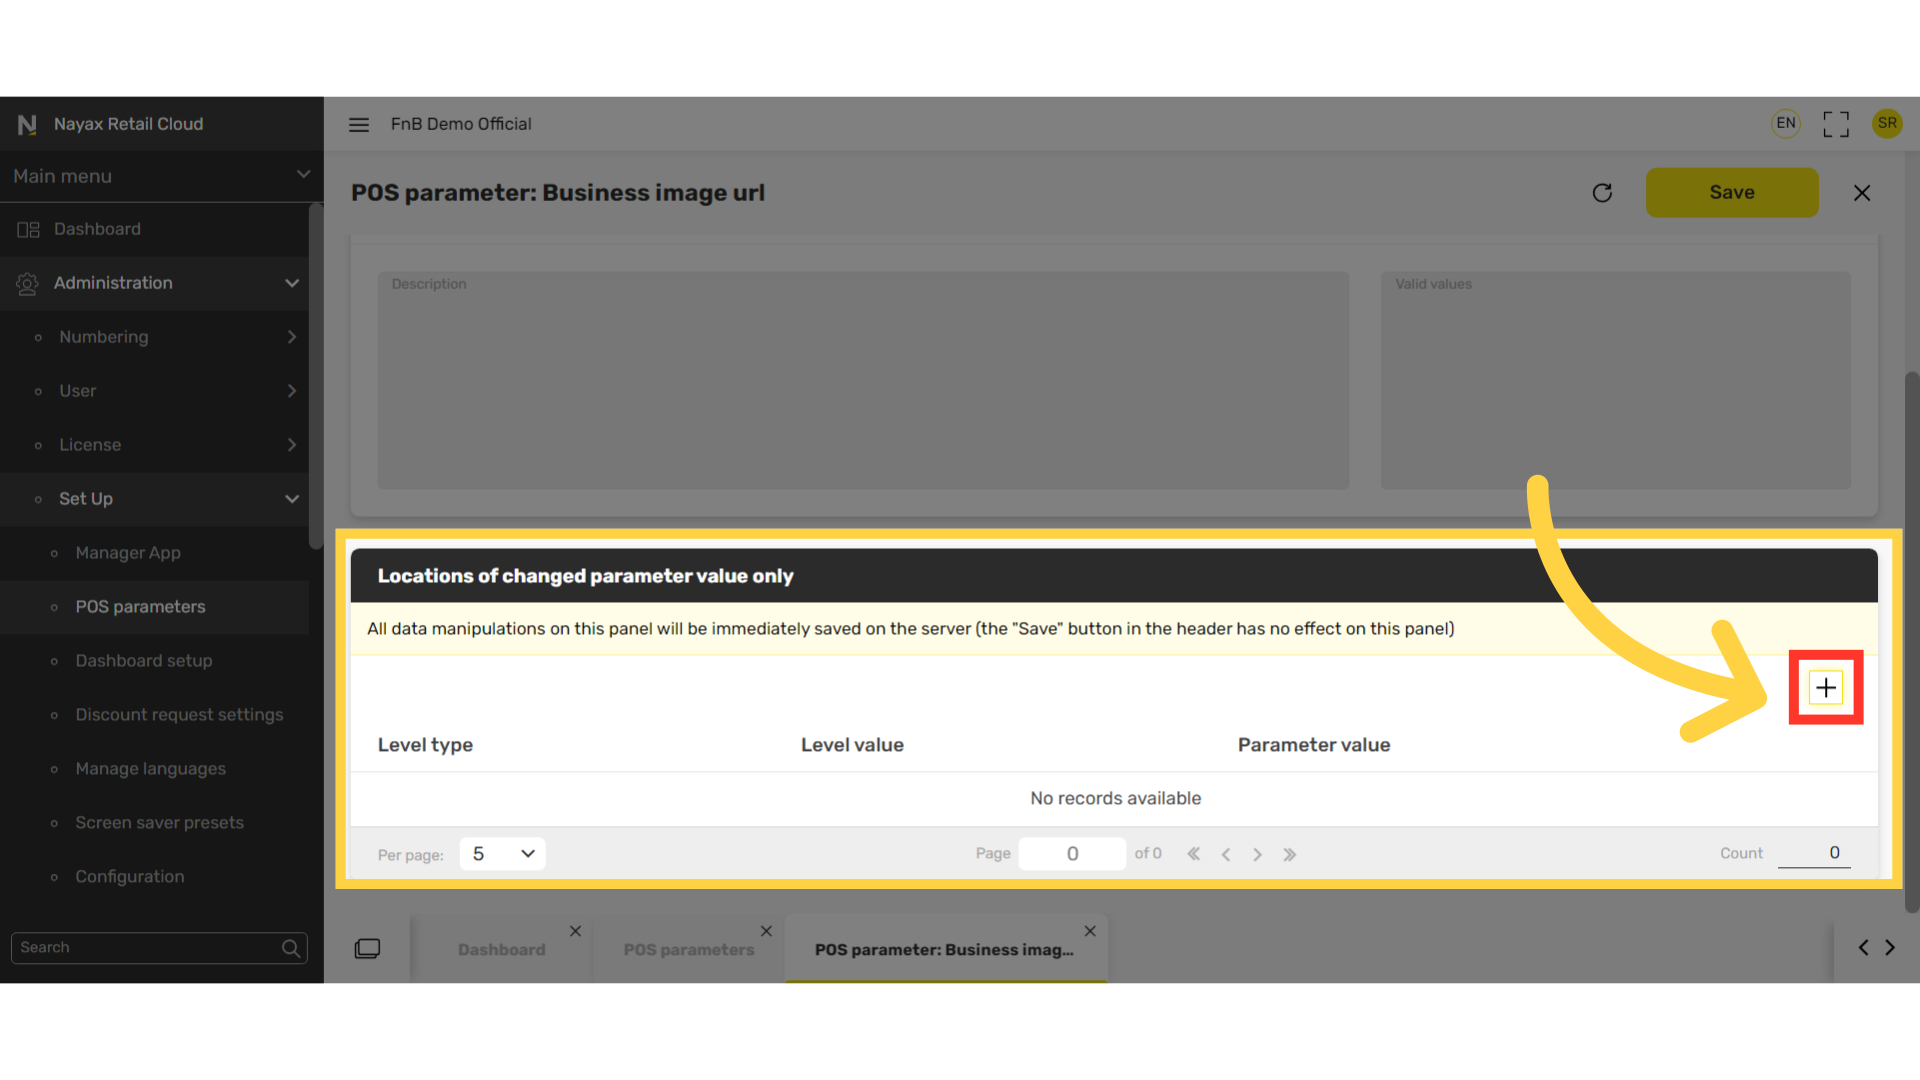
Click + Icon
Image Attached
Scroll down to the Locations of changed parameter value only tab and click plus icon to the right highlighted in RED on the visual.
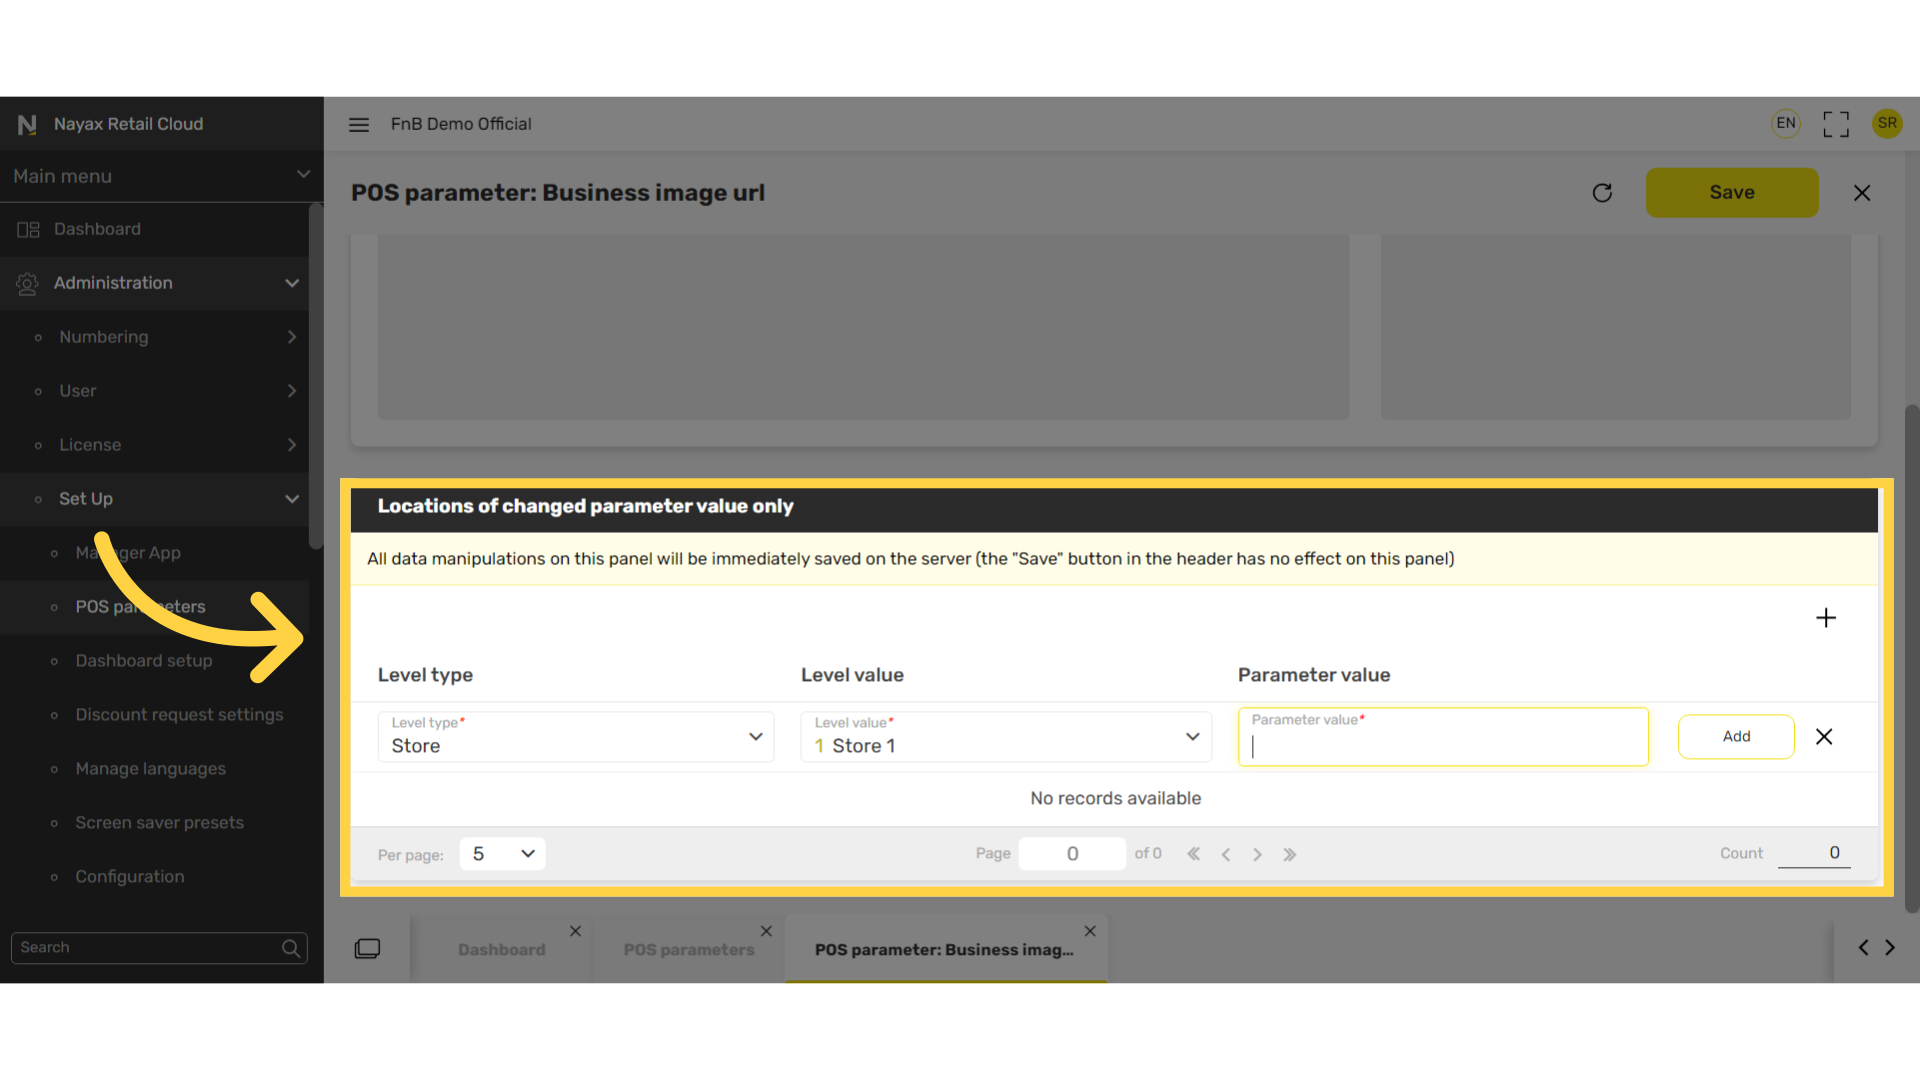
Fill in the following fields:
Image Attached|
Field |
Description |
|
Level Type |
Hierarchy of the company. Select where the parameter value needs to be associated with. |
|
Level Value |
The store you need to associate the parameter value with. |
|
Parameter Value |
The URL link for the image you want to upload. |
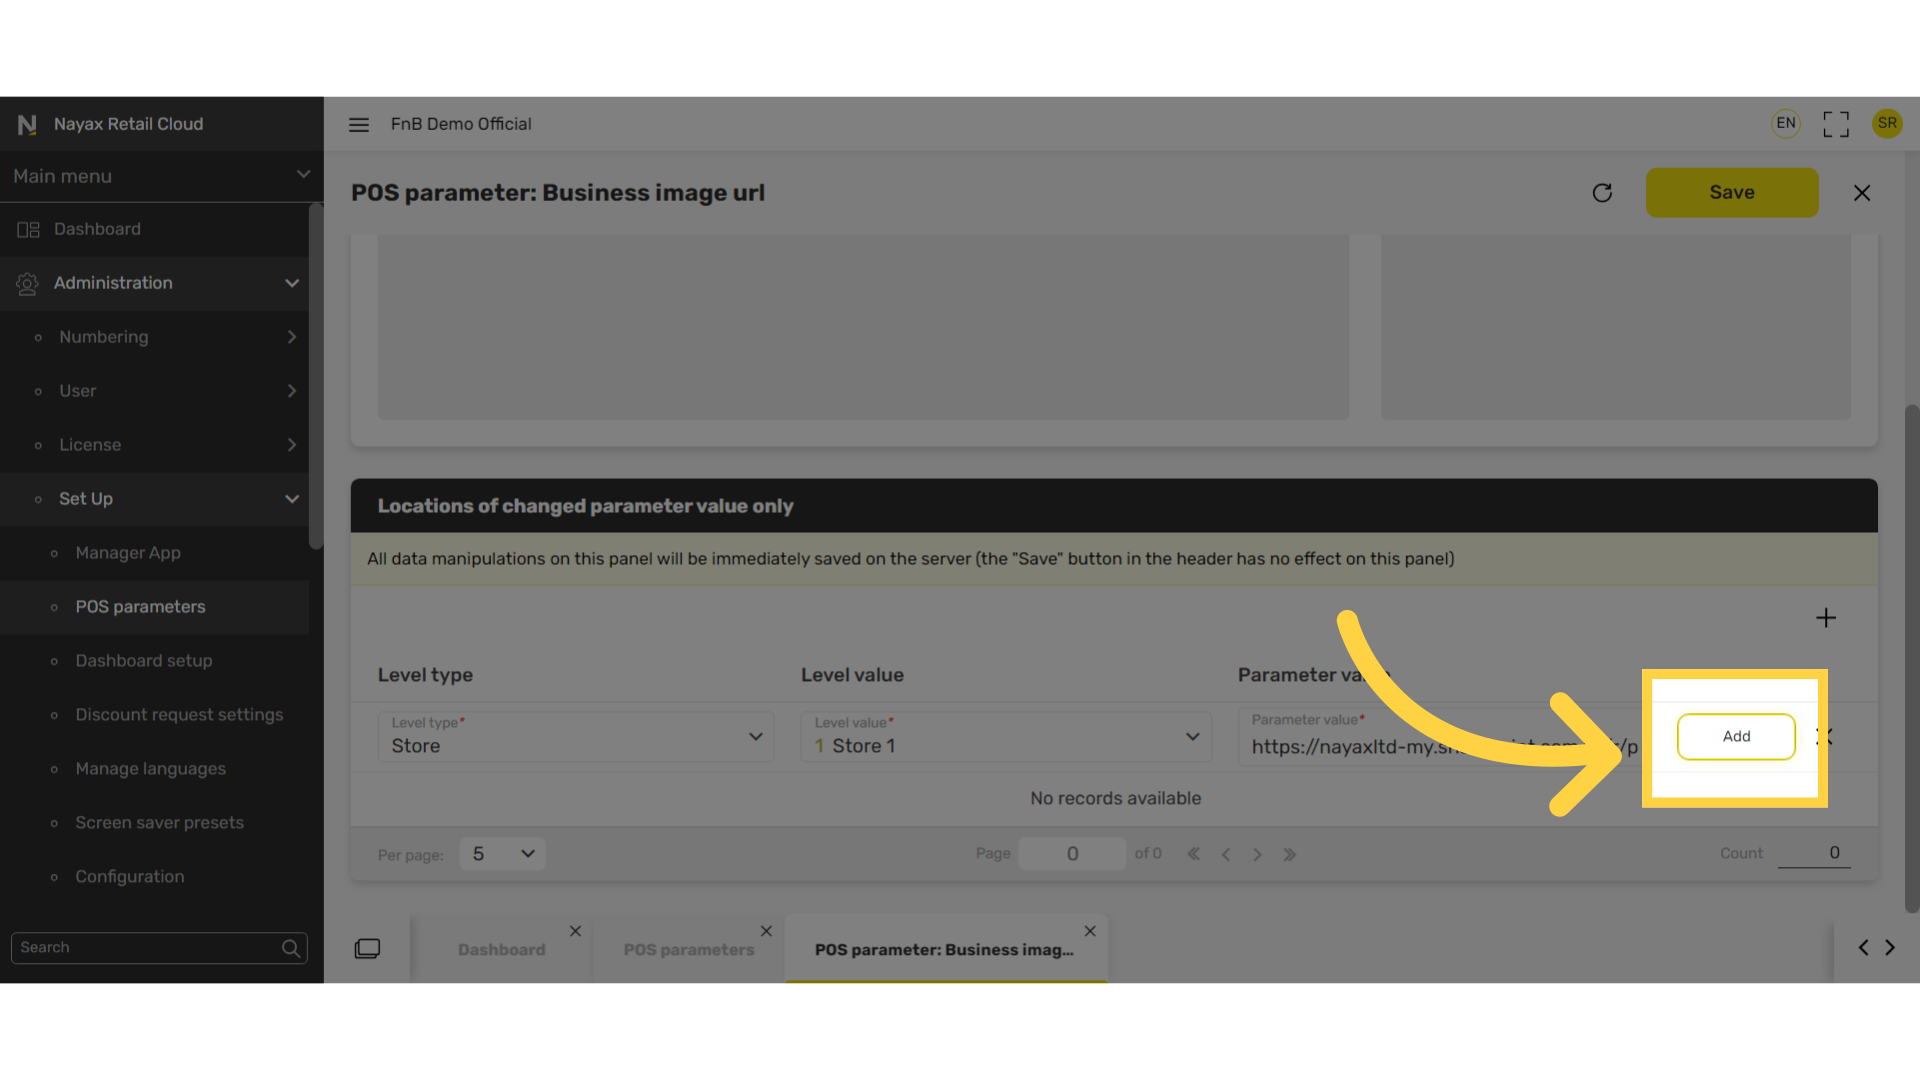
Click Add
Image AttachedClick Add.
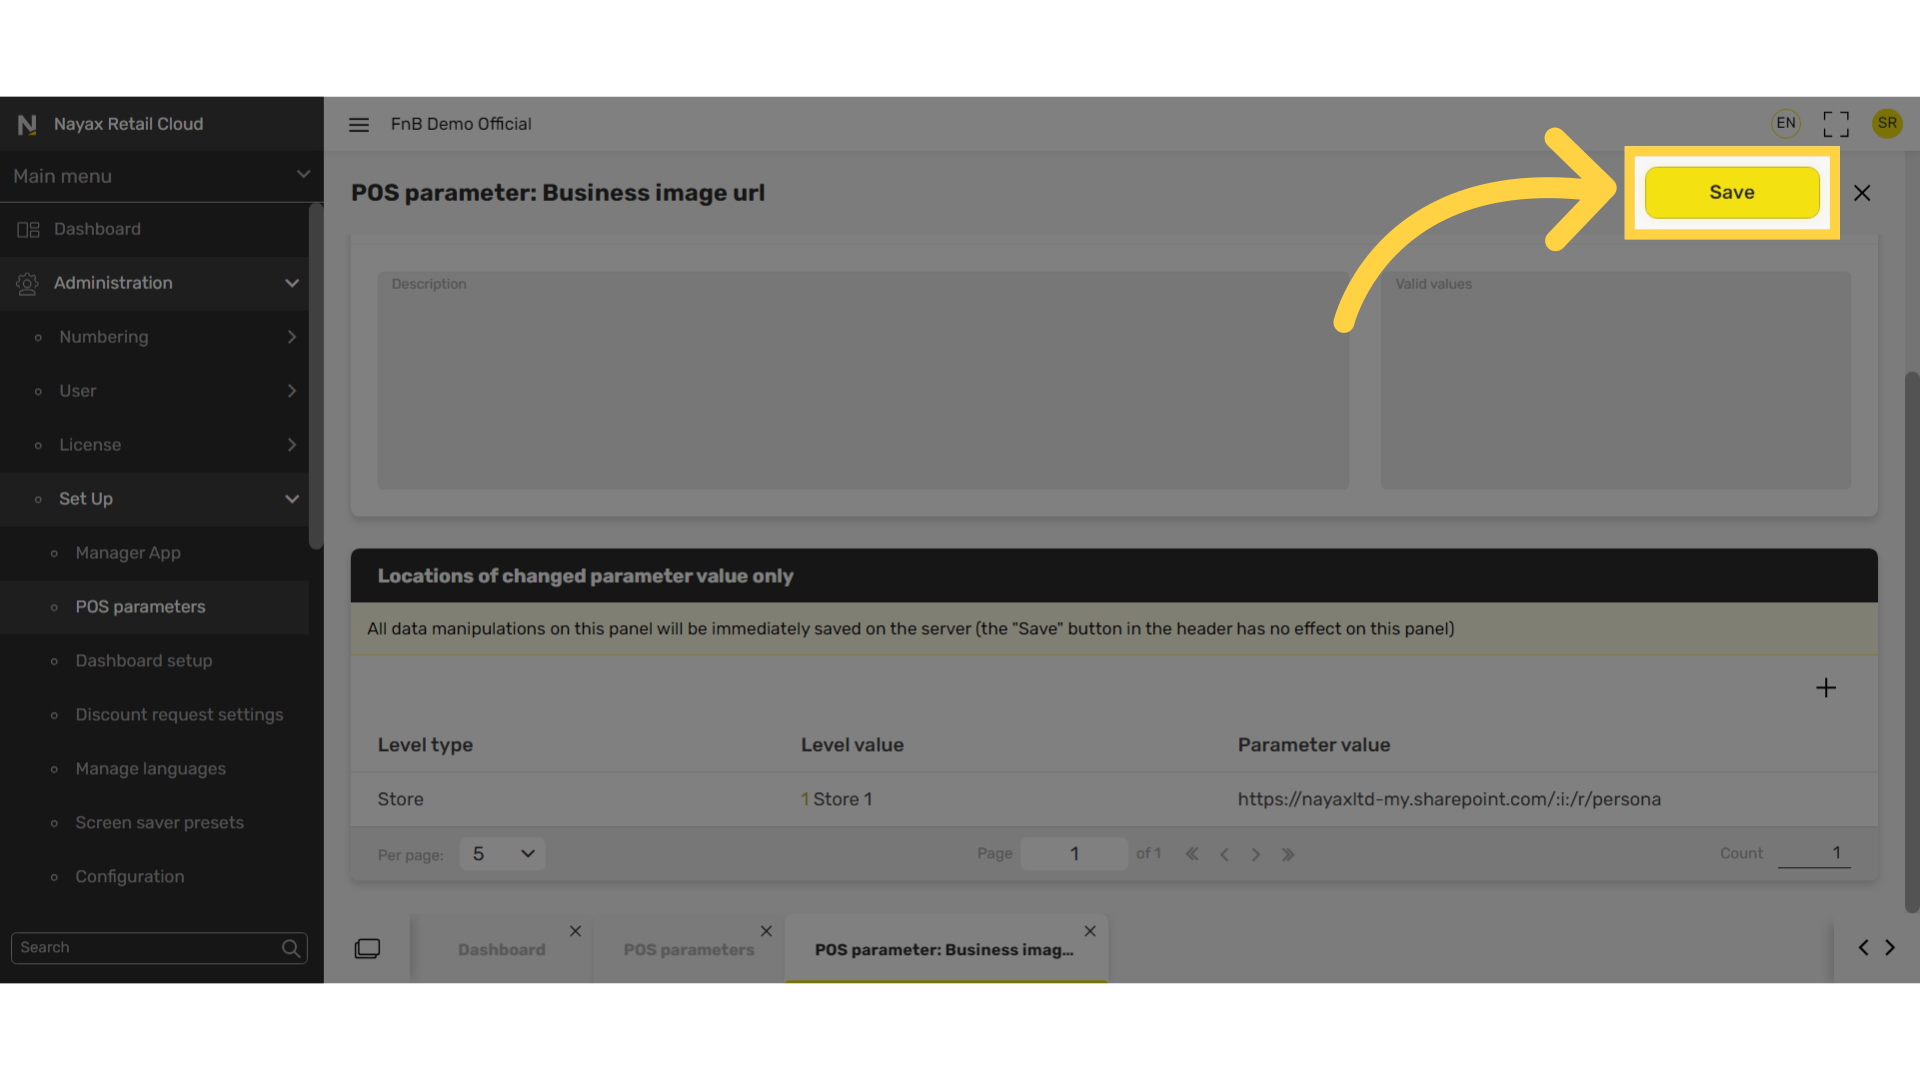
Click Save
Image AttachedDon't forget to save your changes!
Thank you!
Did you find this article helpful?