How to Activate Stock Management | Administration
This guide provides a comprehensive approach to activating stock management, including tracking and replenishing in Retail Core.
Video Guide
00:00: This guide provides a comprehensive approach to activating stock management within
00:04: your software application.
00:06: From the dashboard of your retail core management Suite, click on the administration tab
00:10: from the side menu.
00:13: In the sub-menu. Go to setup.
00:16: In the sub-menu. Go to configuration.
00:19: Select the checkbox for stock management.
00:22: Fill in the required fields.
00:24: Click default purchase price list.
00:26: Depending on the previous selection, the drop-down menu changes.
00:31: Select good receipt from the drop-down menu under replenish stock from
00:35: Choose from the three options. Min, the minimum amount of stock
00:39: listed, for the item Max, the maximum amount of stock listed for
00:43: the item opt a custom amount of stock lesson for the item.
00:48: Click display items Within
00:50: Selecting this checkbox will activate a pop-up window to update customers
00:54: who select products that are no longer in.
00:57: Open the drop-down window to select the action and message to be displayed on
01:01: the screen.
01:02: Click save. Now that stock management is enabled for the company create a
01:06: warehouse.
01:07: We hope this guide was able to walk you through the process.
01:09: We ask you to please help us help you by leaving feedback.
01:12: Thanks for watching.
Click Administration Tab
Image Attached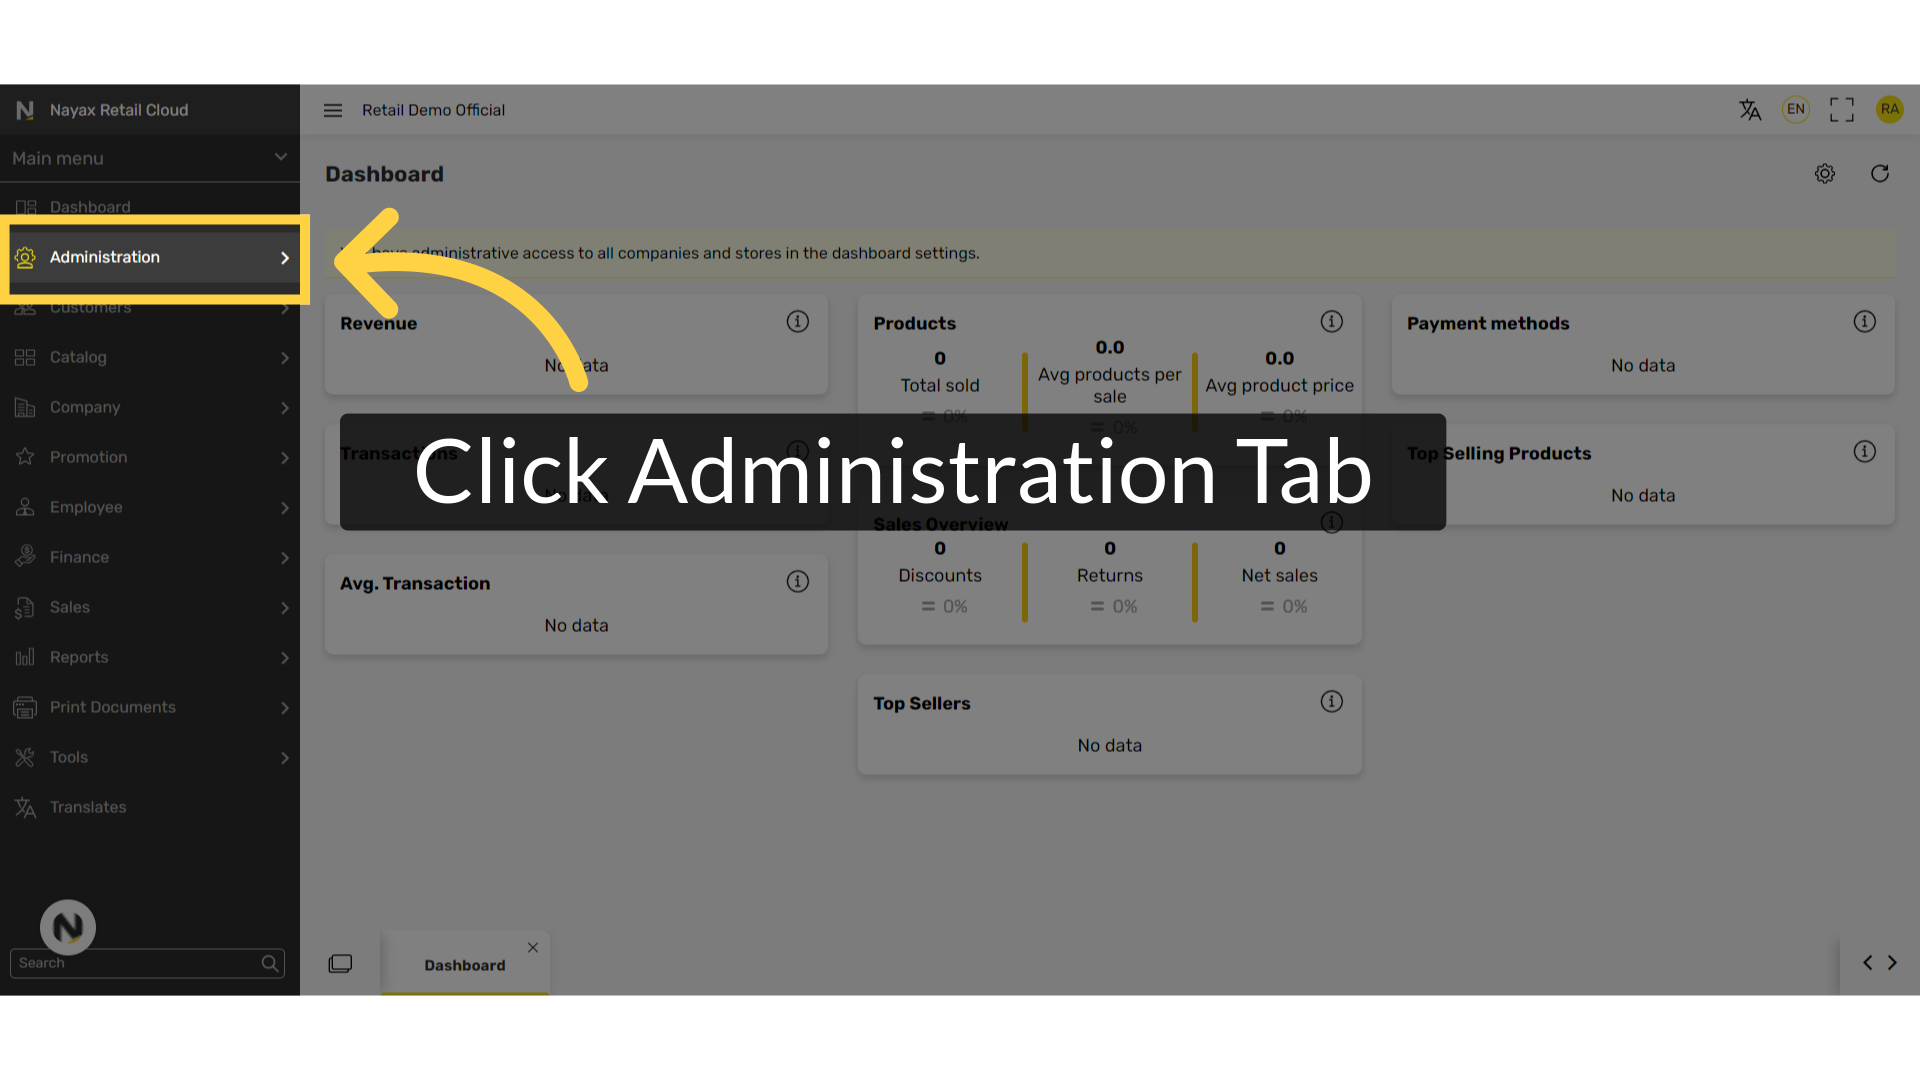
Click Set Up
Image Attached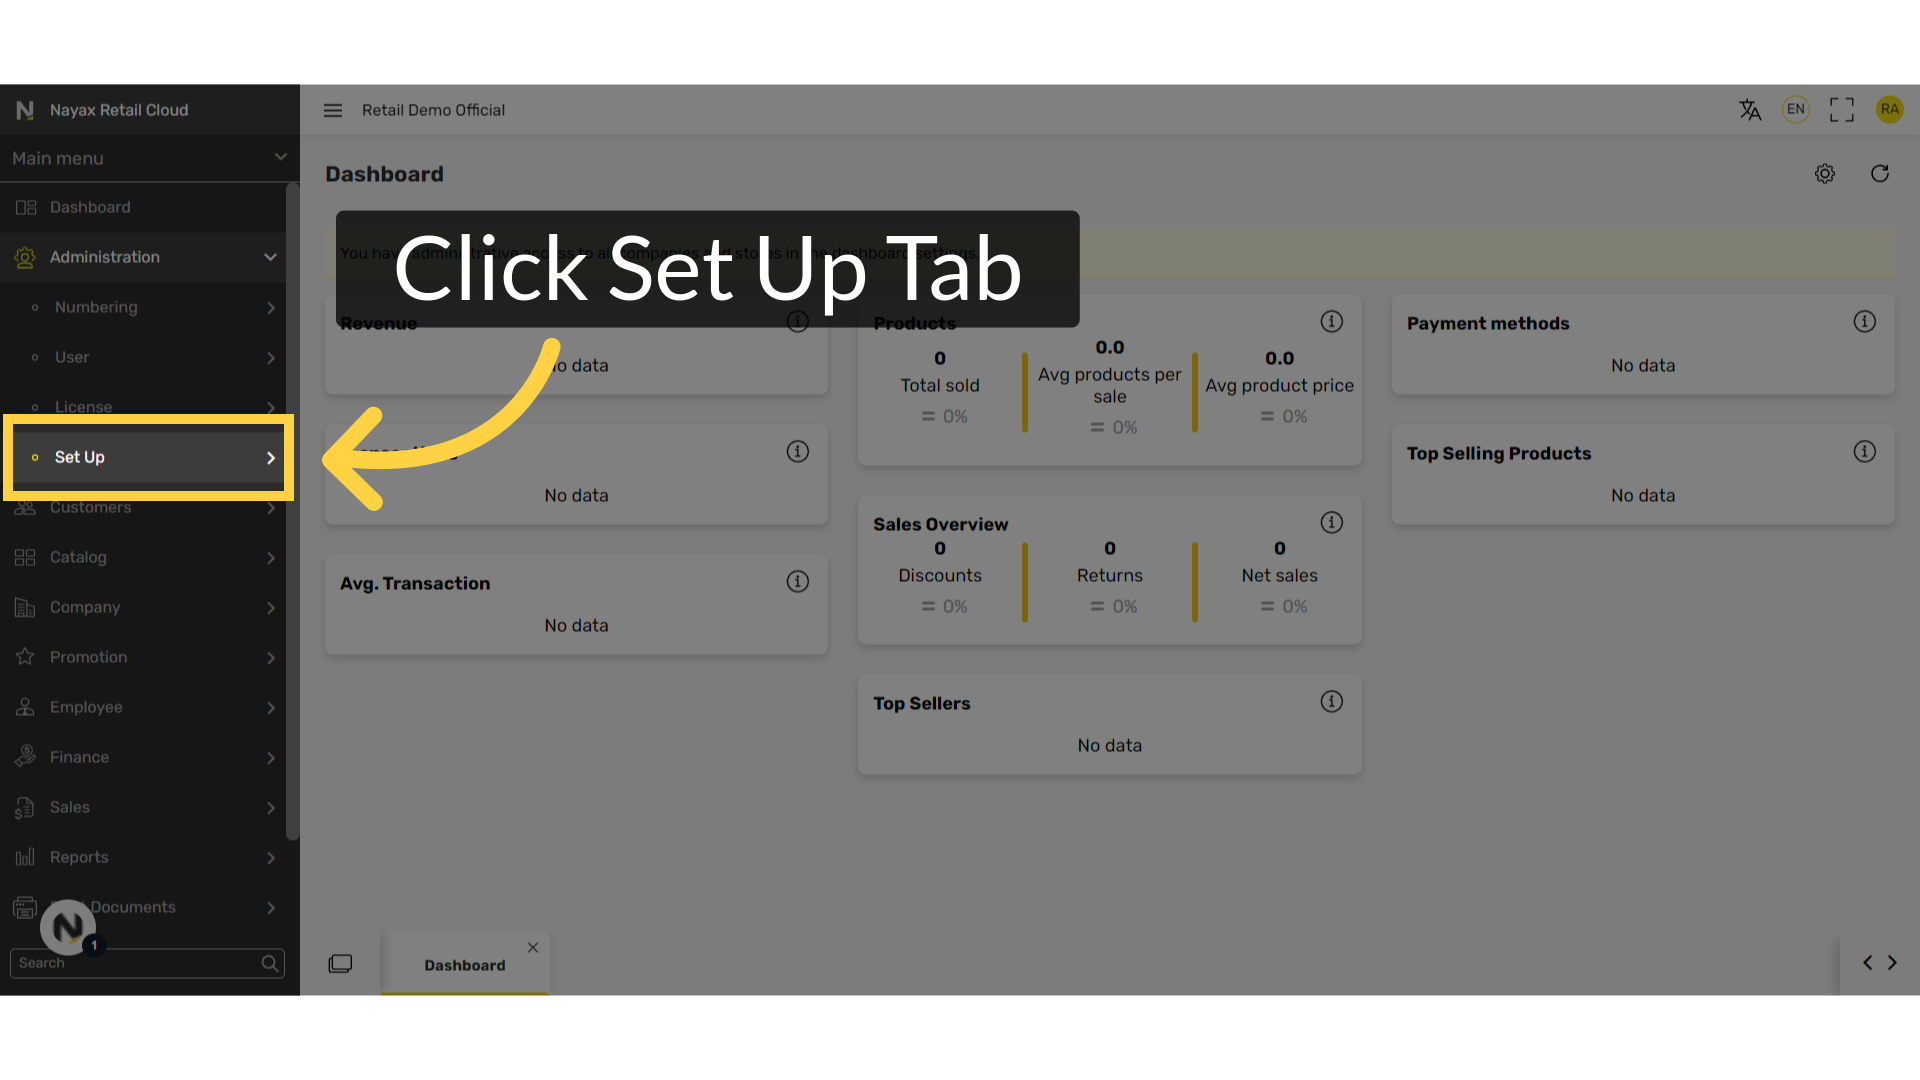
Click Configuration
Image Attached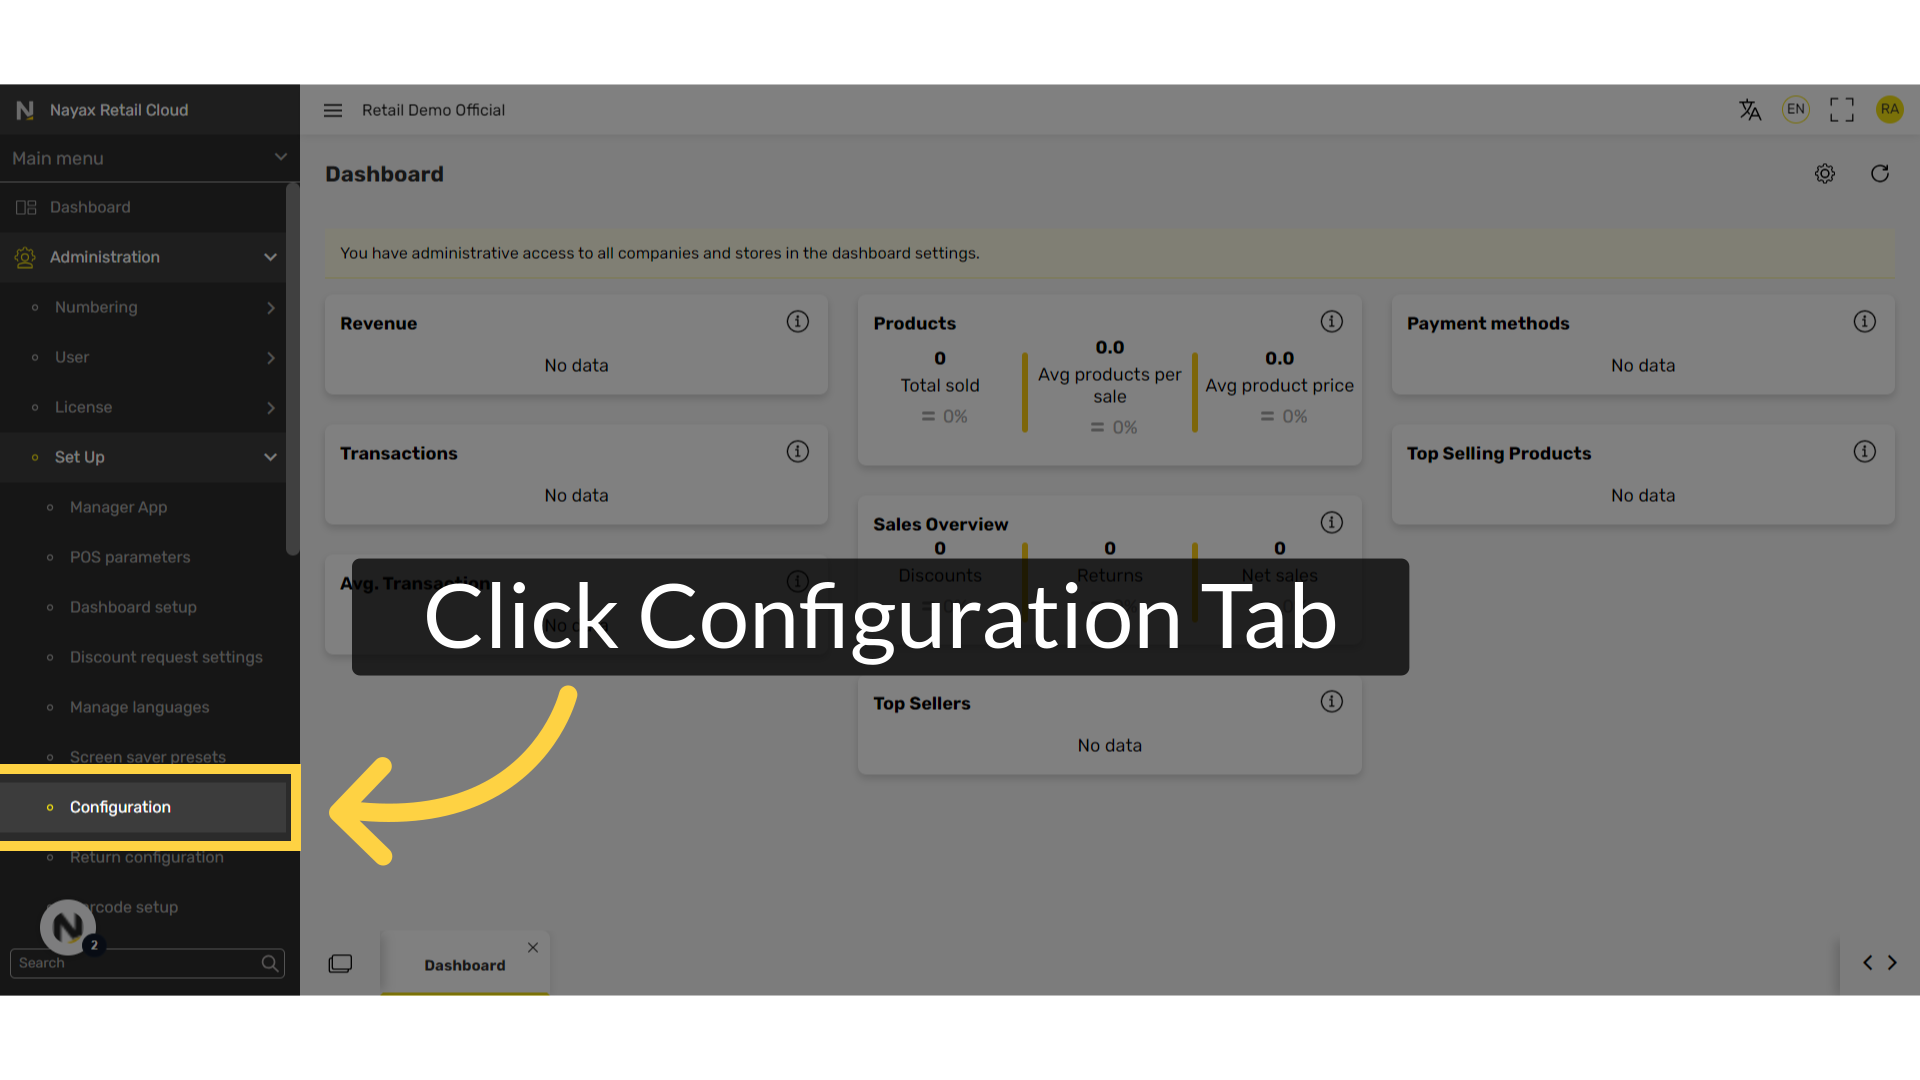
Checkbox Stock Management
Image Attached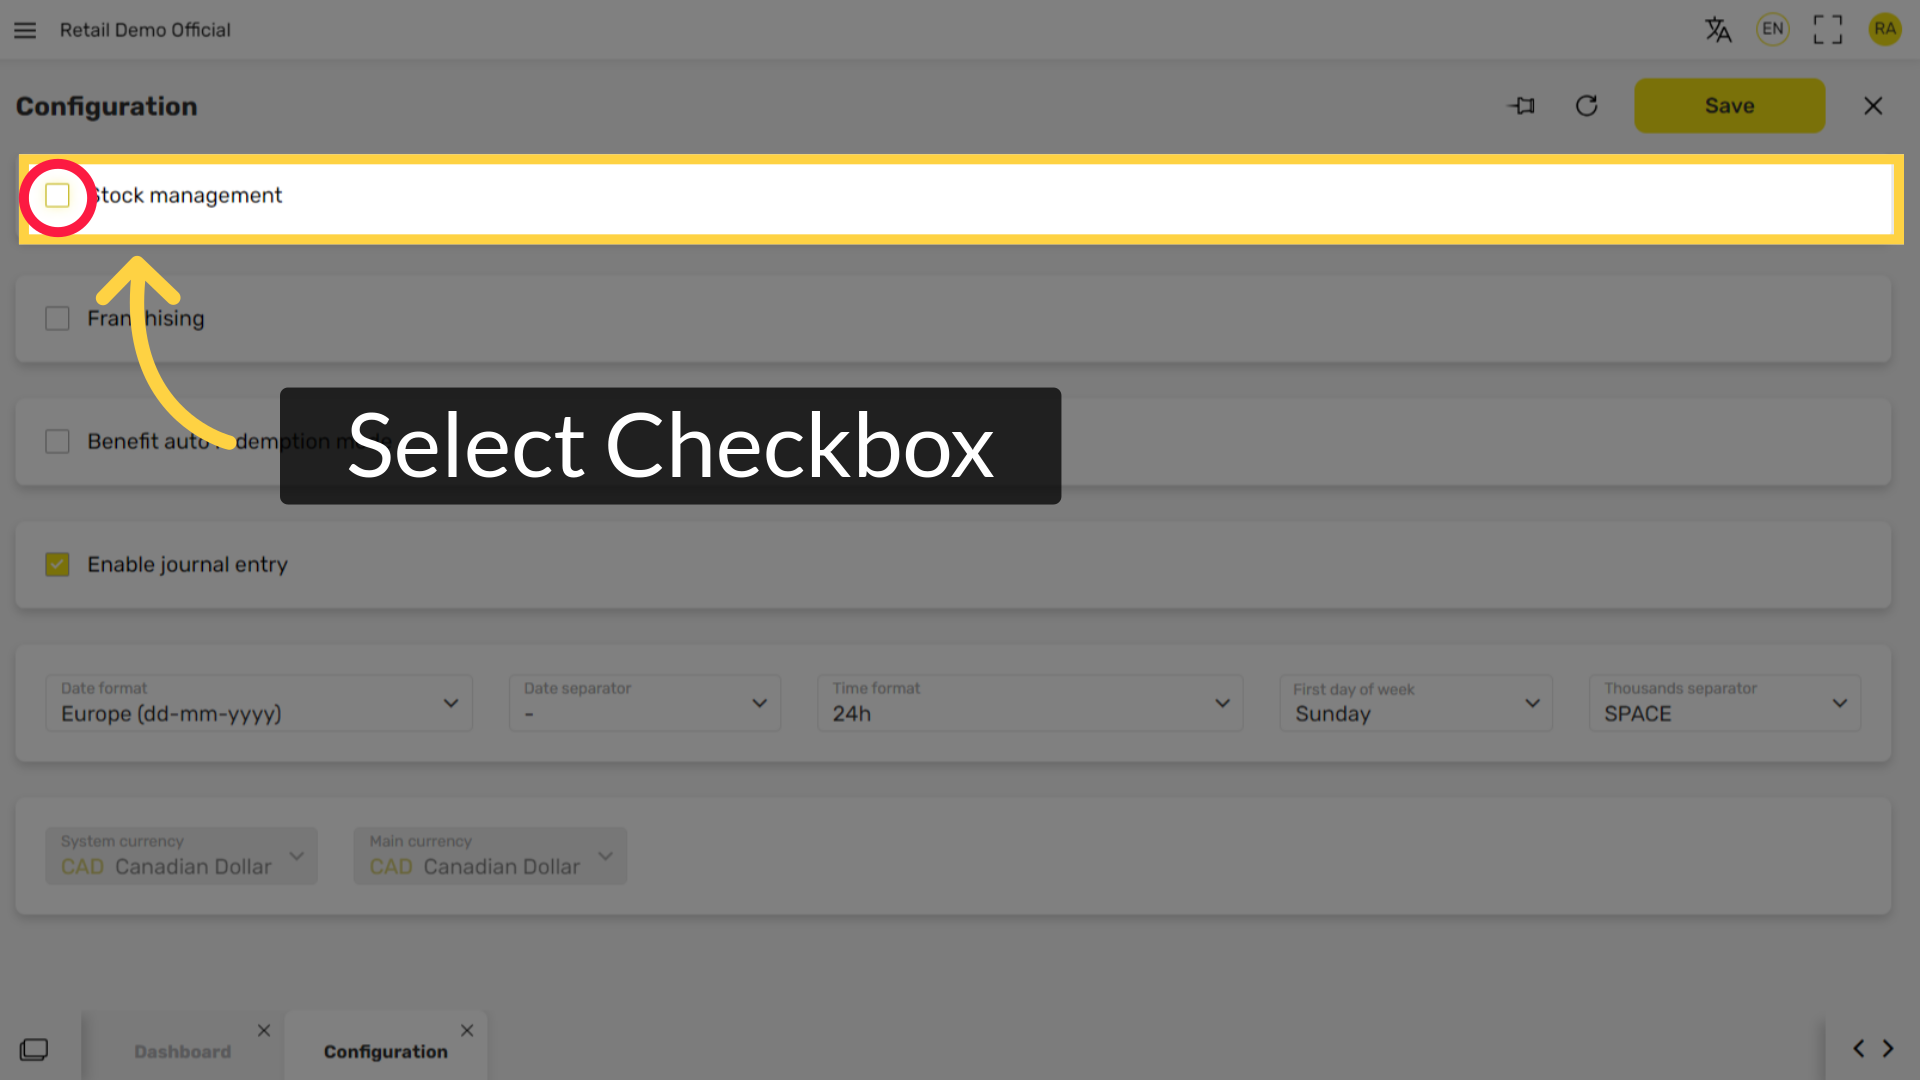
Fill in the following fields:
Image Attached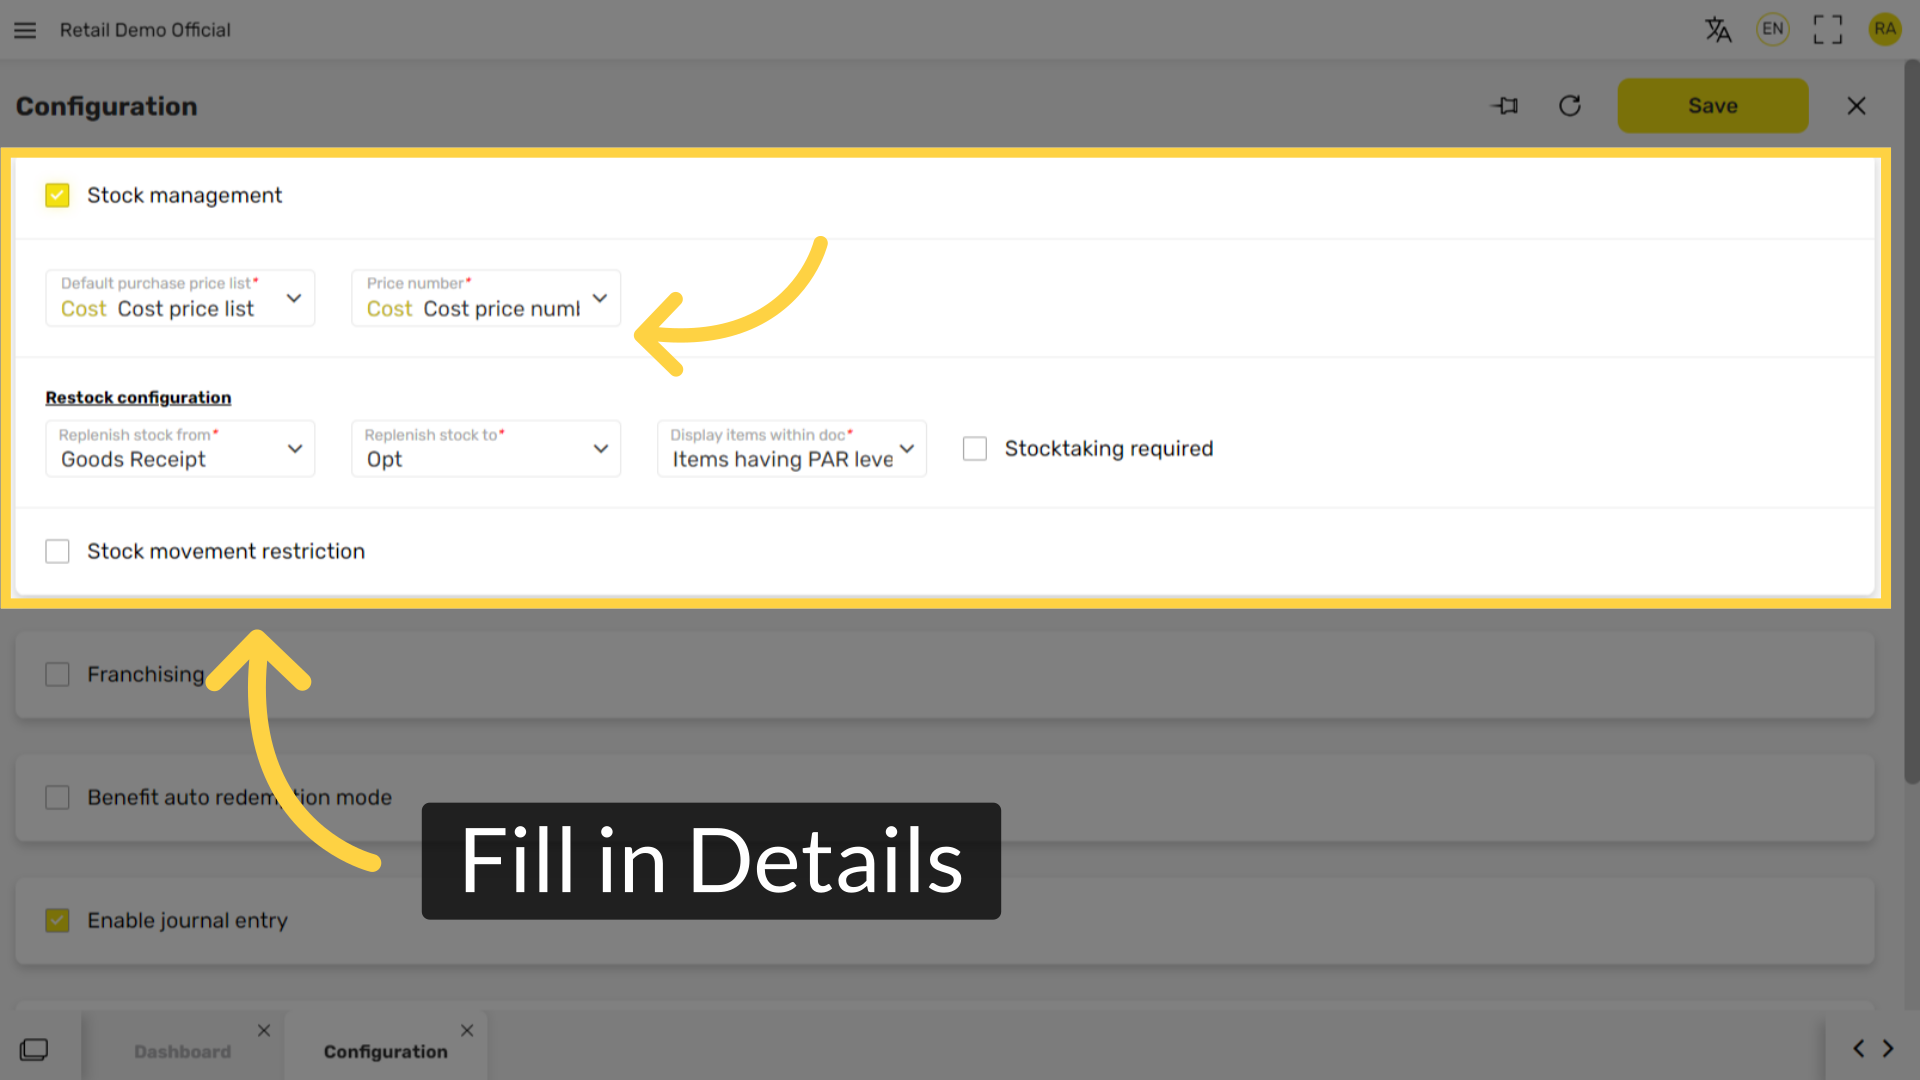
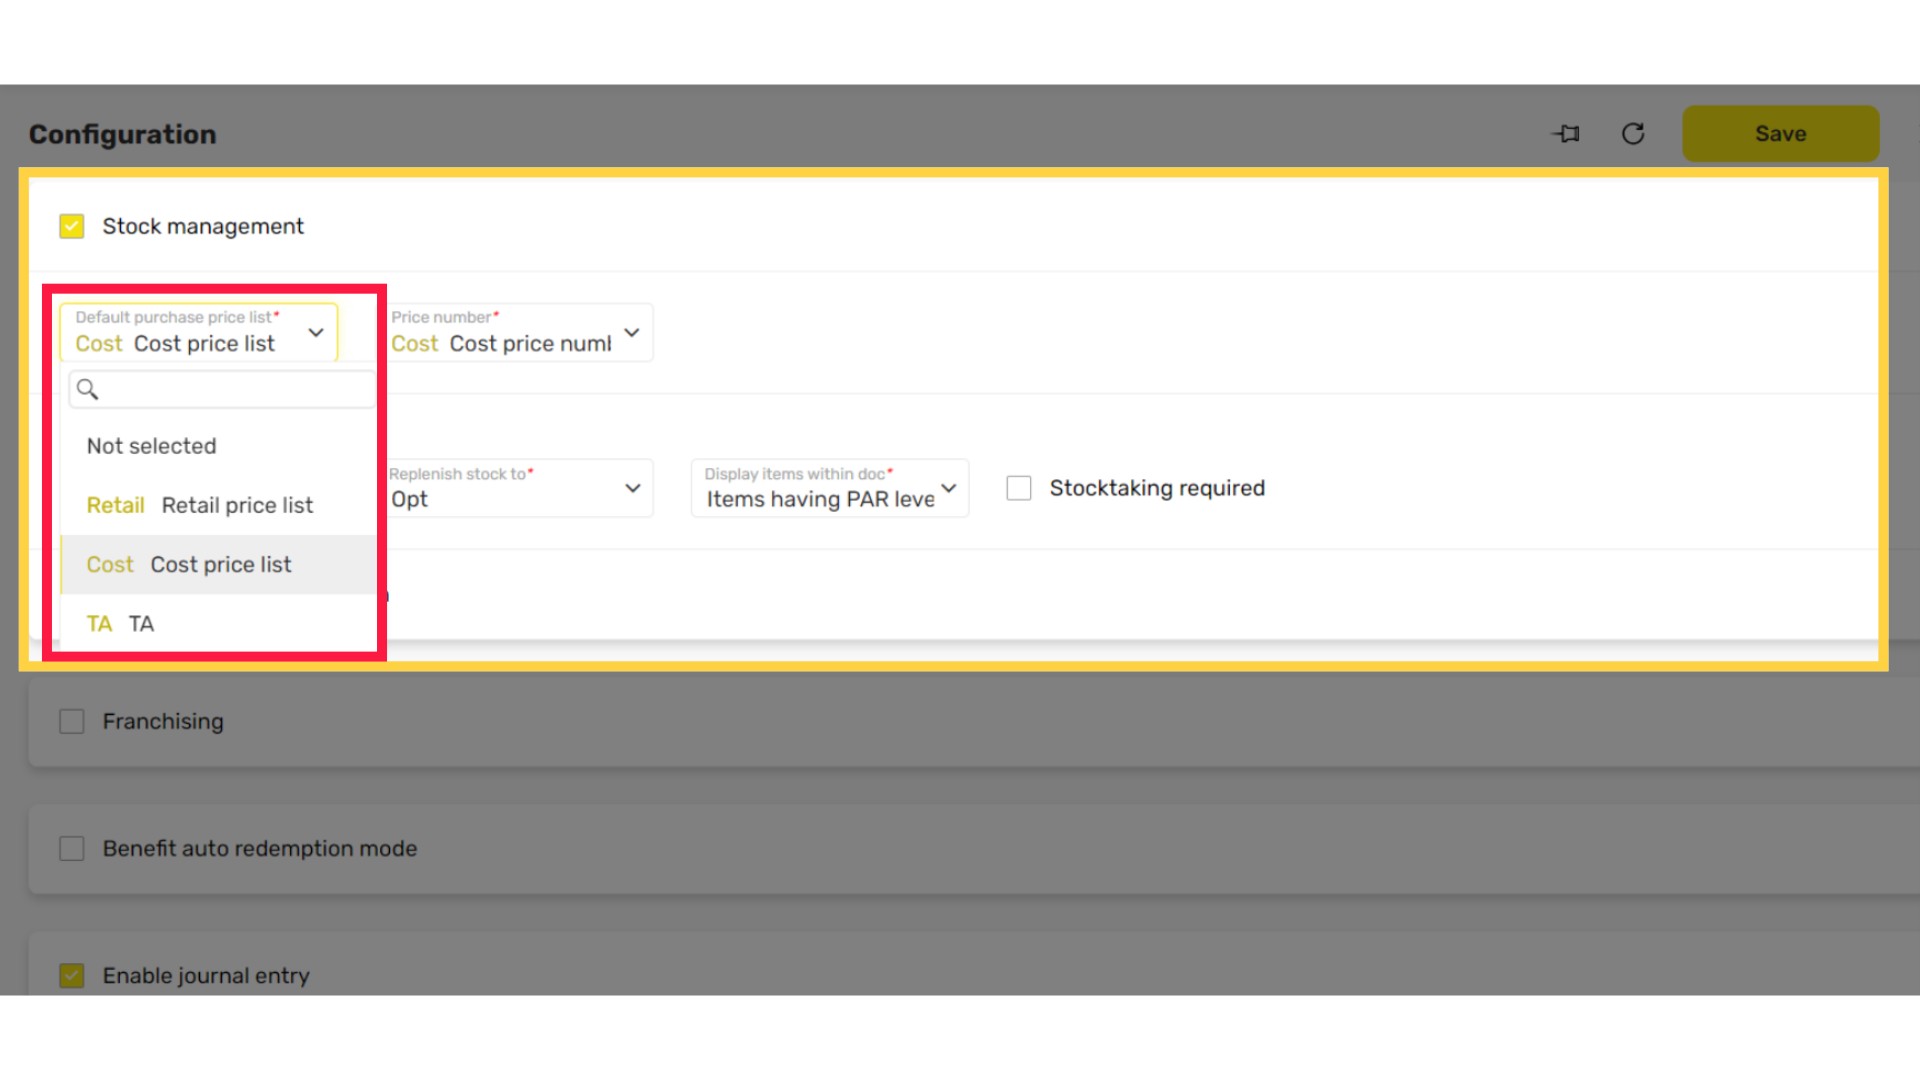
Select Default Purchase Price List
Image AttachedSelect Cost price list - Price list of the cost of products
This is the recommended option to select. The other options are:
Retail price list - Price list for the selling price of products
TA - Take away price list
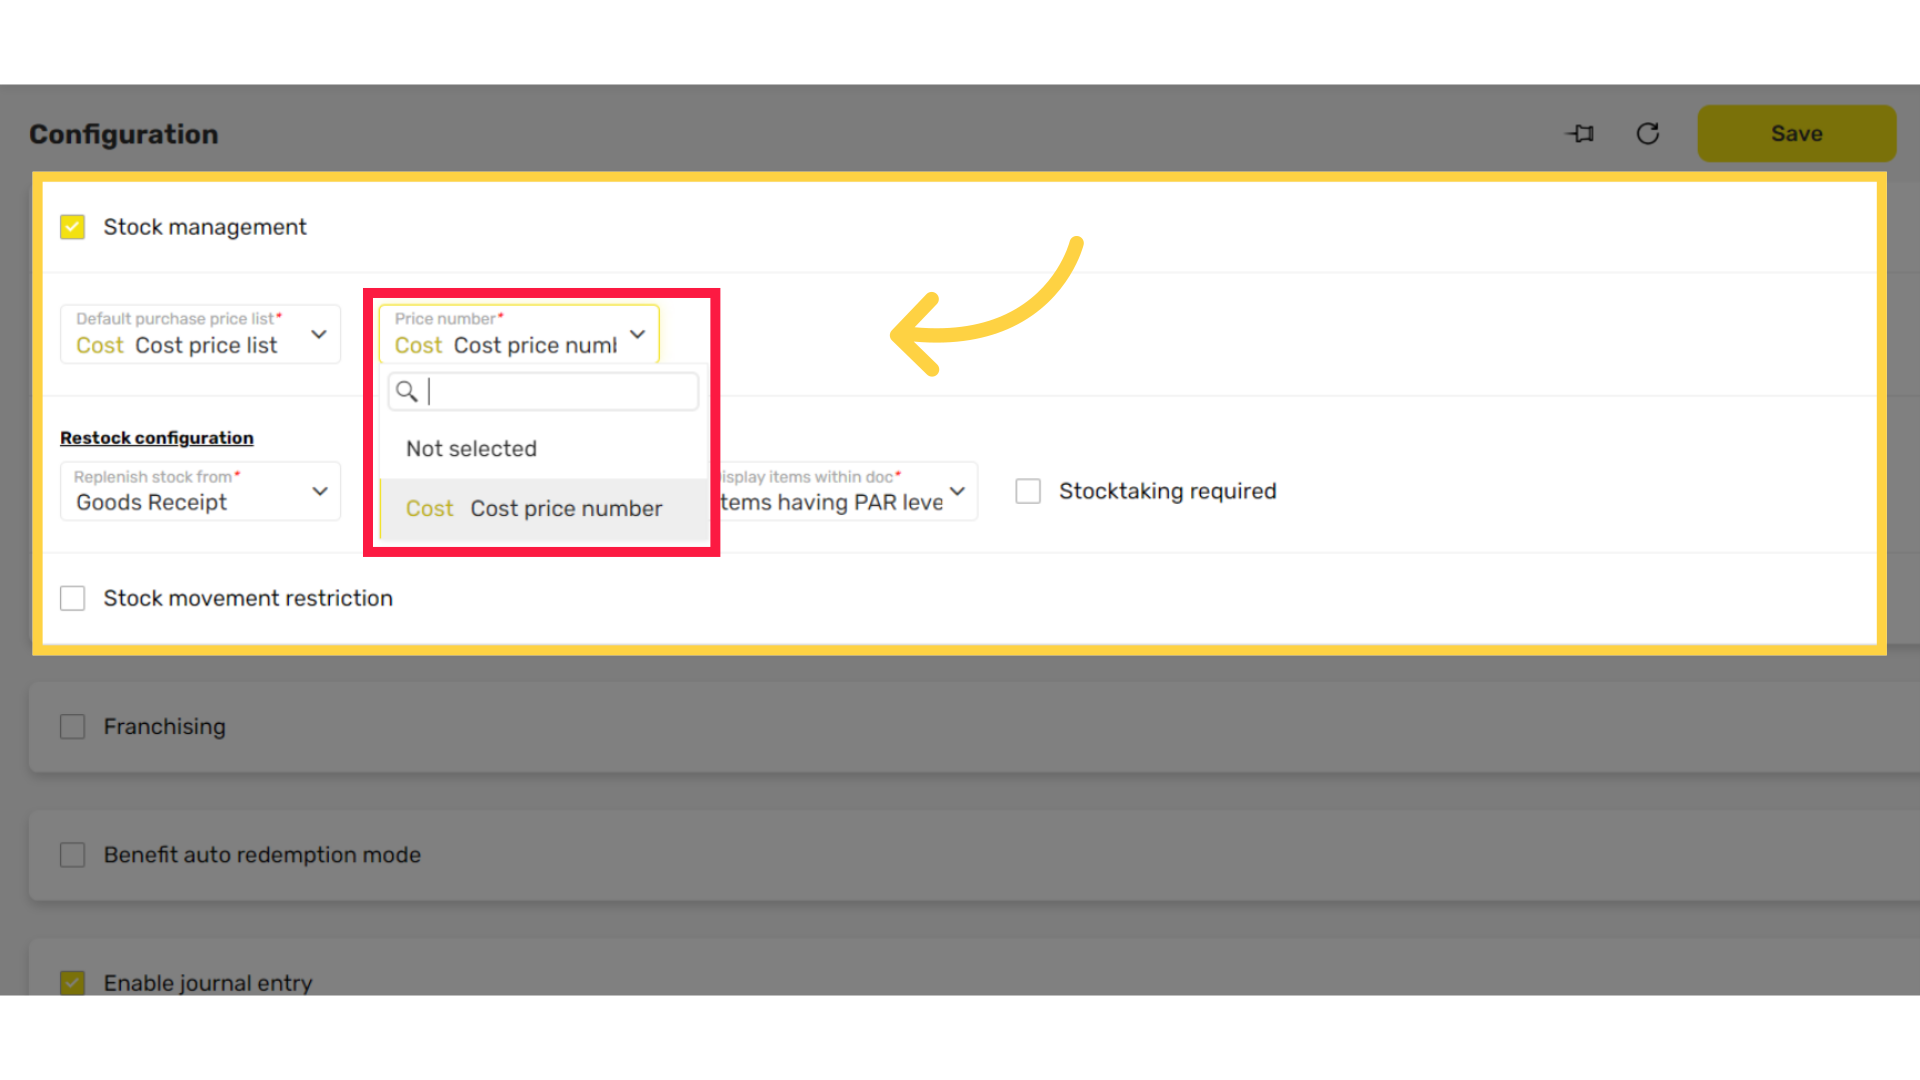
Select Price Number
Image AttachedDepending on the previous selection the drop down menu changes.
Click Replenish Stock From
Image AttachedTransfer - Transfer stock from another warehouse
Goods Receipts - The stock already purchased and at the warehouse
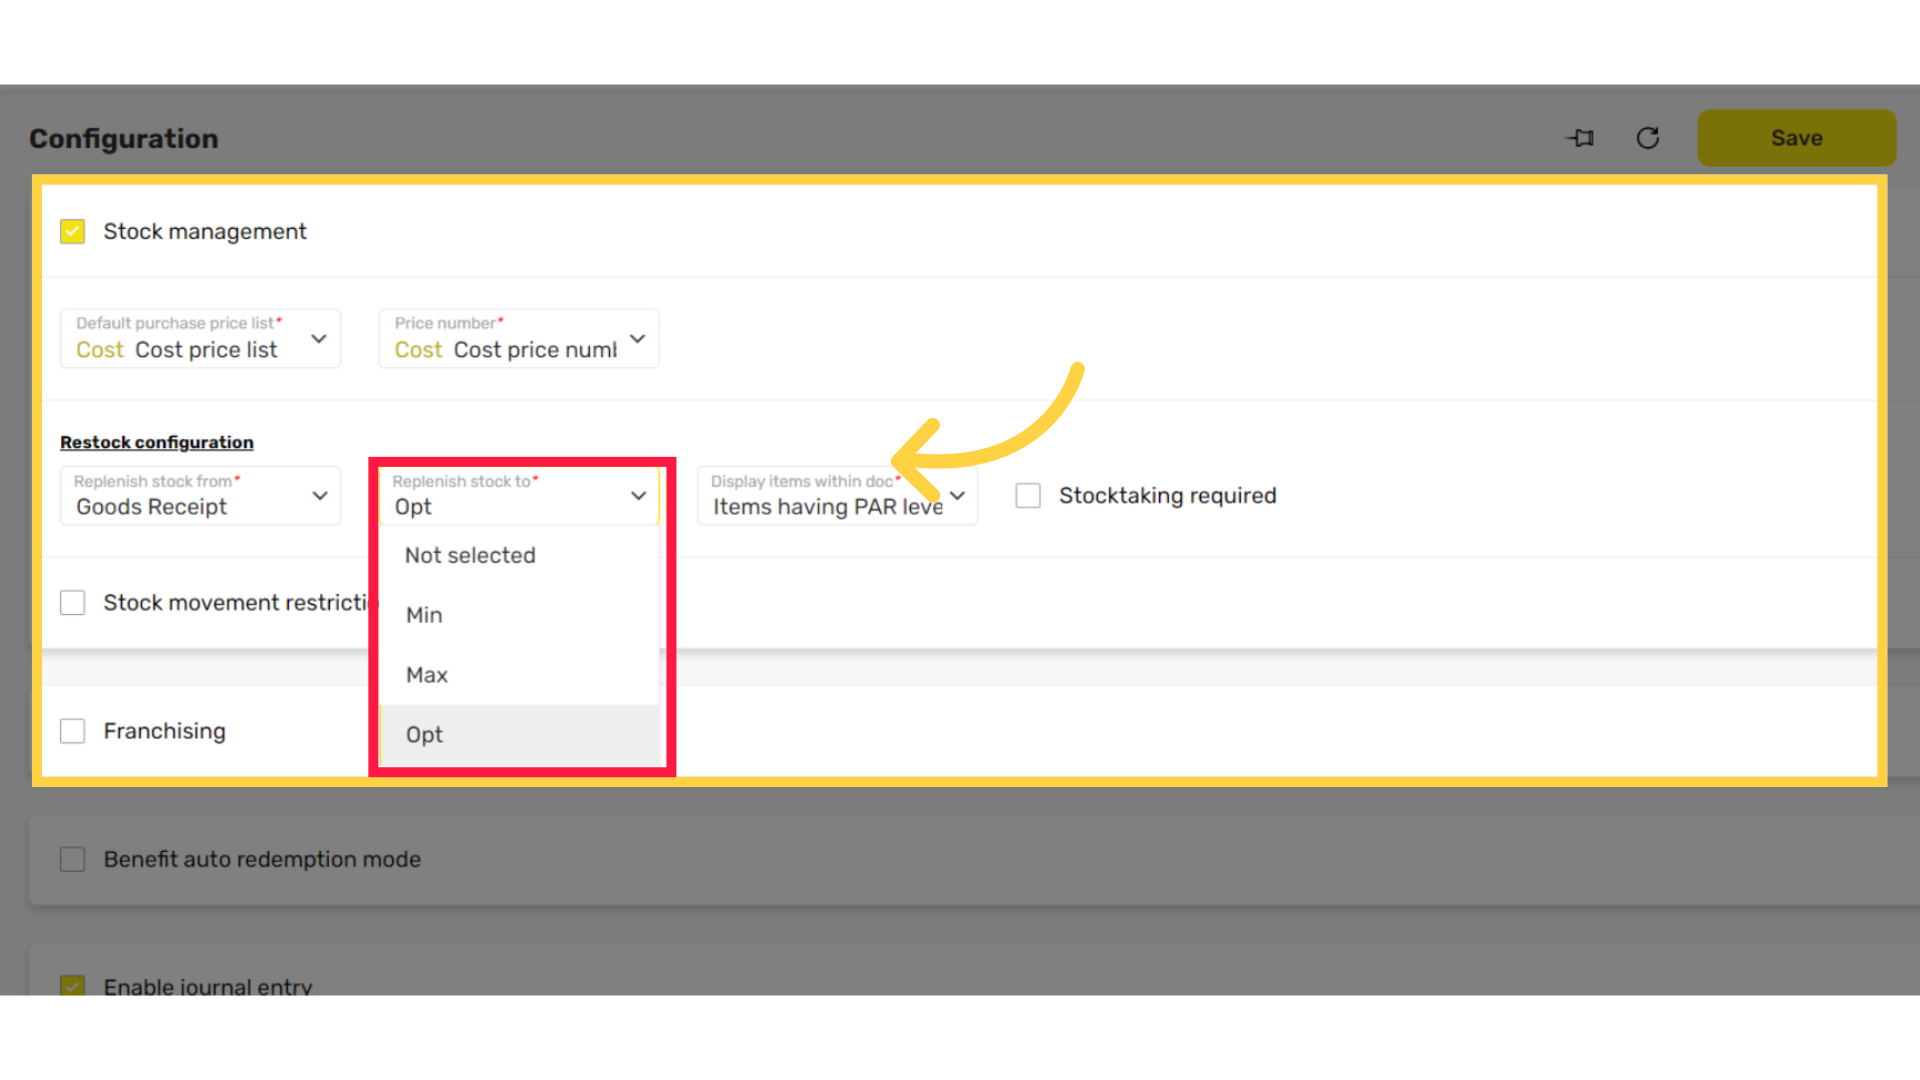
Click Replenish Stock To
Image AttachedWhen restocking, choose the amount of stock to be replenished.
Min - The minimum amount of stock listed for the item
Max - The maximum amount of stock listed for the item
Opt - A custom amount of stock listed for the item
These three options are set in the item settings directly in the current stock tab.
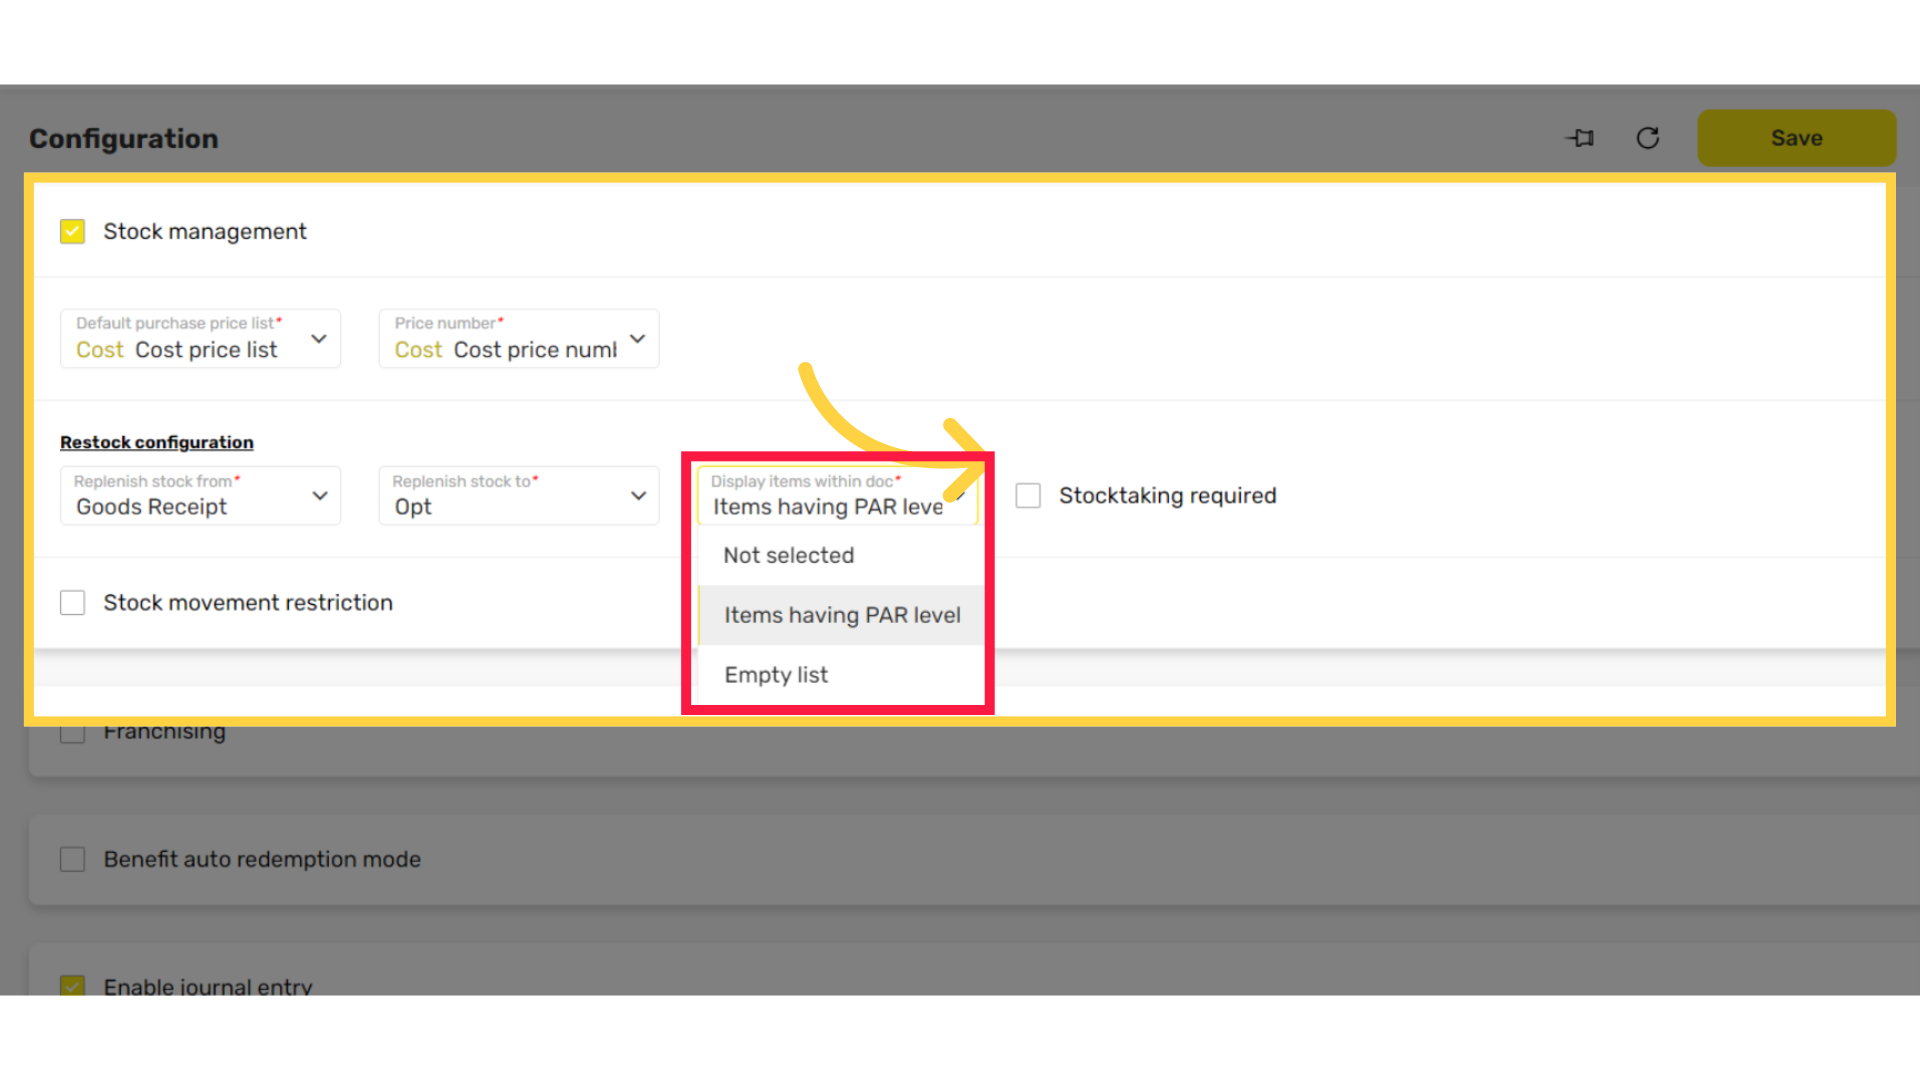
Click Display Items Within Doc
Image AttachedItems having PAR level - Lists only the items that are set with Min Max and Opt options in their product settings
Empty list - Lists all items without replenish settings. This option requires you to manually update the amount of stock needed to be replenished for each item.
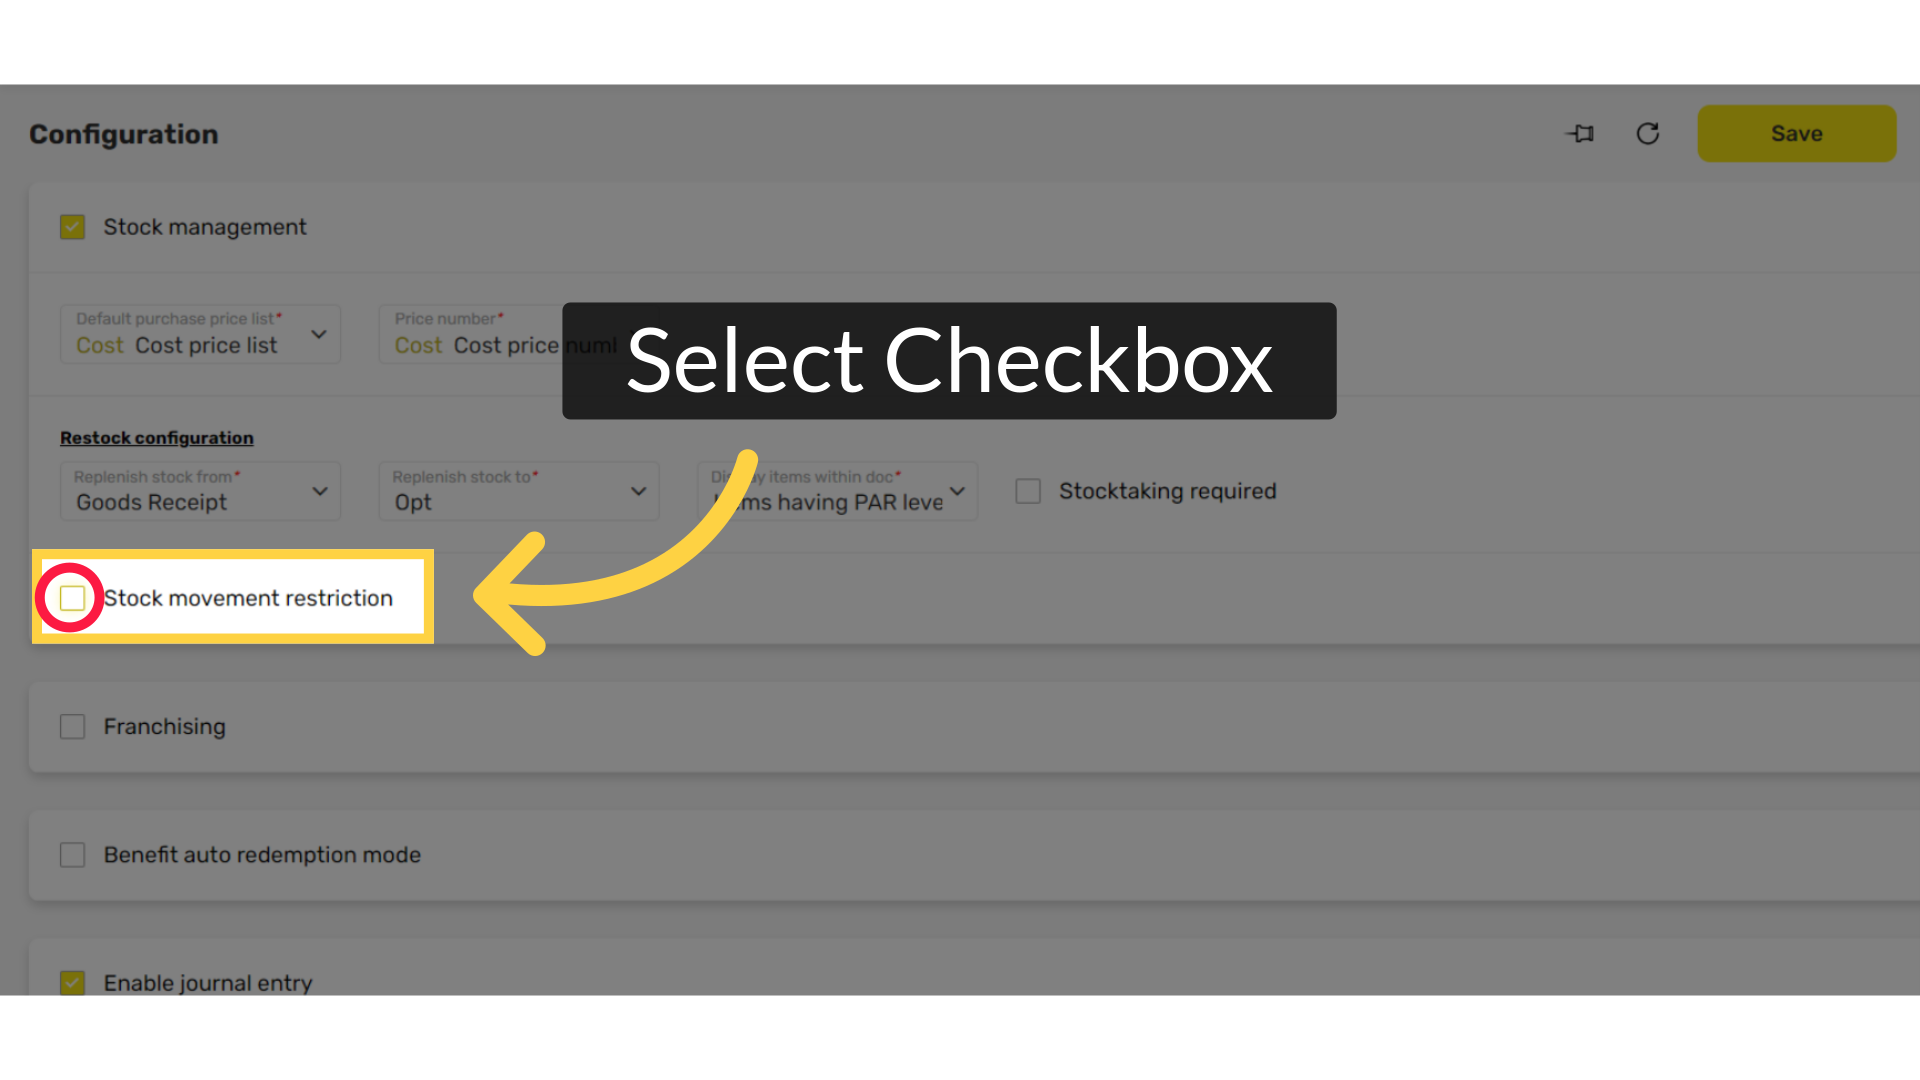
Checkbox Stock Management Restriction
Image AttachedSelecting this checkbox will activate a pop up window to update customers who select products that are no longer in stock.
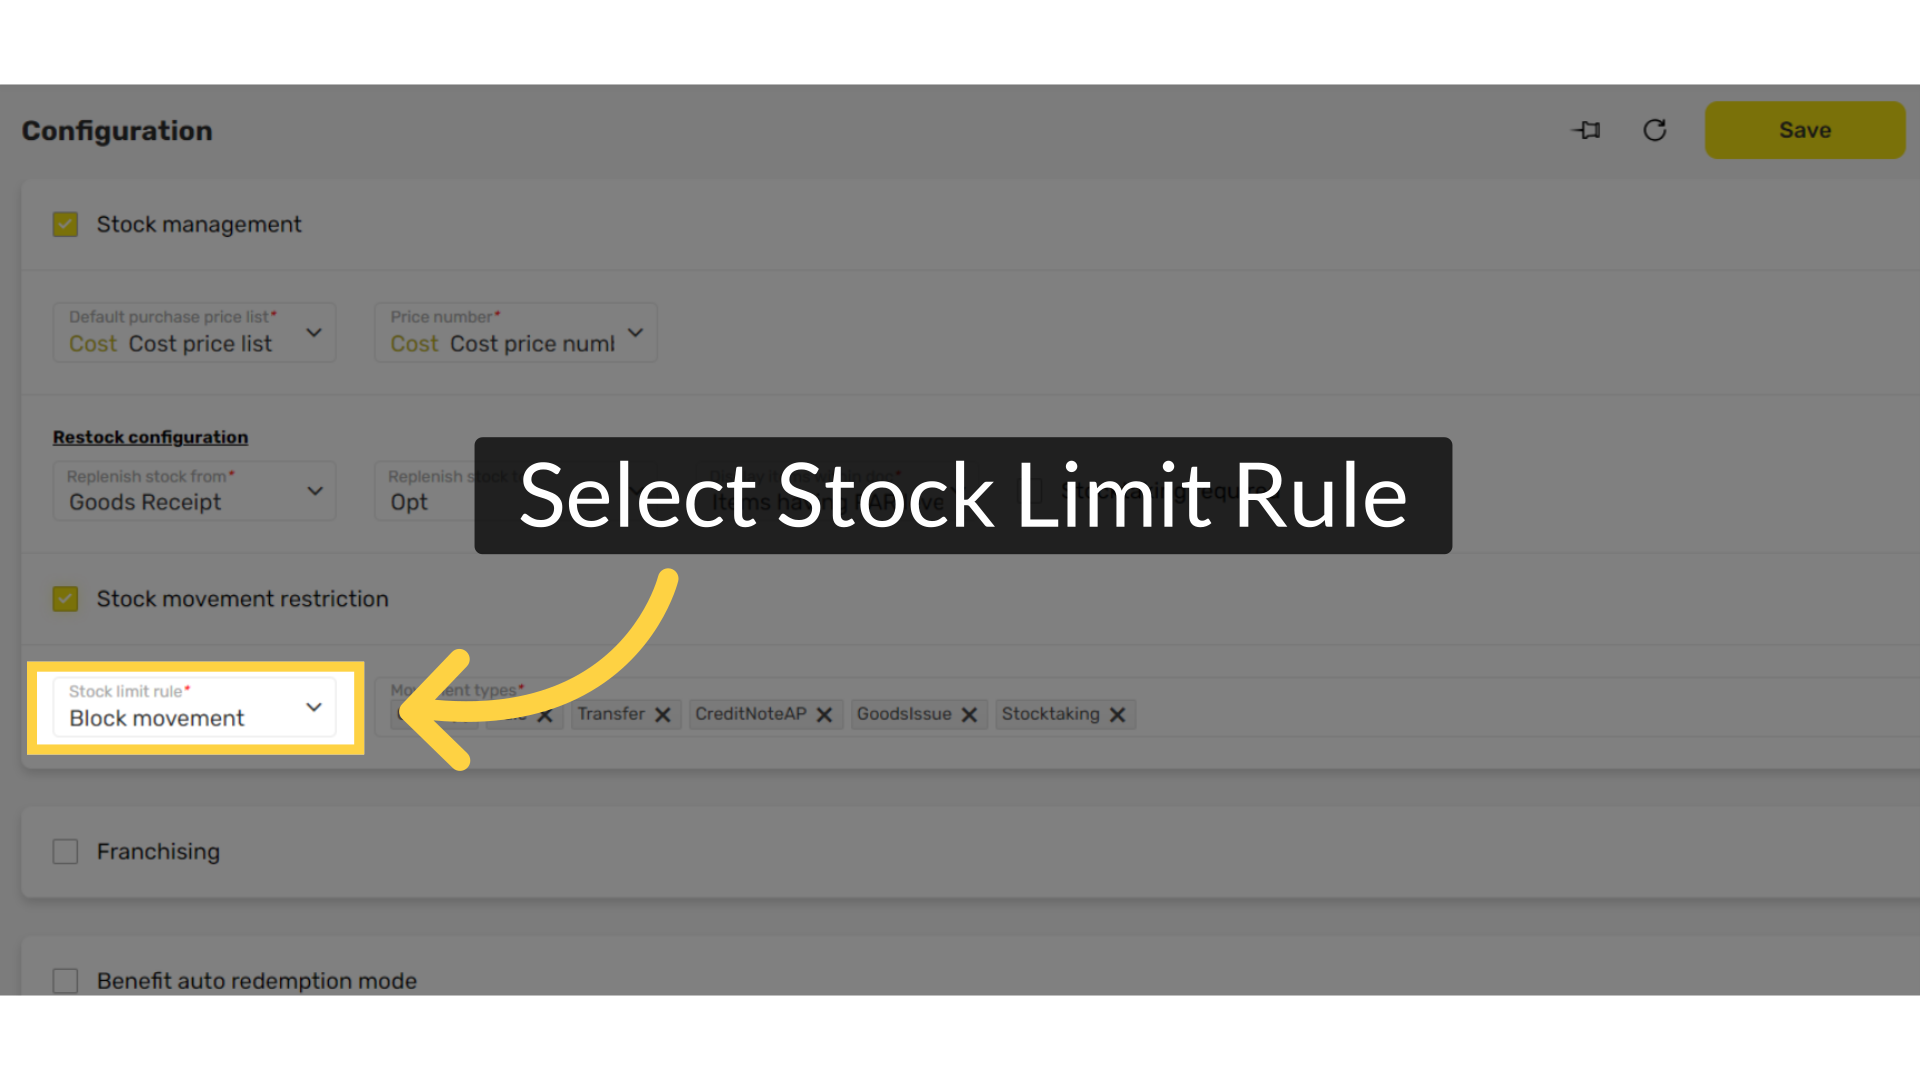
Block movement - An Out of Stock message is shown and blocks the purchase.
Warn and give the user an option to make a decision - A warning message is shown and the customer chooses how to continue.
Do not block or warn - No pop up message will appear if the item selected is out of stock.
Click Save
Image AttachedNow that stock management is enabled for the company, create a warehouse.
Thank you!
Did you find this article helpful?