How to Connect Your VPOS Media 4 and 4 Mini to the Internet | Devices
Learn how to quickly connect your VPOS media device to WiFi, Ethernet or add a new network so you can start accepting payments in no time.
Prerequisites
Before you begin, make sure you have:
- Physical access to the VPOS Media 4 or 4 Mini device
- The Technician passcode for the device
- For Wi-Fi: The network name and password
- For Ethernet: An Ethernet cable connected between the device and your router or switch
Video Guide: How to Connect Your VPOS Media 4 and 4 Mini to the Internet | Devices
00:00: The following guide will help you set up your vpos media for successful
00:04: internet connectivity.
00:06: On your VPOS Media device, on the payment screen, tap the left
00:10: corner of the screen, as highlighted, to reveal the settings icon.
00:15: The settings icon will appear in the top left corner of the screen, as highlighted.
00:19: Tap the Settings icon to access the main menu.
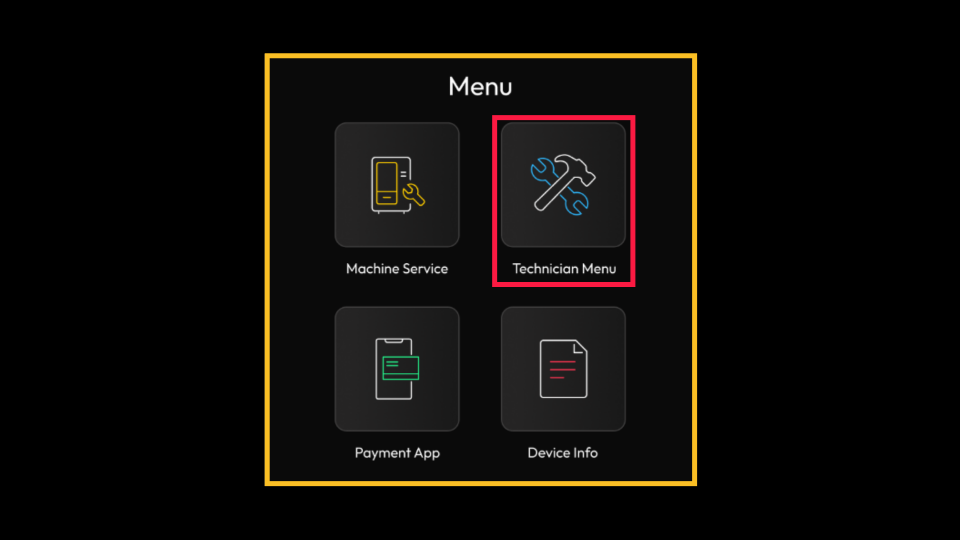
00:23: The main menu will open, displaying four options. Select the Technician
00:27: Menu icon as highlighted.
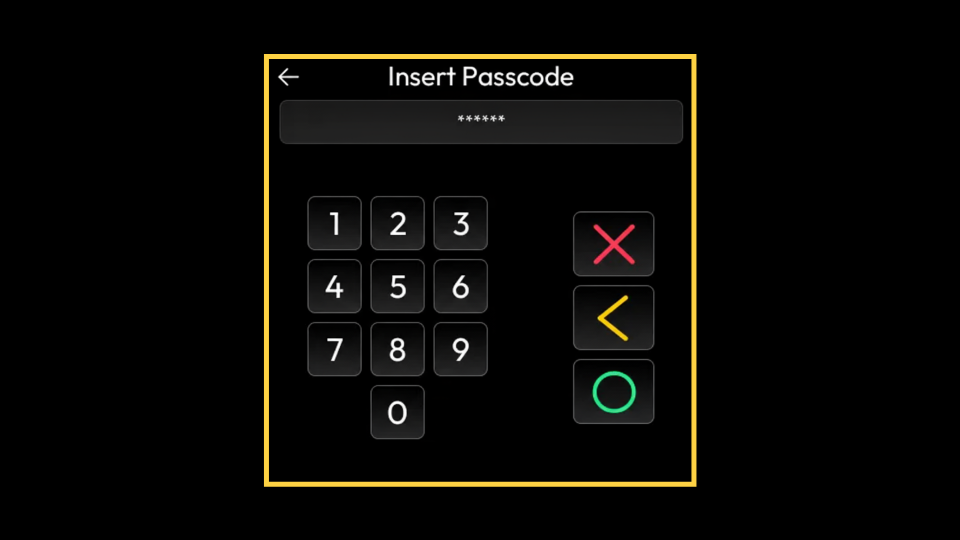
00:29: Enter the Technician passcode and tap the green circle icon to continue.
00:34: The Technician Menu provides access to various technician operations. To
00:38: set up the internet, tap on the communication tab, as highlighted.
00:43: The communication will display your connectivity options;
00:45: tap 'WiFi' to view available WiFi networks.
00:50: The WiFi screen will open. Toggle the WIFI to on.
00:54: The Wi-Fi options available will display. Scroll and tap on your preferred network.
00:59: Enter the SSID (WiFi) network password and tap on connect.
01:04: The connected WiFi page will display the details and strength of this connection.
00:00: In this guide, we will walk you through the steps for connecting a VPOS
00:04: Media 5 device to the internet.
00:06: From the device, tap the three lines, as highlighted, to open the settings menu.
00:11: Tap on the key icon to enter the kiosk settings screen.
00:15: Input the technician password as highlighted and tap on, okay to proceed.
00:20: Tap on the system configuration option as highlighted.
00:24: Scroll down and tap on Ethernet settings.
00:27: Toggle the Ethernet to on as highlighted. This is the recommended connection;
00:31: however, if Ethernet is not available in this location, proceed
00:36: to the following steps to enter the Wi-Fi option and define the local Wi-Fi.
00:41: Scroll down and tap on network and internet.
00:44: Toggle the Wi-Fi to on if Wi-Fi is not available in this location
00:48: or you want to set up the device with a mobile network, continue to the next
00:52: steps.
00:54: The default setting for the kiosk is Ethernet;
00:56: however, if you wish to set up a SIM mobile network, scroll and
01:00: tap on Mobile Network.
01:02: Toggle the mobile data and roaming as highlighted.
Nayax VPOS Media Device
Image Attached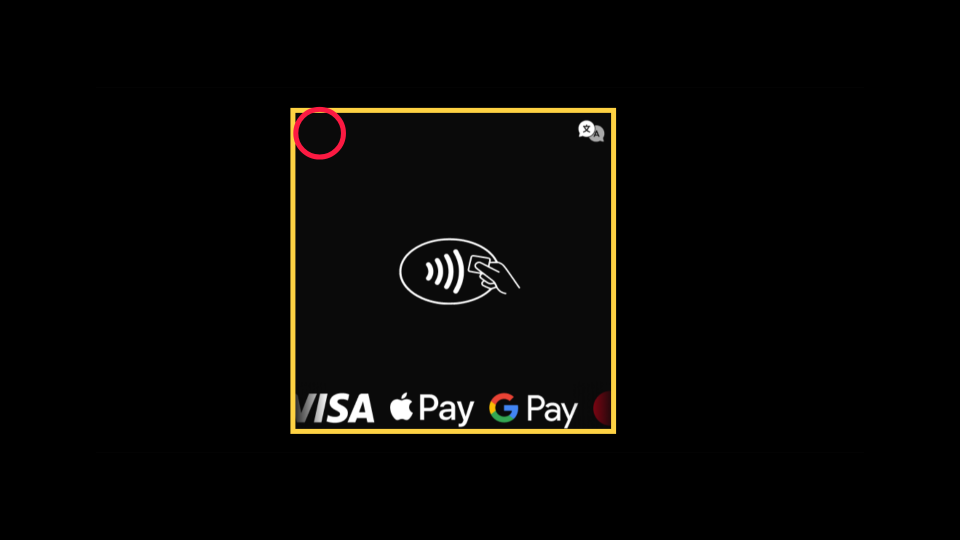
Settings Icon
Image AttachedThe settings icon will appear in the top left corner of the screen, as highlighted. Tap the Settings icon to access the main menu.

Main Menu Options
Image AttachedThe main menu will open, displaying four options. Select the Technician Menu icon as highlighted.
Enter Technician Passcode
Image AttachedEnter the Technician passcode and tap the green circle icon to continue.
Technician Menu
Image AttachedThe Technician Menu opens and provides access to various technician operations.
To set up the internet, scroll down and tap Communication.

Communication Menu
Image AttachedThe Communication screen opens and displays three options: Wi-Fi, Ethernet, and Bluetooth.
Note: Bluetooth is visible but not currently available. Cellular connectivity is always active in the background and does not appear in this menu.

Communication Menu
Image AttachedThe communication screen displays the connectivity options.
Thank you!
Did you find this article helpful?