How to Configure an E-Receipt Operator Level | Administration
This guide provides step-by-step instructions for creating and customizing E-Receipts in the operator system. Follow these instructions to set up your company's digital receipts.
Please Note!
Configuration must be completed at two levels.
Please refer to this guide: How to Configure an E-Receipt Machine Level | Operations to enable e-receipts on both the machine and the device for proper functionality.
Video Guide
00:00: This guide provides step-by-step instructions for creating and customizing e-receipts
00:04: in the operator system.
00:07: On the Dashboard of your Nayax Core platform, click on the Administration tab.
00:12: Click on the e-receipt tab from the drop-down menu.
00:16: In this section, you only need to input the information highlighted with a RED asterisk marke mandatory fields.
00:23: Click on the save button to save your progress.
00:27: Click on the invoice, text and footer tab.
00:30: Each section of the E-Receipt can be customized to meet your specific needs. You can preview the E-Receipt by clicking the "Show Preview" button, as highlighted in red on the visual, to see how it will appear to customers.
00:43: In the preview, an example of the E-Receipt will appear, allowing you to select each section to view the settings location on the E-Receipt page within the system.
00:01: This guide provides a comprehensive overview of configuring.
00:04: E-receipt settings at the operator level.
00:08: On the Dashboard of your Nayax Core platform, click on the Administration tab.
00:13: Click on the e-receipt tab from the drop-down menu.
00:17: In this section, you only need to input the information highlighted with a RED asterisk marke mandatory fields.
00:24: Click on the save button to save your progress.
00:28: Click on the invoice, text and footer tab.
00:31: Each section of the E-Receipt can be customized to meet your specific needs. You can preview the E-Receipt by clicking the "Show Preview" button, as highlighted in red on the visual, to see how it will appear to customers.
00:44: In the preview, an example of the E-Receipt will appear, allowing you to select each section to view the settings location on the E-Receipt page within the system.
Click Administration Tab
Image Attached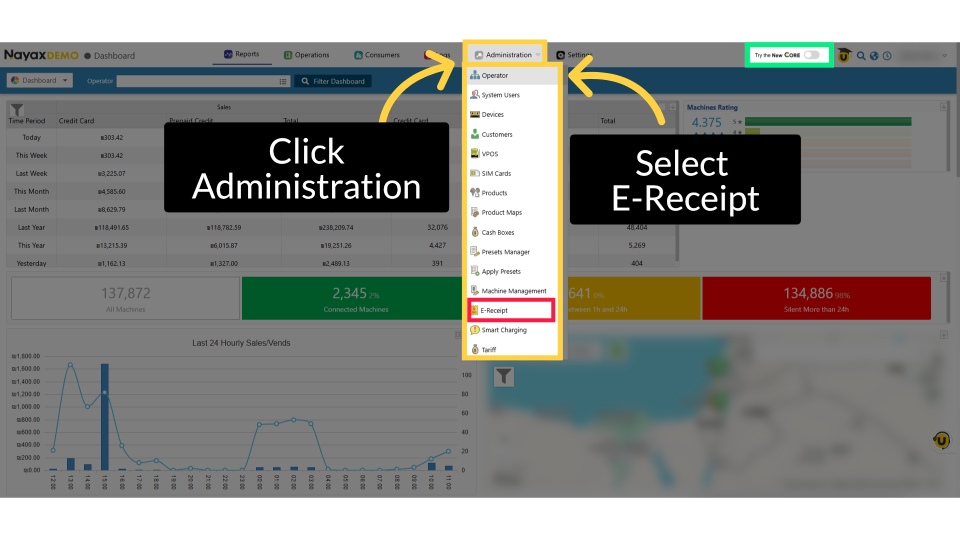
Click E-Receipt
Image Attached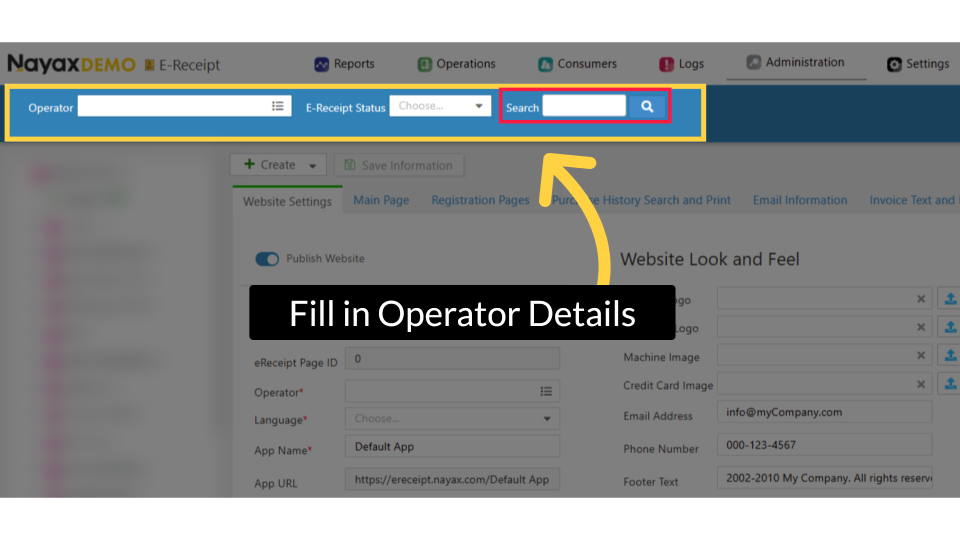
Create the E-Receipt
Image AttachedIn this section, you only need to input the information highlighted with a RED asterisk marked mandatory fields.

Click Save Information
Image Attached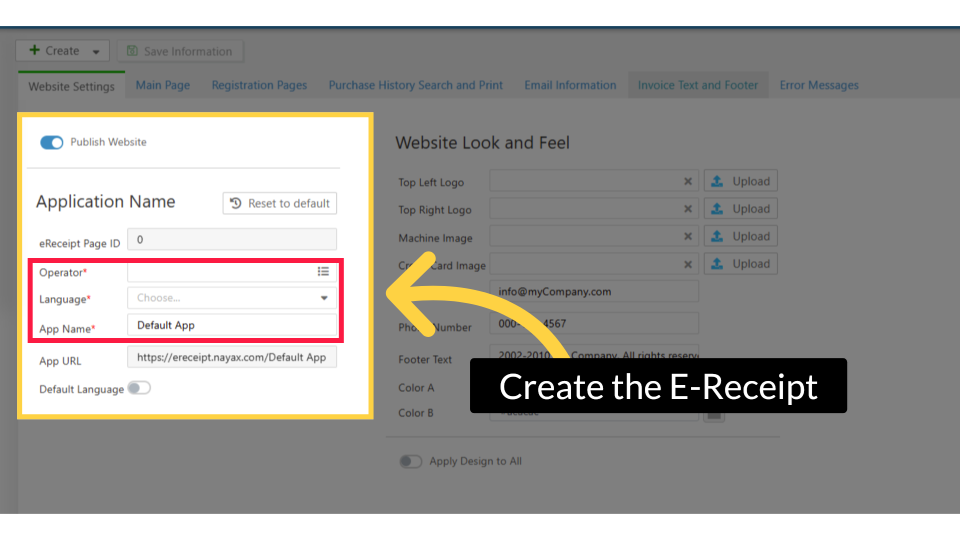
Click Invoice Text and Footer
Image Attached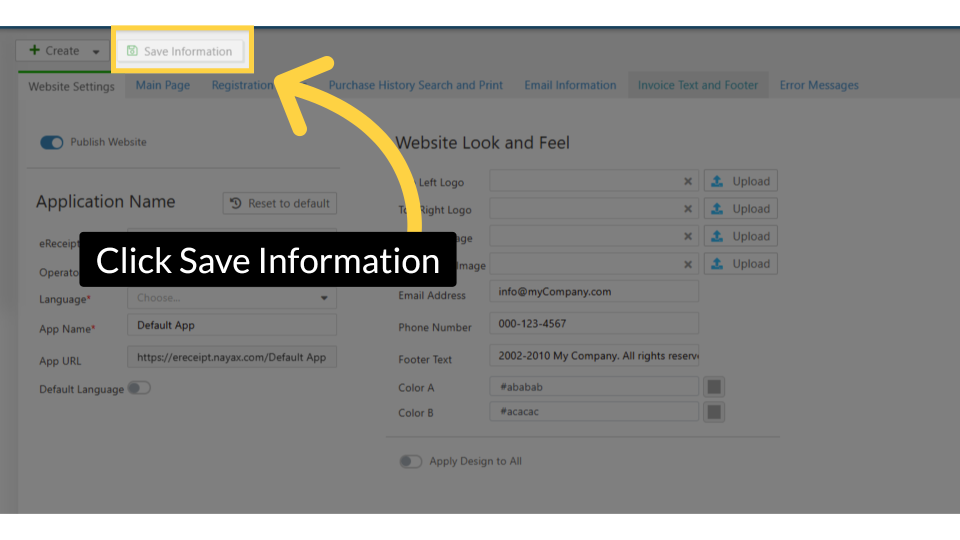
Customize the E-Receipts' information
Image Attached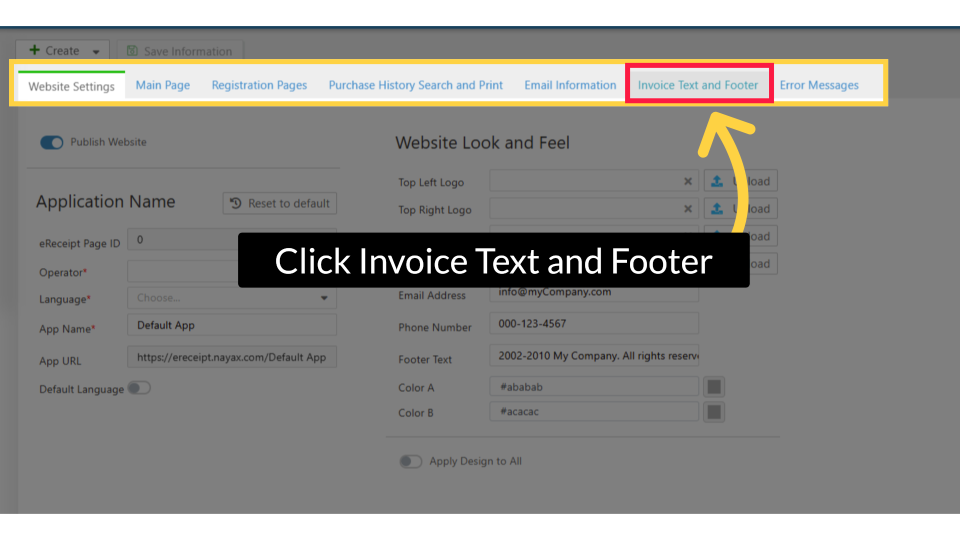
E-Receipt Preview
Image Attached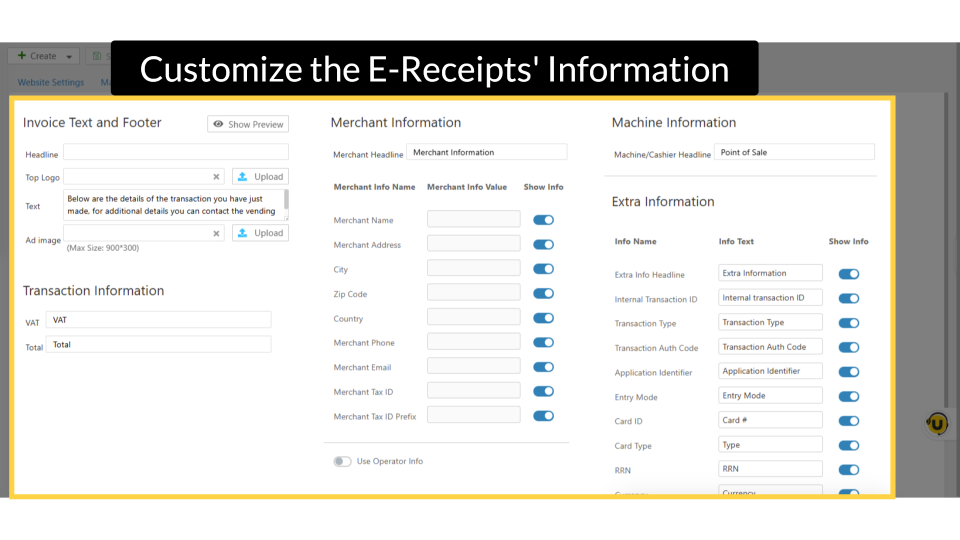
Thank you!
Did you find this article helpful?