How to Setup a Product Map with Planogram Wizard| MoMa
Set up a planogram in MoMa to map products to shelves and bins. Track inventory, manage stock levels, and keep your machine organized all from your phone.
Video Guide
00:01: Set up a planogram in the MoMa app to map products to your machine's shelves and
00:05: bins.
00:06: Open the MoMa app and tap Machines on the bottom navigation bar. Search for
00:10: and tap the machine you want to create a planogram for.
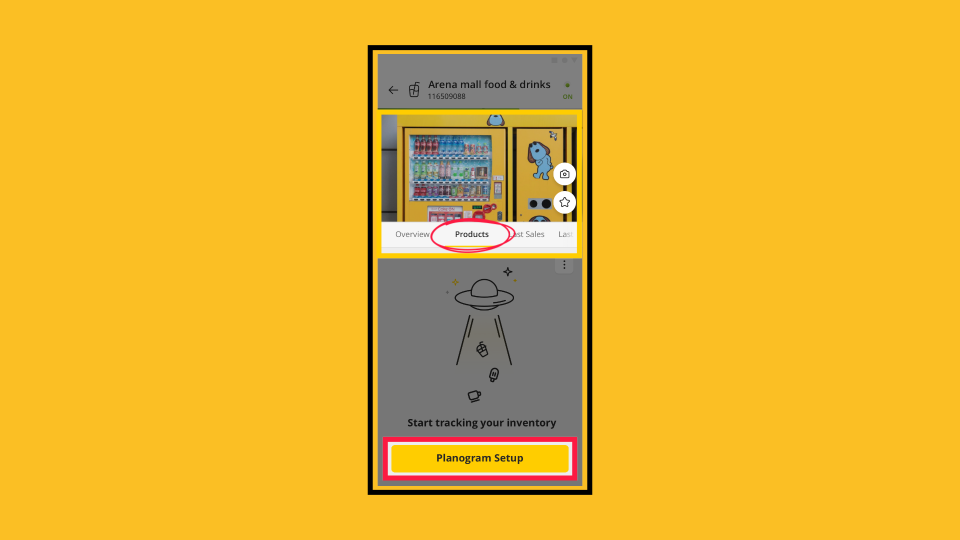
00:14: Tap the Products tab on the machine screen and then tap Planogram Setup.
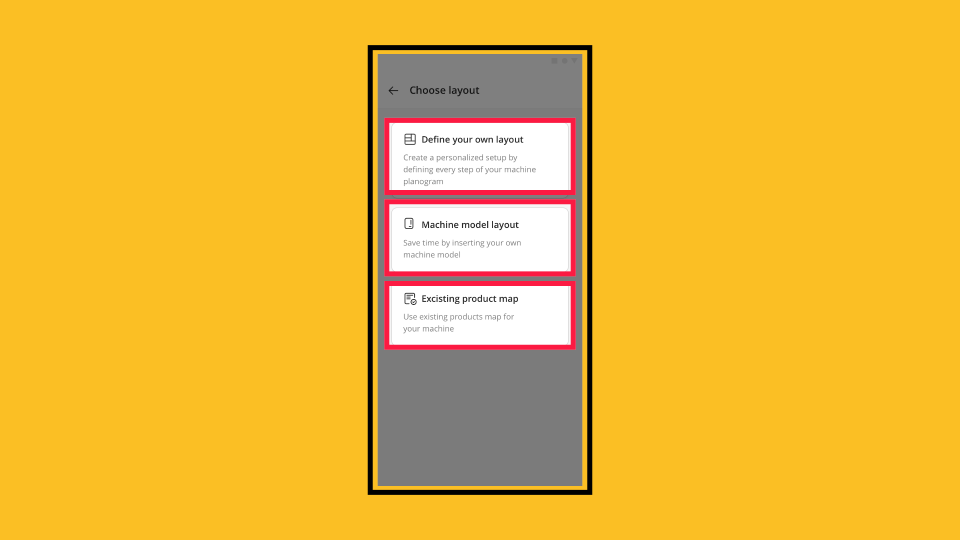
00:18: On the Choose layout screen, select one of the following options: Define your own
00:23: layout to build a custom planogram from scratch. Machine model layout to use a
00:27: predefined layout based on your machine model. Existing product map to apply a
00:32: product map
00:32: you already created. For this guide, we'll follow the Define your own layout path.
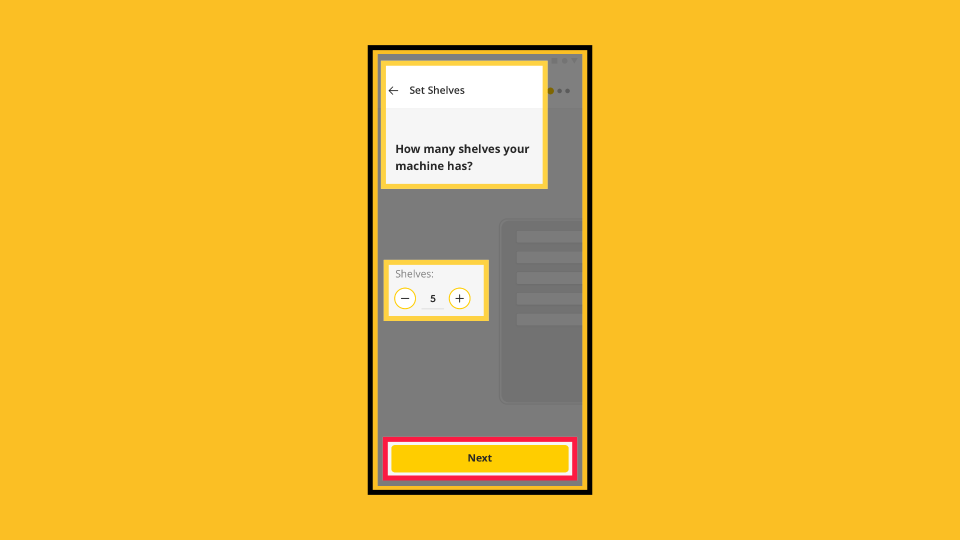
00:38: On the Set Shelves screen, use the + and − buttons to set the number of shelves
00:42: on your machine.
00:42: Then tap 'Next'.
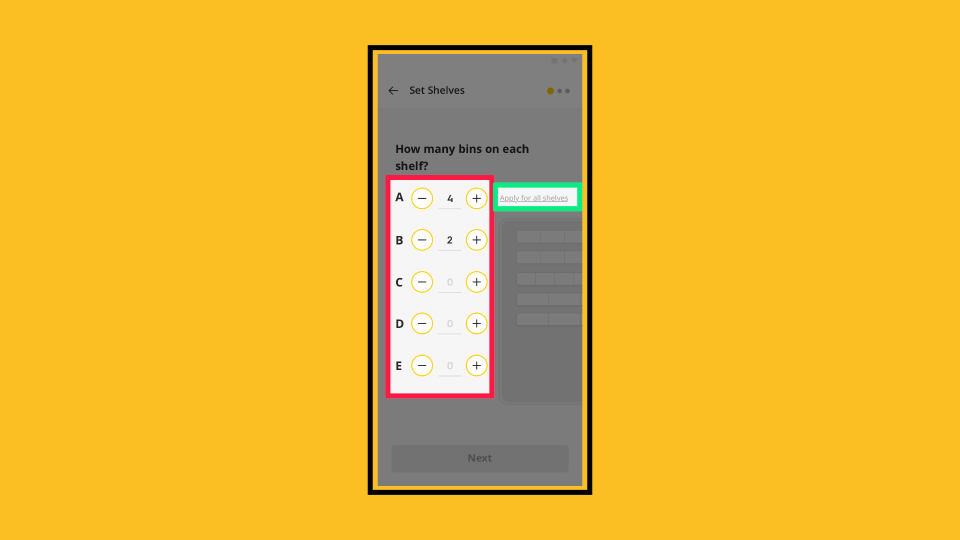
00:44: Set the number of bins for each shelf (labeled A, B, C, etc.).
00:48: Use the + and − buttons
00:50: next to each shelf letter. Tap Apply for all shelves if every shelf has the same
00:54: number of bins.
00:54: When ready, tap Next.
00:57: You will see a visual grid showing all shelves and bins.
01:01: On the Assign products to bins screen, tap the checkbox on each bin where you want
01:05: to place a product. Selected bins are highlighted in yellow. Tap Assign product.
01:10: On the Choose Product screen, browse or search the product catalog. Tap the product
01:15: you want to assign to the selected bins.
01:17: On the PAR & Price screen, set the following: PAR field for the maximum capacity
01:22: of items the bin can hold, and enter the product's sale price in the price
01:25: field. Once completed, tap 'Next'.
01:28: Repeat the steps above until all bins have products assigned.
01:32: A confirmation message will appear, acknowledging that all products are in their
01:36: places, and will appear
01:37: when every bin is filled. Tap Next to proceed.
01:41: On the Set MDB Codes screen,
01:43: choose one of the following:
01:44: Yes, if you know your MDB codes, or No, if you need help. If you need help, then
01:49: follow the on-screen guidance to identify your codes.
01:53: If yes, and you know your MDB codes, on the next screen shown here, you can either
01:57: enter them or select Finish without filling them in, and can add them later.
02:02: Tap each bin's MDB field and enter the code using your keyboard.
02:07: When you have entered all MDB codes (or chosen to skip), tap Done.
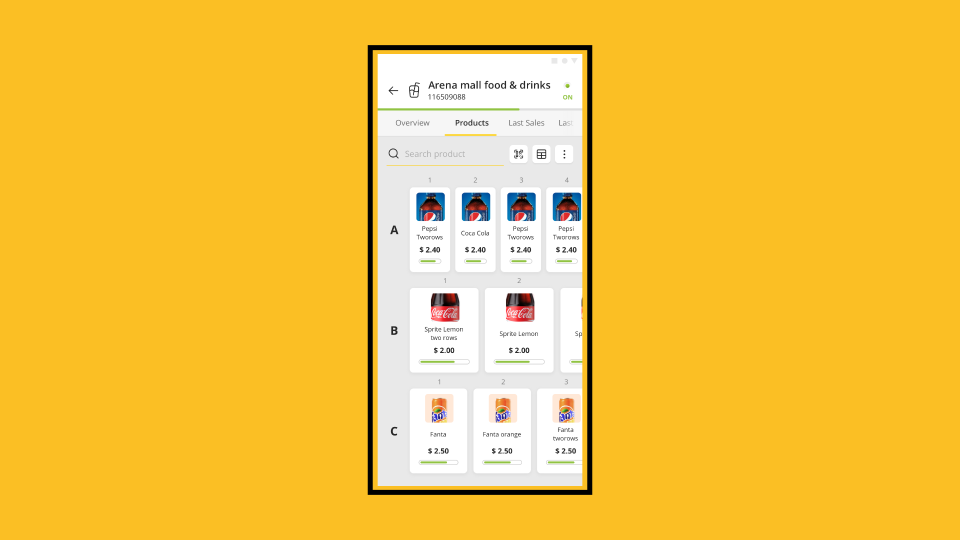
02:11: Your planogram is now active. On the Products tab of your machine,
02:15: you will see a visual grid showing each shelf, bin, product name, price, and stock
02:19: level.
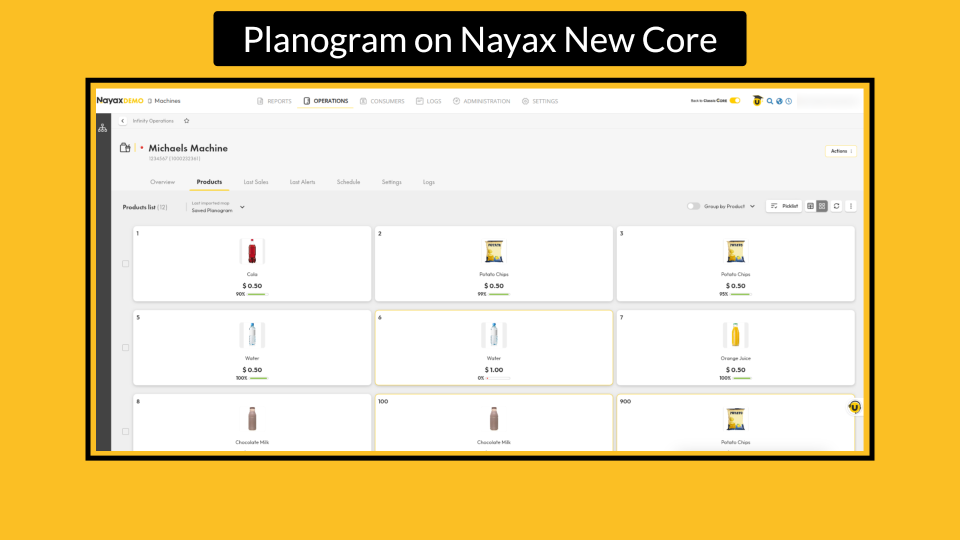
02:20: The planogram syncs with Nayax NEW CORE, allowing you to view and manage it through
02:25: the web dashboard under the Operations, Machines, and selected Machine Products tab.
Tap Machine
Image AttachedOpen the MoMa app and tap Machines on the bottom navigation bar. Search for and tap the machine you want to create a planogram for.

Tap Product
Image AttachedTap the Products tab on the machine screen and then tap Planogram Setup.
Select Layout
Image AttachedOn the Choose layout screen, select one of the following options:
- Define your own layout to build a custom planogram from scratch.
- Machine model layout to use a predefined layout based on your machine model.
- Existing product map to apply a product map you already created.
For this guide, we'll follow the Define your own layout path.
Set Shelves
Image AttachedOn the Set Shelves screen, use the + and − buttons to set the number of shelves on your machine. Then tap 'Next'.
Configure Shelves and Bins
Image AttachedSet the number of bins for each shelf (labeled A, B, C, etc.). Use the + and − buttons next to each shelf letter. Tap Apply for all shelves if every shelf has the same number of bins. When ready, tap Next.
Visual Grid
Image AttachedYou will see a visual grid showing all shelves and bins.
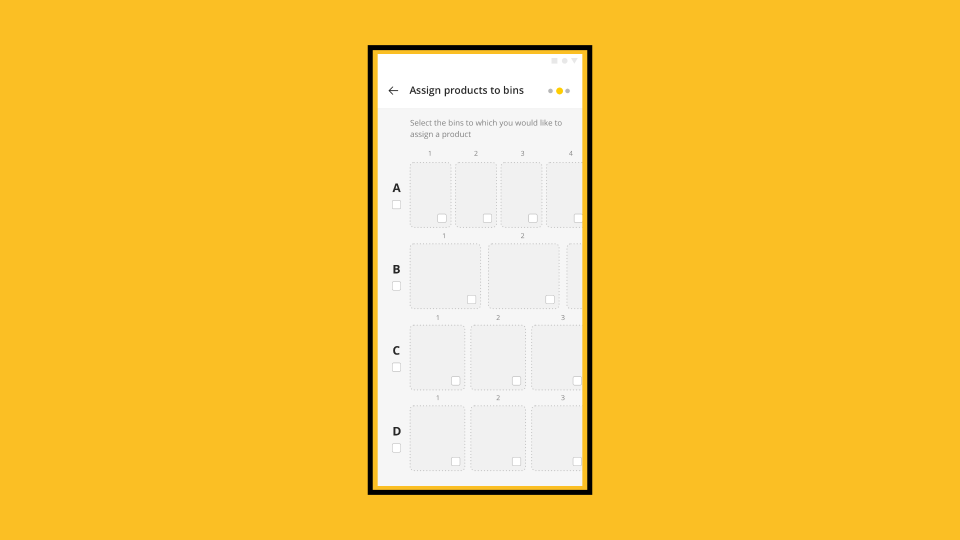
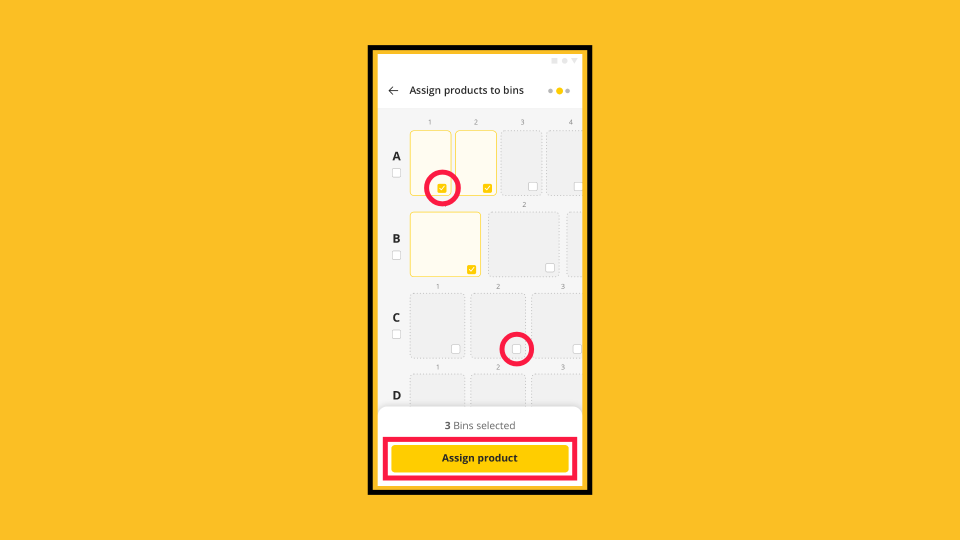
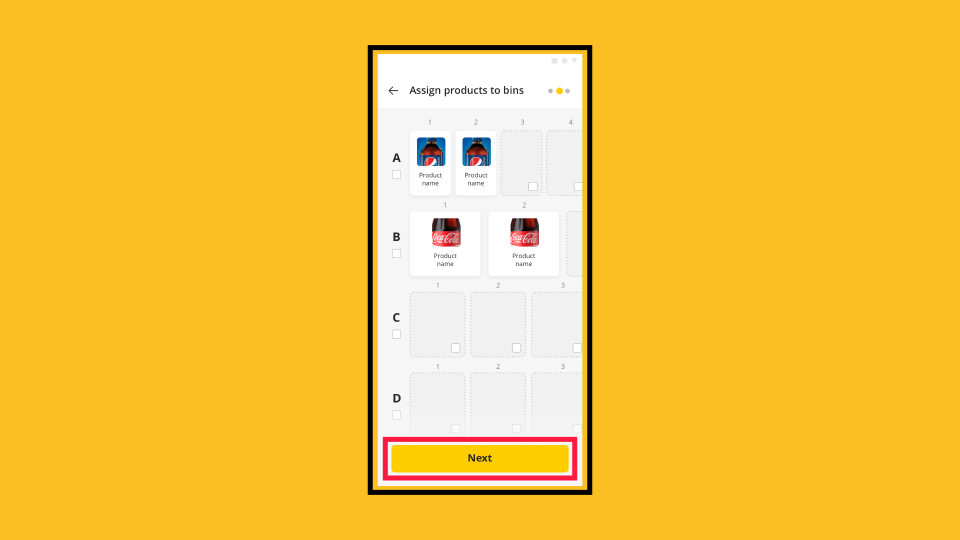
Assign Products to Bins
Image AttachedOn the Assign products to bins screen, tap the checkbox on each bin where you want to place a product. Selected bins are highlighted in yellow. Tap Assign product.
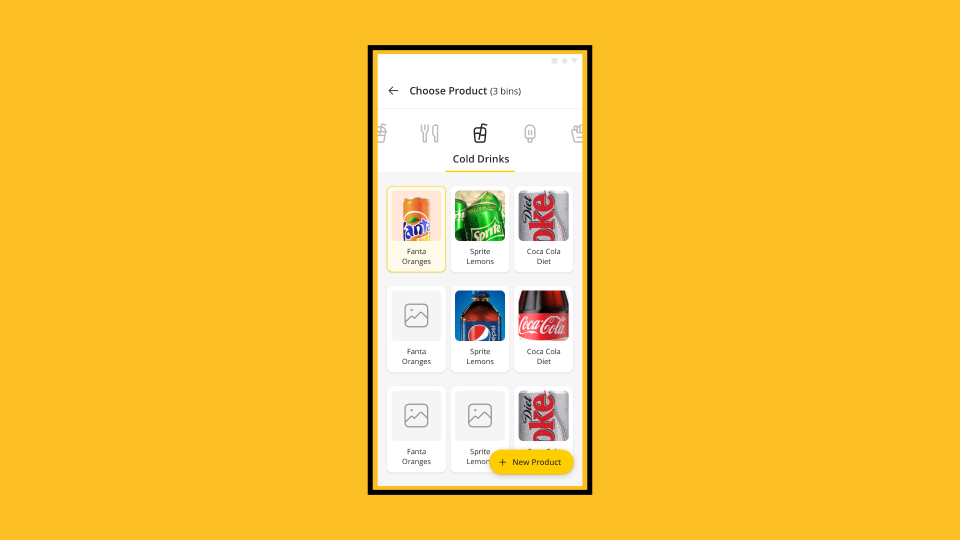
Choose Product
Image AttachedOn the Choose Product screen, browse or search the product catalog. Tap the product you want to assign to the selected bins.
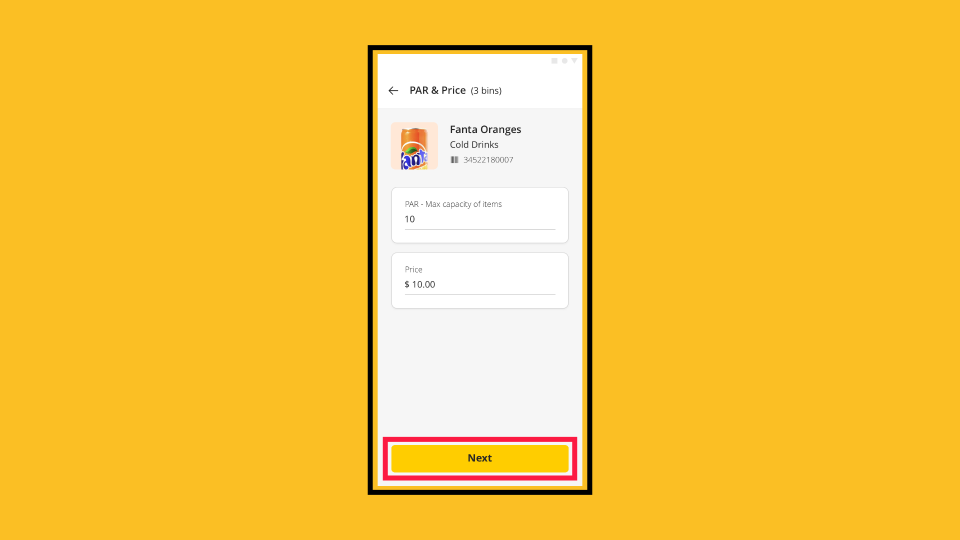
PAR & Price
Image AttachedOn the PAR & Price screen, set the following:
PAR field for the maximum capacity of items the bin can hold, and enter the product's sale price in the price field. Once completed, tap 'Next'.
Repeat Assigning Products to Bins
Image AttachedRepeat the steps above until all bins have products assigned.
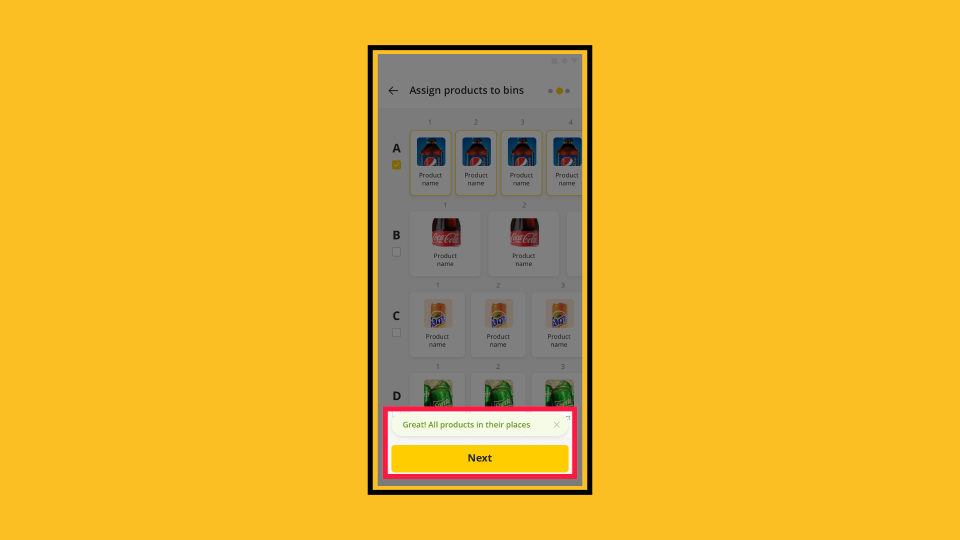
Completed Assigning Product to Bins
Image AttachedA confirmation message will appear, acknowledging that all products are in their places, and will appear when every bin is filled. Tap Next to proceed.
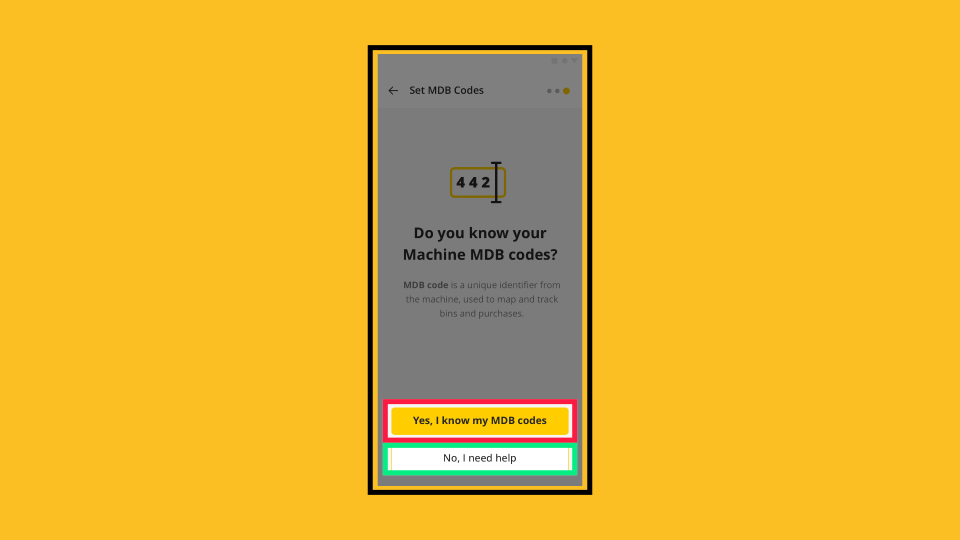
Set MDB codes
Image AttachedOn the Set MDB Codes screen, choose one of the following:
Yes, if you know your MDB codes, or No, if you need help.
If you need help, then follow the on-screen guidance to identify your codes.
If Yes
Image AttachedIf yes, and you know your MDB codes, on the next screen shown here, you can either enter them or select Finish without filling them in, and can add them later.

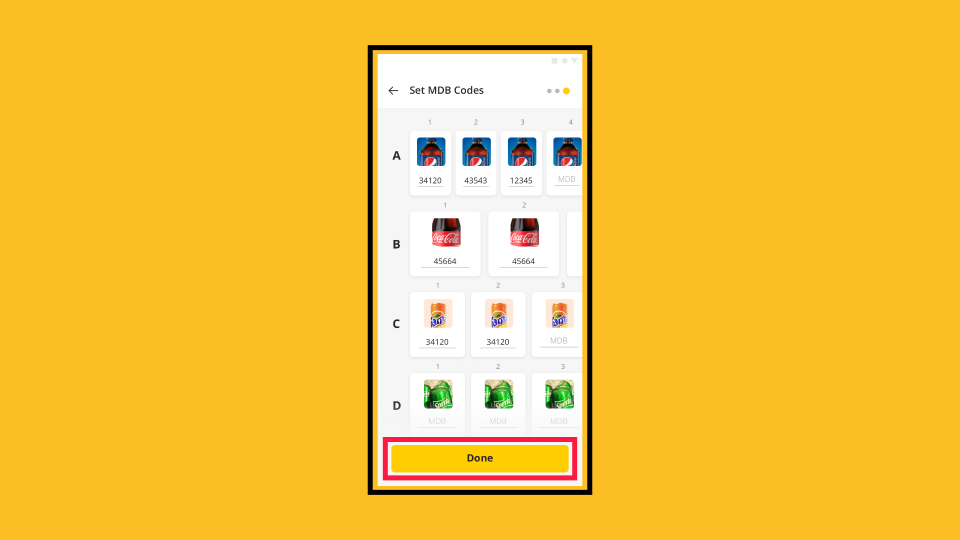
Add MDB Codes
Image AttachedTap each bin's MDB field and enter the code using your keyboard.

Proceed
Image AttachedWhen you have entered all MDB codes (or chosen to skip), tap Done.
Planogram is now active!
Image AttachedYour planogram is now active. On the Products tab of your machine, you will see a visual grid showing each shelf, bin, product name, price, and stock level.
Planogram on Nayax New Core
Image AttachedThe planogram syncs with Nayax NEW CORE, allowing you to view and manage it through the web dashboard under the Operations, Machines, and selected Machine Products tab.
Thank you!
Did you find this article helpful?