How to Set Up Roles | Administration
Users under the administration tab are management personnel in the company that are granted access based on their role. When creating roles, you can grant access to specific fields in Nayax Retail Core.
Video Guide
00:00: This guide will walk you through setting up roles in Retail Core.
00:03: From the dashboard of your Retail Core management suite click on the Administration tab
00:08: from the side menu.
00:10: In the sub-menu. Go to user.
00:13: In the sub-menu. Go to roles.
00:16: Click Plus at the top right of the screen.
00:18: Fill in a numerical code as another means of identification and name,
00:22: the role
00:23: In the permissions tab below, select the relevant fields to Grant access for
00:27: the role created. When selecting the checkboxes some will turn yellow
00:31: with a check mark to show. They've been selected While others will appear as a
00:35: small yellow Square within the Box. The semi filled checkboxes mean
00:39: that only certain permissions are granted in the hierarchy.
00:42: While a full yellow checkbox opens access for the entire subject
00:47: To open the full list of roles and access Fields.
00:49: Click plus icon to expand the permissions.
00:52: To close the tabs, click the double minus icon.
00:55: Click create.
00:56: Make sure to click save.
00:58: Thanks for watching!
Click Administration tab
Image Attached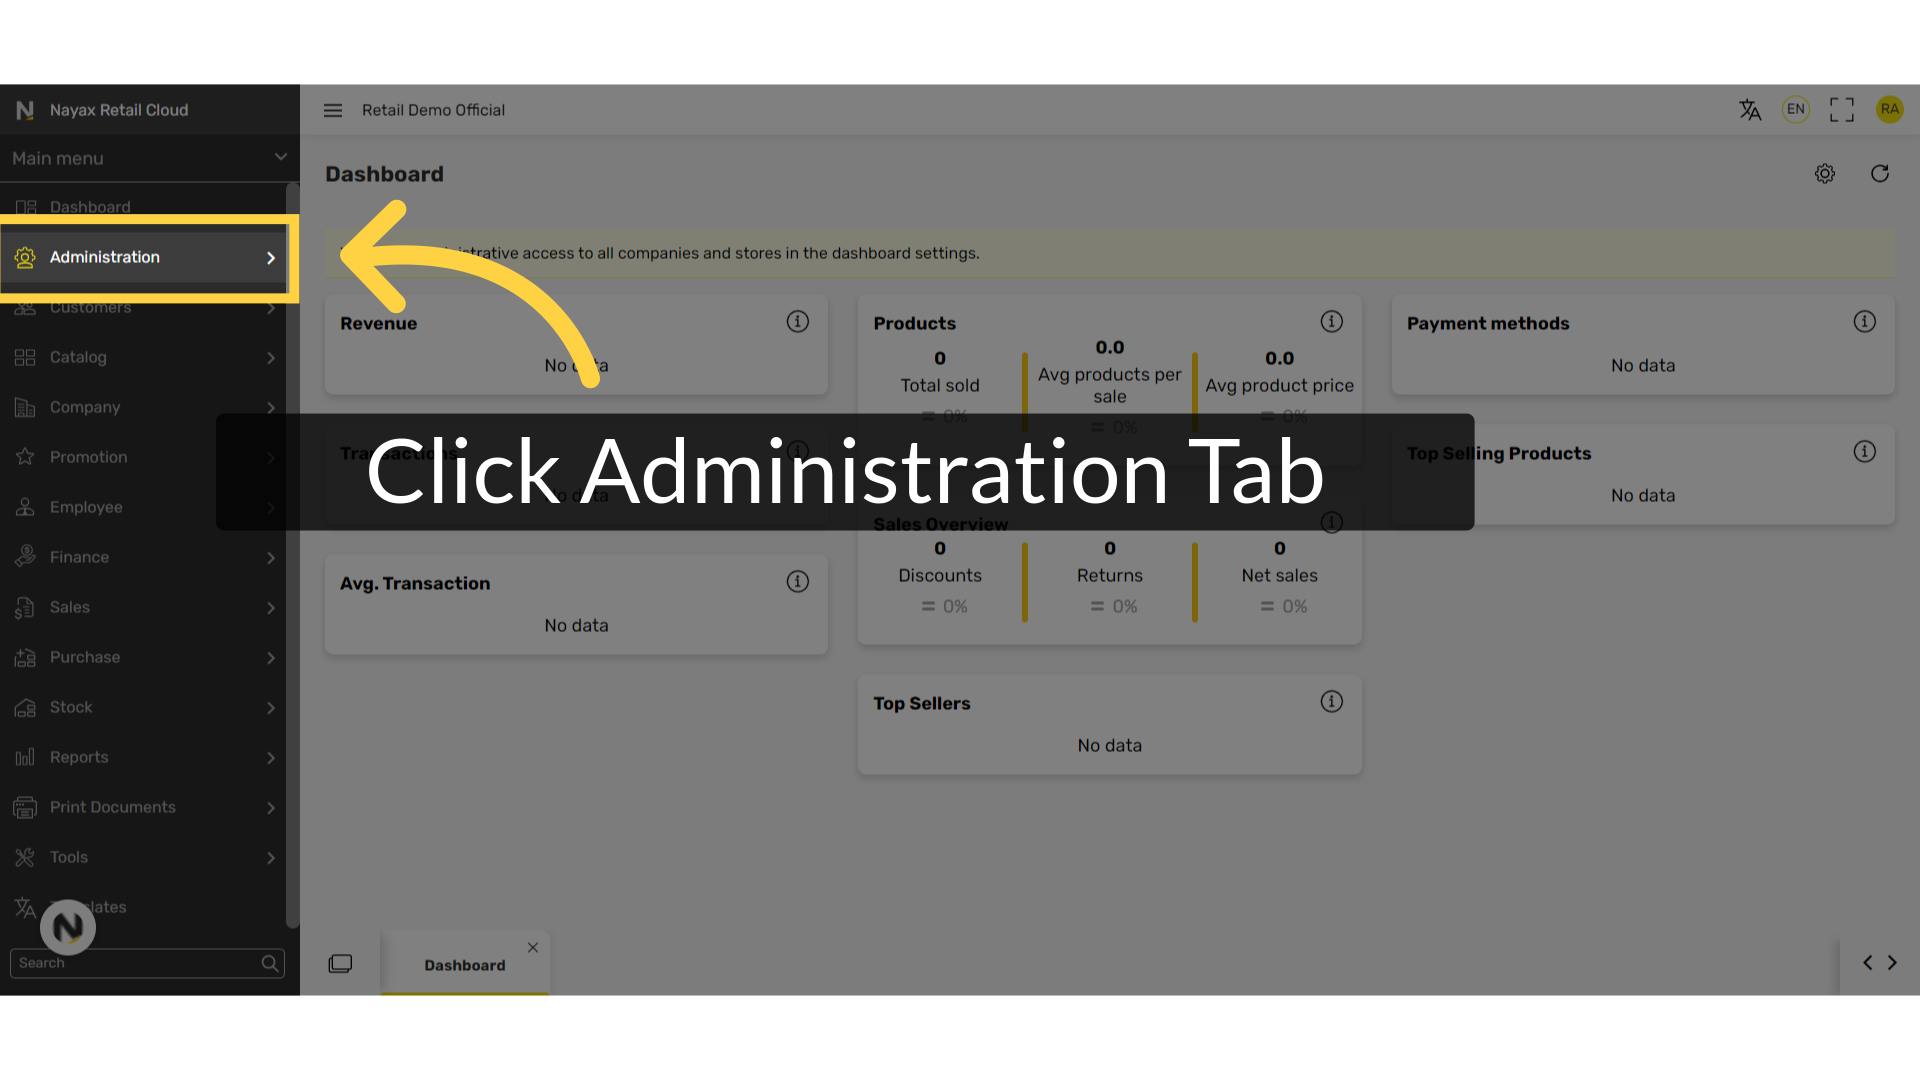
Click User tab
Image Attached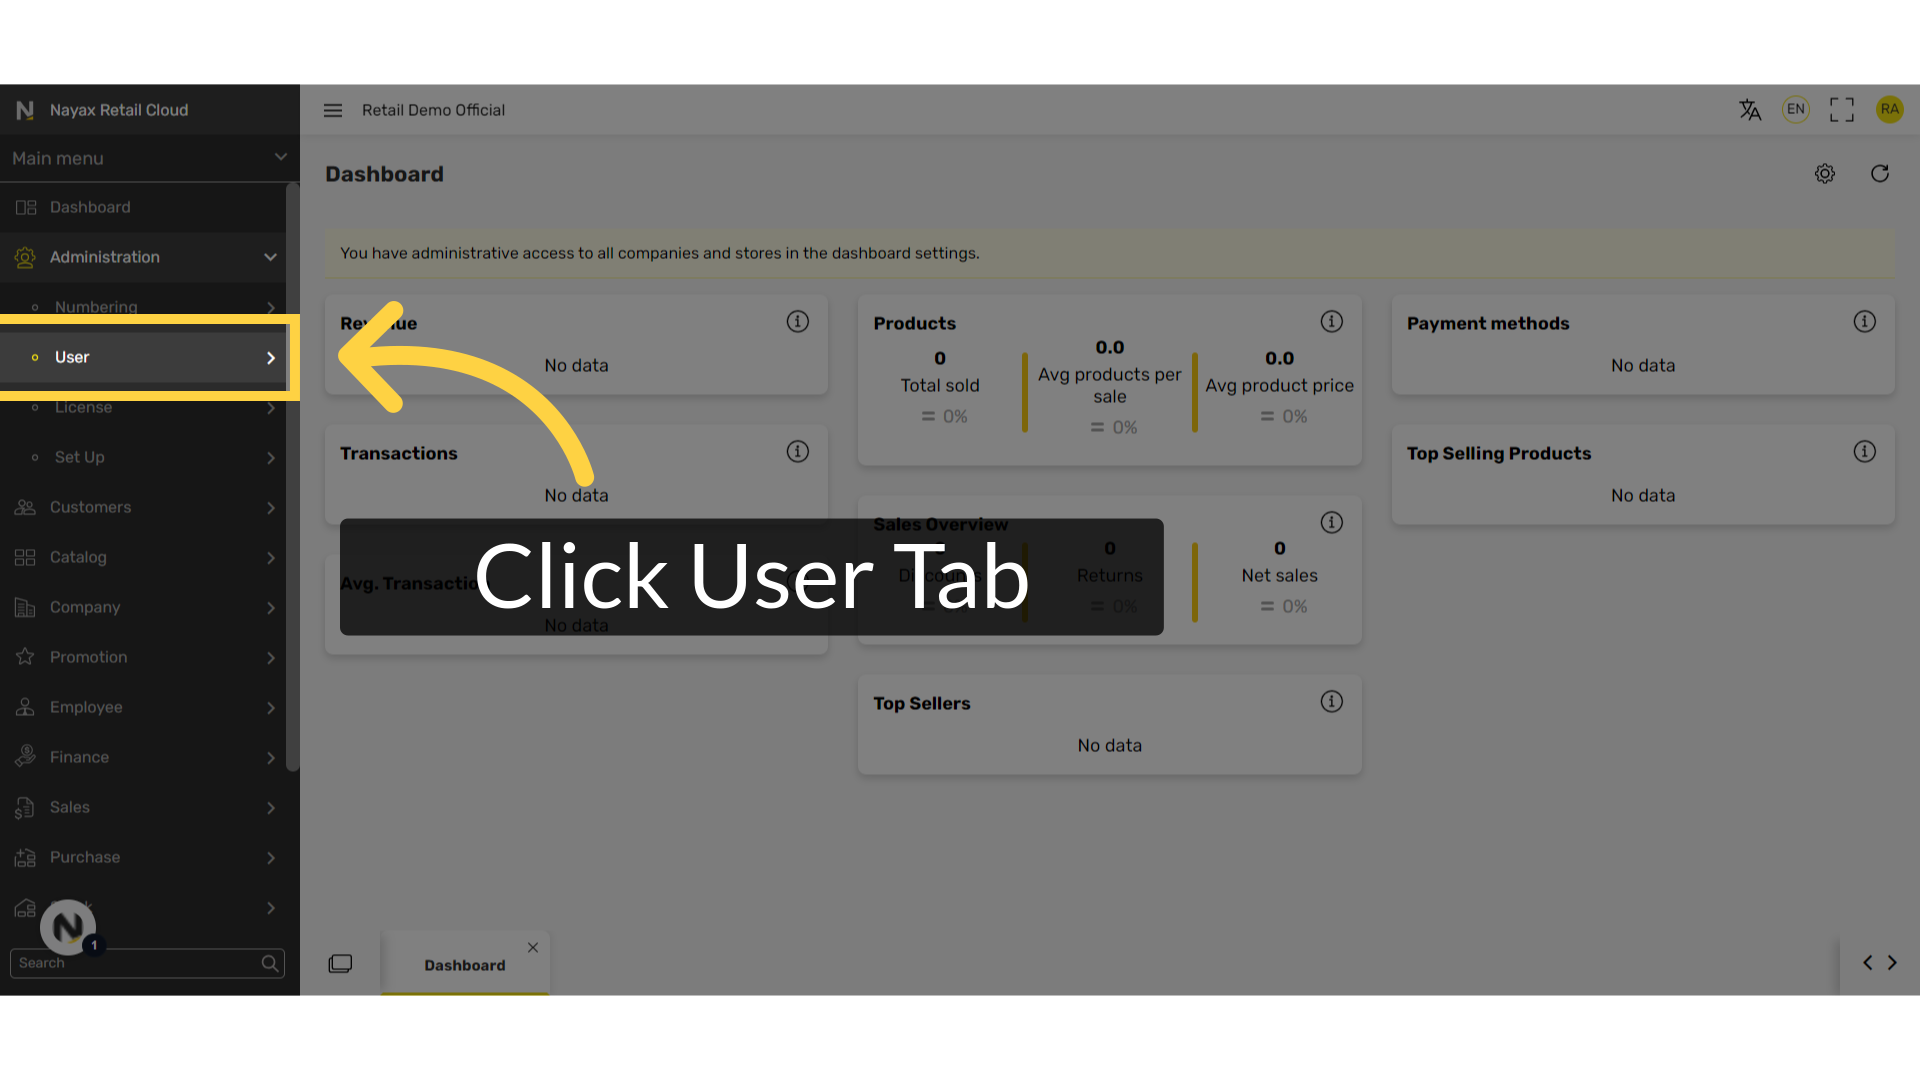
Click Roles tab
Image Attached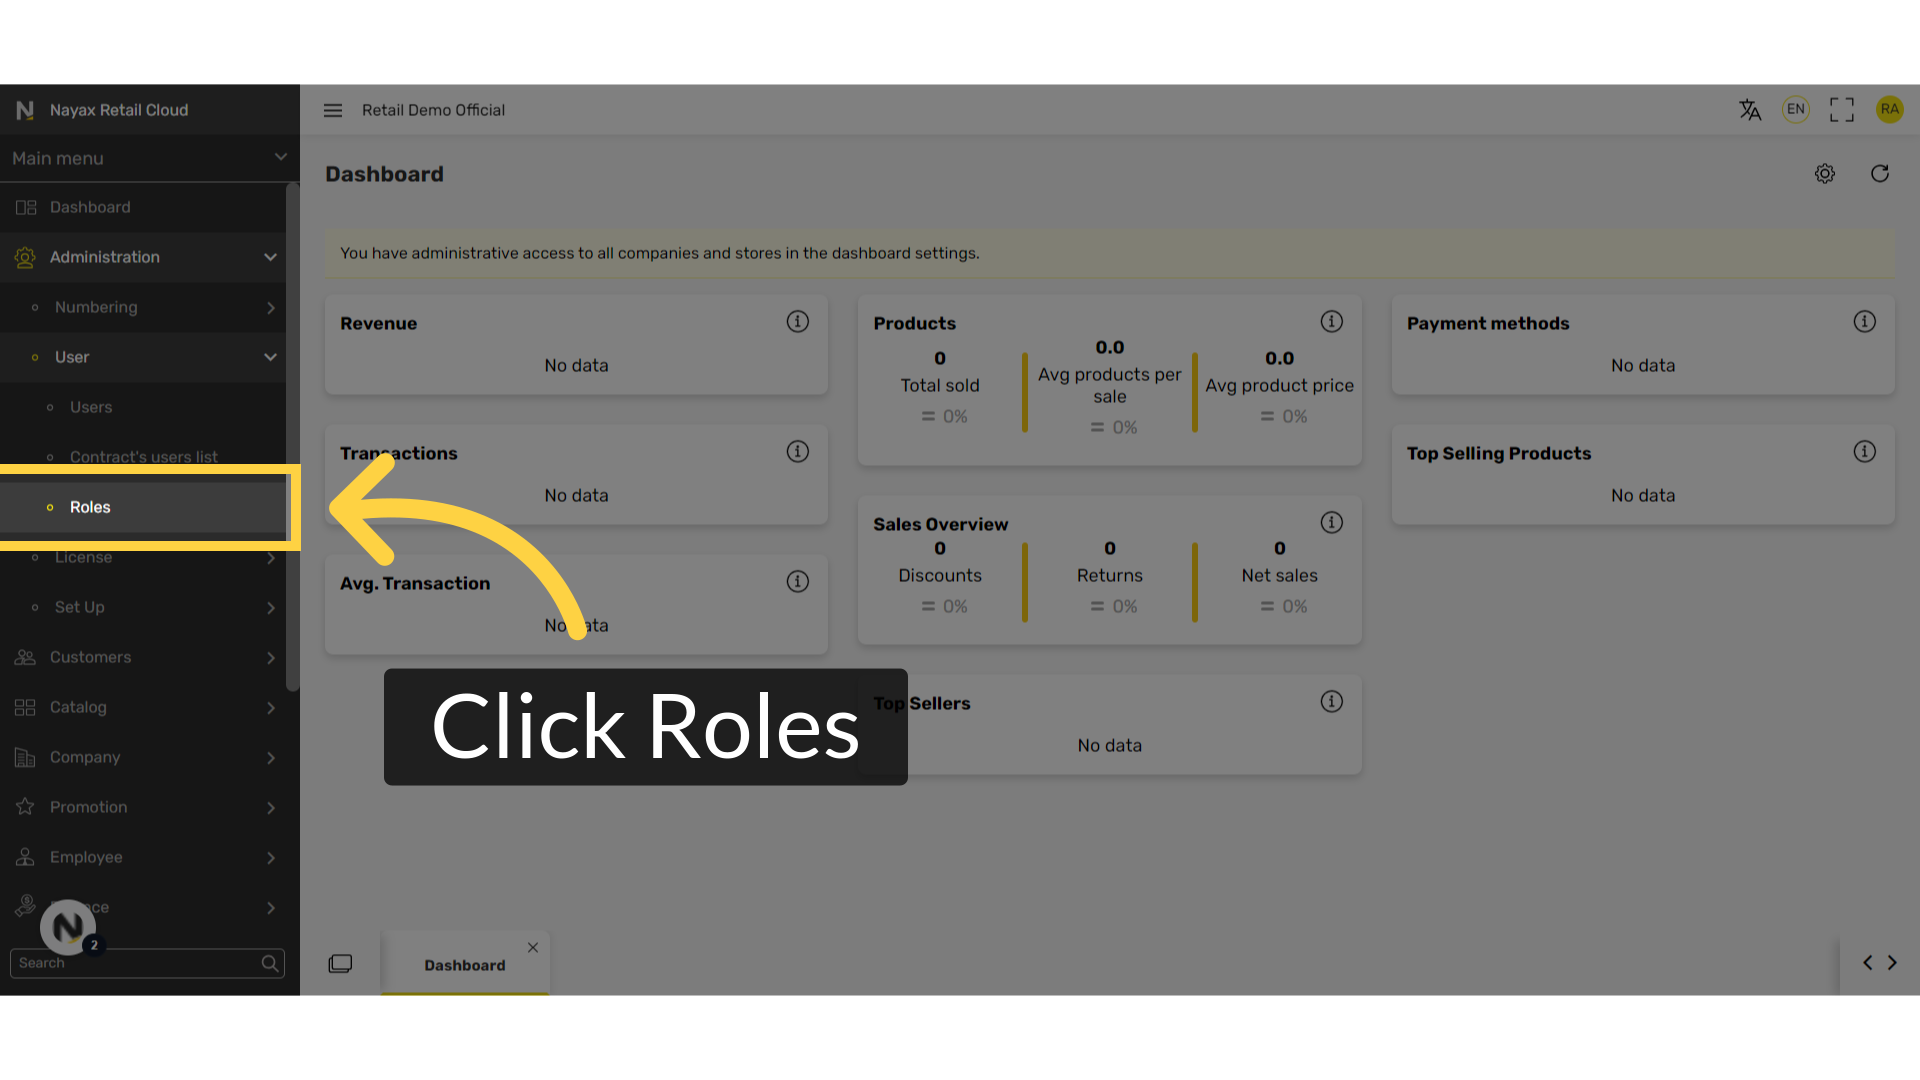
Click + icon
Image Attached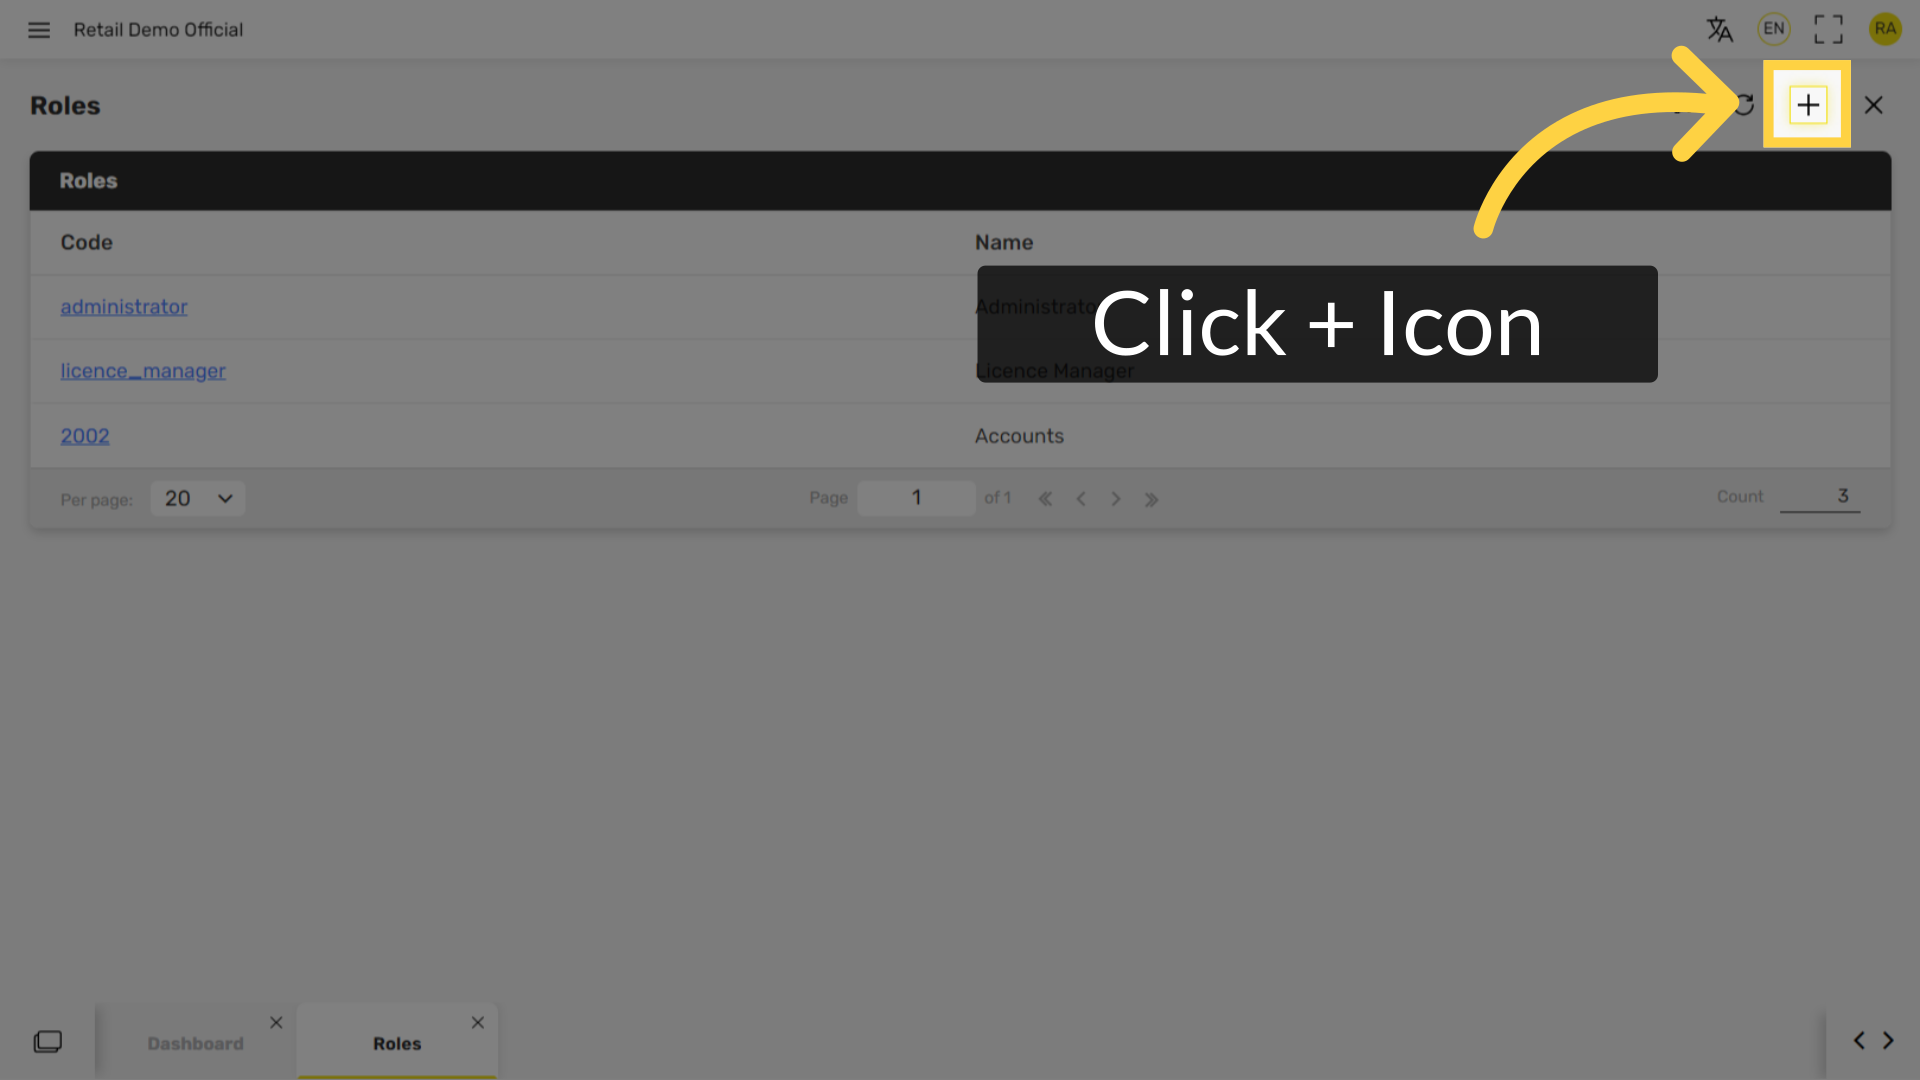
Fill in the following fields:
Image Attached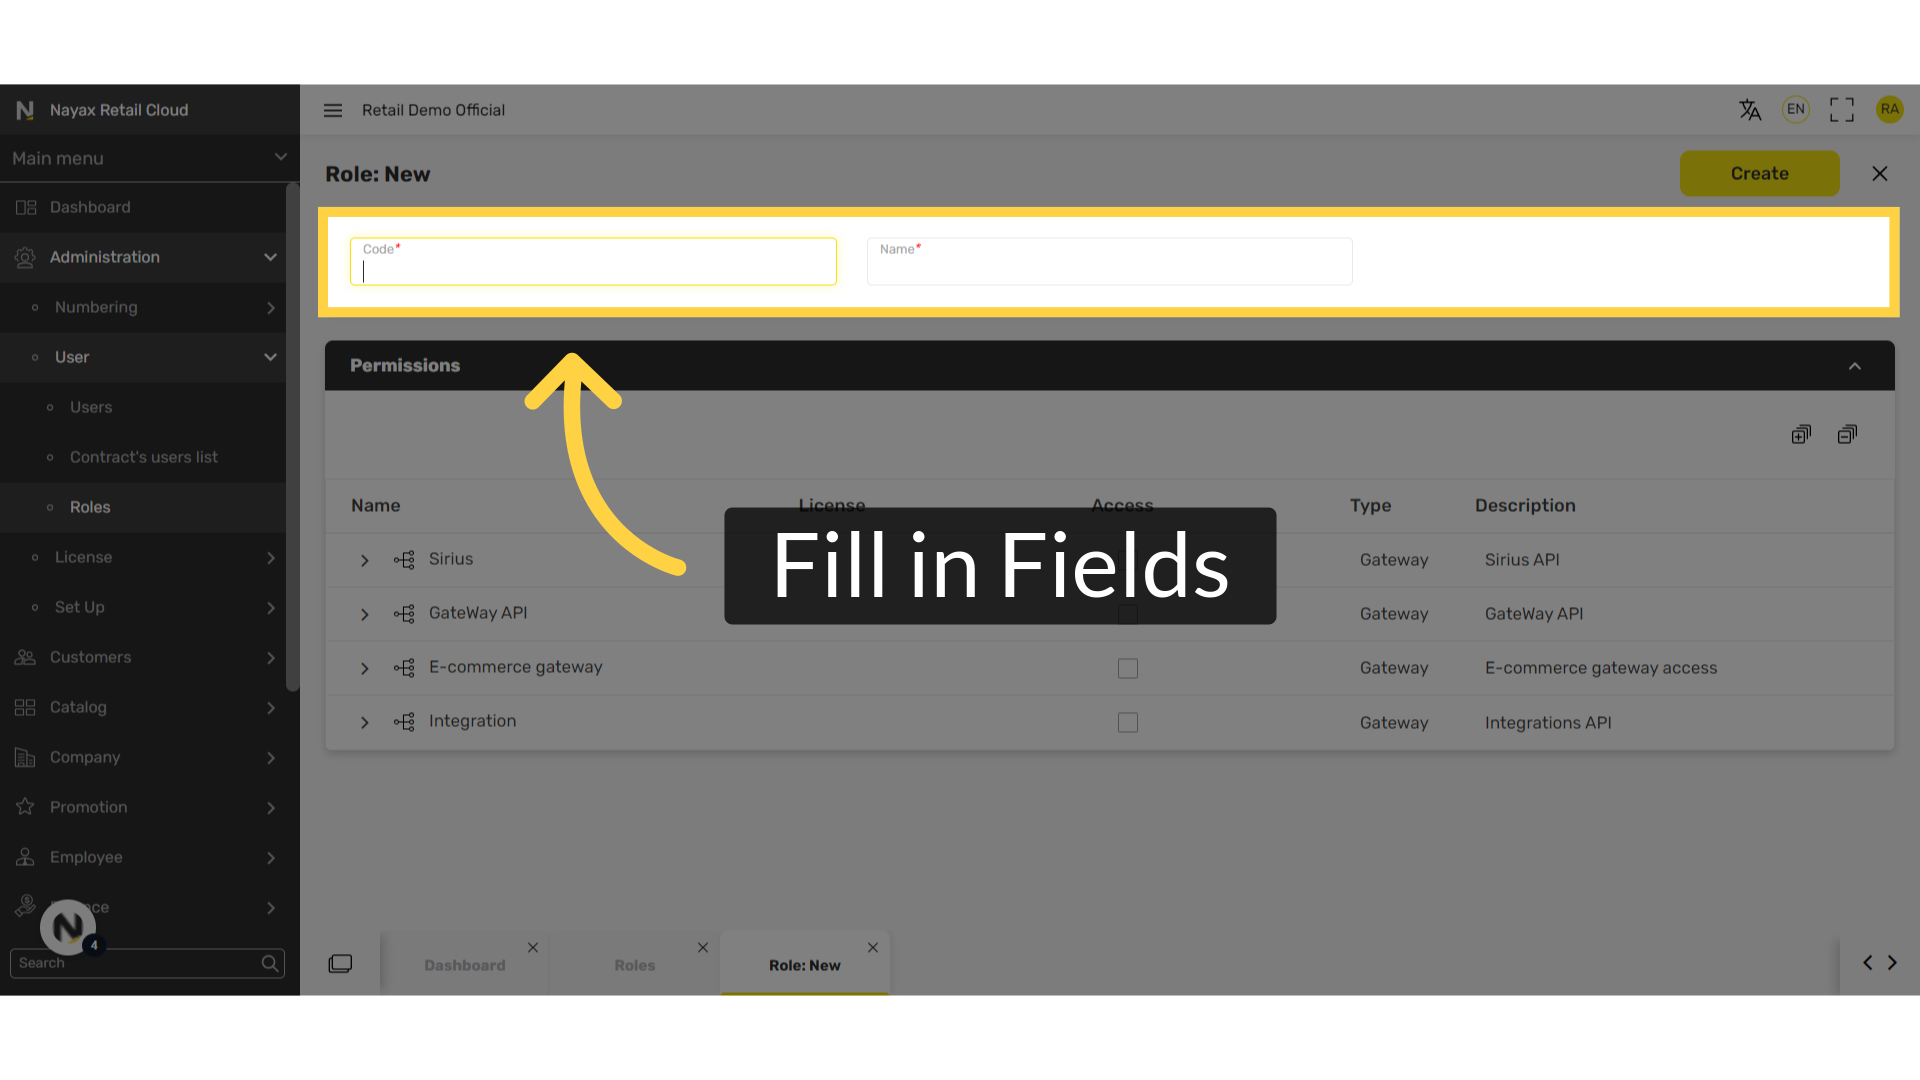
Select Fields
Image Attached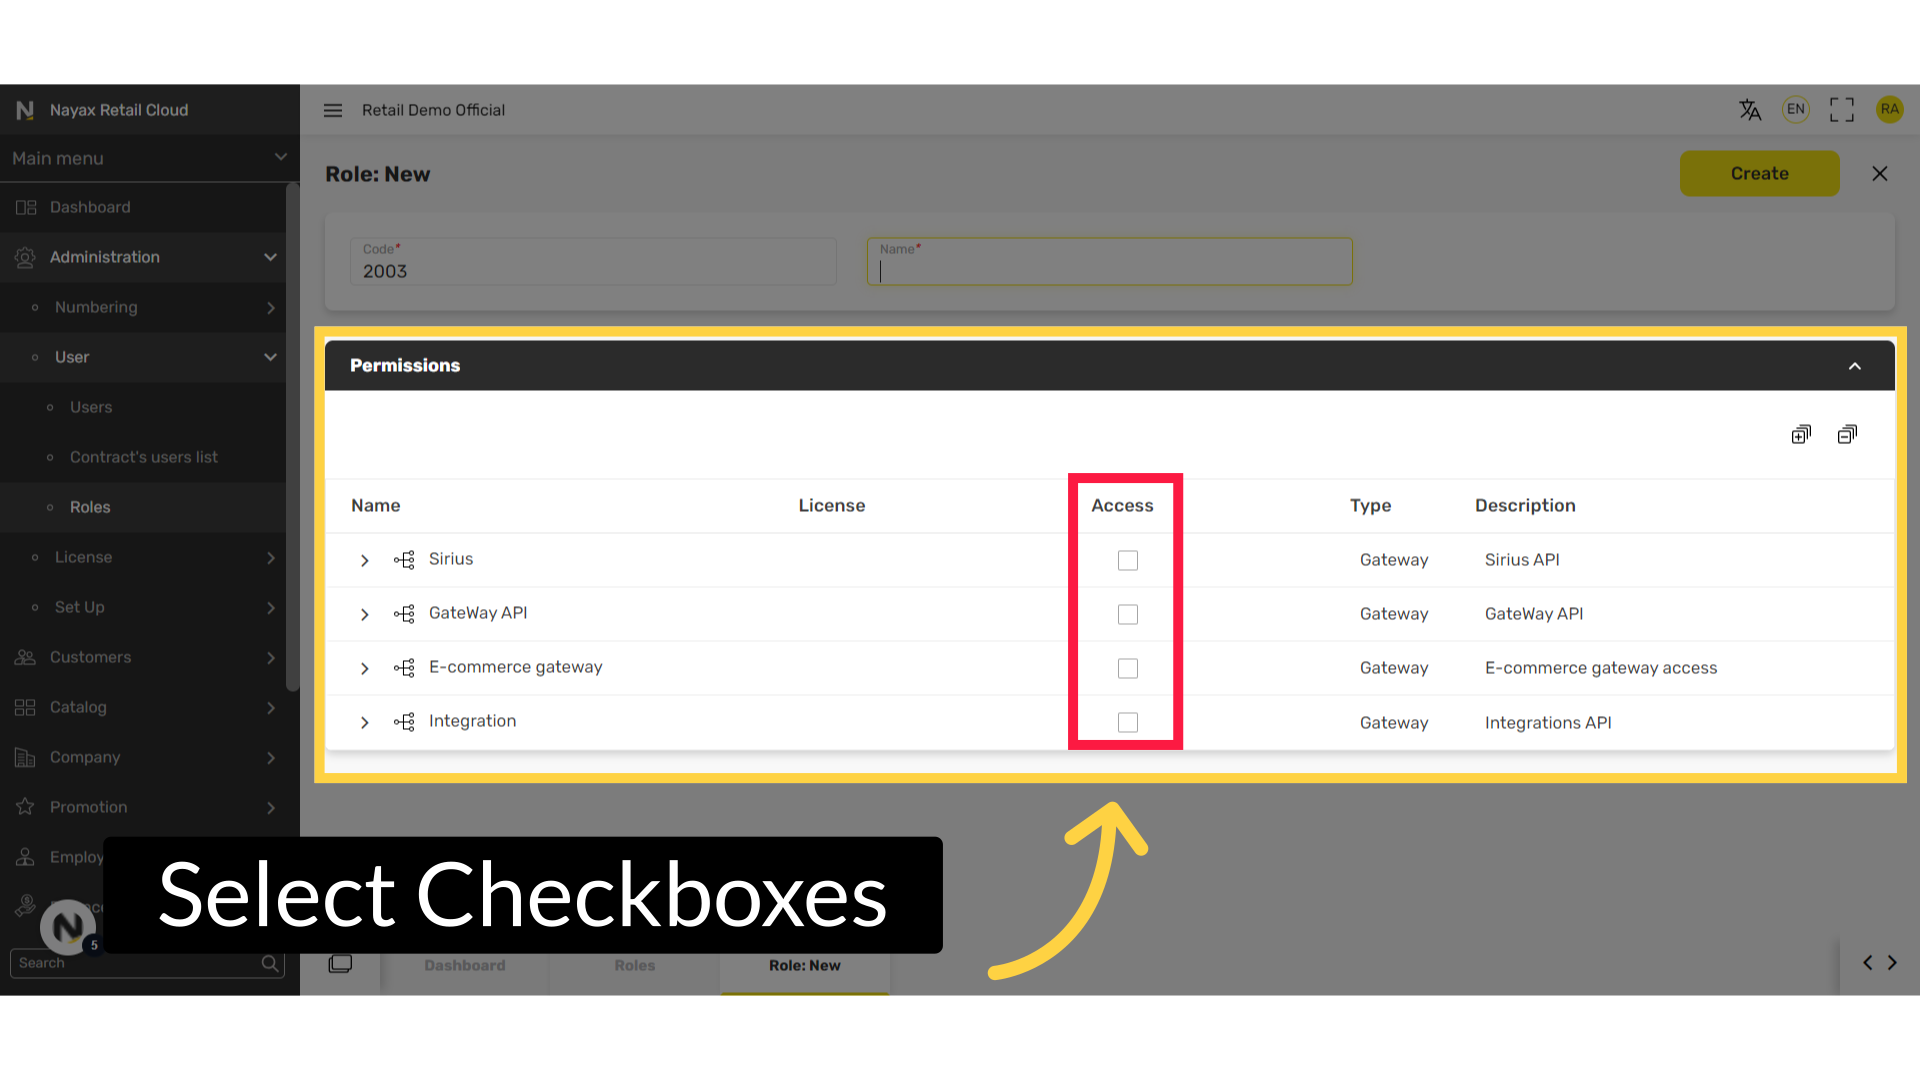
Click + Icon
Image Attached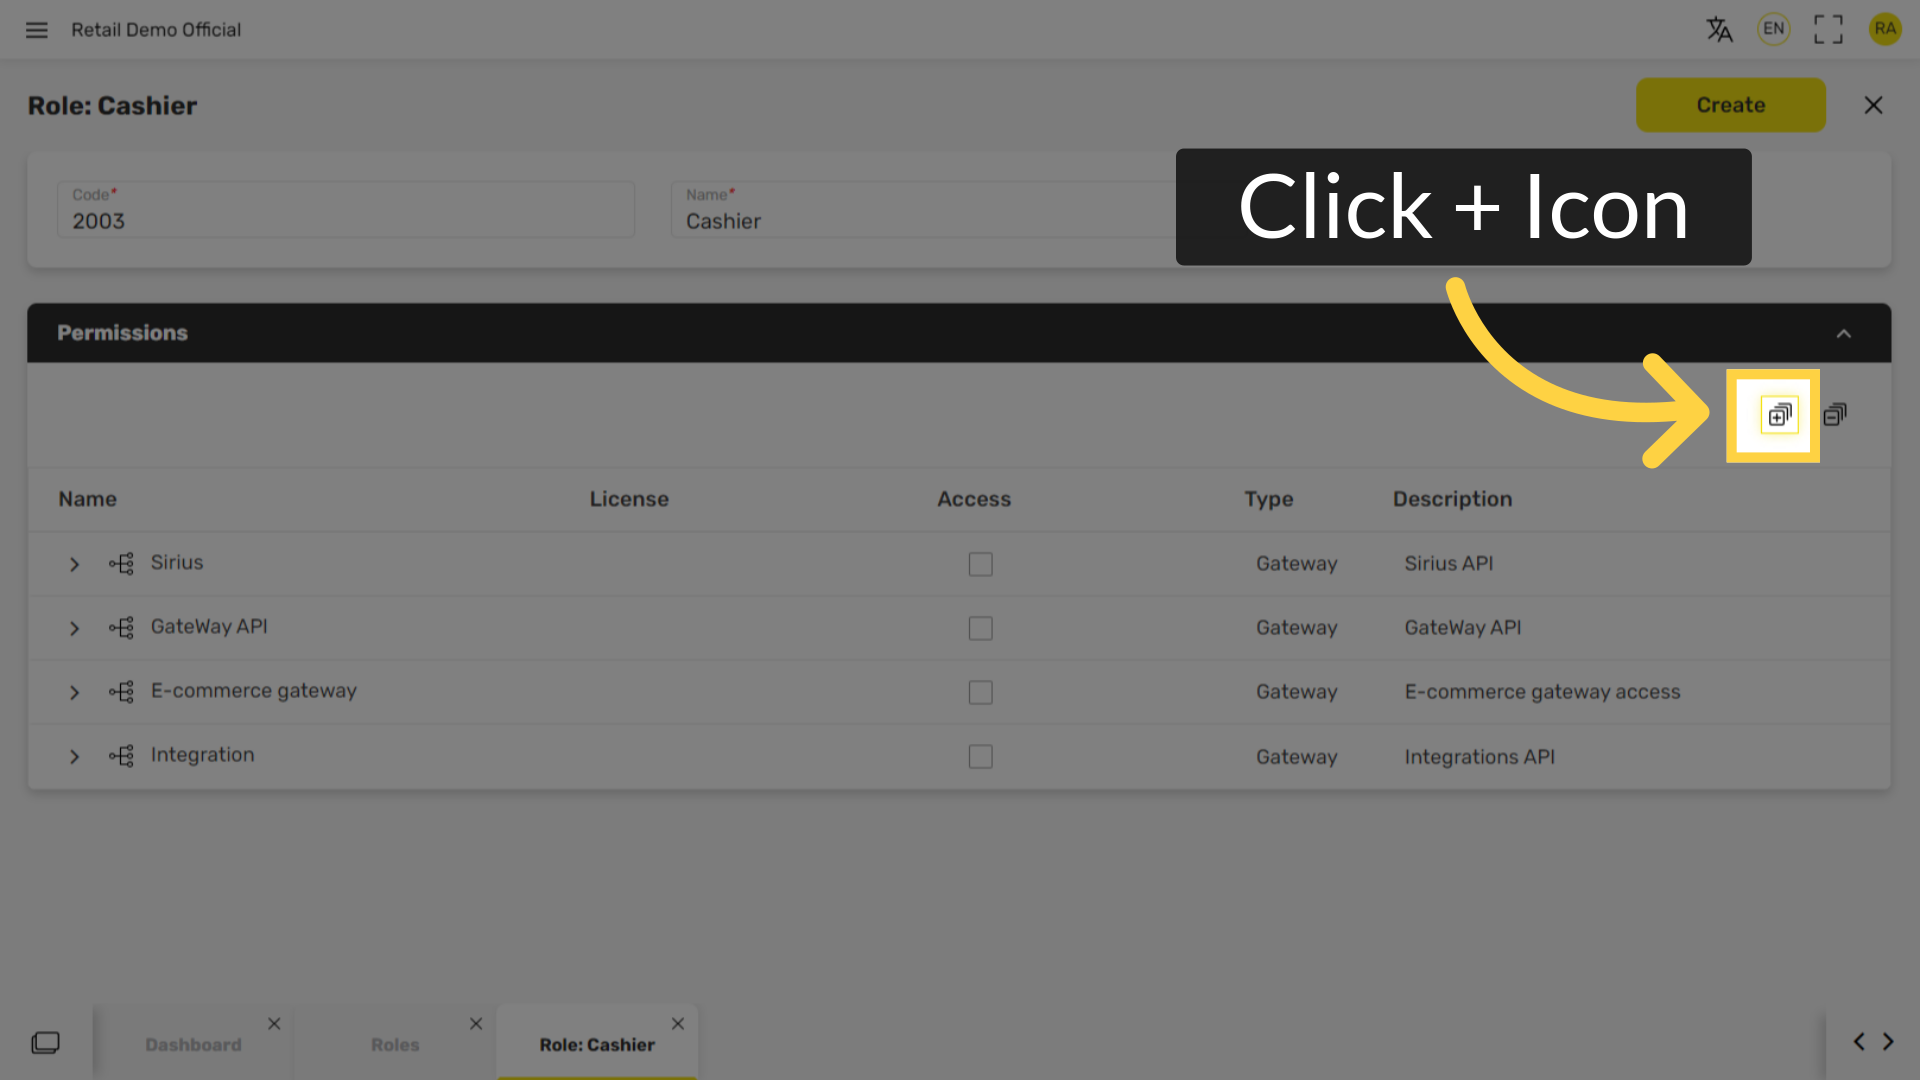
Click - Icon
Image Attached
Click Create.
Image Attached
Click Save.
Image Attached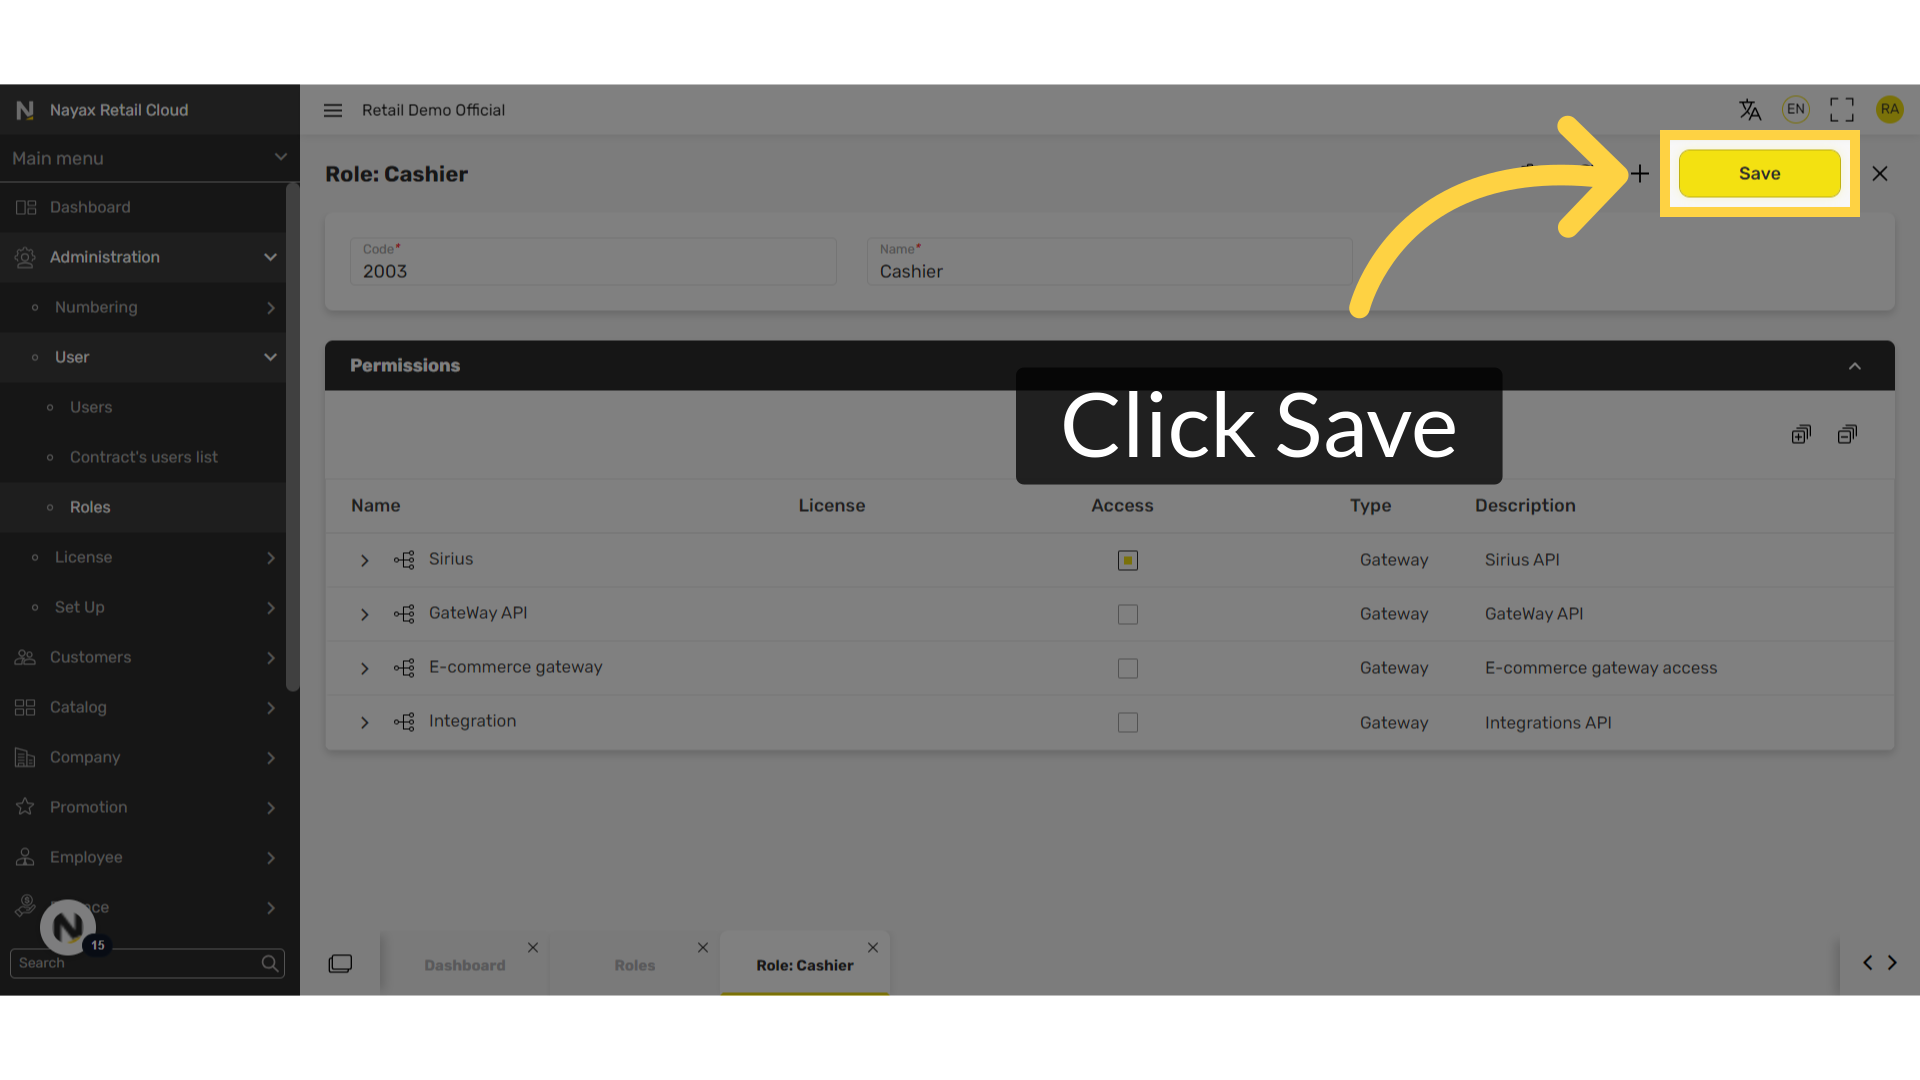
Thank you!
Did you find this article helpful?