How to Set Up and Link Complimentary Products | Catalog
1
Video Guide
2
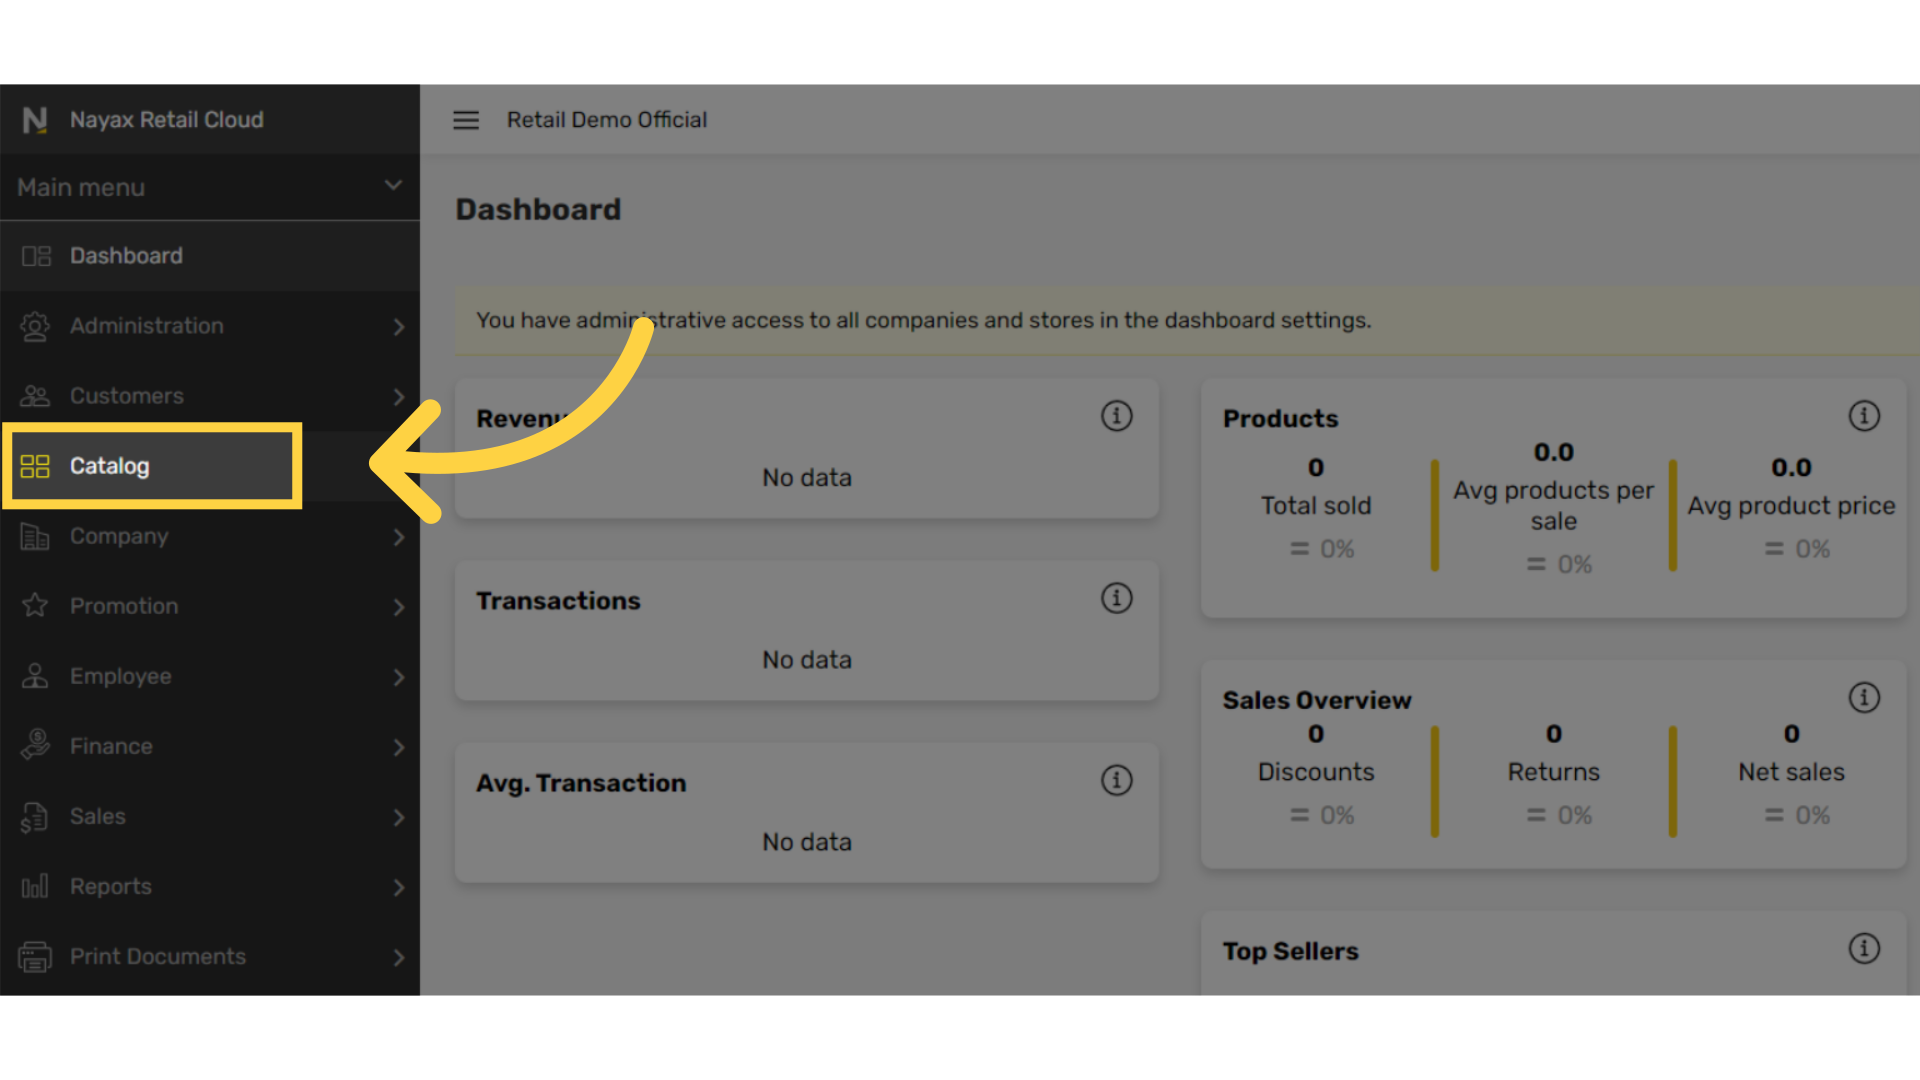
Click Catalog Tab
Image AttachedOn the dashboard of your Retail Core management suite click the Catalog tab from the side menu.
3
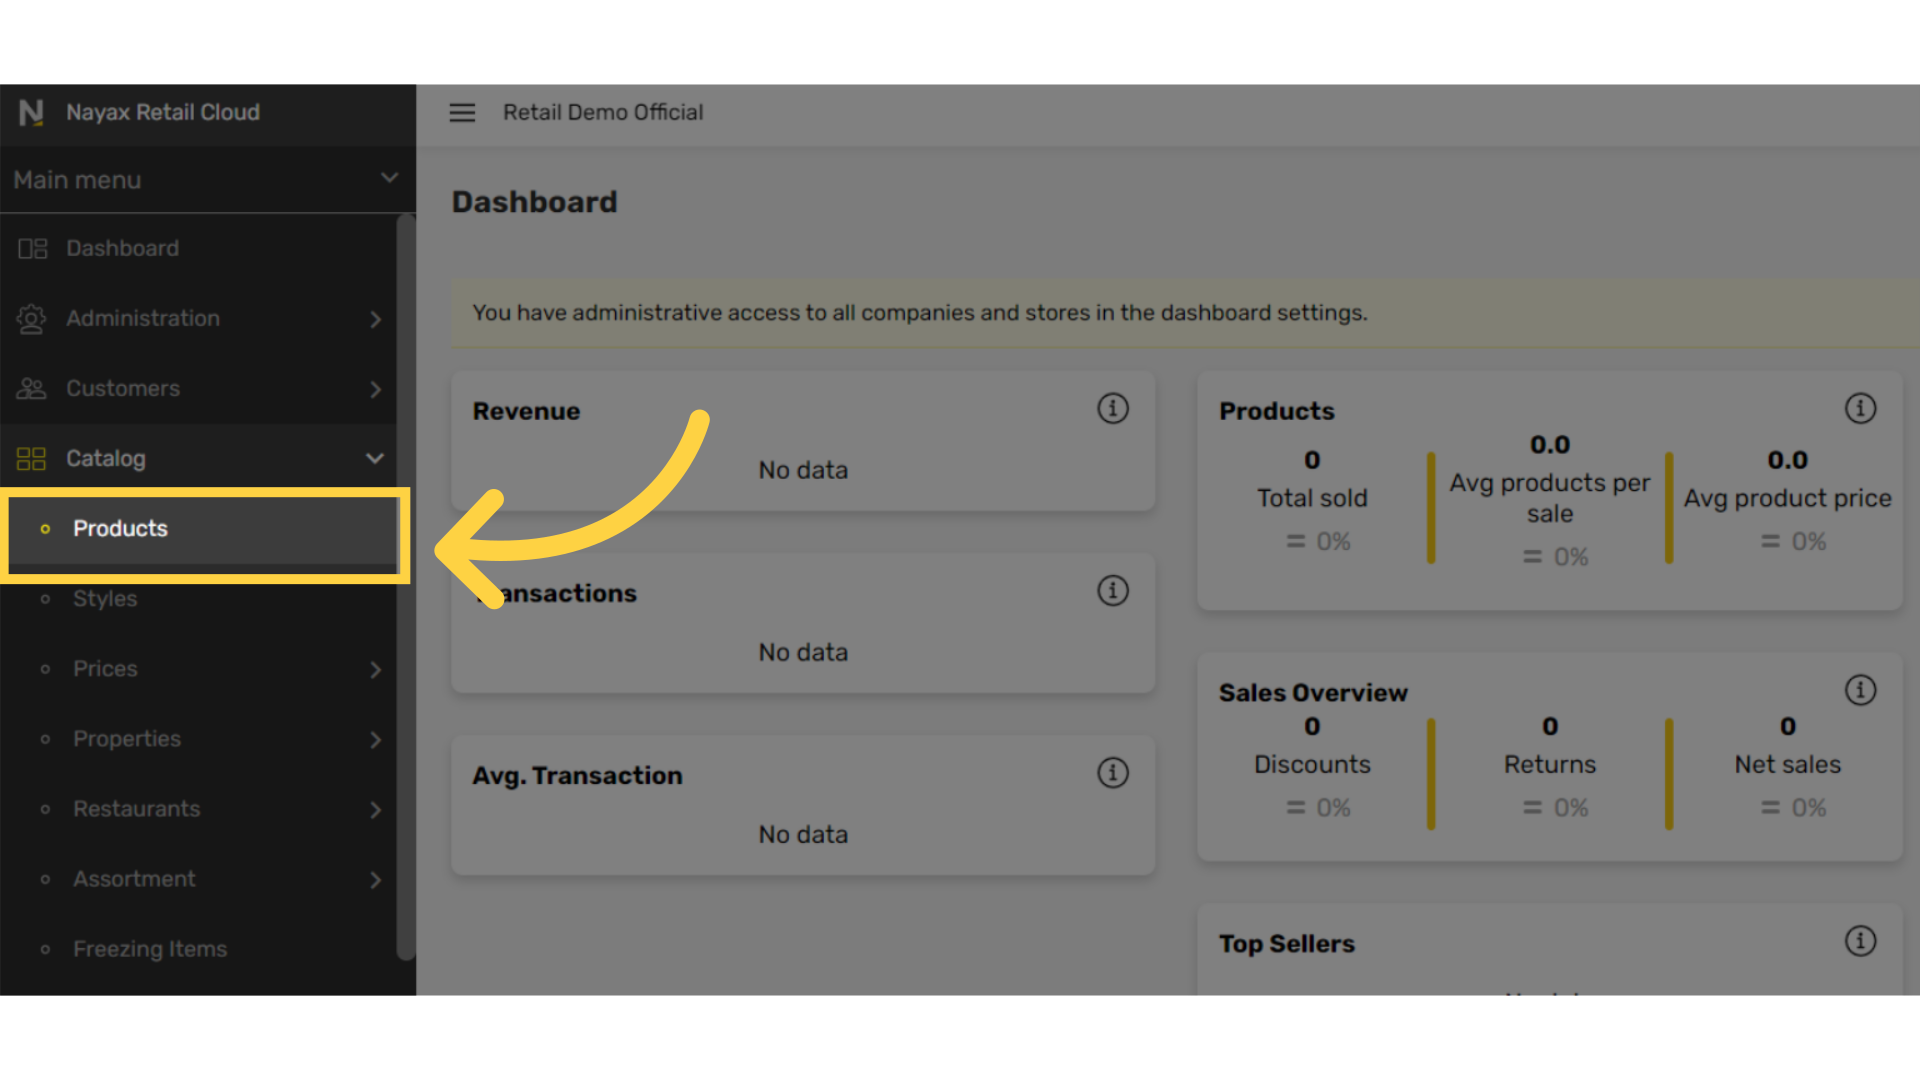
Click Products Tab
Image Attached
In the sub-menu, click the products tab.
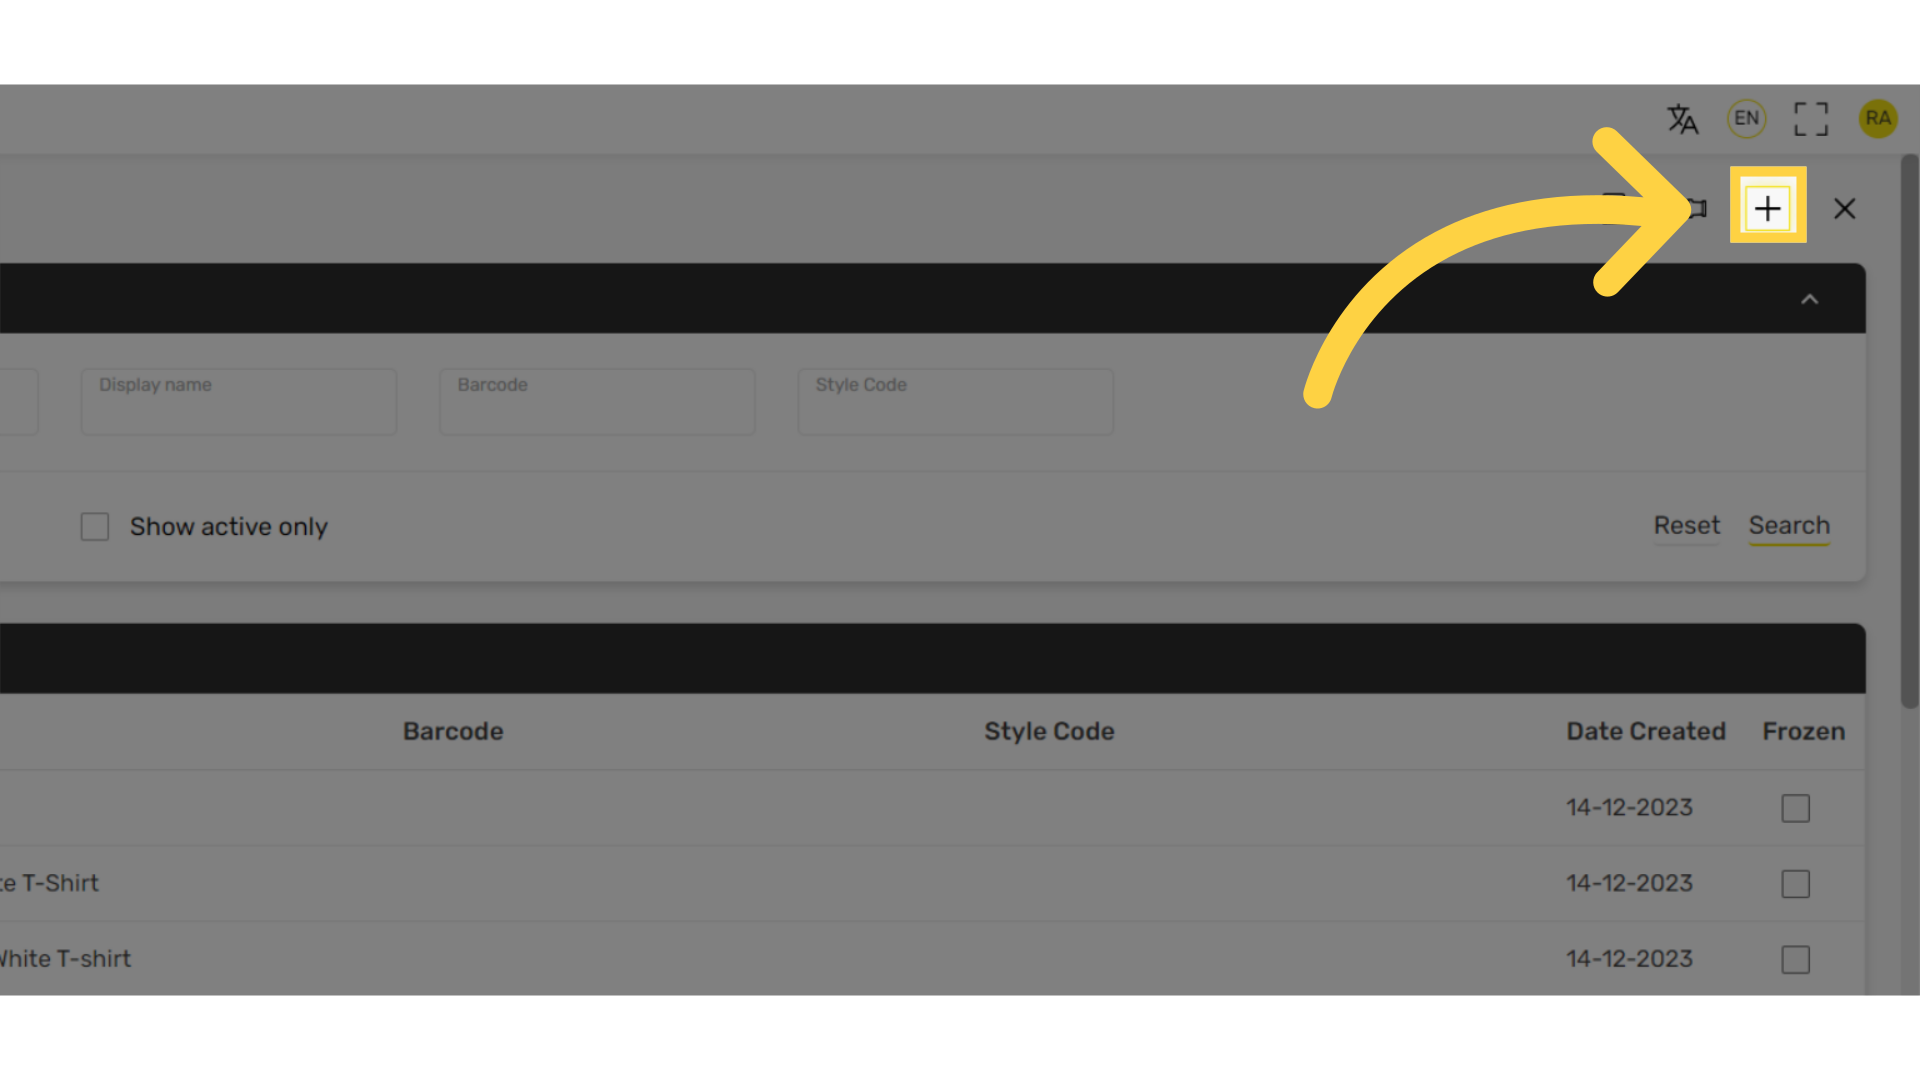
4
Click + Icon
Image Attached
Click + icon on the top right of the screen.
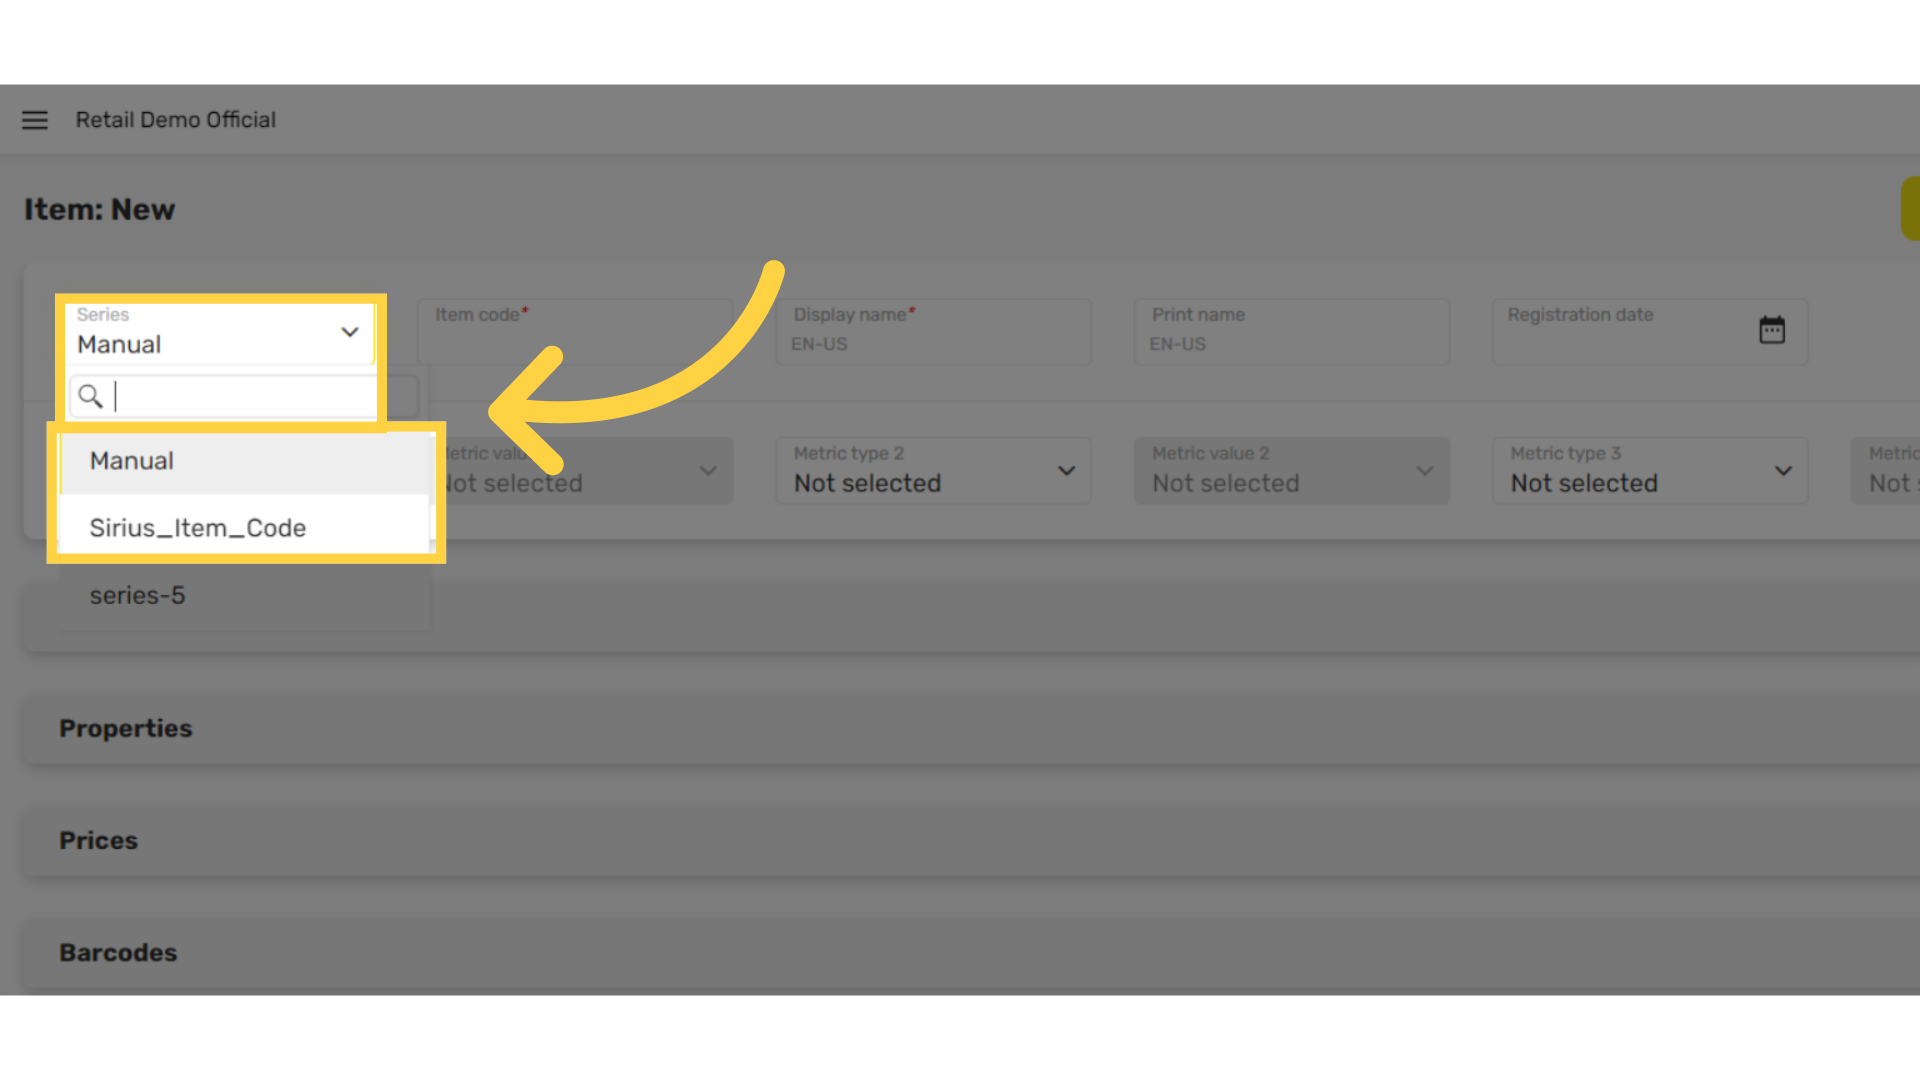
5
Select Series
Image Attached
Select a number series.
Manual - Choose Item codes manually
Sirius - Allocates the Item codes automatically
Sirius - Allocates the Item codes automatically
6
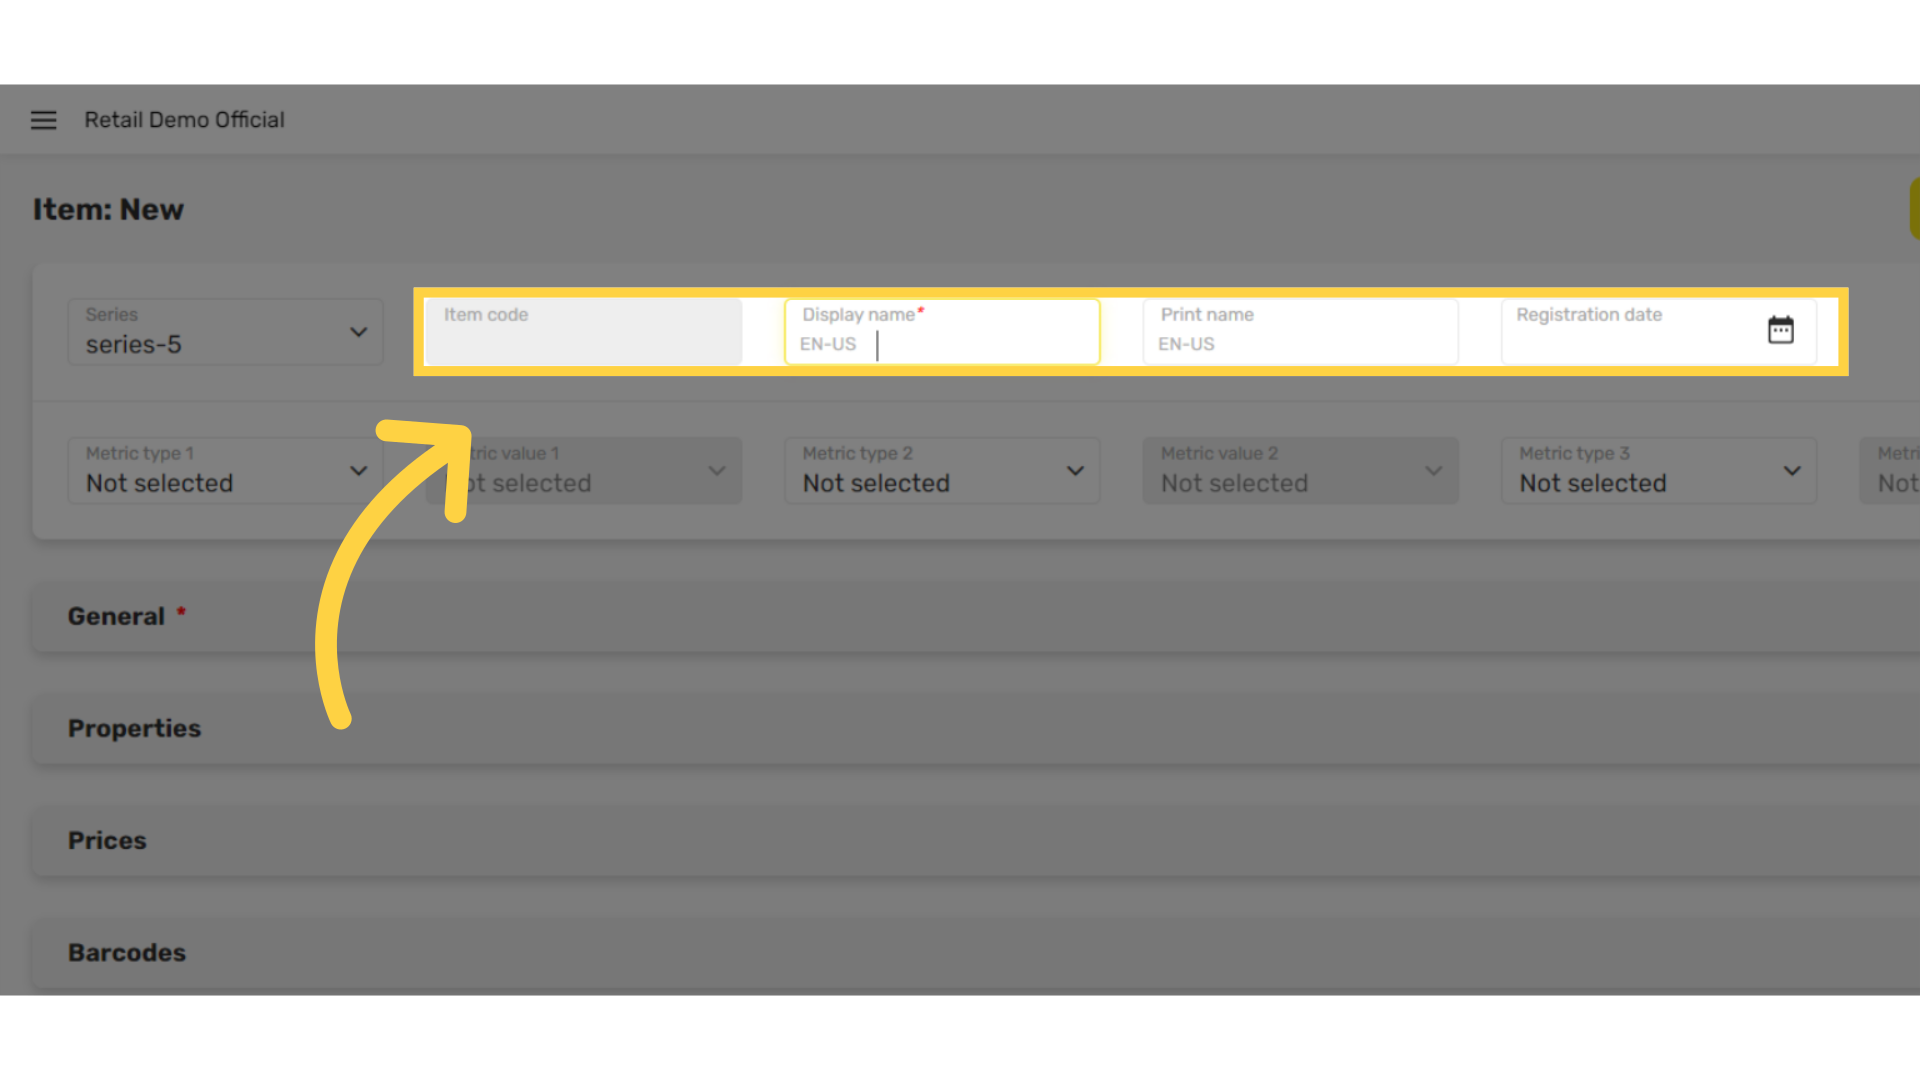
Fill in the following fields:
Image Attached
Enter product item code and display name for this item then click on the calendar icon to set the date.
7
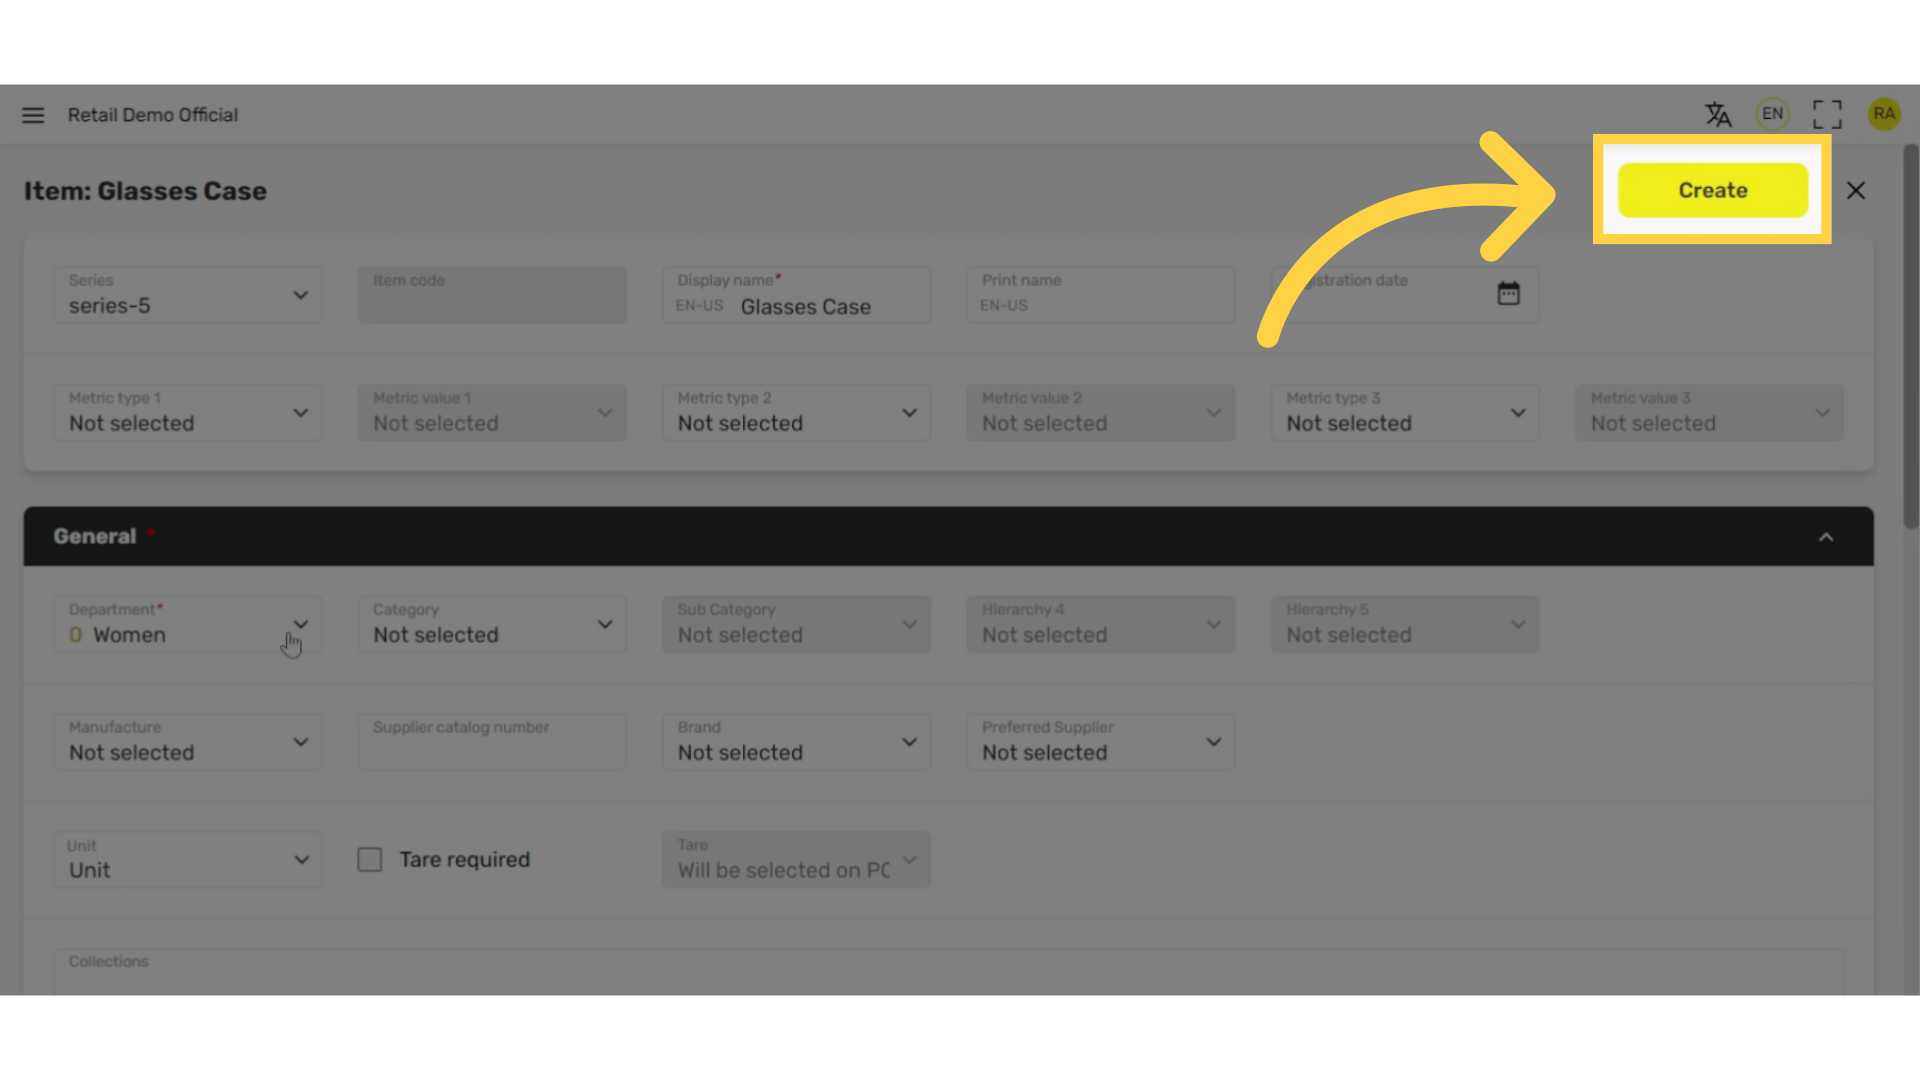
Tap Create
Image Attached
Tap Create button at the top of the screen.
8
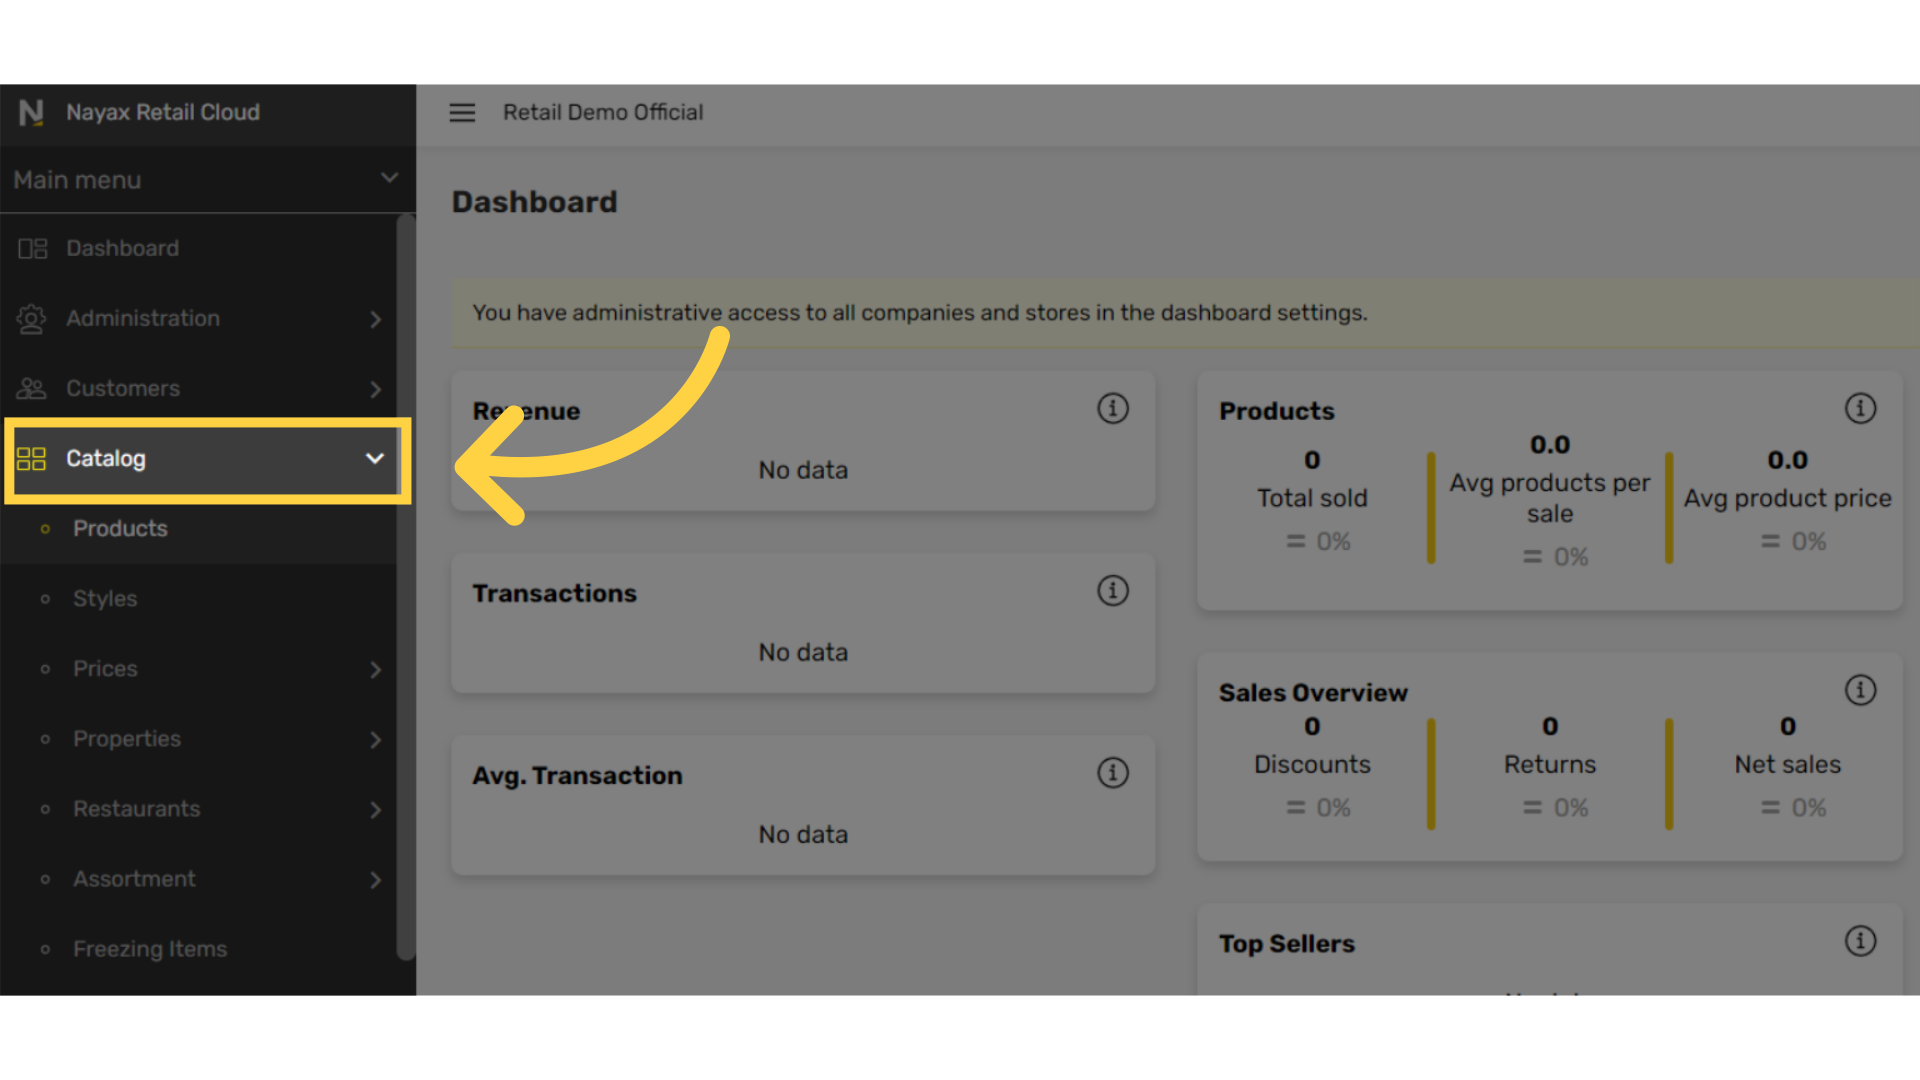
Click Catalog Tab
Image Attached
To link the complimentary item to the product, click on the Catalog tab from the side menu.
9
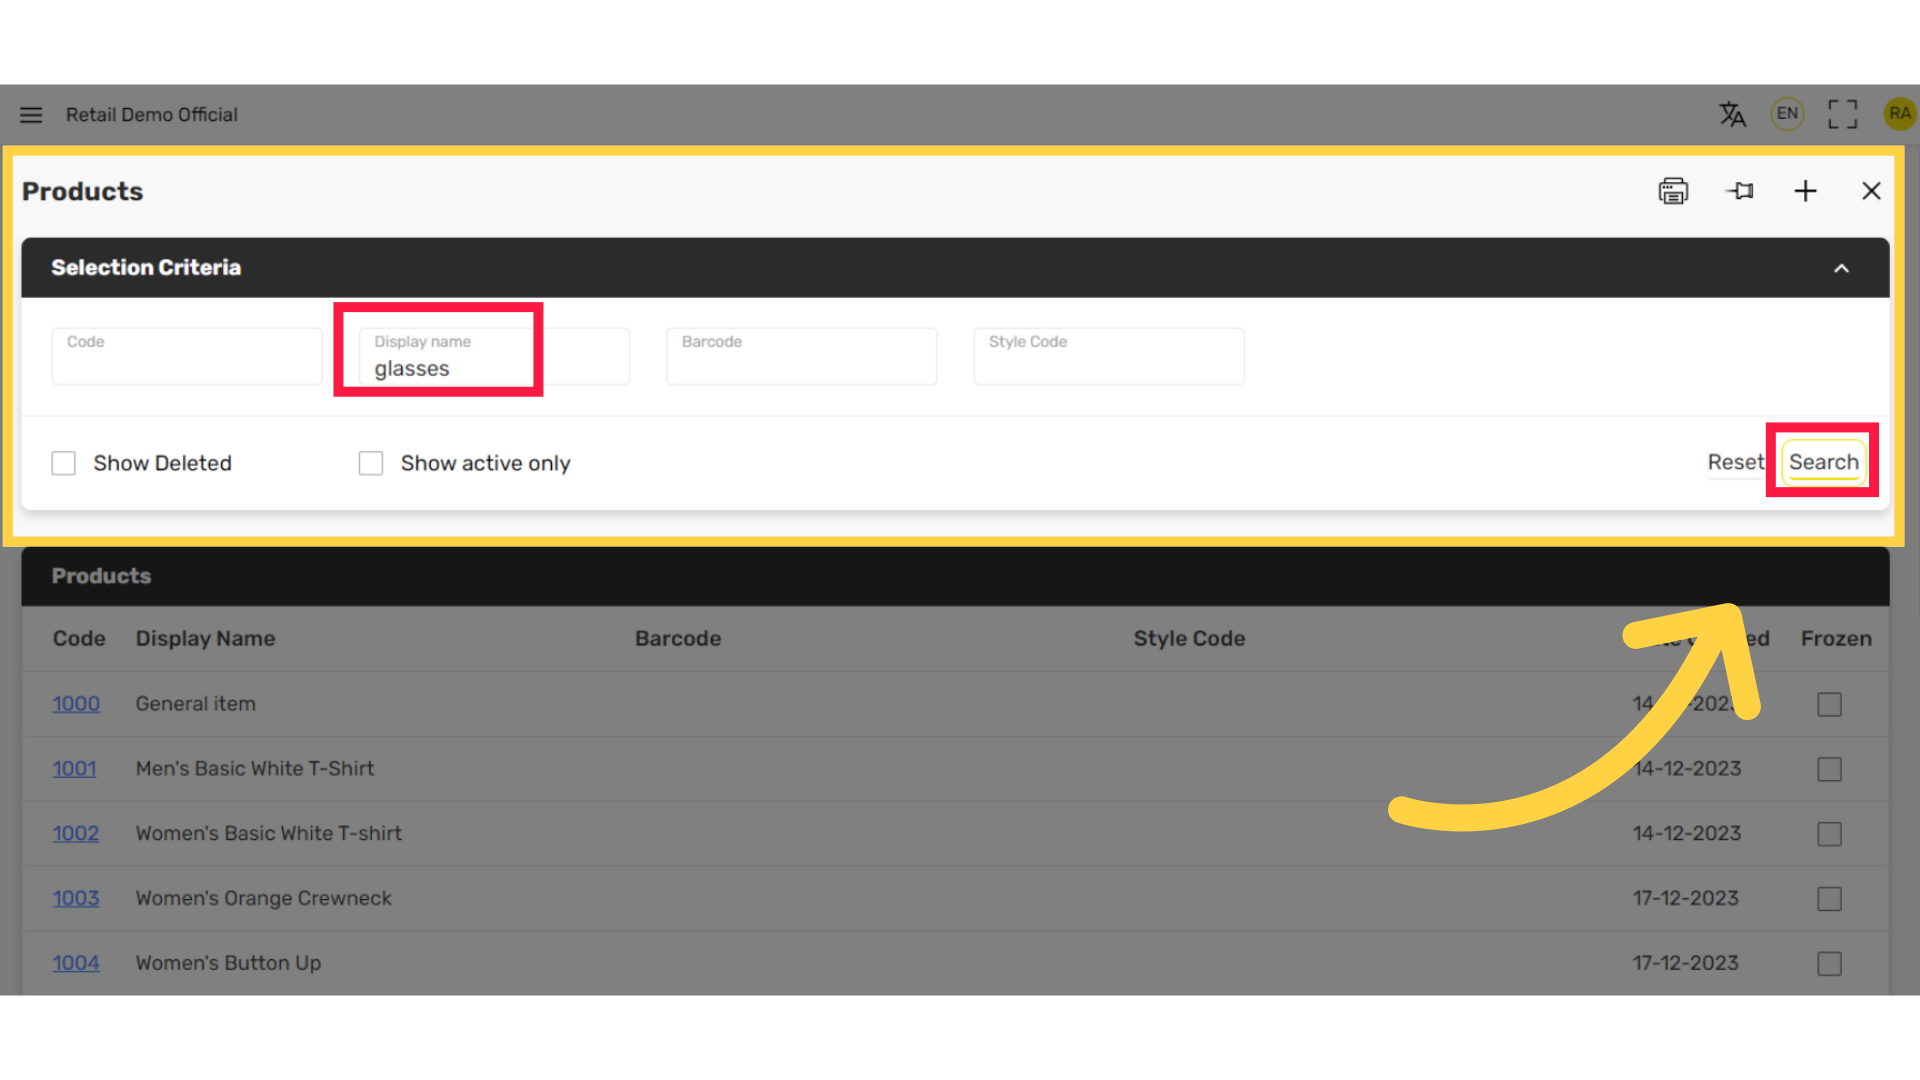
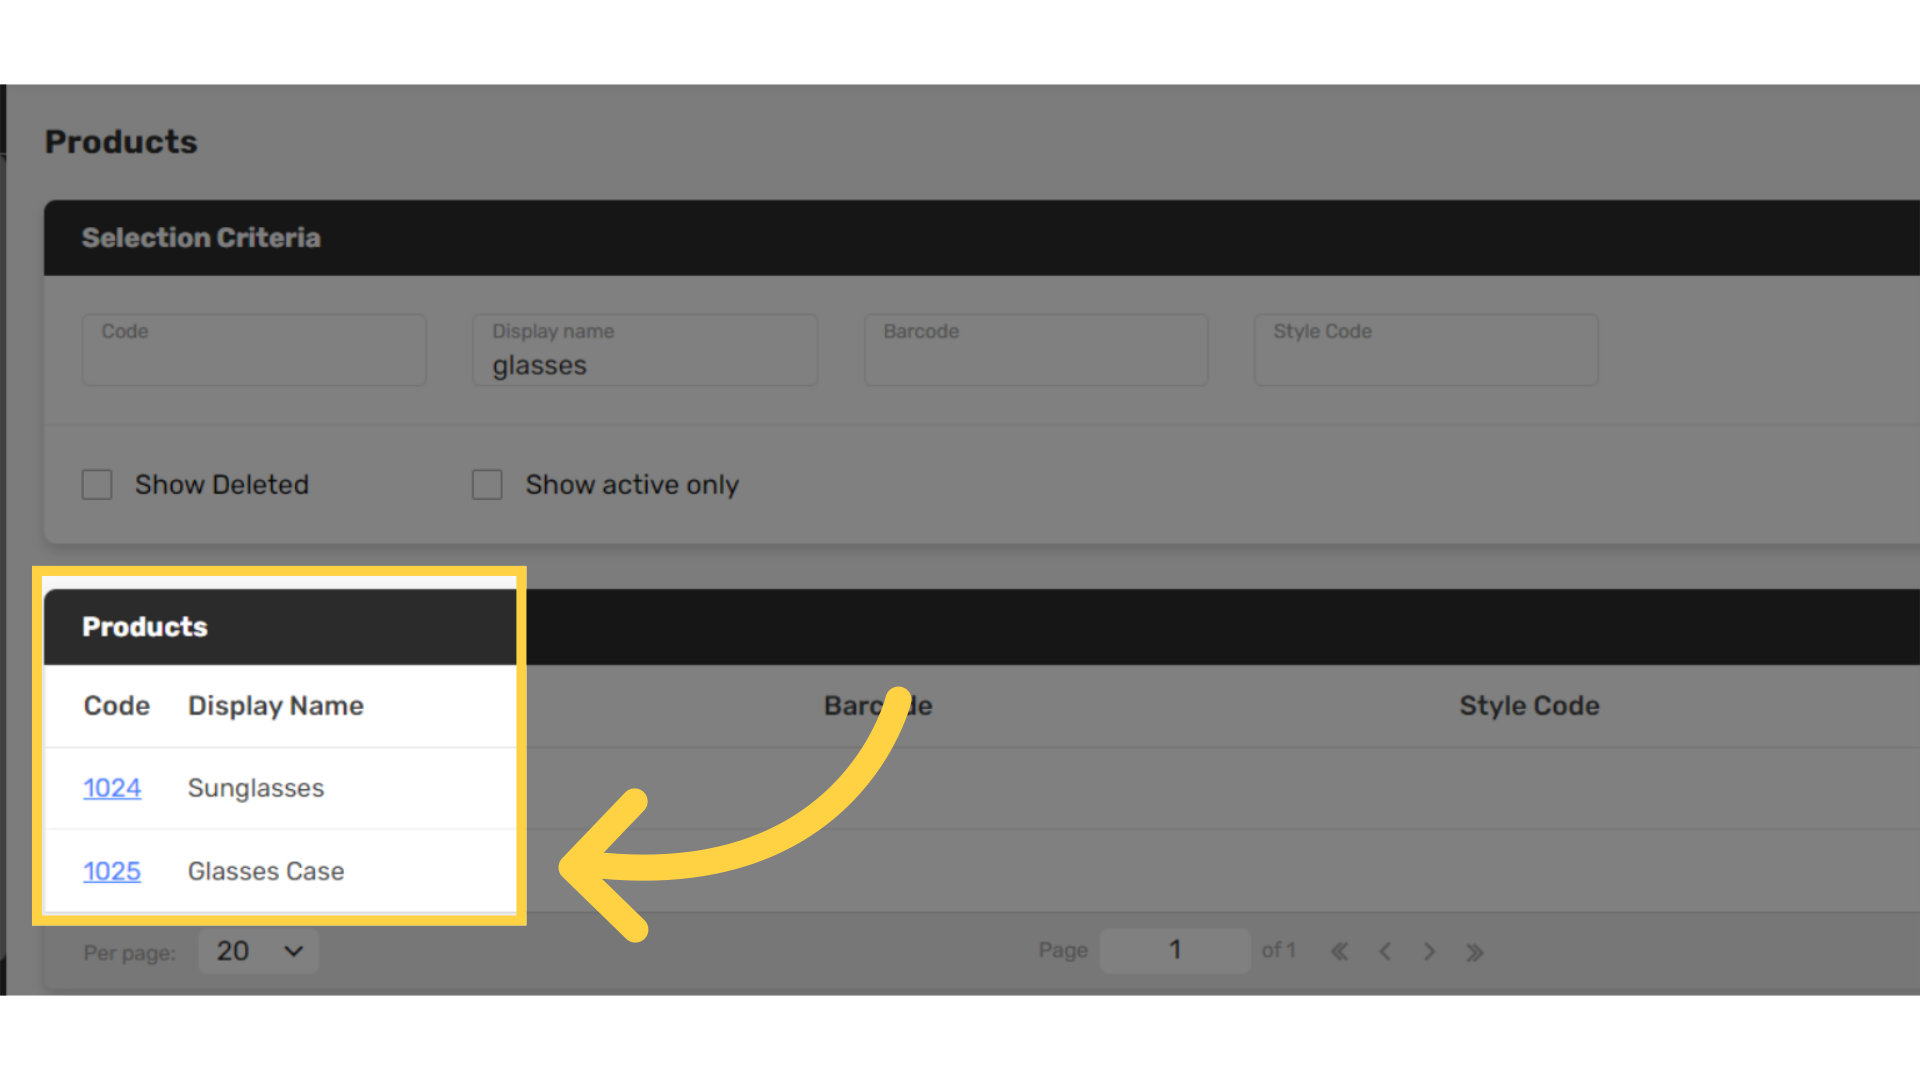
Search Item
Image Attached
Search for the item you want to link the complimentary item to. For this example glasses.
10
Click Item Code
Image Attached
Click the Item Code of the item you want to link the complimentary item to.
11
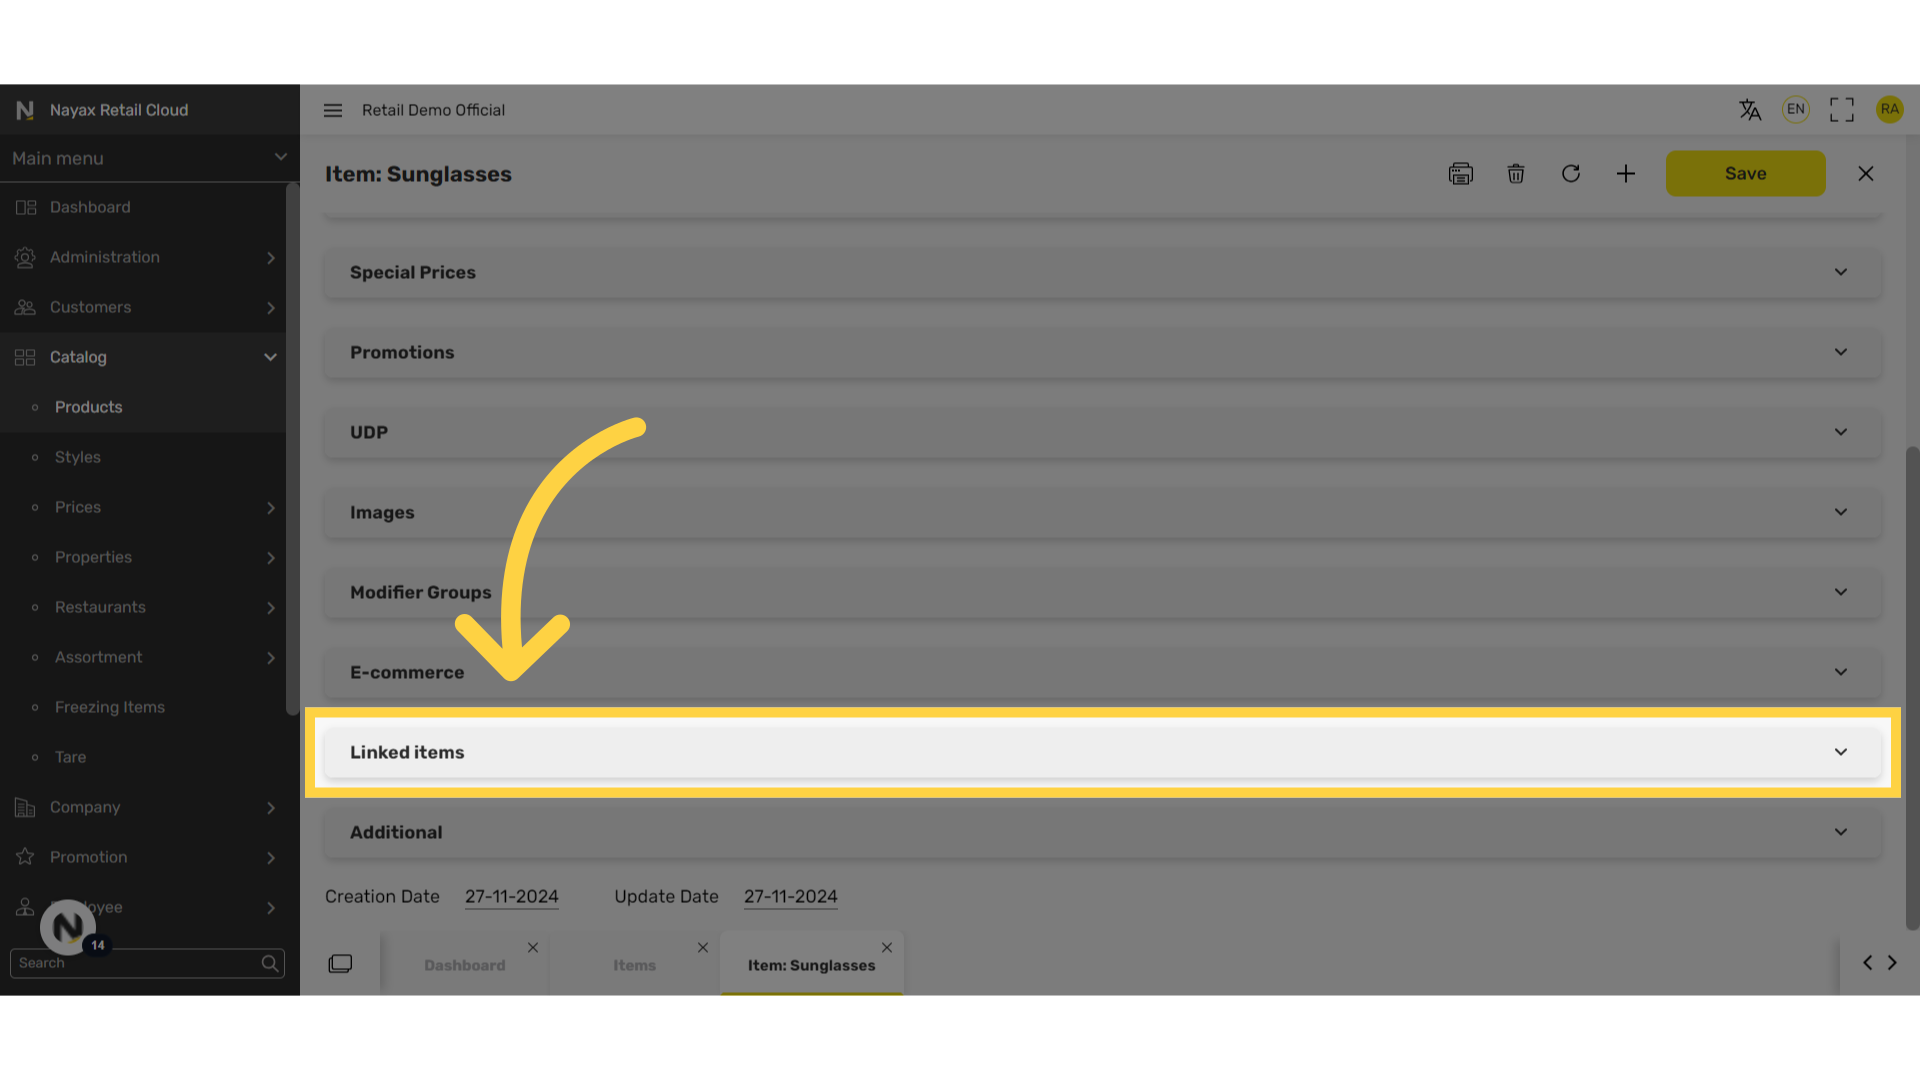
Click Linked Items Tab
Image Attached
Scroll down to the Linked items section and click on it to open.
12
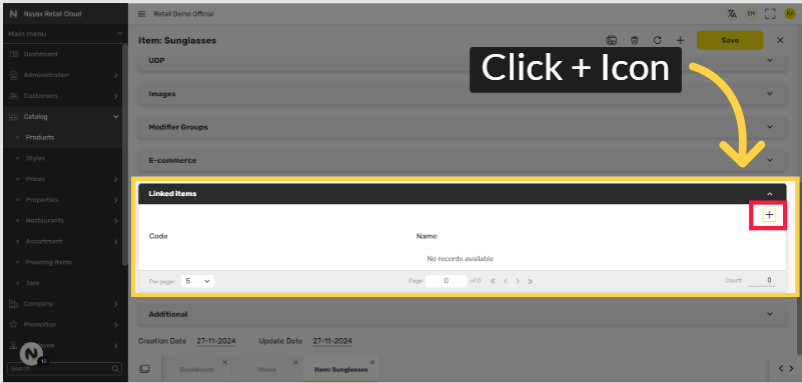
Click + Icon
Image Attached
Click on the plus Icon as highlighted in RED on the visual.
13
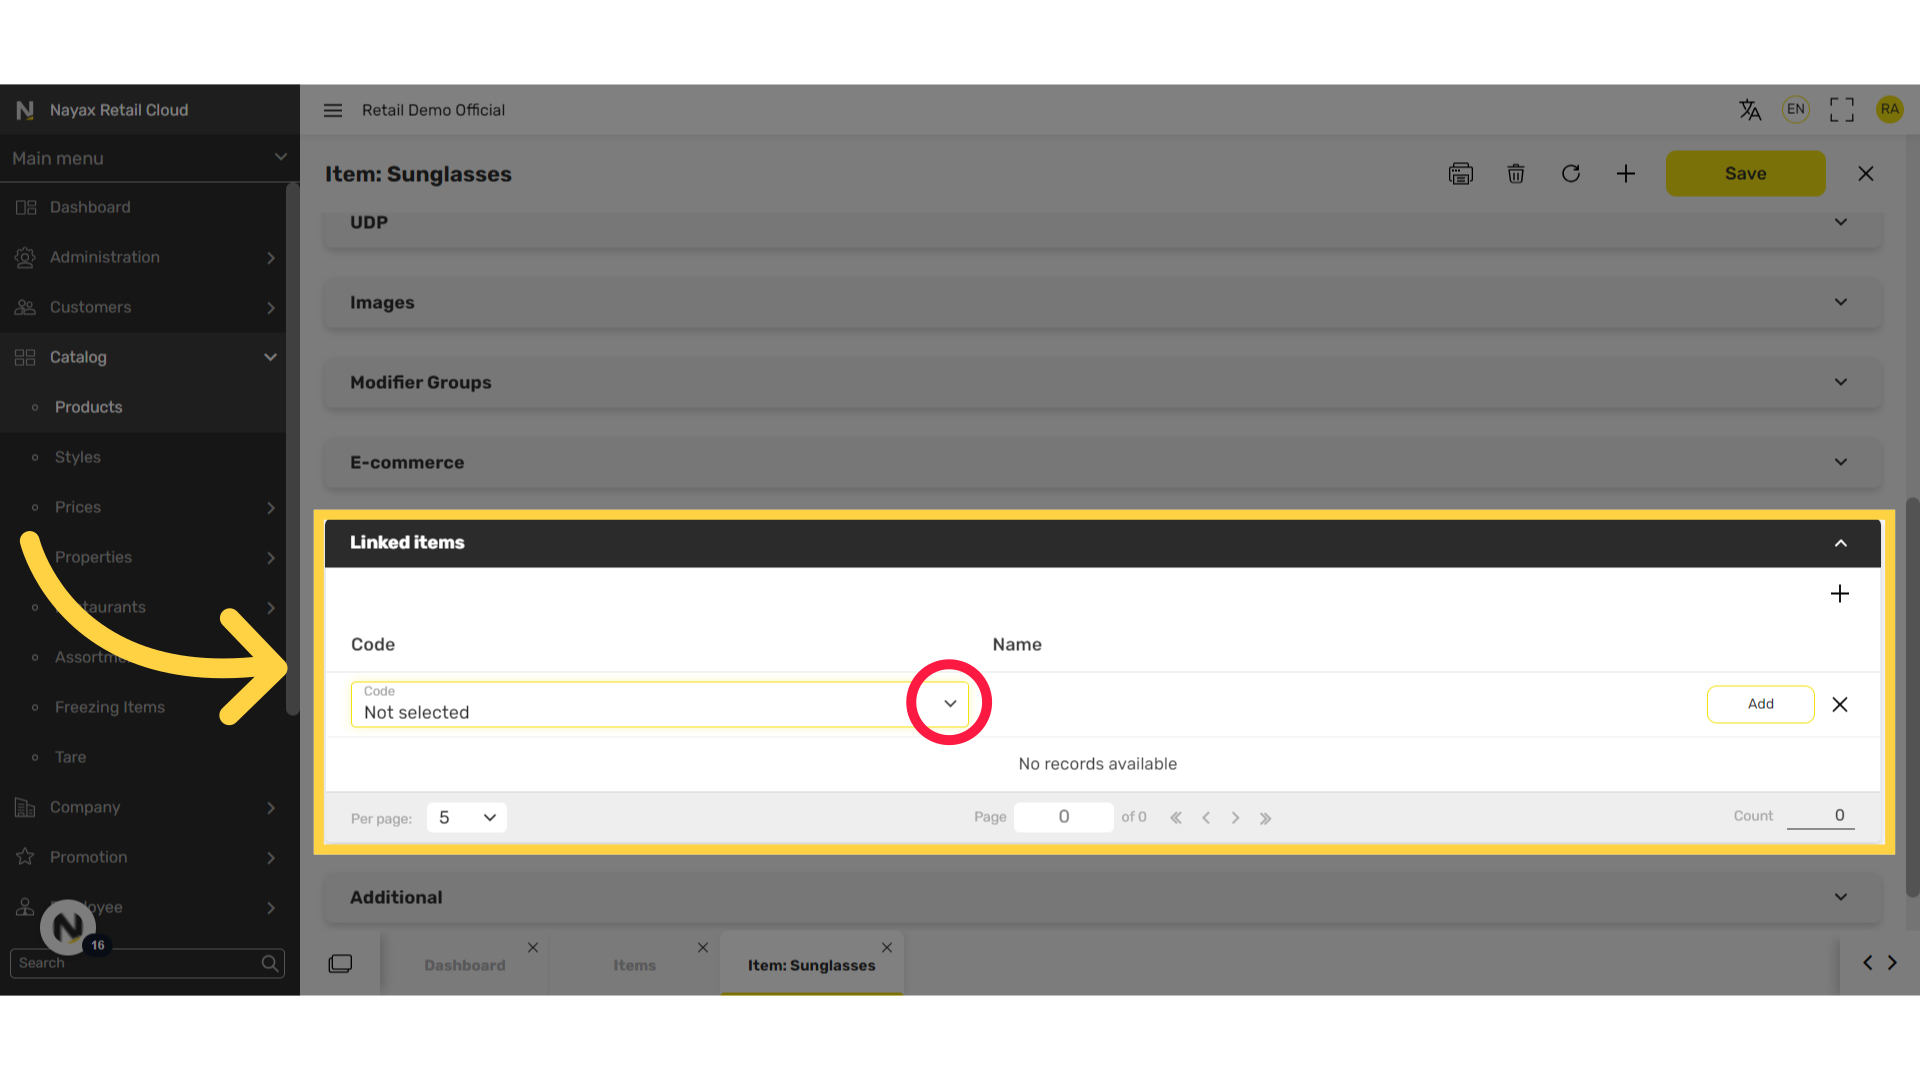
Click Arrow
Image Attached
Click on the arrow for the drop down options.
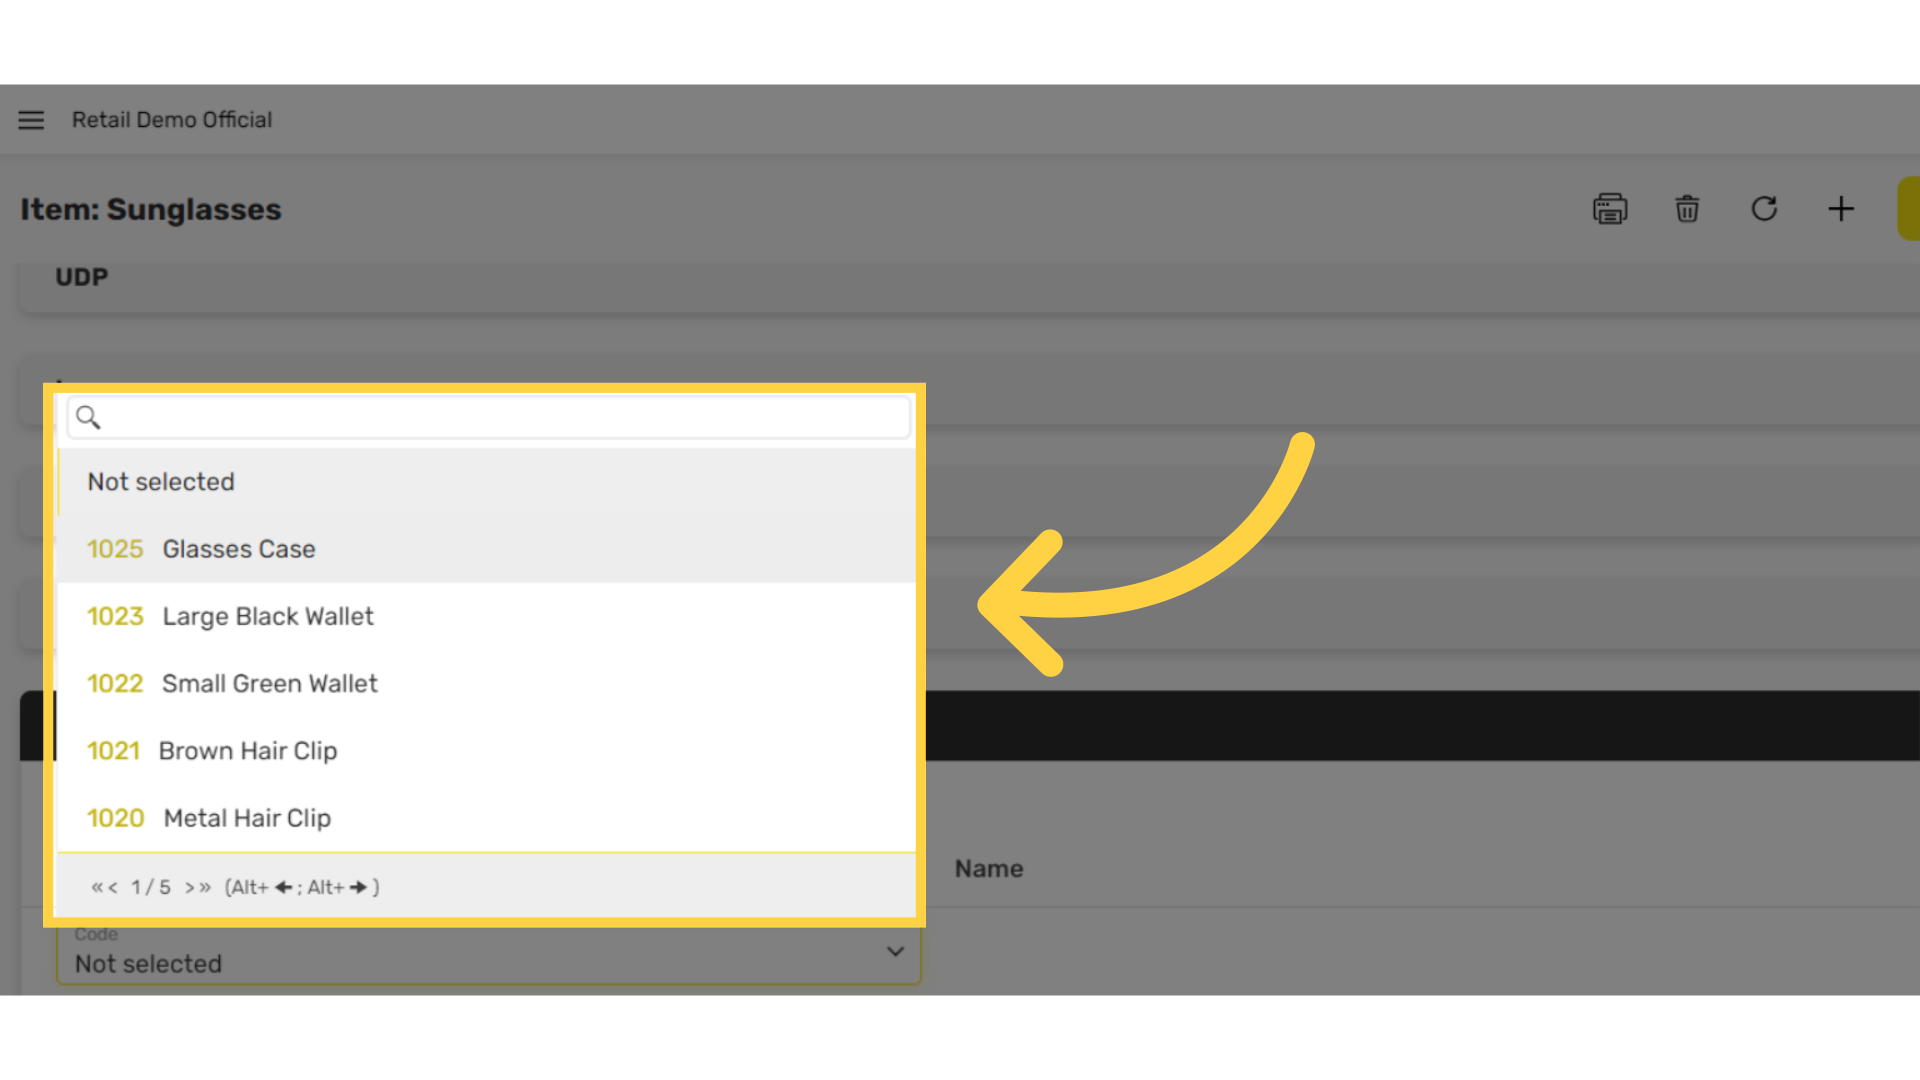
14
Locate Item to Link
Image Attached
Locate the item you created to link, for this example: glasses case
15
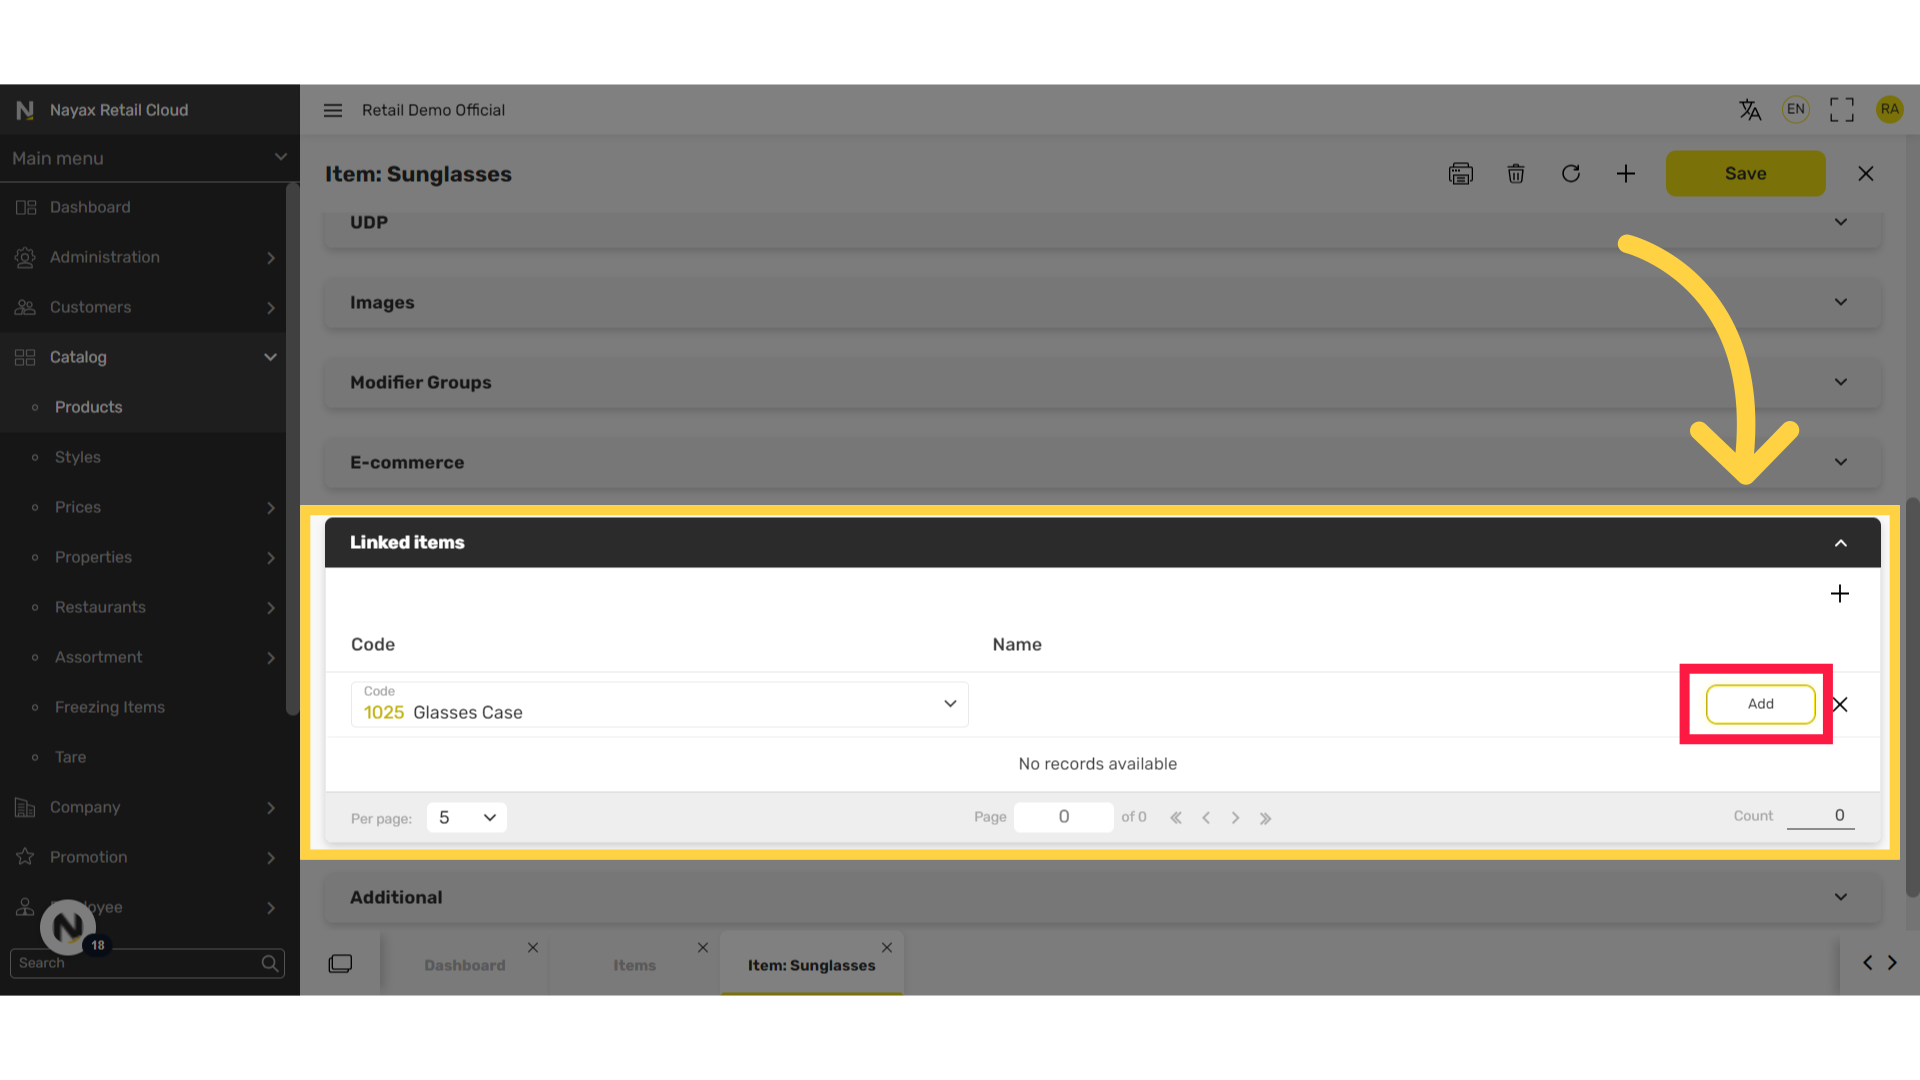
Click Add
Image Attached
Click Add button as highlighted in RED on the visual.
16
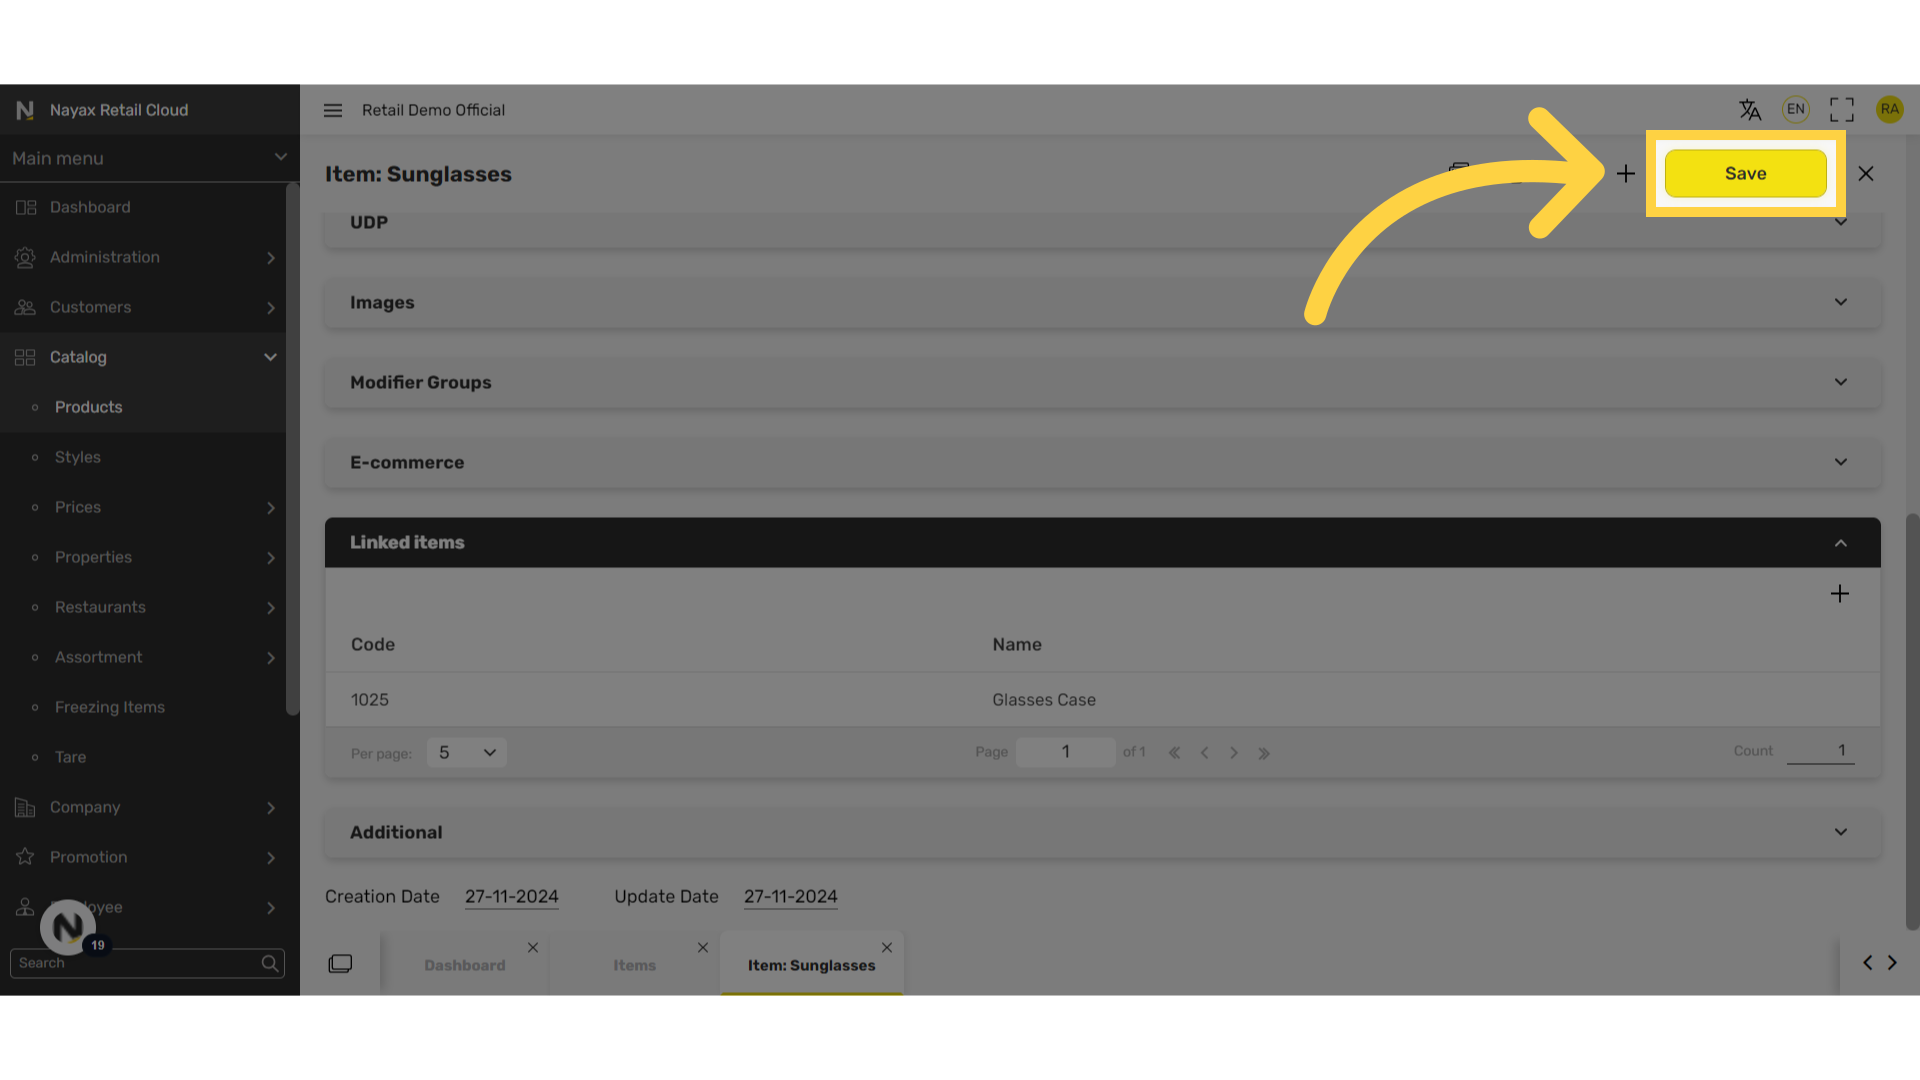
Click Save
Image Attached
Click save to save your progress!
Note: This will appear as a second item on the receipt with the charge set as zero.
We hope this guide was able to walk you through the process, we ask you to please help us help you by leaving feedback!
Thank you!
Did you find this article helpful?