How to Set and Assign Smart Charging | Operations
This capability is fundamental to smart charging, which allows a charging station operator to remotely manage and optimize energy consumption across multiple charging stations.
1
Video Guide
2
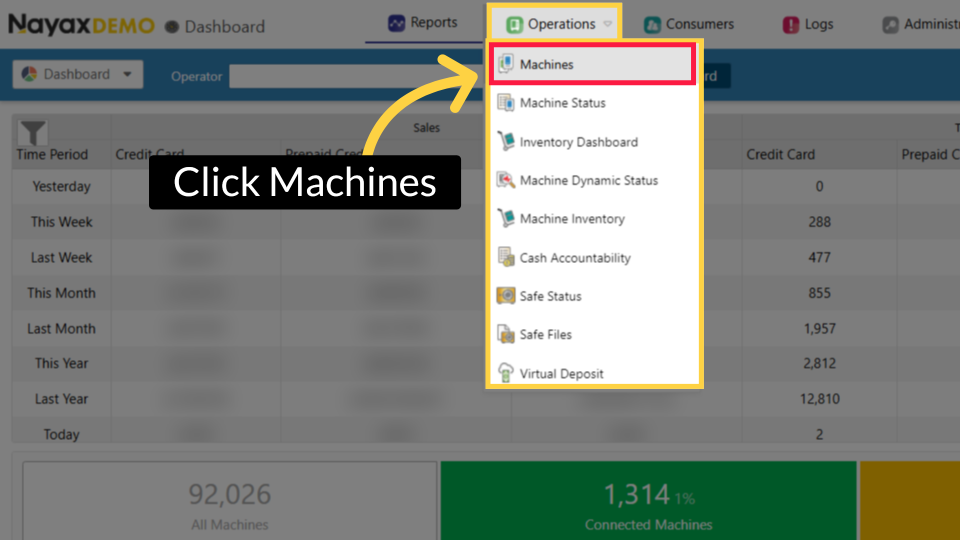
Click Operations Tab
Image Attached
On the Dashboard of the Nayax Core platform, click on the Operations tab. Then click on "Machines" from the drop-down menu.
3
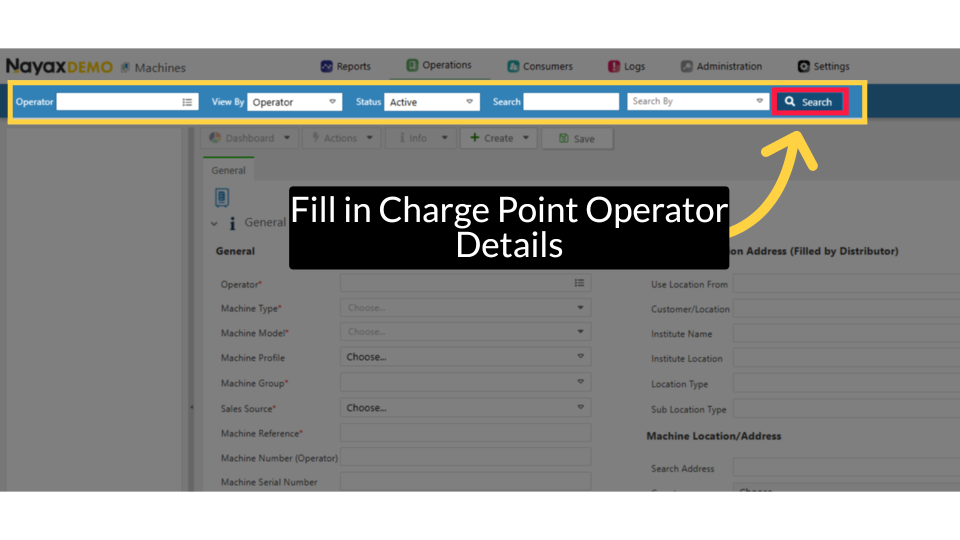
Fill Charge Point Operator
Image Attached
Type in your Charge Point Operator name and any other fields to locate your Charging Point. Click search as highlighted.
4
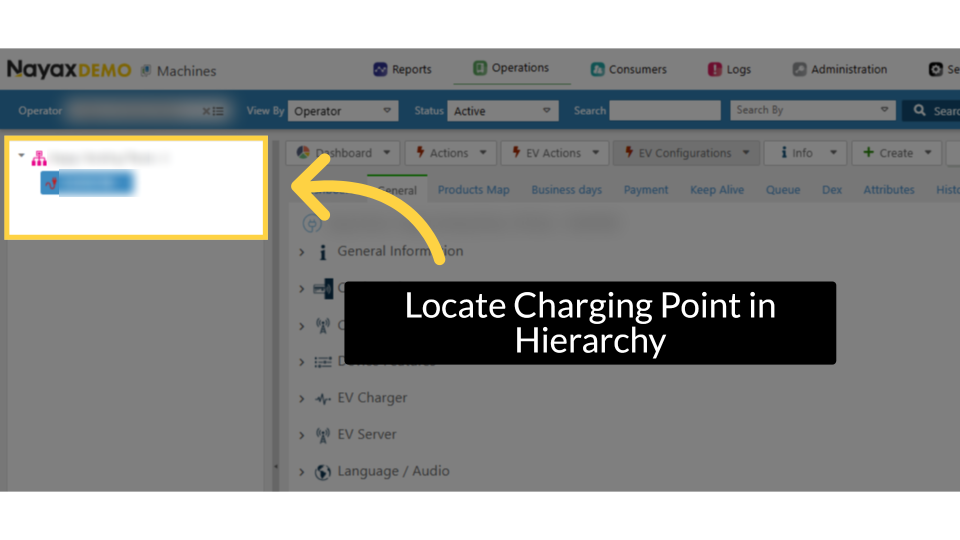
Locate Charging Point in Hierarchy
Image AttachedLocate and click on the Charging Point from the hierarchy.
5
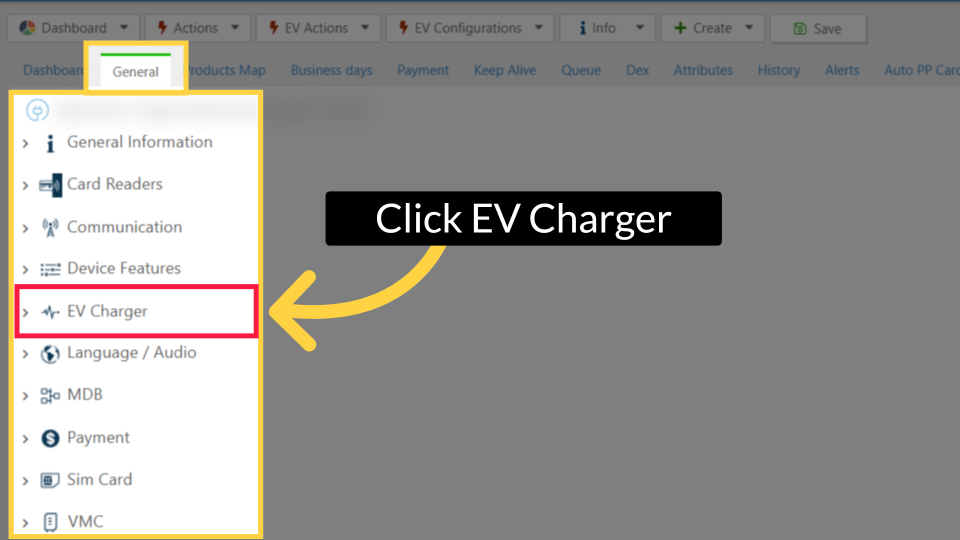
Click EV Charger
Image Attached
From the general tab scroll and click on the EV Charger tab as highlighted in RED on the visual.
6
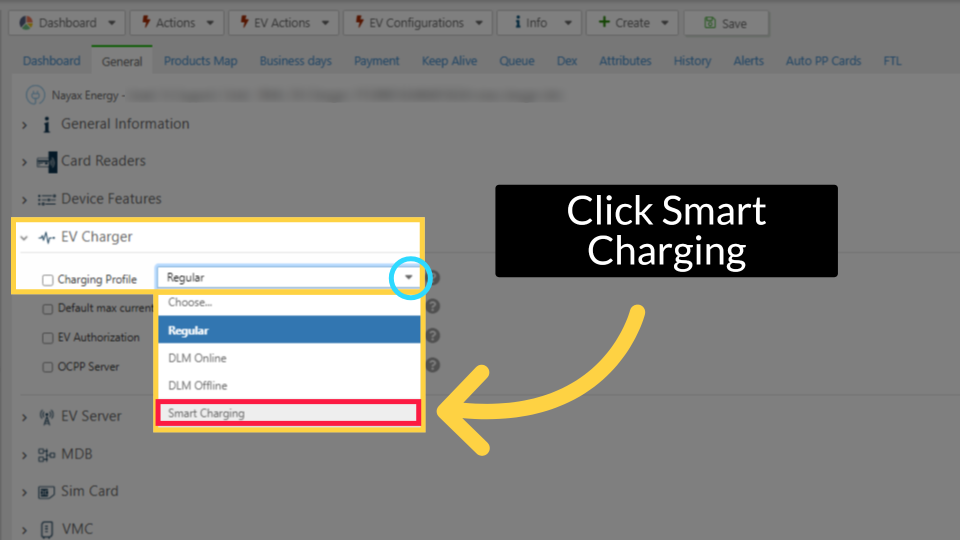
Click Smart Charging
Image Attached
To enable Smart Charging, go to Charging Profile attribute and click on the arrow as highlighted in BLUE to open the drop down menu and select Smart Charging from the options.
7
Click on Checkbox
Image Attached
Click on the checkbox located to the left of the Charging Profile attribute as highlighted then click on the save button to save your progress as highlighted BLUE.

8
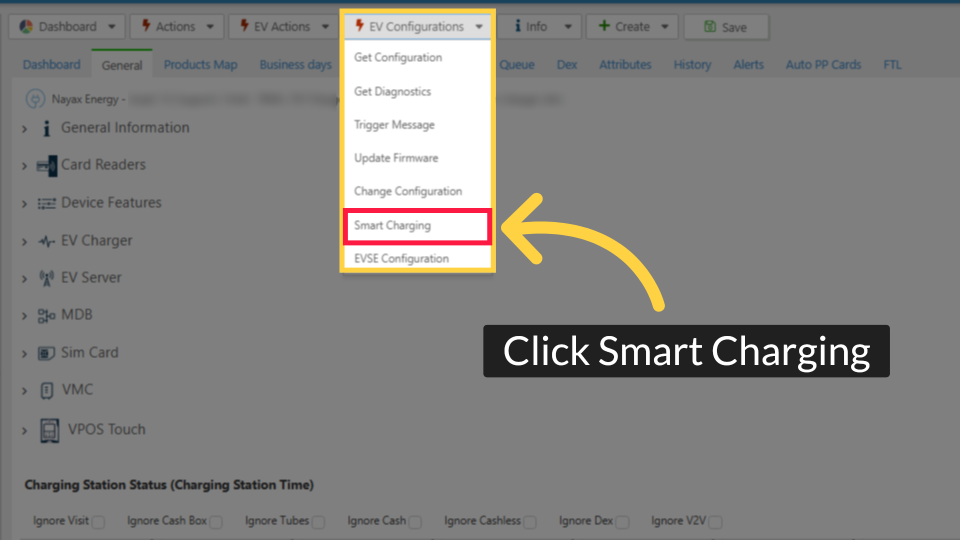
Click Smart Charging
Image AttachedClick on the EV Configurations button and select "Smart Charging" from the drop-down menu, as highlighted.
9
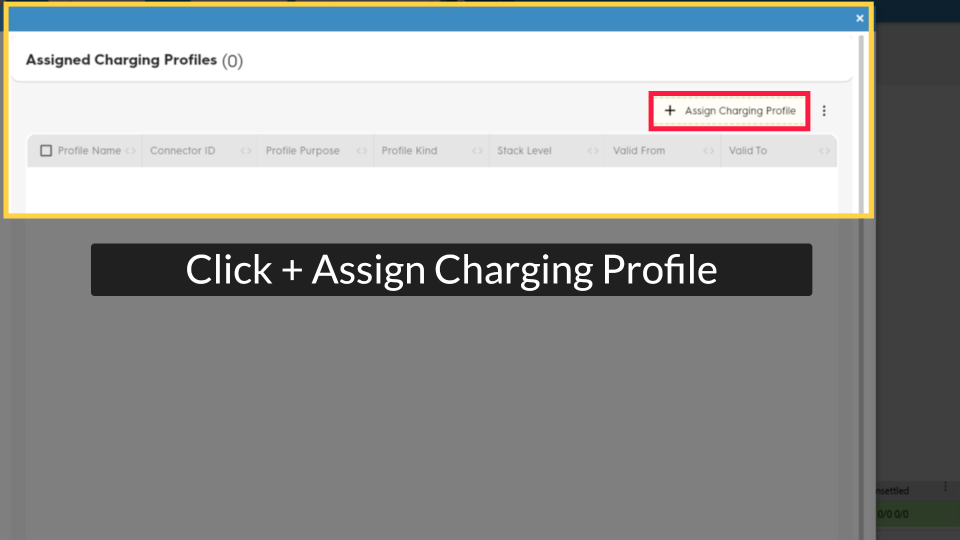
Click + Assign Charging Profile Tab
Image AttachedClick on the + Assign Charging Profile Tab
10
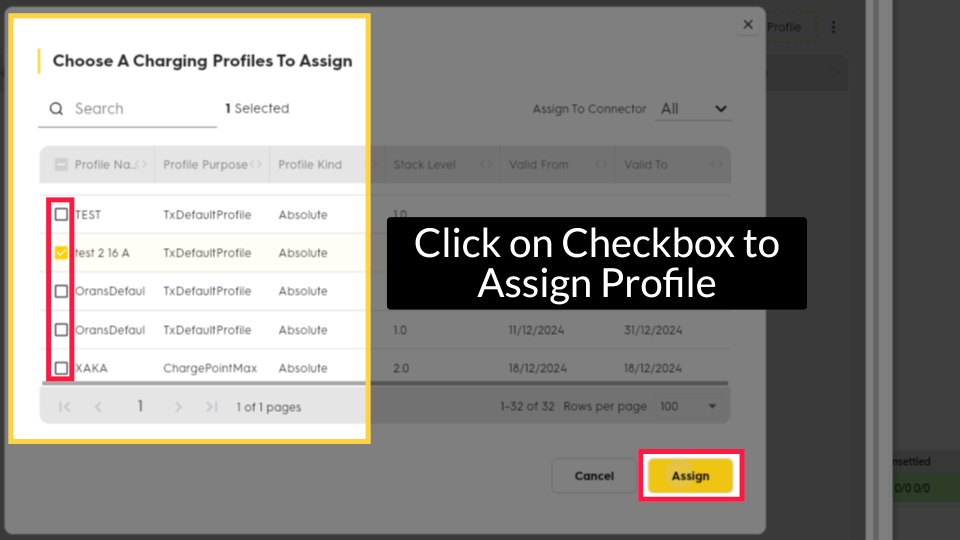
Click on Checkbox to Assign Profile
Image Attached
Click on the Checkbox to assign the chosen profile as highlighted, and click on the Assign Button to save your configurations.
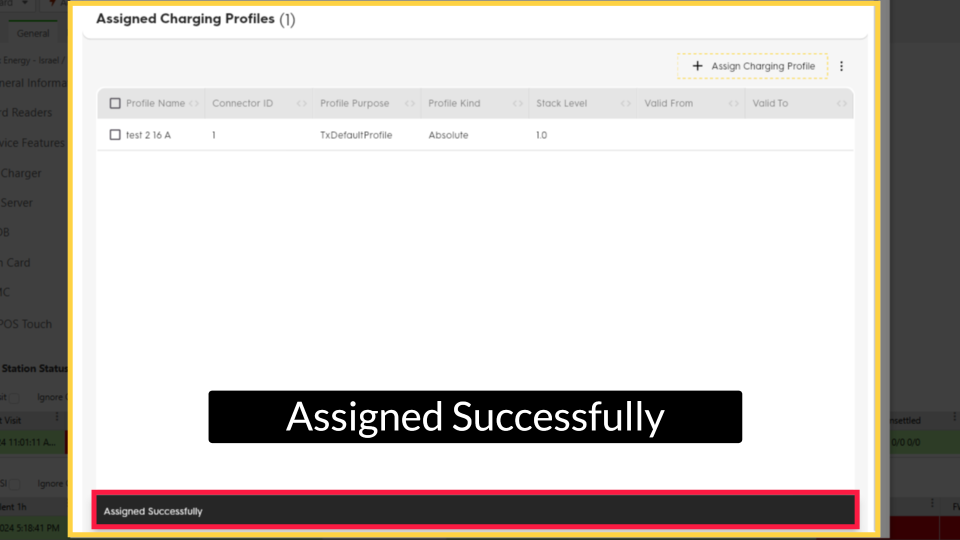
11
Assigned Successfully
Image Attached
A pop-up message will appear as highlighted to confirm the profile assigned successfully.
Thank you!
Did you find this article helpful?