
How to Edit your Account Email or Contact Information in Nayax Core | Account Settings
Learn how to update your account contact information in Nayax Core.
Video Guide
00:00: This video guides you through updating your account contact details in Nayax Core.
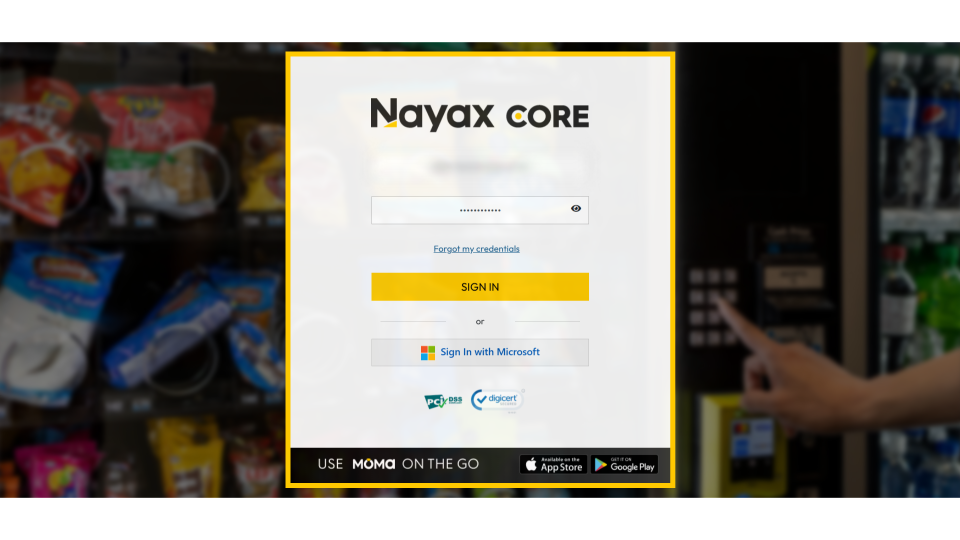
00:04: Sign in to Nayax Core using your account credentials.
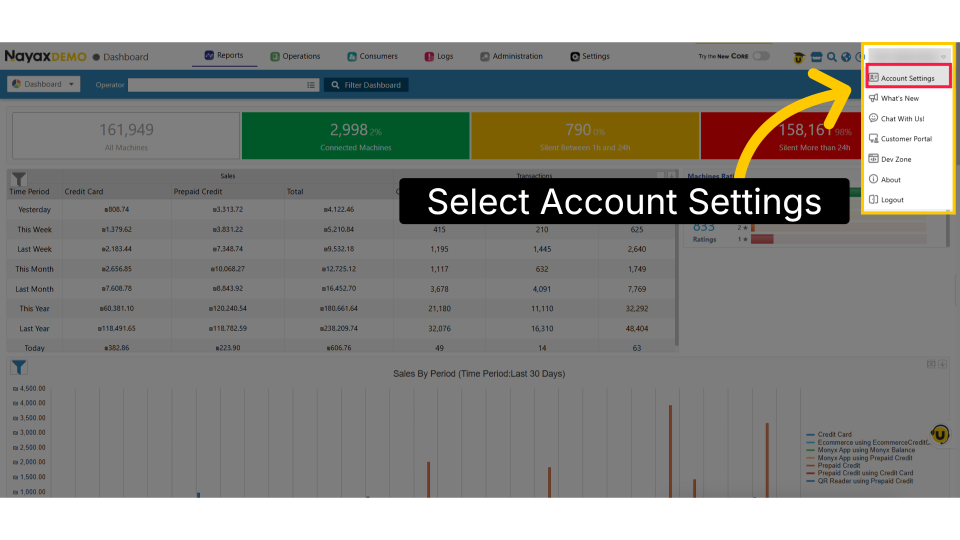
00:08: Click on your account user name and then select "Account Settings" from the menu
00:11: to manage your account preferences and details.
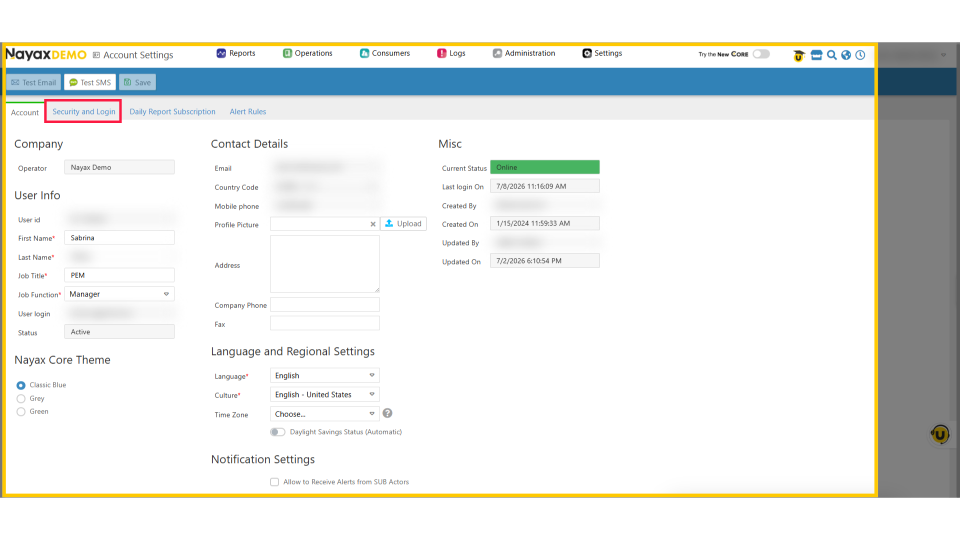
00:14: On the Account Settings page, to edit your email or contact details, click on the
00:18: Security and Login tab.
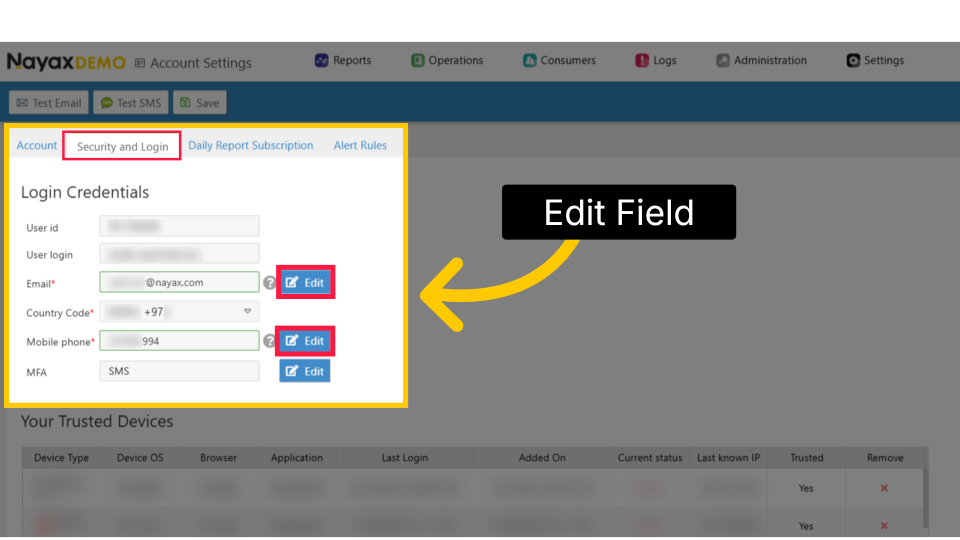
00:21: The Login Credentials page opens.
00:22: Click "Edit" to update your email and contact information.
00:26: Click "Send Verification" to confirm your edits.
00:29: Click "Login Credentials" again to continue managing your user ID and verification
00:34: process.
00:35: A verification field will appear to enter the code
00:38: you received to complete verification of your account updates.
00:42: A confirmation message
00:43: will confirm that your edits have been successfully updated, and you're all set!
Sign In to Nayax Core
Image AttachedSign in to Nayax Core using your account credentials.
Access Account Settings
Image AttachedClick on your account user name and then select "Account Settings" from the menu to manage your account preferences and details.
Security and Login
Image AttachedOn the Account Settings page, to edit your email or contact details, click on the Security and Login tab.
Edit Field
Image AttachedThe Login Credentials page opens. Click "Edit" to update your email and contact information.
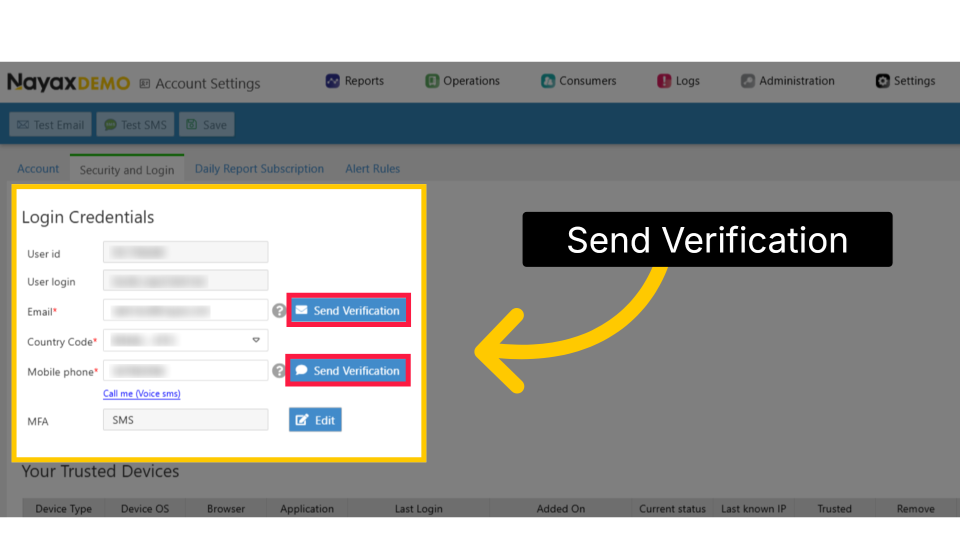
Send Verification
Image AttachedClick "Send Verification" to confirm your edits.
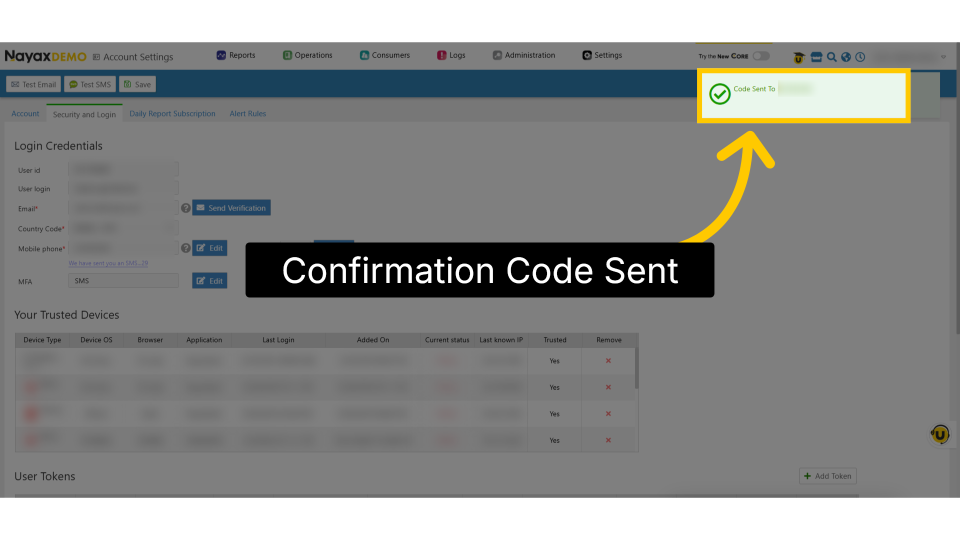
Confirmation Code Sent
Image AttachedClick "Login Credentials" again to continue managing your user ID and verification process.
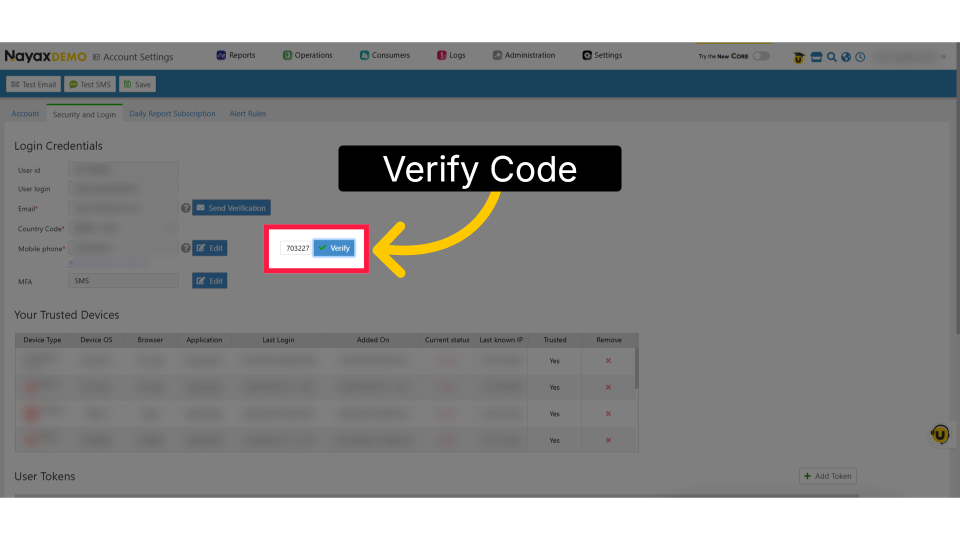
Confirm Verification
Image AttachedA verification field will appear to enter the code you received to complete verification of your account updates.
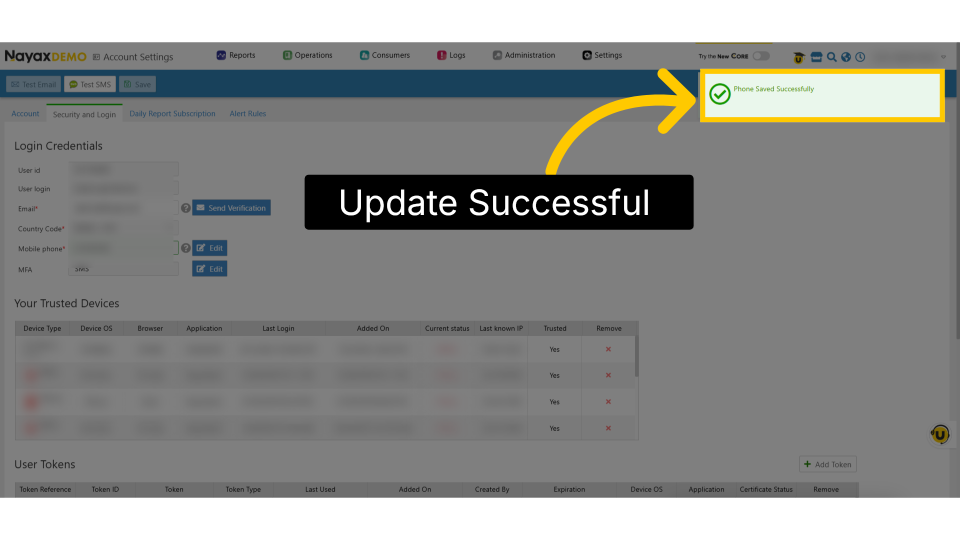
Update Successful
Image AttachedA confirmation message will confirm that your edits have been successfully updated, and you're all set!
Thank you!
Did you find this article helpful?