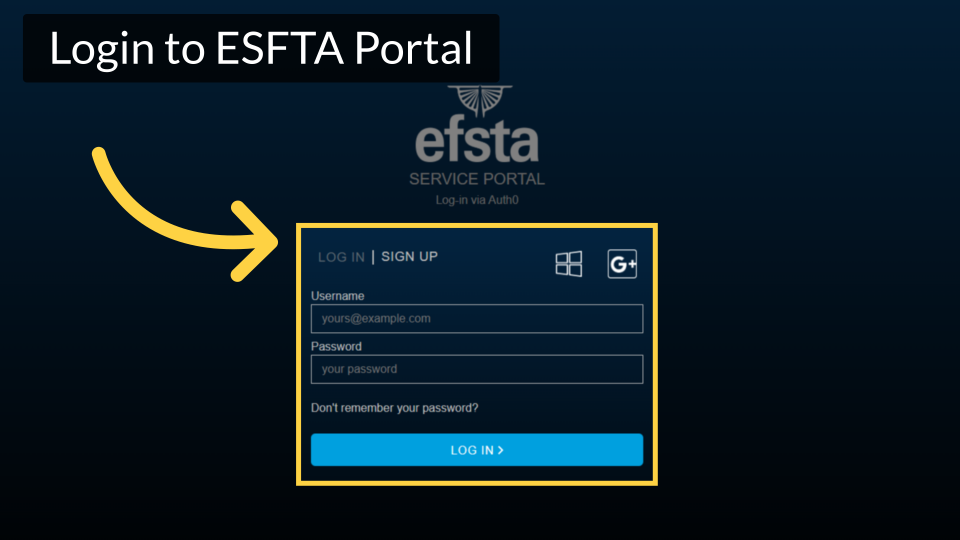
How to Configure and Associate a POS on EFSTA | Nayax Retail
After activating the EFSTA Fiscalization extension on Nayax Retail Core, go to the EFSTA website to set up the POS.
1
Video Guide
3
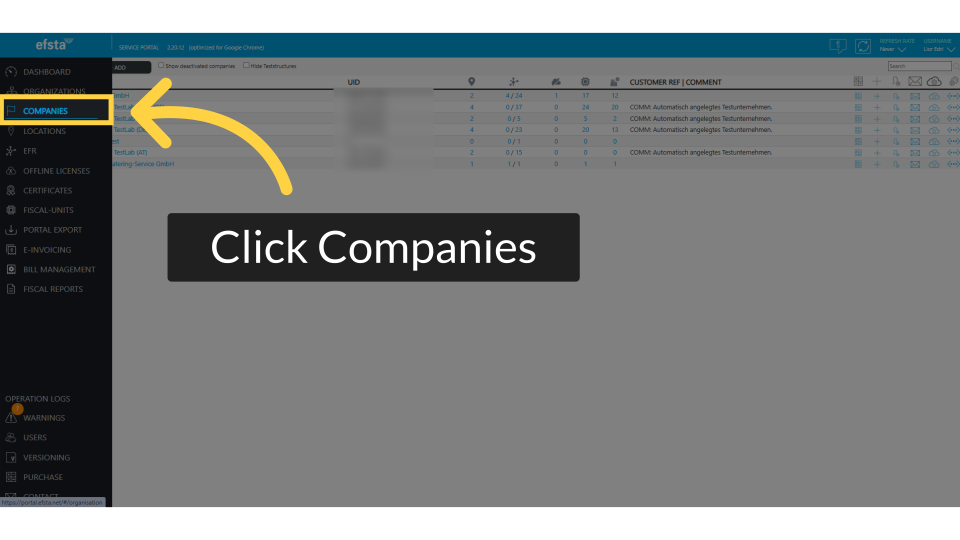
Click Companies
Image AttachedClick on the companies tab from the side menu.
4
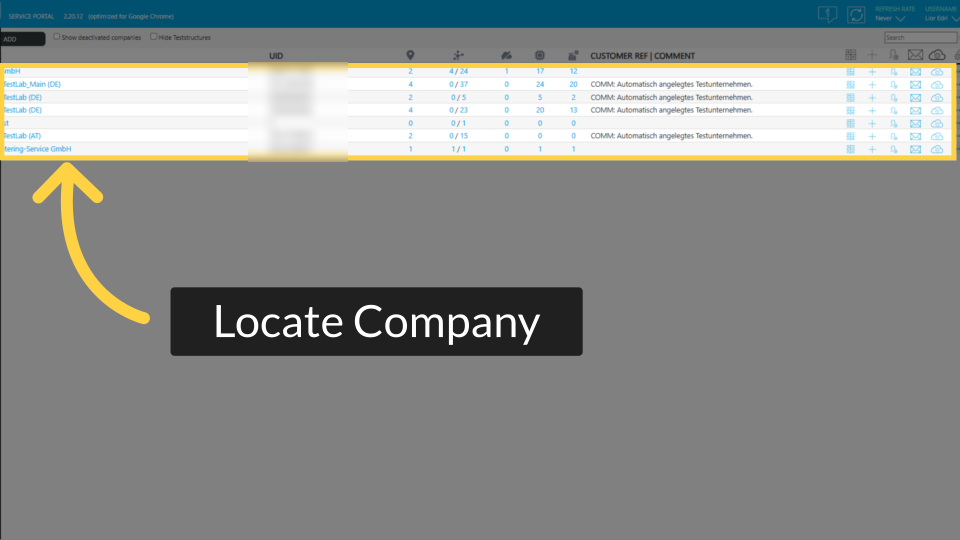
Locate Company
Image AttachedLocate and click on the company that is being connected.
5
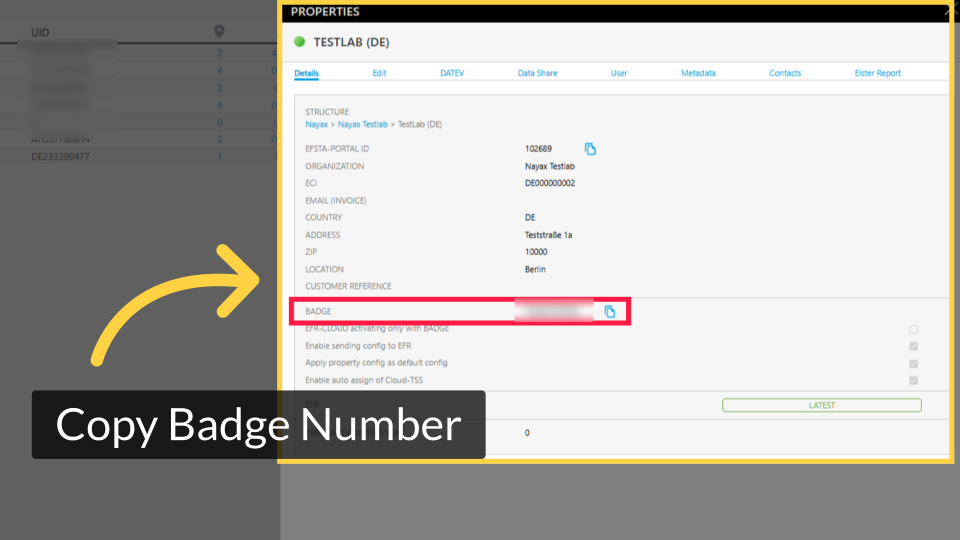
Copy Badge Number
Image AttachedCopy the badge number for this company.
6
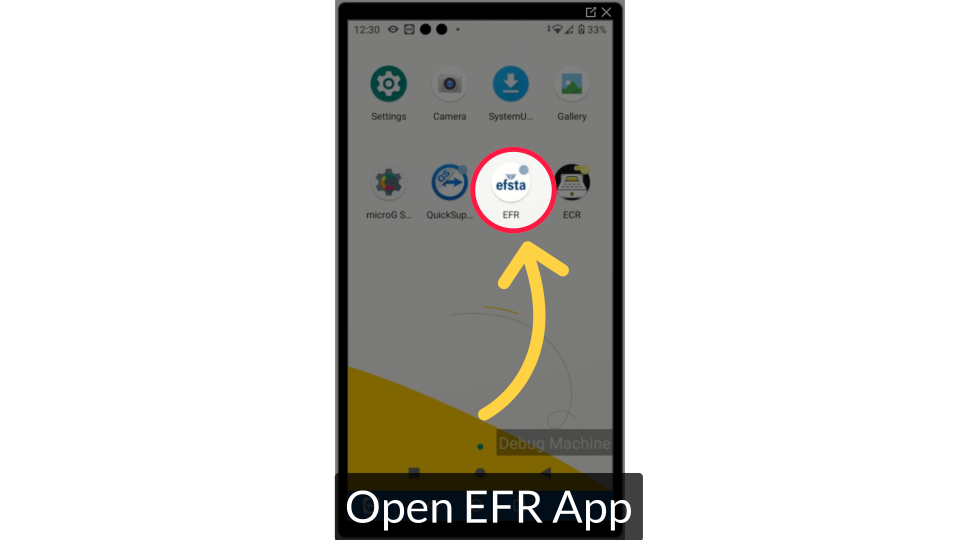
Open EFR App
Image AttachedOpen the EFR app on your device. Notice that when the app is opened, the flag is the correct country of the company.
7
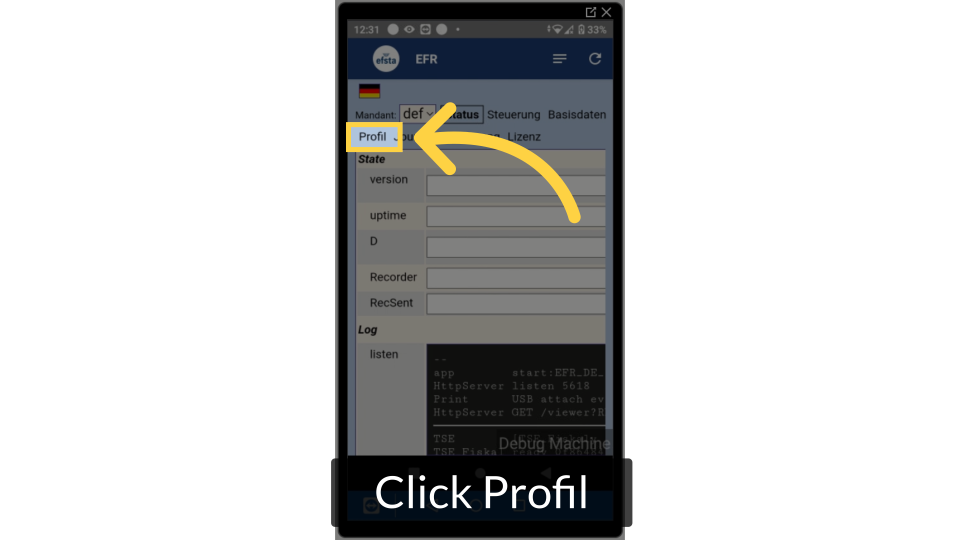
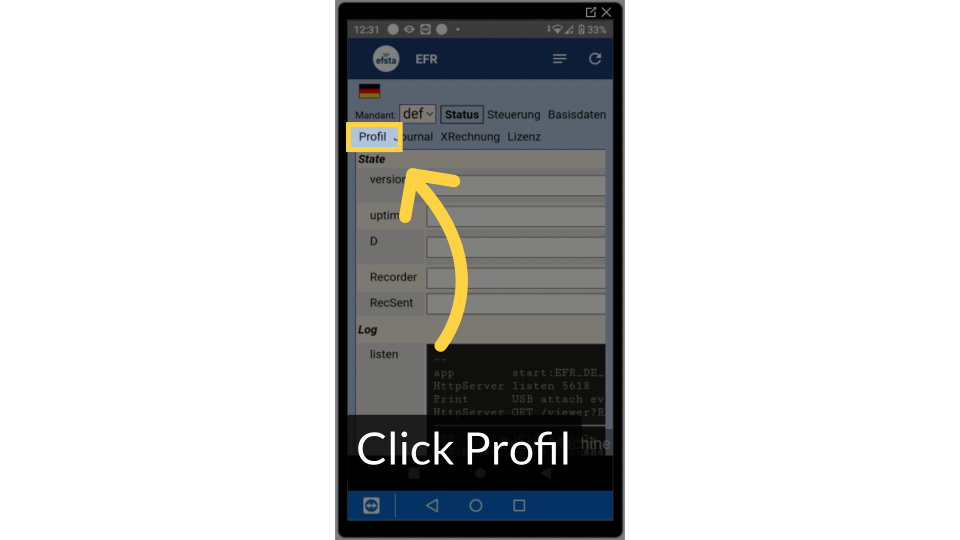
Click Profile
Image AttachedClick on profile located at the menu bar at the top.
8
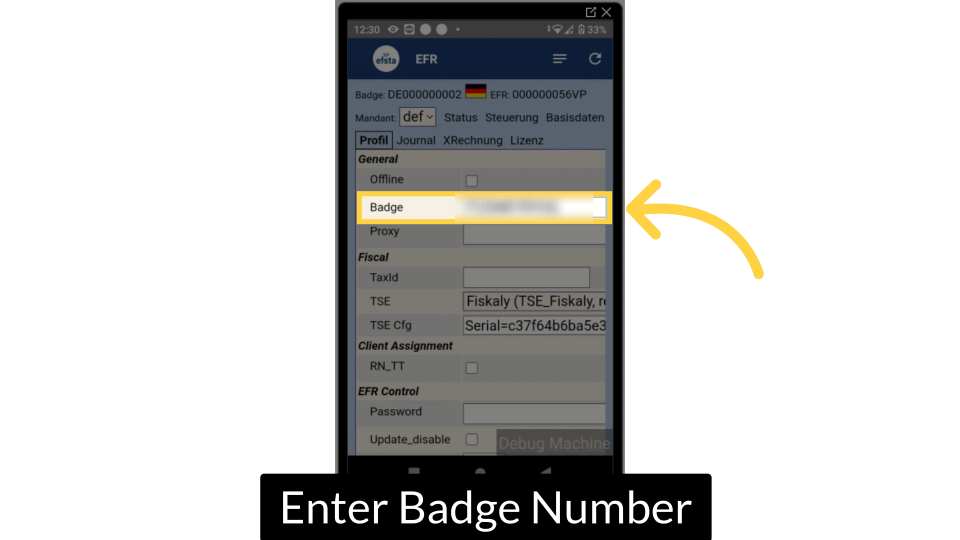
Enter Badge Number
Image AttachedEnter the badge number in the required field.
9
Click Save
Make sure to press save to continue.
10
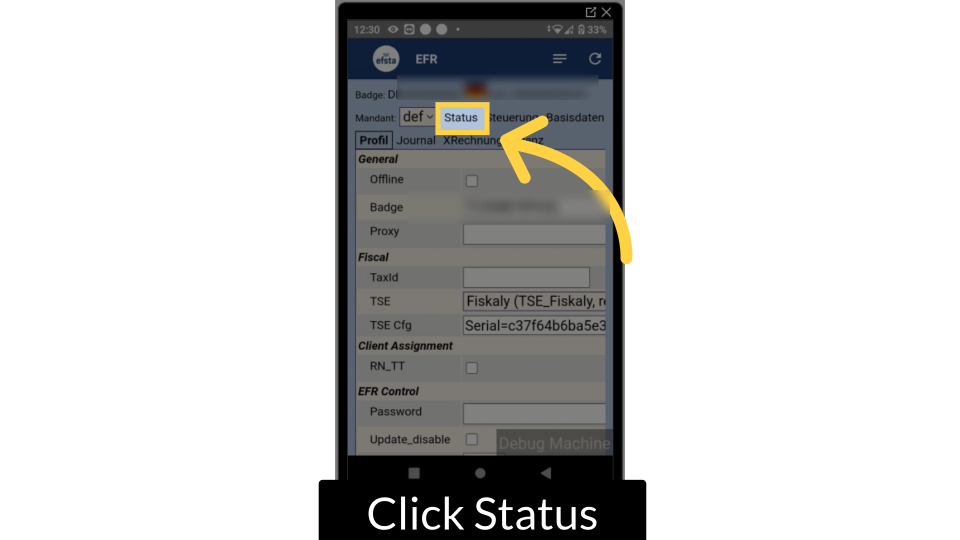
Click Status
Image AttachedClick status to return back to the previous tab.
11
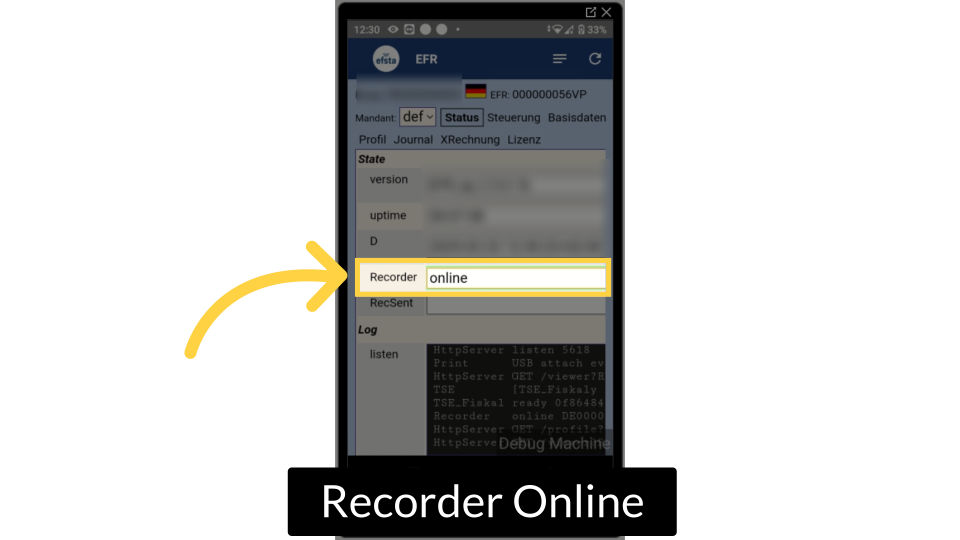
Check Recorder Status
Image AttachedThe recorder field will take a few moments to load. Once it reads Online, it is complete.
12
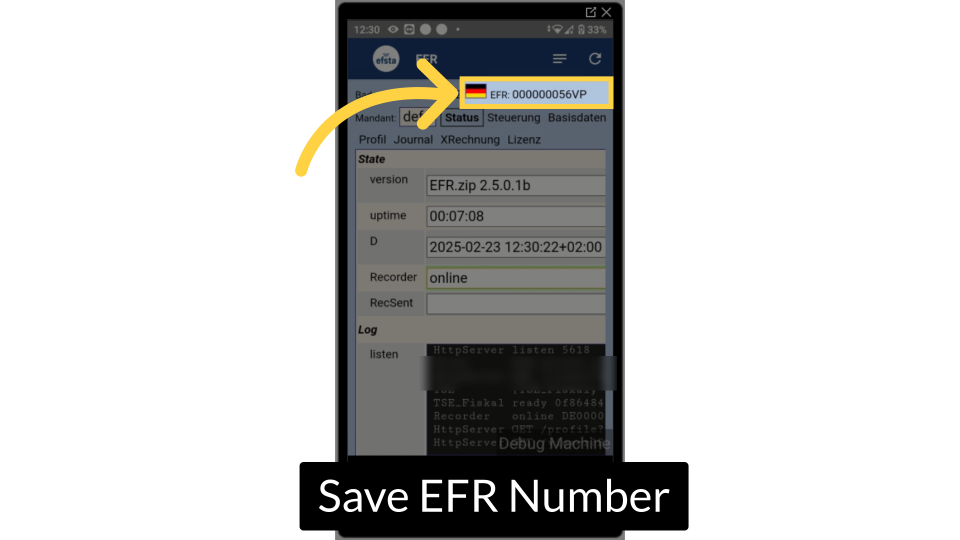
Save EFR Number
Image AttachedSave the EFR number that's located at the top.
13
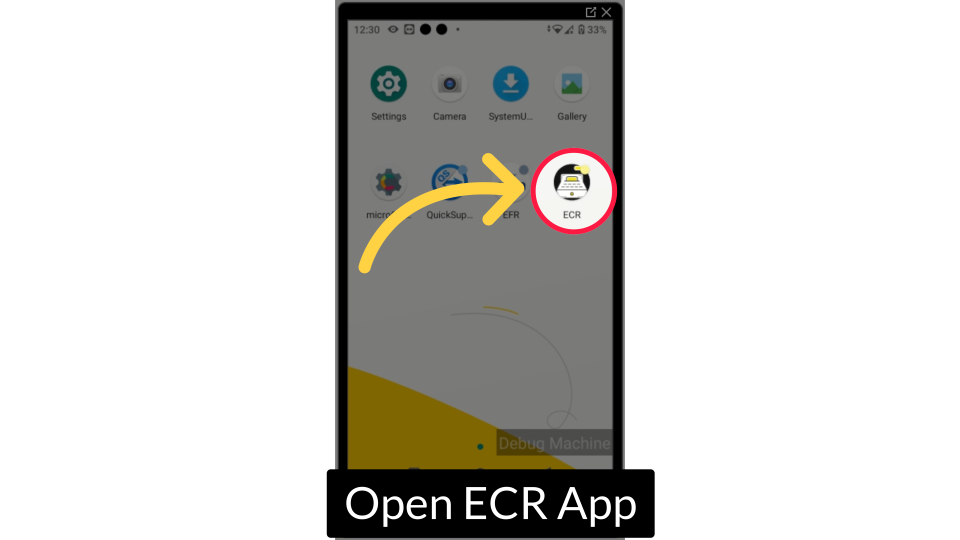
Open ECR App
Image AttachedOpen the ECR app on your device.
14
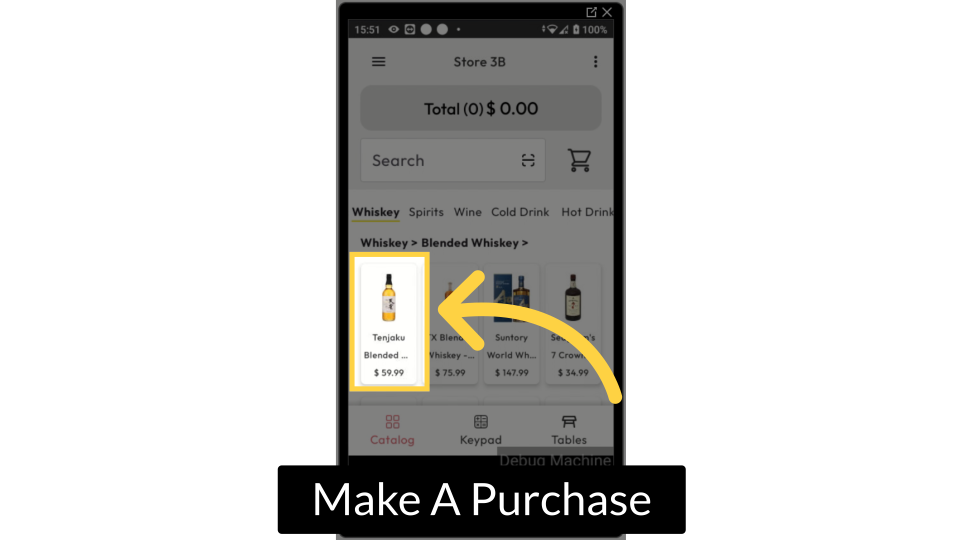
Make a Purchase
Image AttachedIn order to activate the EFSTA, make a purchase and evaluate how the receipt is printed.
15
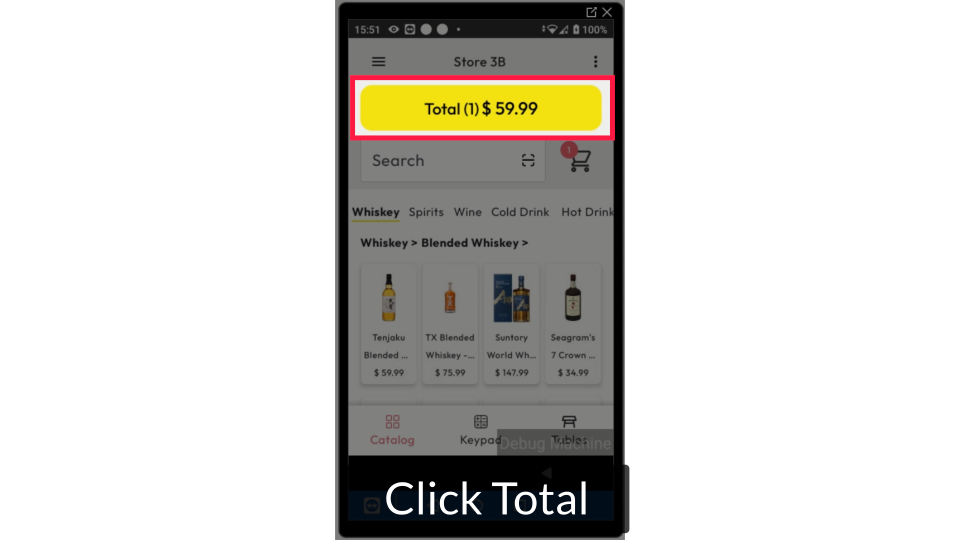
Click Total
Image AttachedClick the total.
16
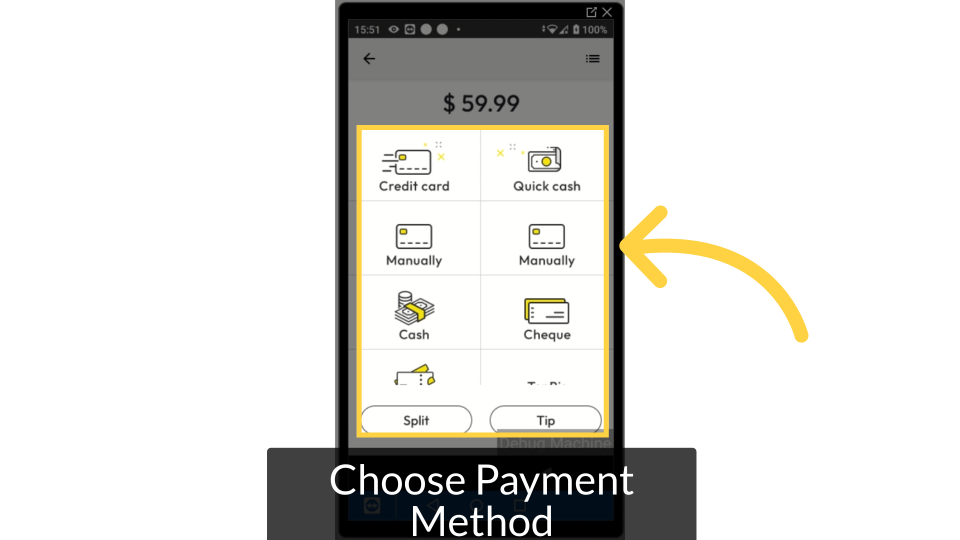
Choose Payment Method
Image AttachedChoose the payment method in order to complete the transaction.
17
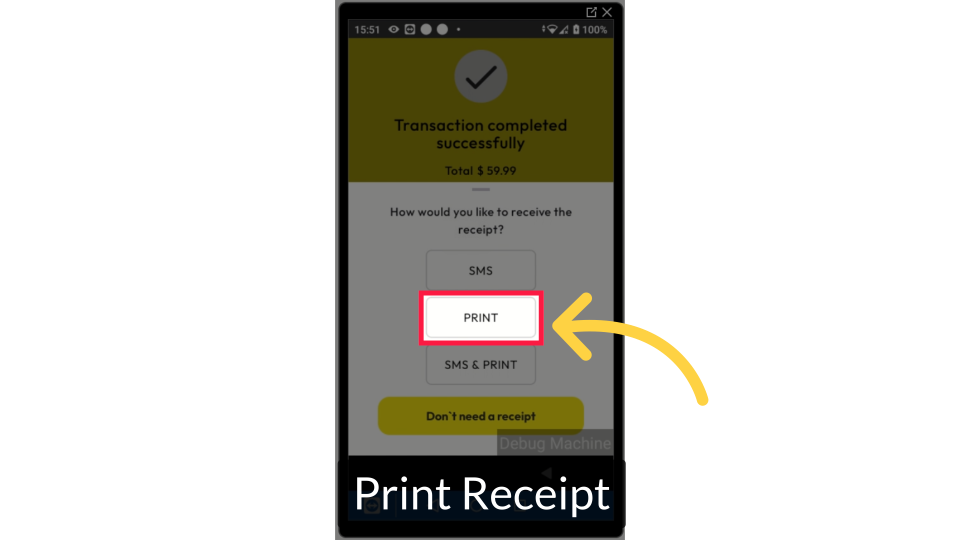
Receipt Printed
Image AttachedPrint the receipt and check if it prints properly. If there is an error, continue with the following steps.
18
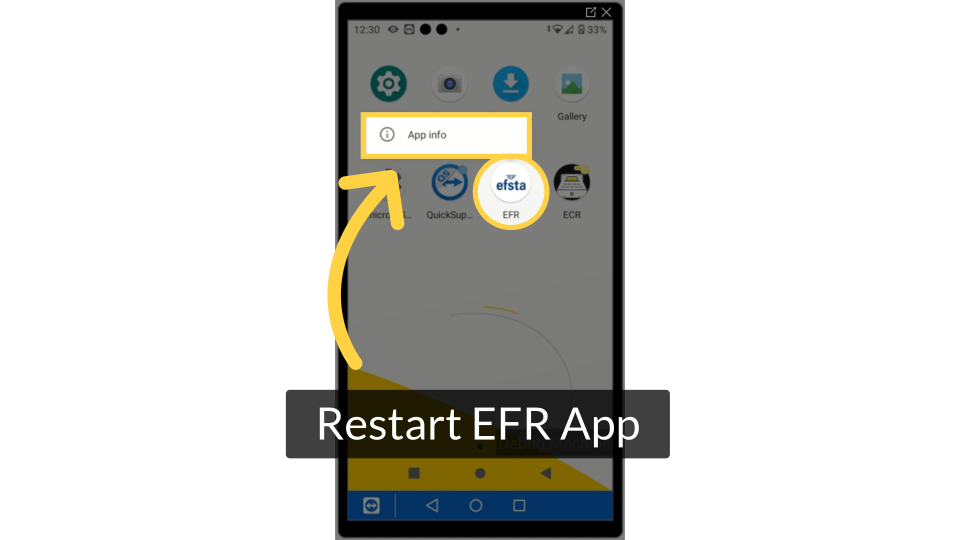
Restart EFR App
Image AttachedOn the POS device, long press on the EFR app. Click on App info.
19
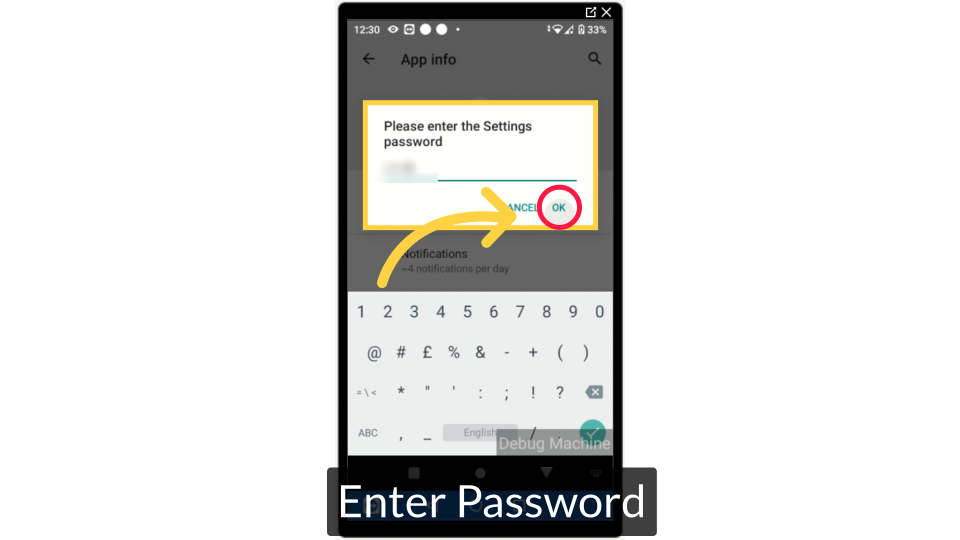
Enter Password
Image AttachedEnter the password and click ok.
20
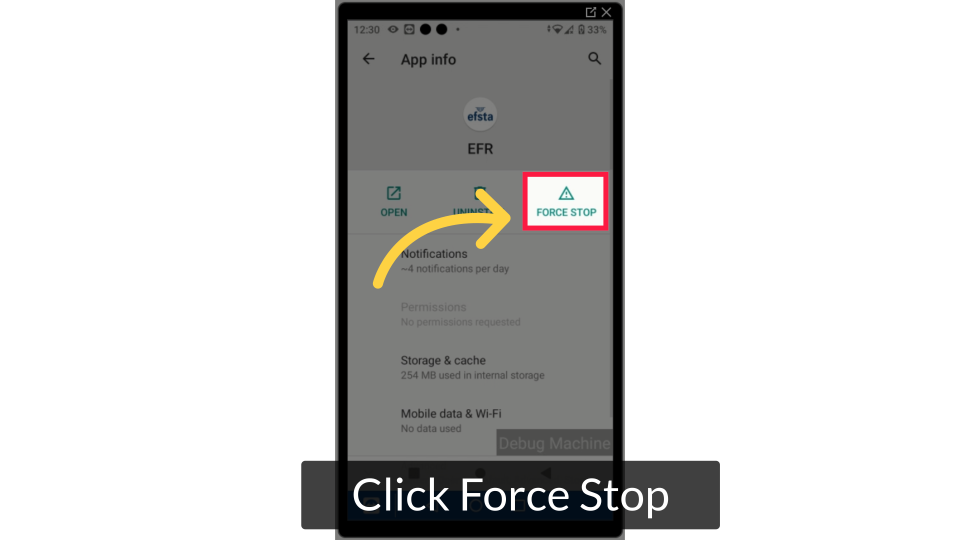
Click Force Stop
Image AttachedClick force stop.
21
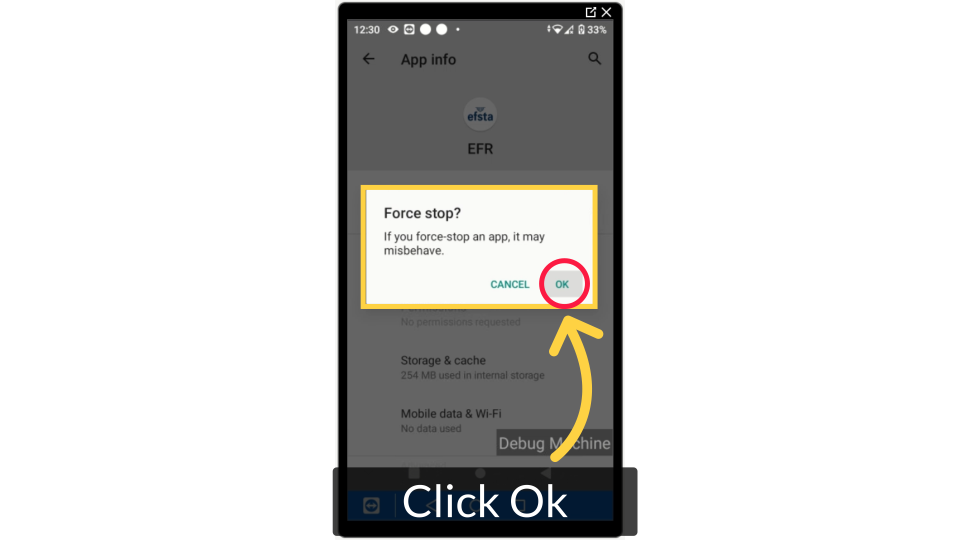
Click Ok
Image AttachedClick ok to continue.
22
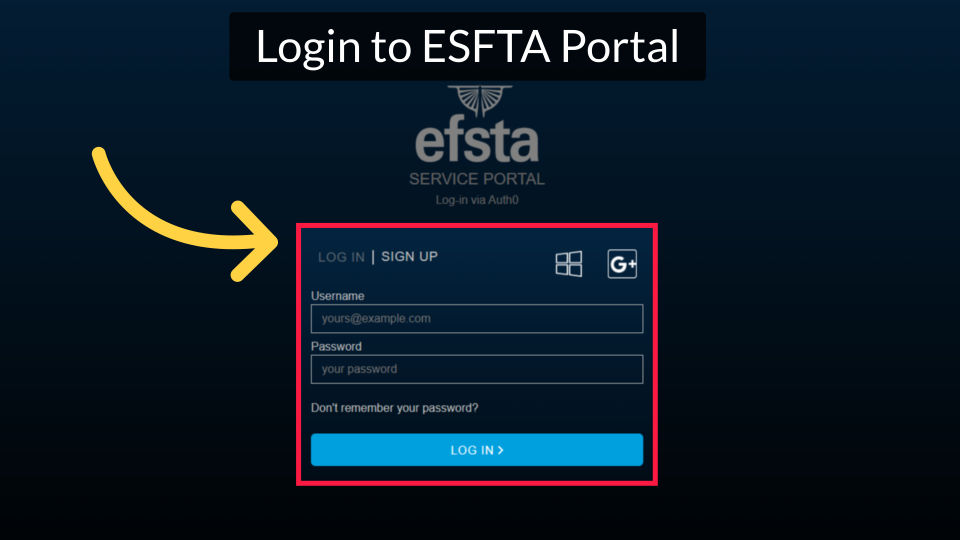
Go to EFSTA Portal
Image AttachedLog back into the EFTSA Portal.
23
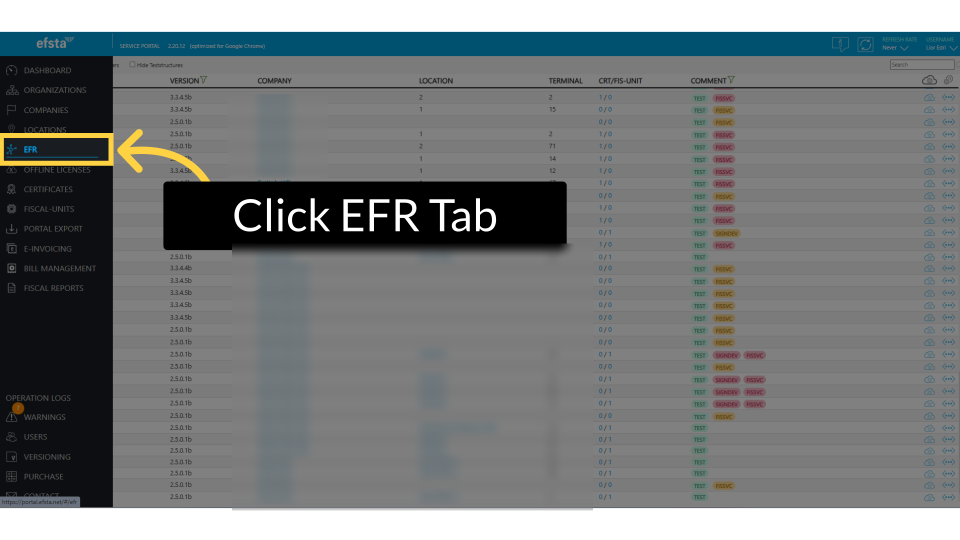
Click EFR Tab
Image AttachedClick on the EFR tab from the side menu.
24
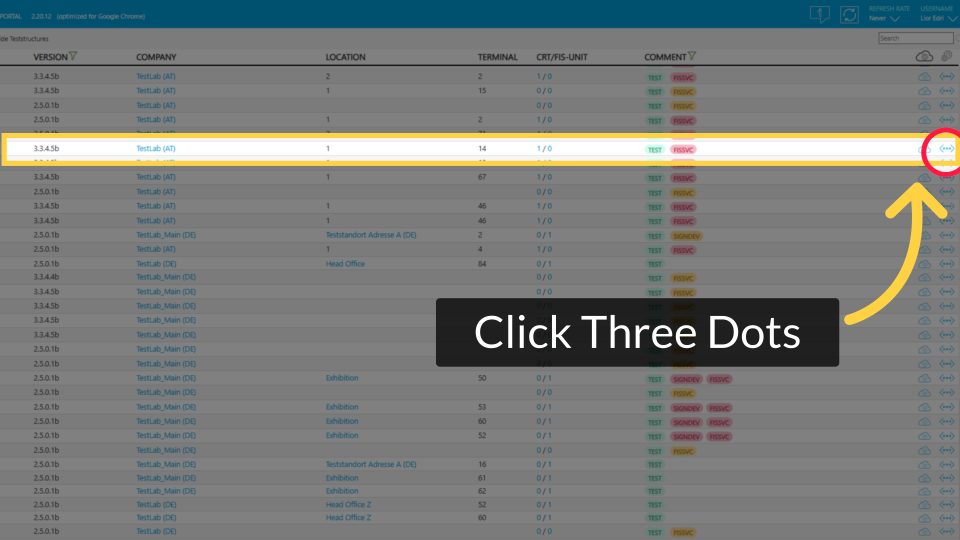
Click Three Dots
Image AttachedLocate the company in the list and click the three dots to the right.
25
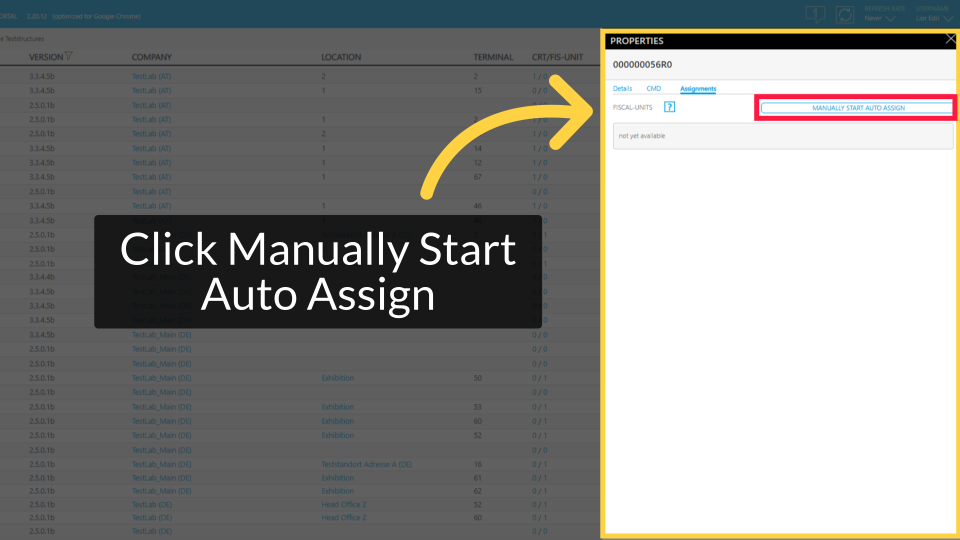
Click Manually Start Auto Assign
Image AttachedClick on Manually Start Auto Assign button to manually connect the company. Click Ok to continue.
26
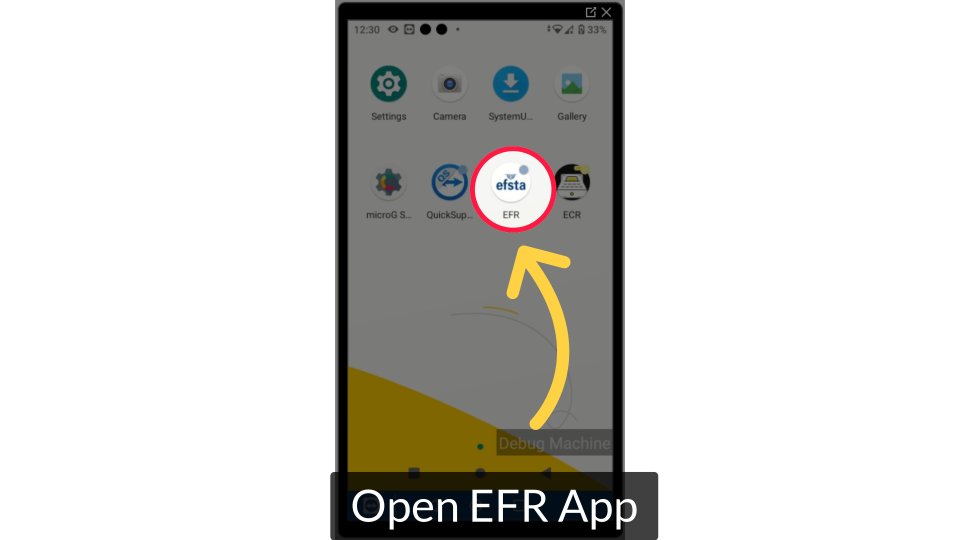
Open EFR App
Image AttachedOpen the EFR app on your device.
27
Click Profil
Image AttachedClick on profile located at the menu bar at the top.
28
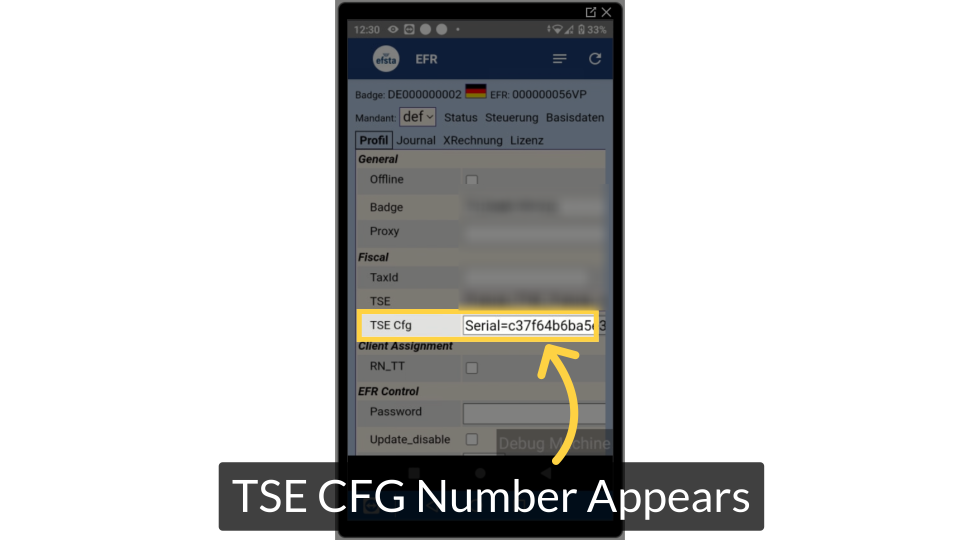
TSE CFG Number Appears
Image AttachedIf the TSE CFG number shows, the restart worked and the application is now connected.
Thank you!
Did you find this article helpful?