How to Configure an EV Kiosk for VPOS Media | Operations
This guide will walk you through the process of configuring and assigning a VPOS Media Kiosk to a charging station in the Nayax Energy Core.
1
OCPI Pre-Requisite
- Verify your CSMS is integrated with Nayax PTP solution via OCPI
-
Confirm credentials were configured correctly between the Nayax EV Kiosk and CSMS
-
Confirm location and tariff are synced to the Kiosk
2
Video Guide
3
Click Operations
Image Attached
On the Dashboard of your Nayax Core platform, click on the Operations tab. Then click on "Machines" from the drop-down menu.

4
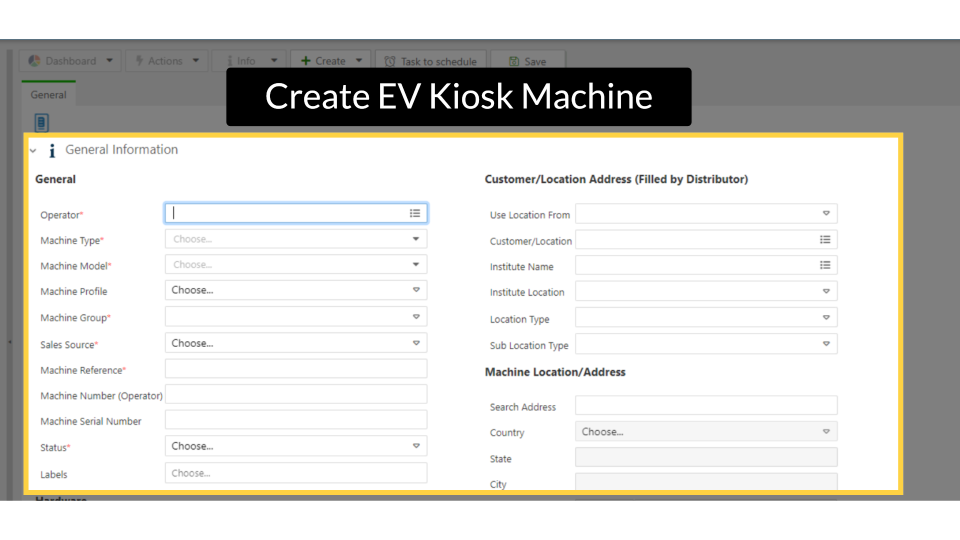
Create EV Kiosk Machine
Image Attached
Now, to add the new Kiosk machine information. We need to create it by filling in the General Information section as follows:
5
Operator and CPO
Image Attached
For the Operator, select the CPO under which this machine will be created.

6
Define a Kiosk
Image Attached
For machine type, select 'Kiosk' from the drop-down menu, as highlighted.

7
Machine Station Model
Image Attached
For the Machine Station Model, select the OCPI Nayax Energy EV Kiosk option as highlighted.

8
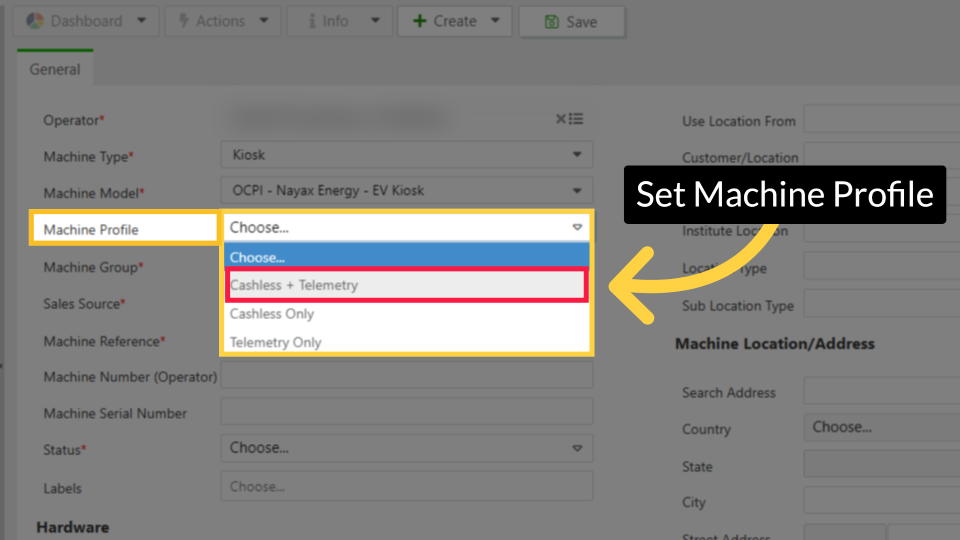
Set Machine Profile
Image Attached
For machine profile select Cashless + Telemetry
9
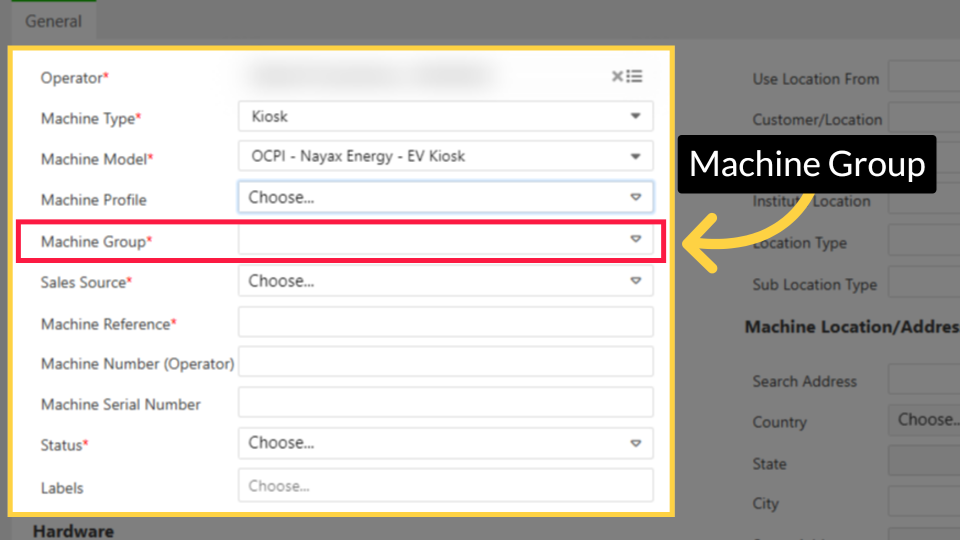
Machine Group
Image Attached
For Machine Group select the group this EV Kiosk will be associated with.
If not defined, we need to assign it to a group or to create a new machine group click this link How to Create a Machine Group in Nayax Energy Core | Operations
10
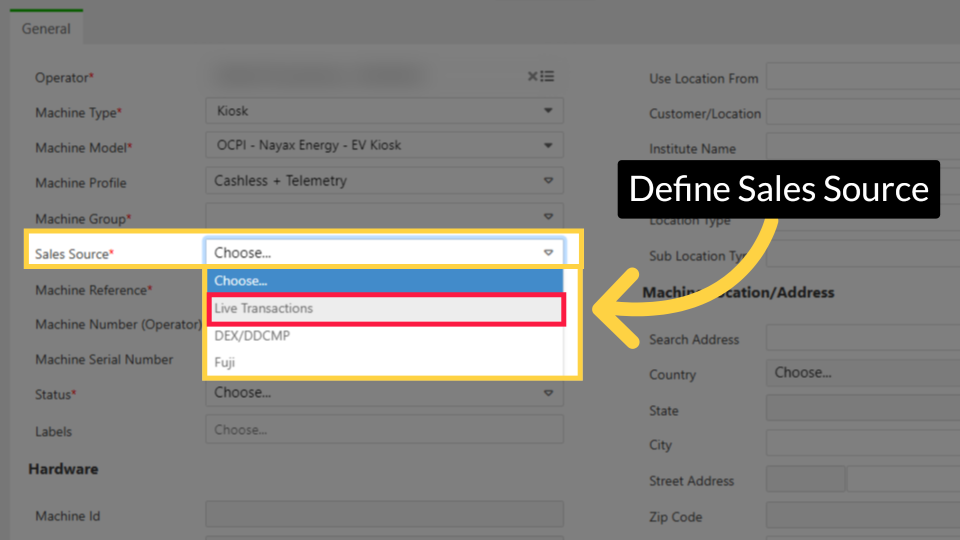
Define Sales Source
Image Attached
To define the sales source select Live Transactions.
11
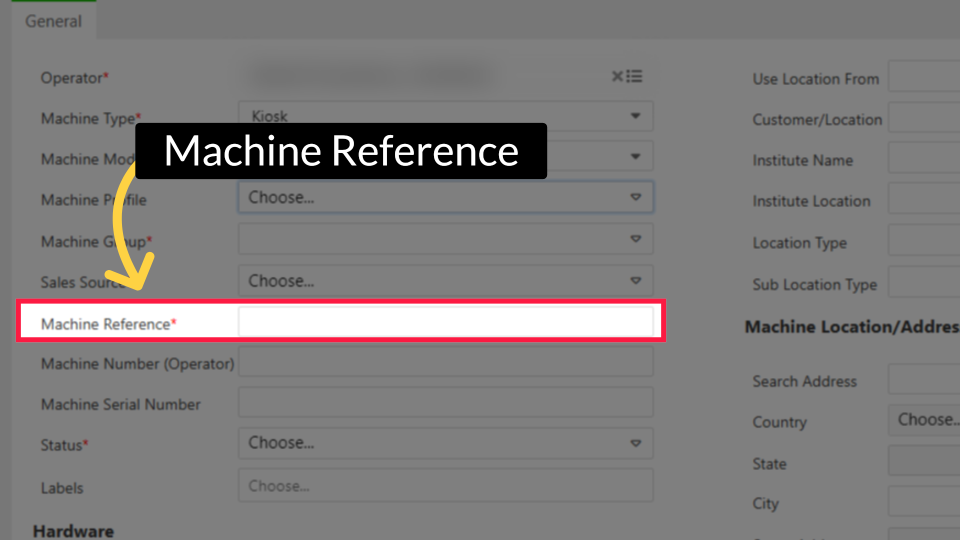
Machine Reference
Image Attached
Insert the location identifier as the address and specification. For machine reference, we recommend entering the device's location address and specifications.
12
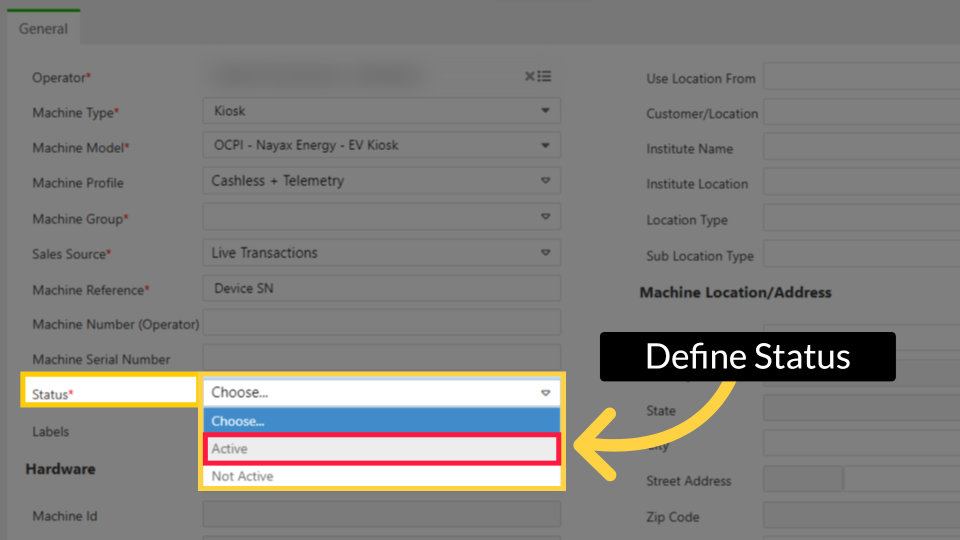
Define Status
Image Attached
To define the Status Select Active for this machine to go live immediately.
13
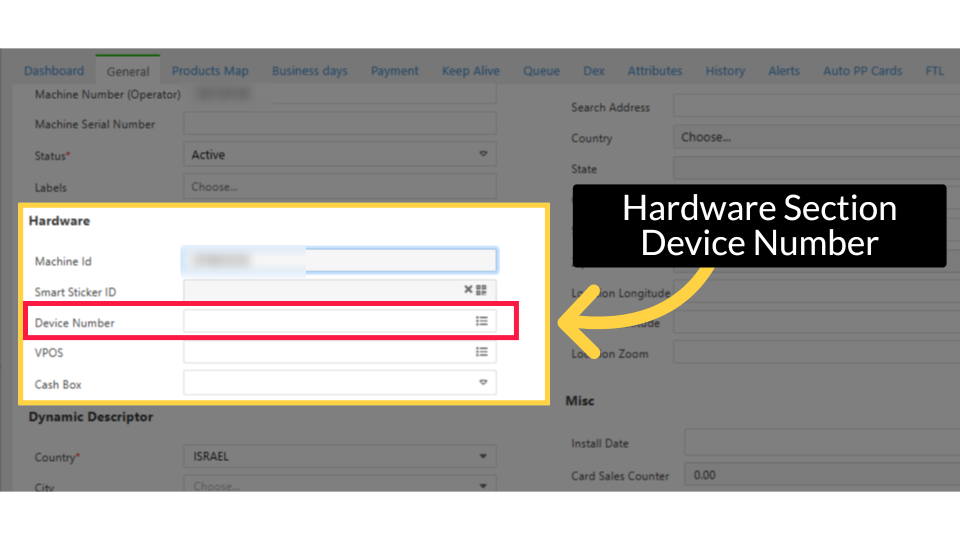
Hardware Section - Device Number
Image Attached
The kiosk serial number options will appear automatically in the device field dropdown. Verify the serial number matches your physical device and select the corresponding option.
The Device Number is located on the back of the EV Kiosk device.
14
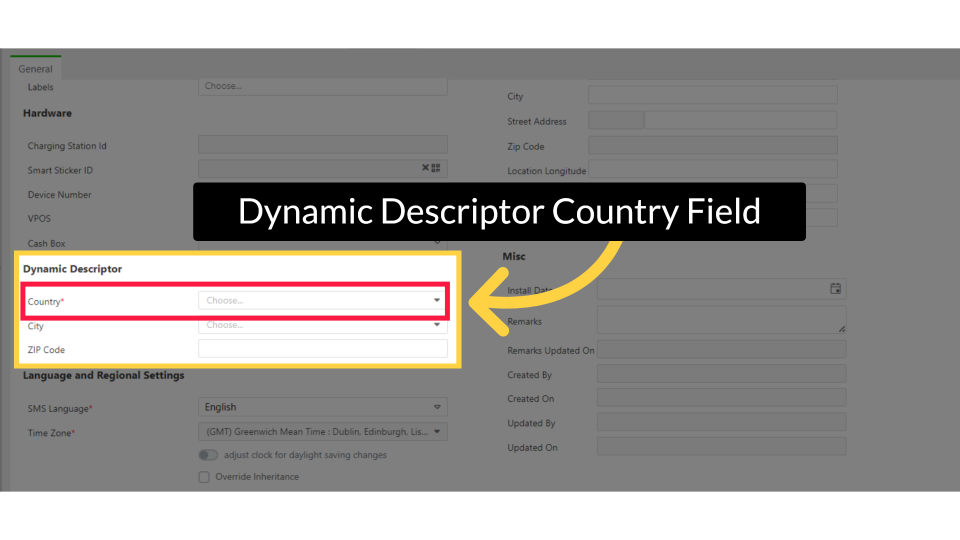
Click Dynamic Descriptor - Country
Image Attached
For the Dynamic Descriptor settings select the country where the kiosk is installed.
15
Click Save
Image Attached
Click on the save button to save your progress.

16
Click Payment Tab
Image Attached
Scroll to Payment tab as highlighted in RED on the visual and click to open.

17
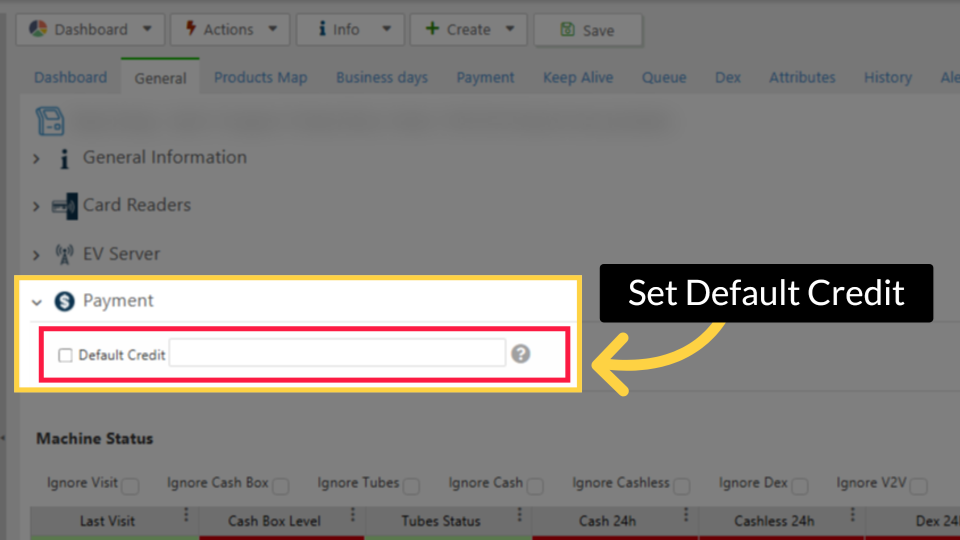
Define Default Credit
Image Attached
Set the Default Credit field - This must be higher than the potential charging value.
Please note that the number of zeros added to the default credit should be configured according to the decimal point configured in card reader step.
Please note that the number of zeros added to the default credit should be configured according to the decimal point configured in card reader step.
For example, for the default credit of 123.00 of any currency, the value should be as follows:
- Decimal Place 2 > Default credit should be 12300
18
Click Save
Image Attached
Click on the save button to save your progress.

19
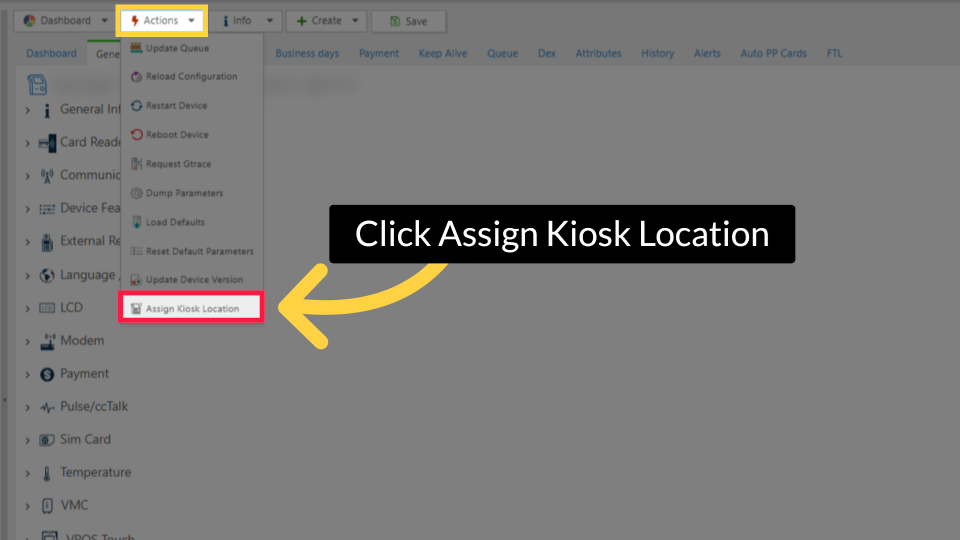
Click Assign Kiosk Location
Image Attached
Click Actions tab and then click on Assign Kiosk Location from the drop down menu as highlighted on the visual.
20
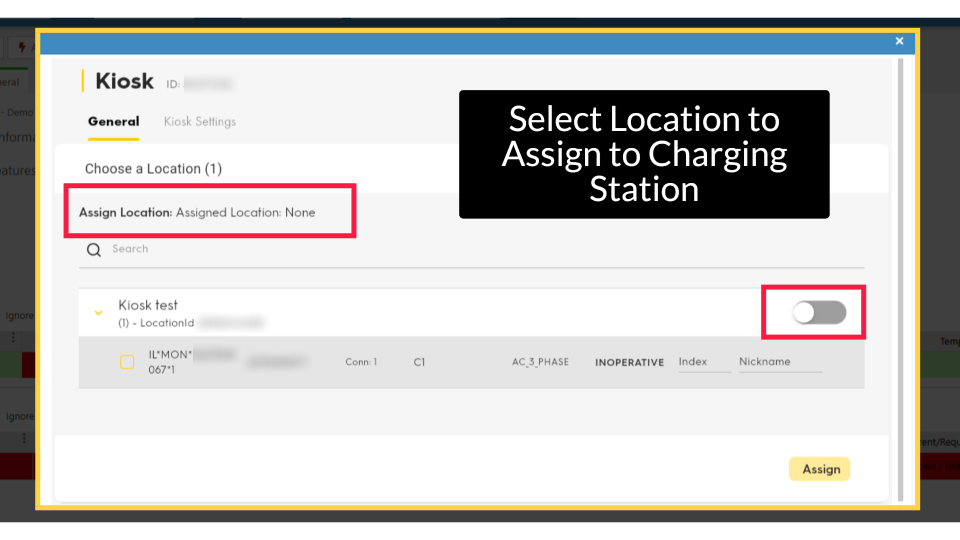
Select Location to Assign to Charging Station
Image AttachedToggle on to activate the location. If the location is already active, select the charging stations you want to link to this machine.
21
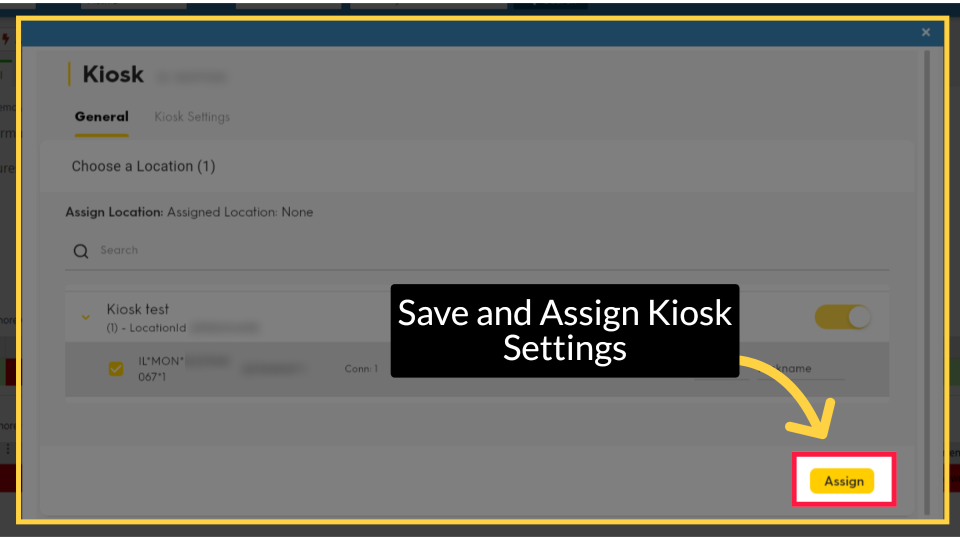
Save and Assign Kiosk Settings
Image AttachedClick on the Assign button to save your settings.
22
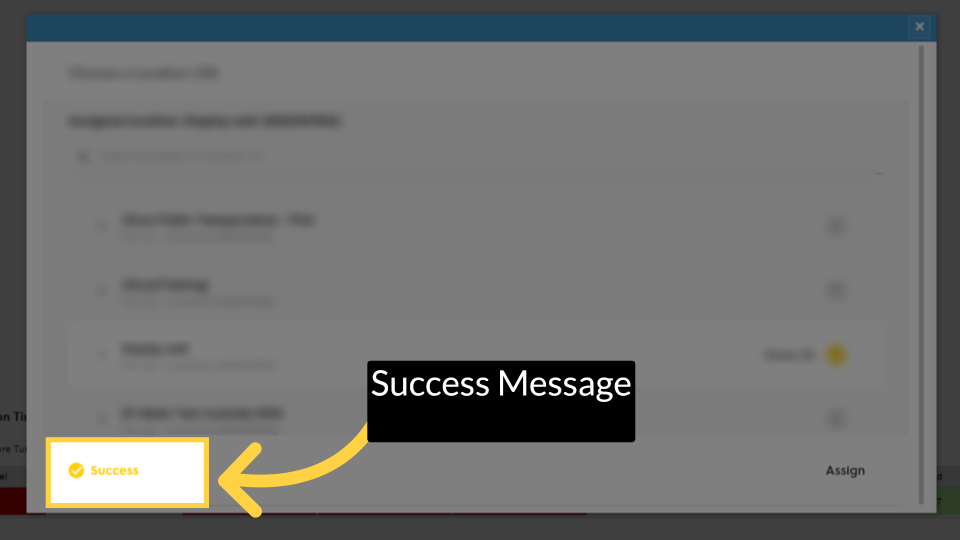
Success Message
Image Attached
Once you see the success message, the changes as been saved.
The EV Kiosk will open automatically after Device reset.
Thank you!
Did you find this article helpful?