Collecting Logs for VPOS Media | Operations
Log collection and device logs are managed within Nayax Core, specifically located under the dedicated 'Dex' tab for each machine record. This process is key to quickly identifying the root cause of operational disruption.
Video Guide
00:00: This guide explains how to collect logs from a vpos media device using
00:04: Nyx.
00:06: On the dashboard of your NYX core management Suite, click on the operations
00:10: tab.
00:11: From the drop-down menu, click on Machines as highlighted.
00:14: Type in your Operator's name and any other fields to locate your machine and click
00:18: search.
00:20: Locate and click on the machine from the hierarchy.
00:24: On the main machine section, click on Device Features tab to open.
00:28: Hover over the tooltip to understand how to fill in each field.
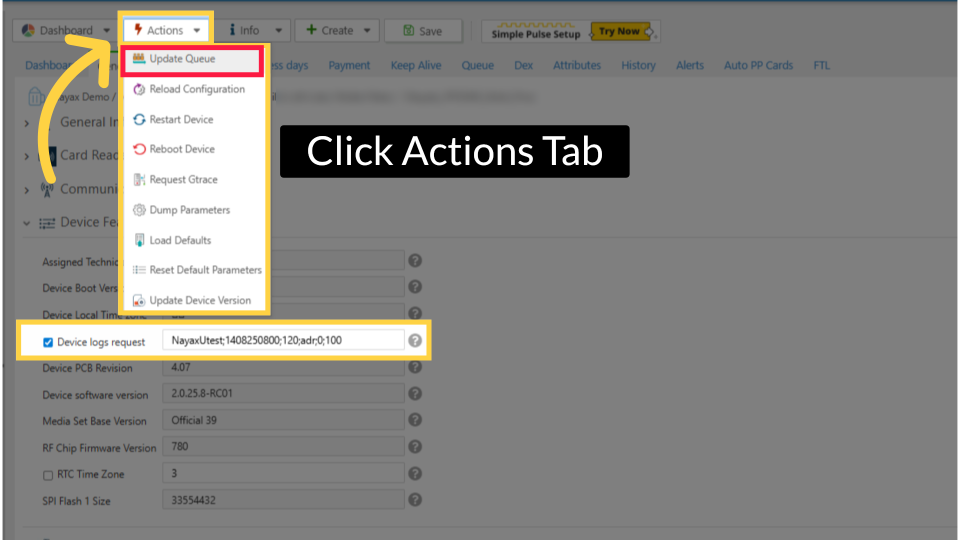
00:32: Scroll down to device logs request and fill in the field in a specific structure:
00:36: See the visual for structure and example.
00:40: Click on the checkbox to enable.
00:43: When ready to proceed scroll to the actions button and click update queue from
00:47: the drop-down as highlighted in red?
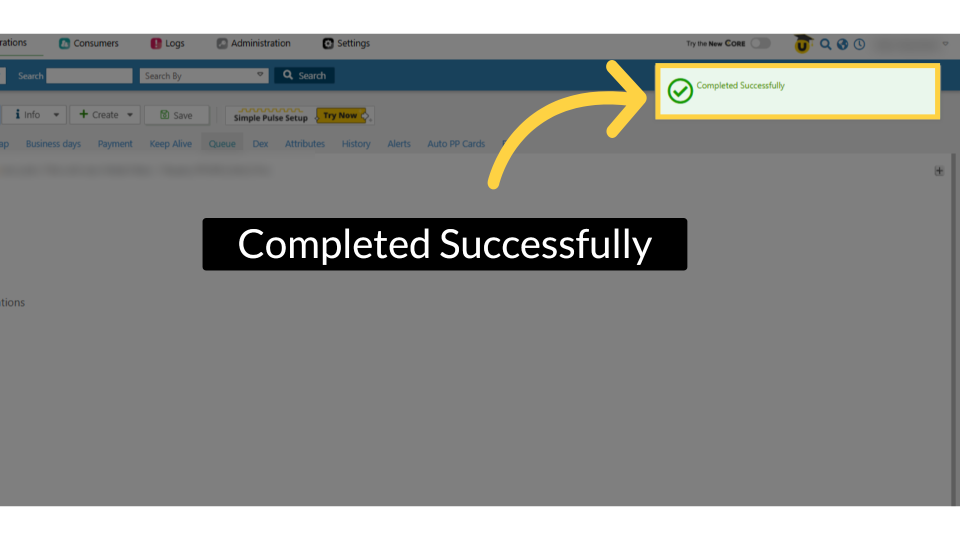
00:49: A confirmation message should pop up confirming
00:52: the action was Completed Successfully.
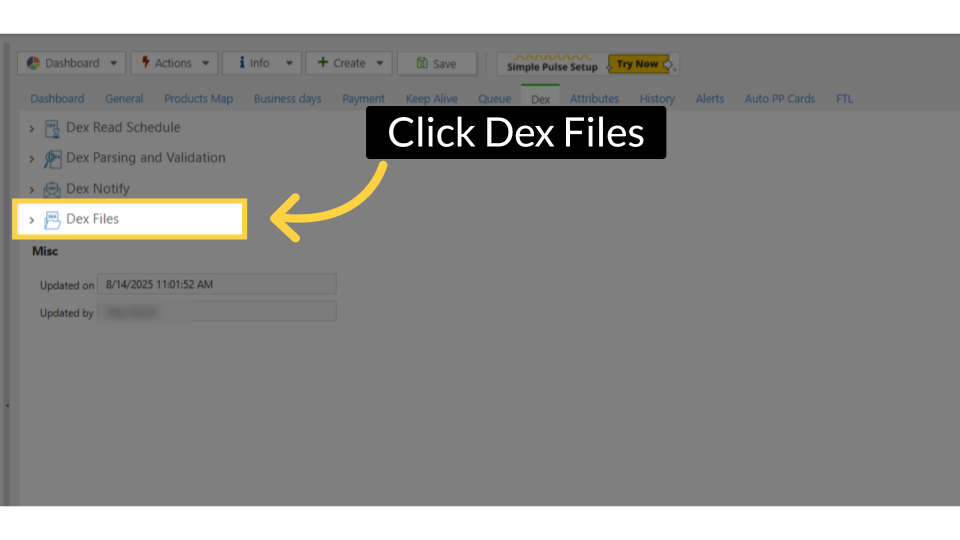
00:58: Click on Dex Files to open the file list.
01:01: Scroll down and click in the table highlighted in RED to be able to access
01:05: and click into the View Raw tab as highlighted.
01:08: The detailed log will be displayed for the device events.
01:12: Thanks for watching!
Click Operations Tab
Image AttachedOn the dashboard of your Nayax Core management suite click on the Operations Tab, then from the drop-down menu, click on Machines as highlighted.

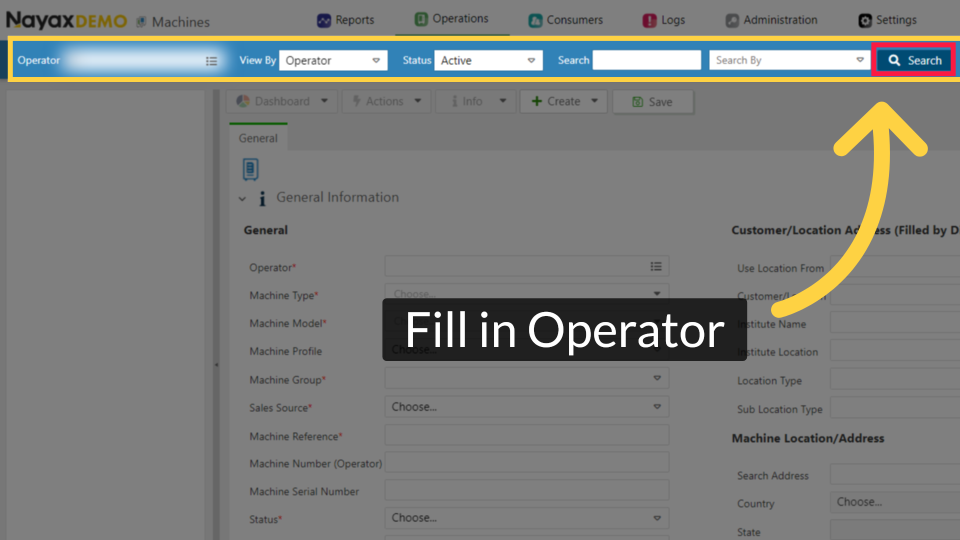
Fill in Operator Details
Image AttachedType in your Operator's name and any other fields to locate your machine and click search.
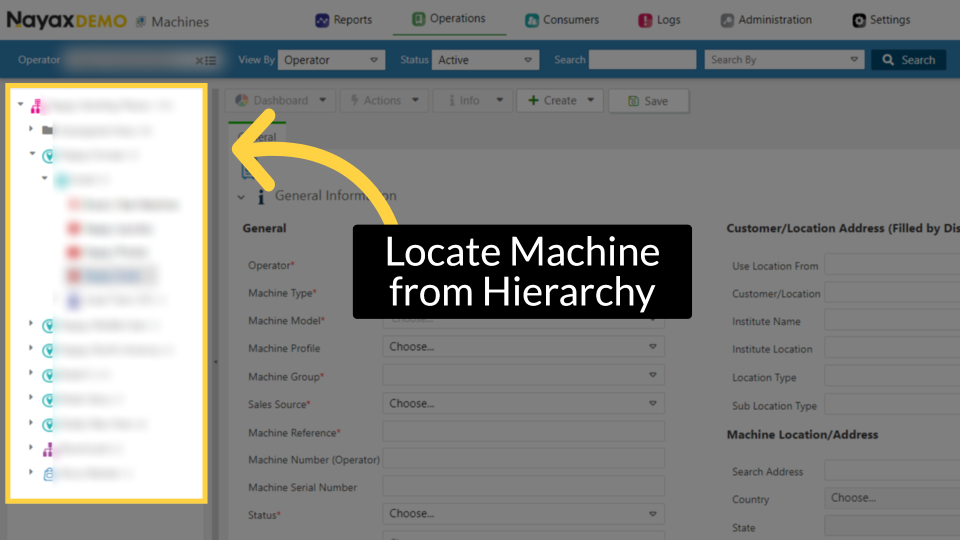
Locate Machine from Hierarchy
Image AttachedLocate and click on the machine from the hierarchy.
Click Device Features Tab
Image AttachedOn the main machine section, click on Device Features tab to open.

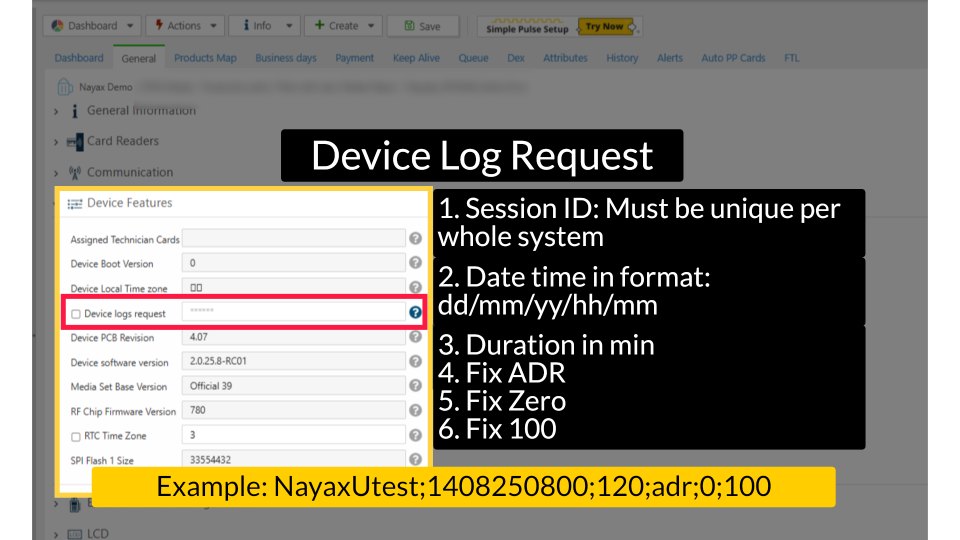
Device Log Request
Image AttachedScroll down to device logs request and fill in the field in a specific structure: See the visual for structure and example.
Pro tip: Hover over the tooltip to understand how to fill in each field.
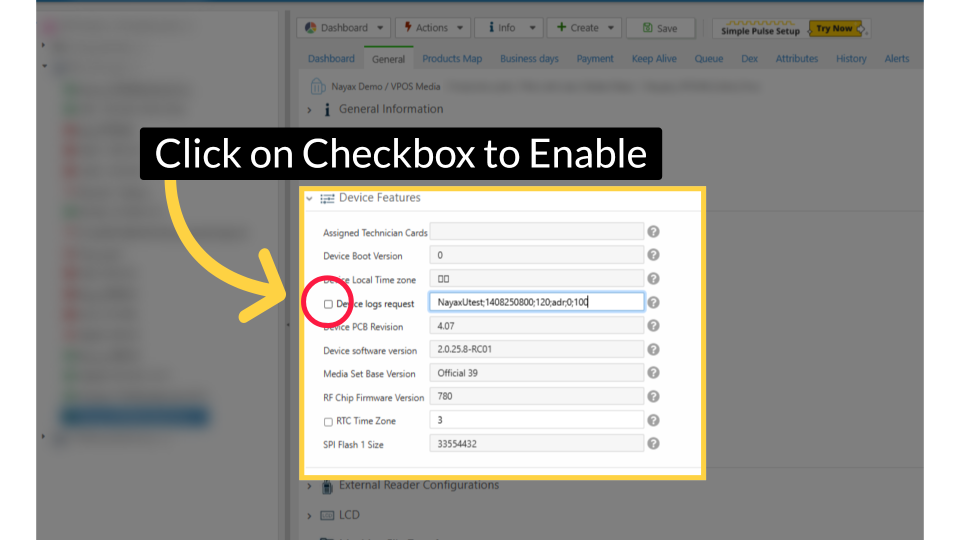
Click on Checkbox to Enable
Image AttachedClick on the checkbox to enable.
Click Actions Tab
Image AttachedWhen ready to proceed scroll to the Actions button and click Update Queue from the drop down as highlighted in RED.
Completed Successfully
Image AttachedA confirmation message should pop up confirming the action was Completed Successfully.
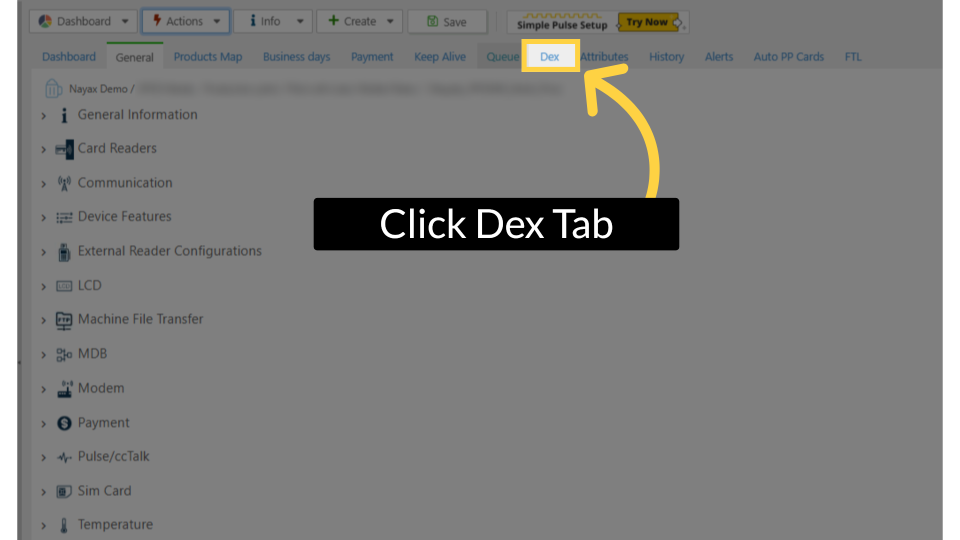
Click Dex Tab
Image AttachedClick open the Dex from the top tab menu.
Click Dex Files
Image AttachedClick on Dex Files to open the file list.
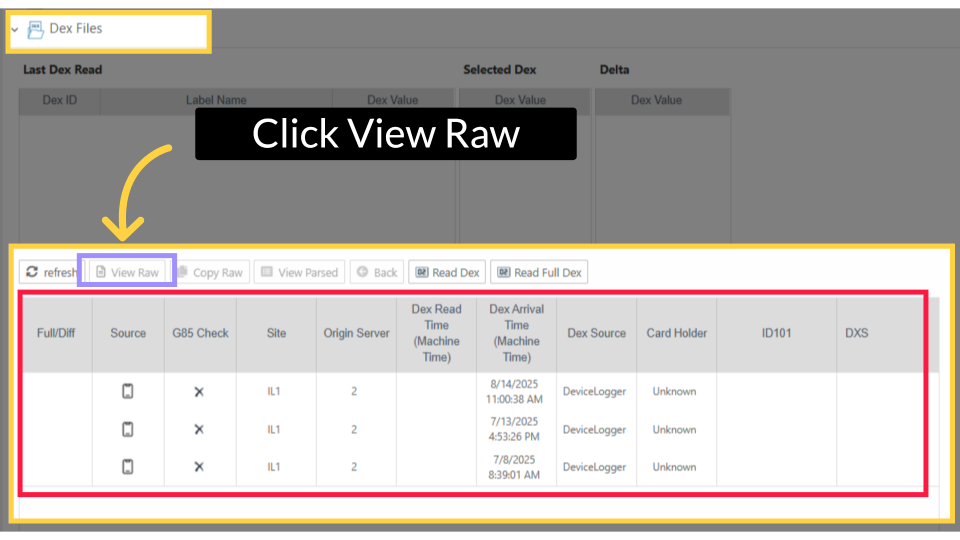
Click View Raw
Image AttachedScroll down and click in the table highlighted in RED to be able to access and click into the View Raw tab as highlighted.
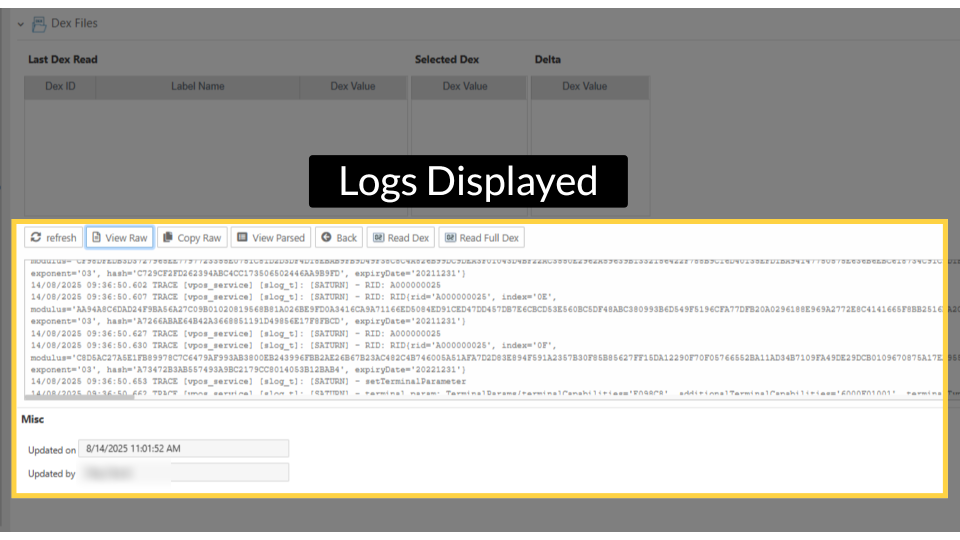
Logs Displayed
Image AttachedThe detailed log will be displayed for the device events.
Thank you!
Did you find this article helpful?