How to Create and Invite a New User in Energy Core | Administration
This guide will show you how to create and invite a new user in Energy Core.
1
Video Guide
2
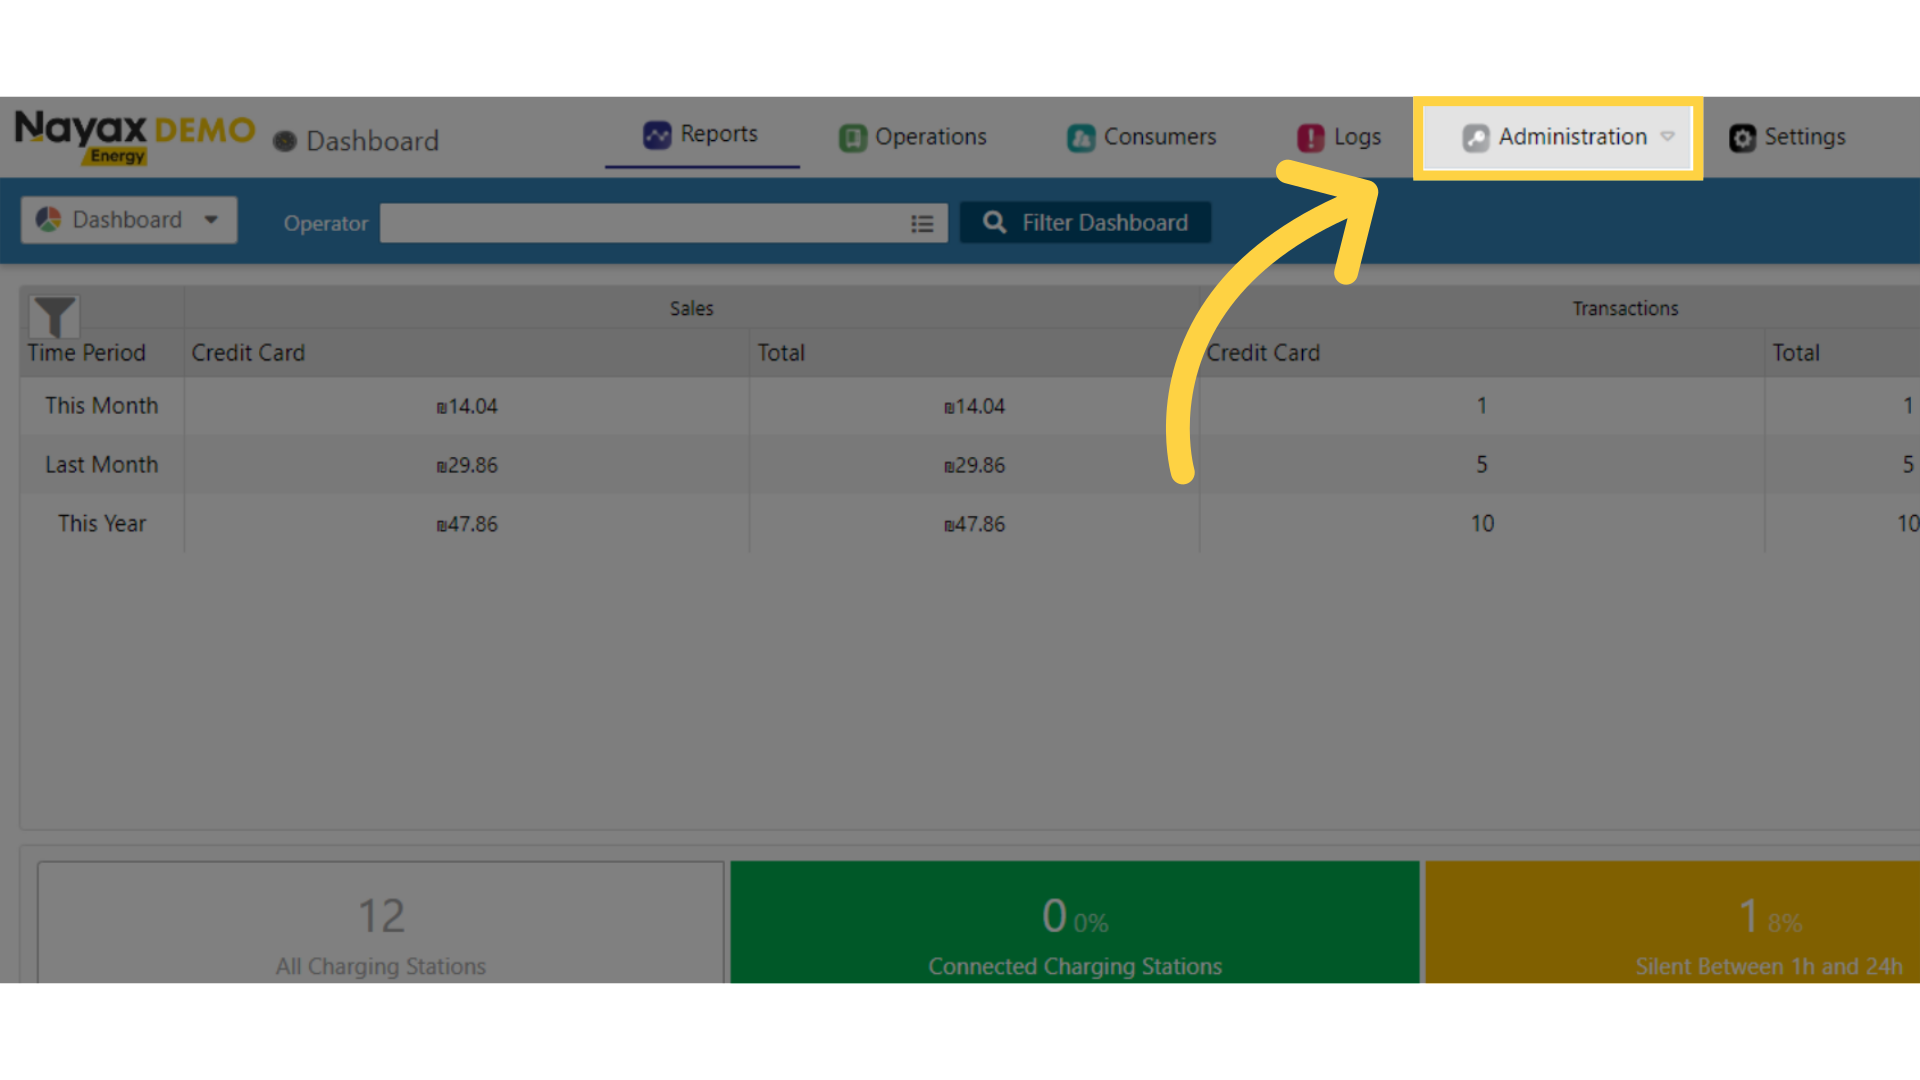
Click Administration
Image Attached
On the dashboard of your Nayax Energy Core management suite click on the Administration tab.
3
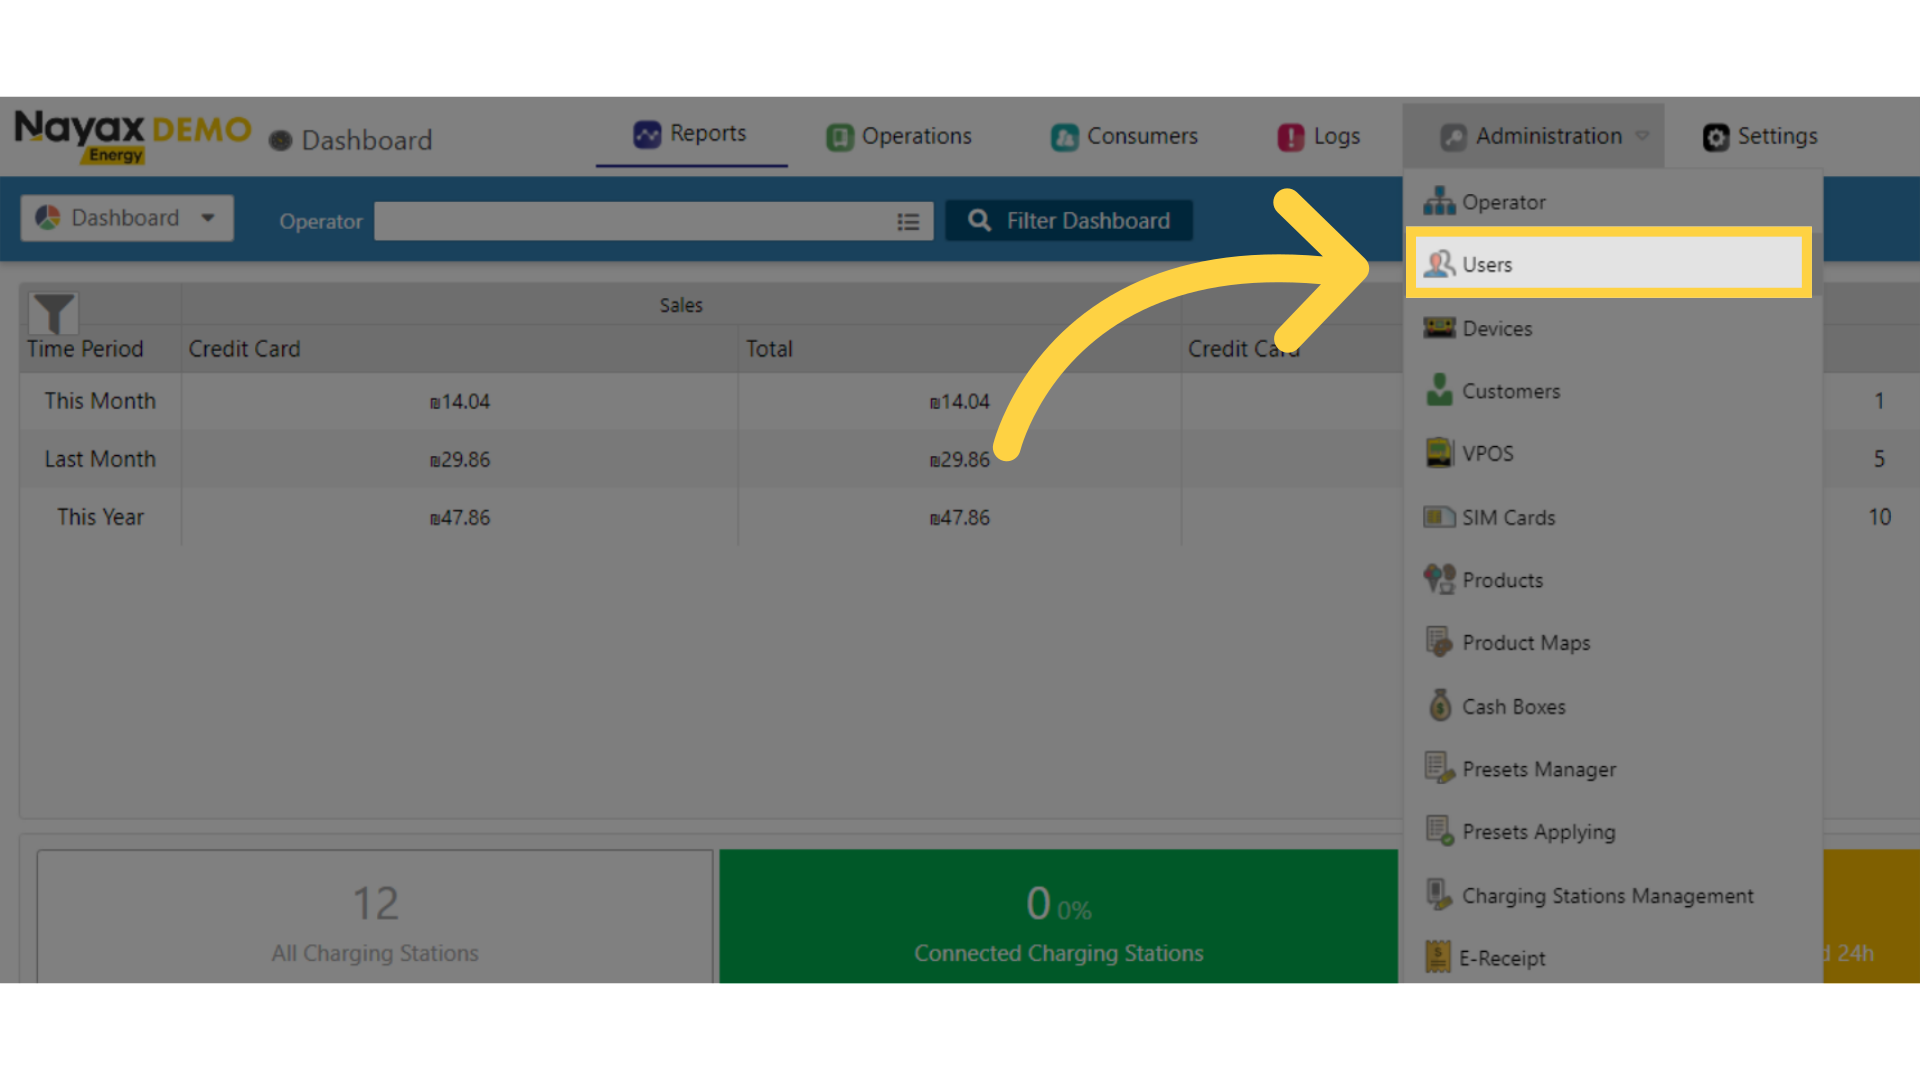
Click Users
Image AttachedClick on users from the drop down menu.
4
Click + Icon
Image Attached
A new screen will open with a Plus Icon, click on the icon as highlighted in RED on the visual.

5
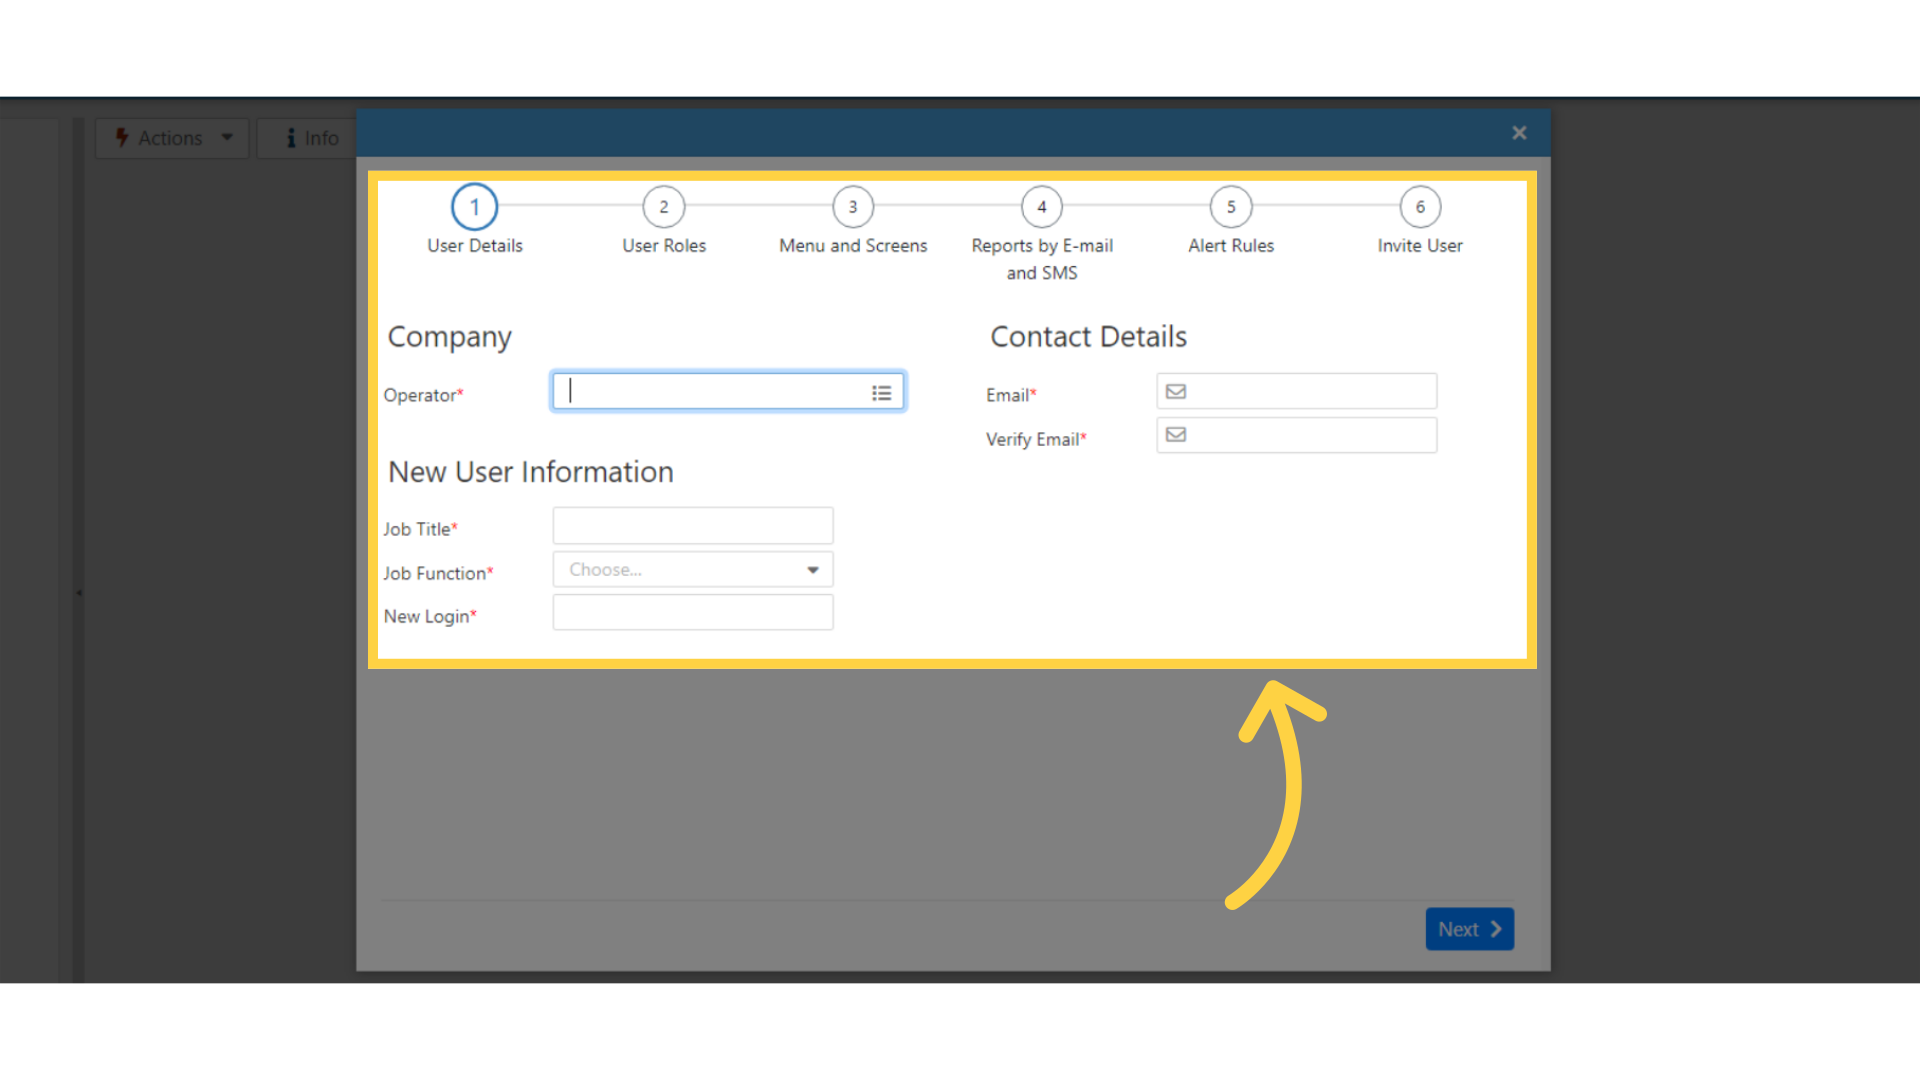
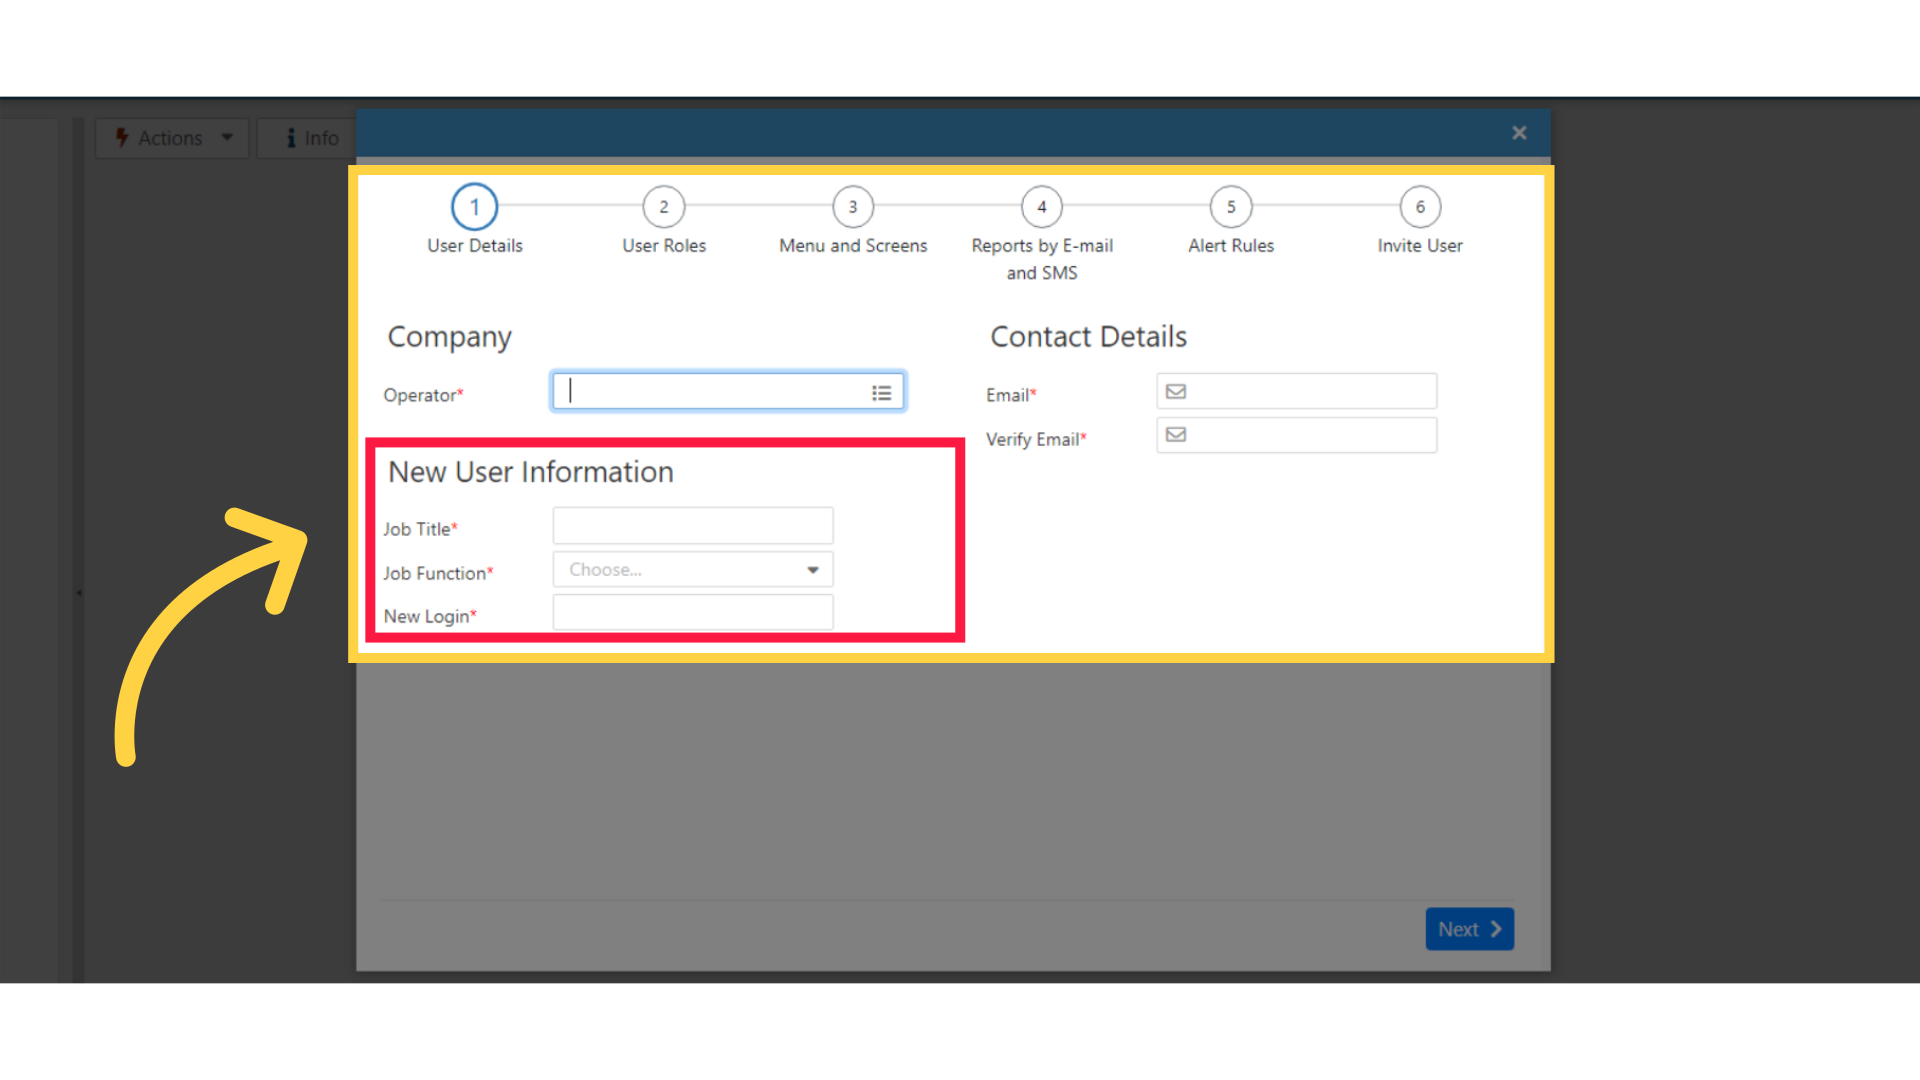
Fill in Fields
Image AttachedA pop up screen will open to input the new user details.
6
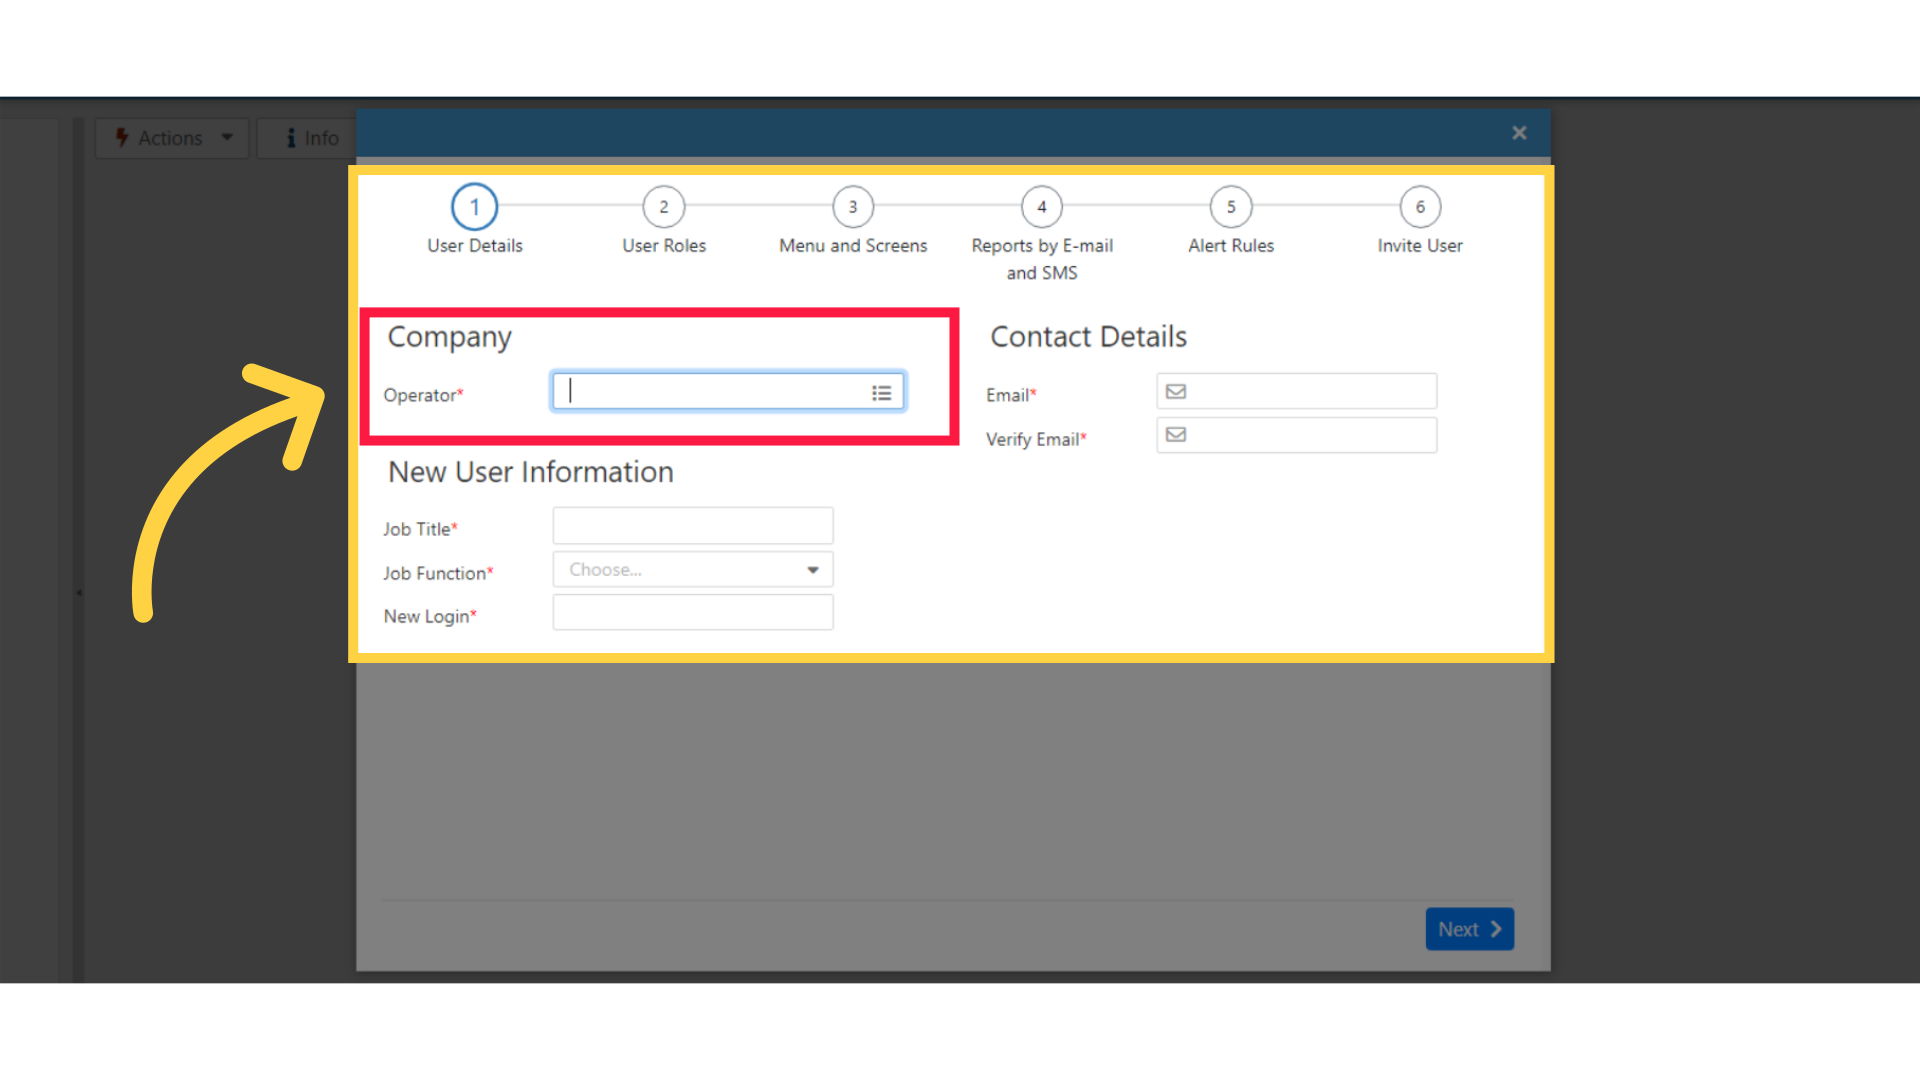
Fill in Operator
Image AttachedType the operator name. The user will be created under this operator.
7
User Role
Image AttachedNow to add the users role, type the user job title.
8
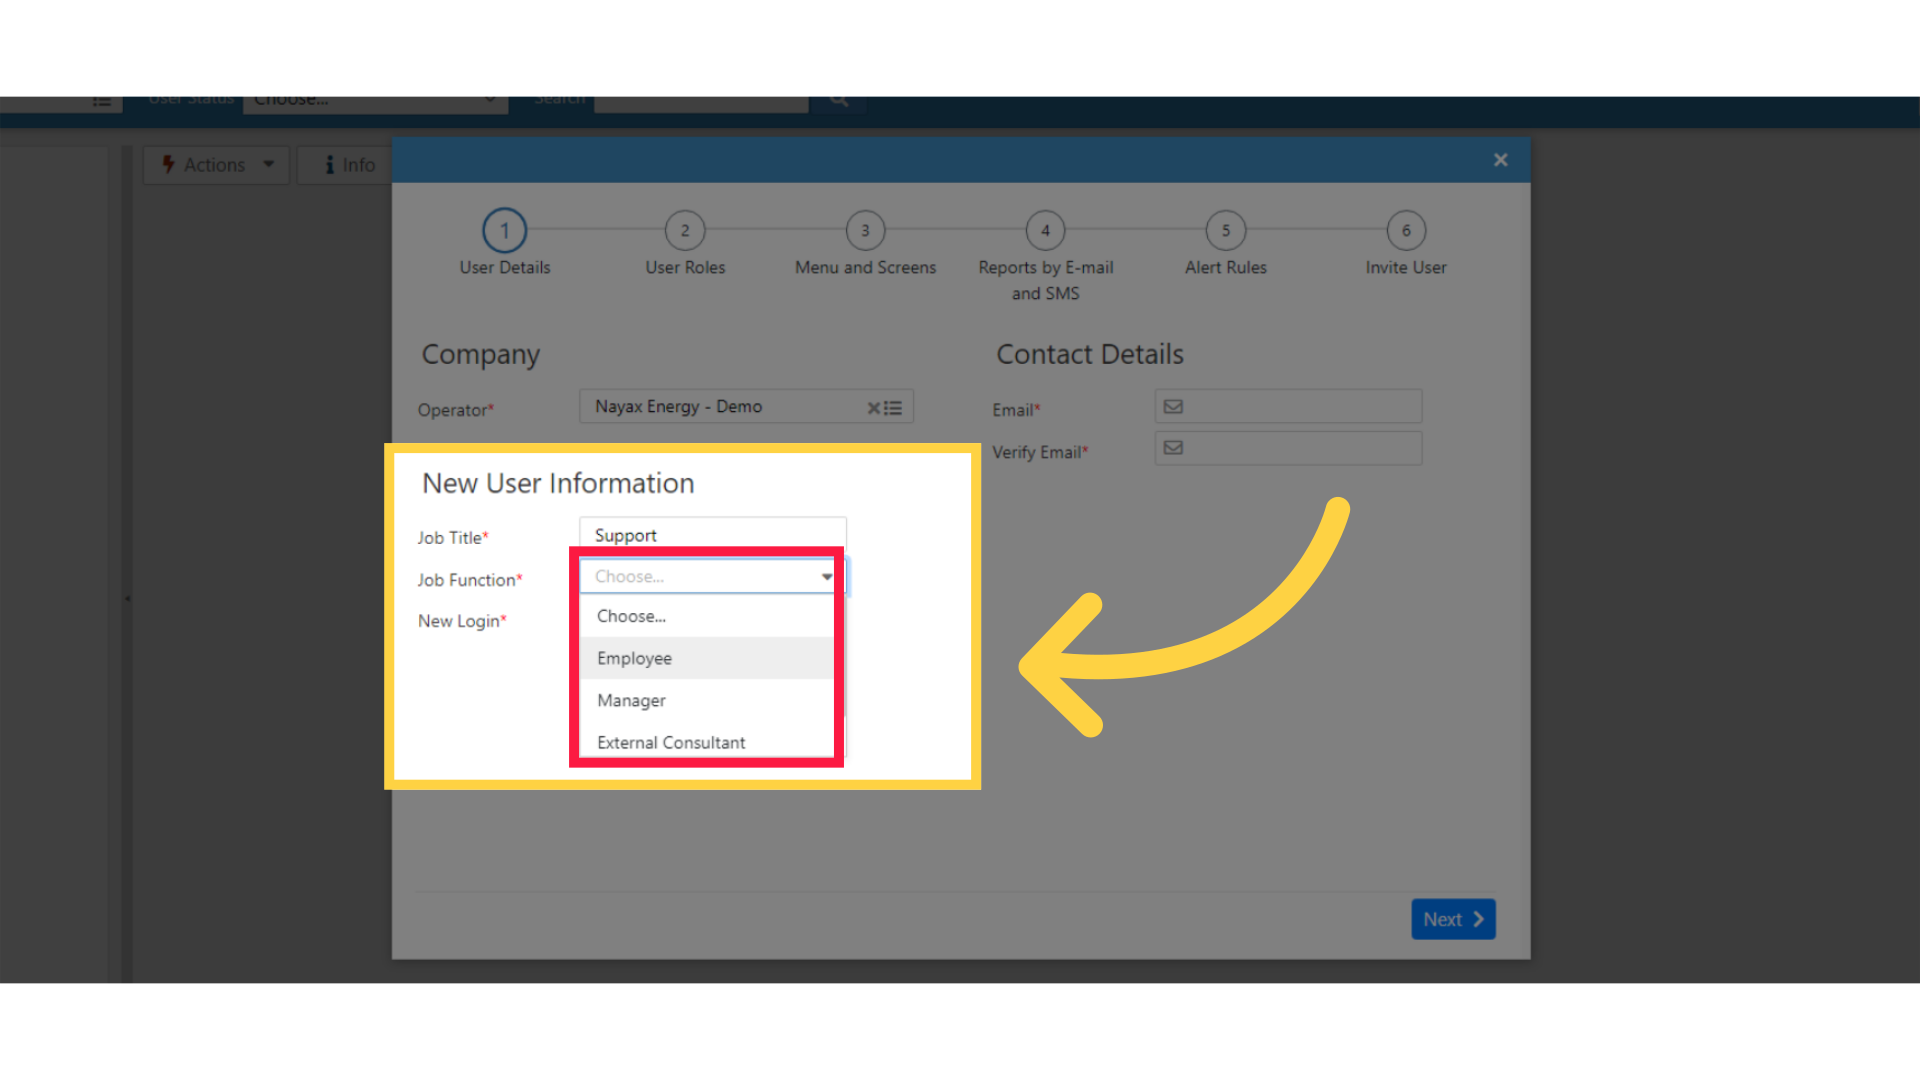
Set Job Function
Image Attached
Set the user job function from the drop down menu as highlighted in RED on the visual.
9
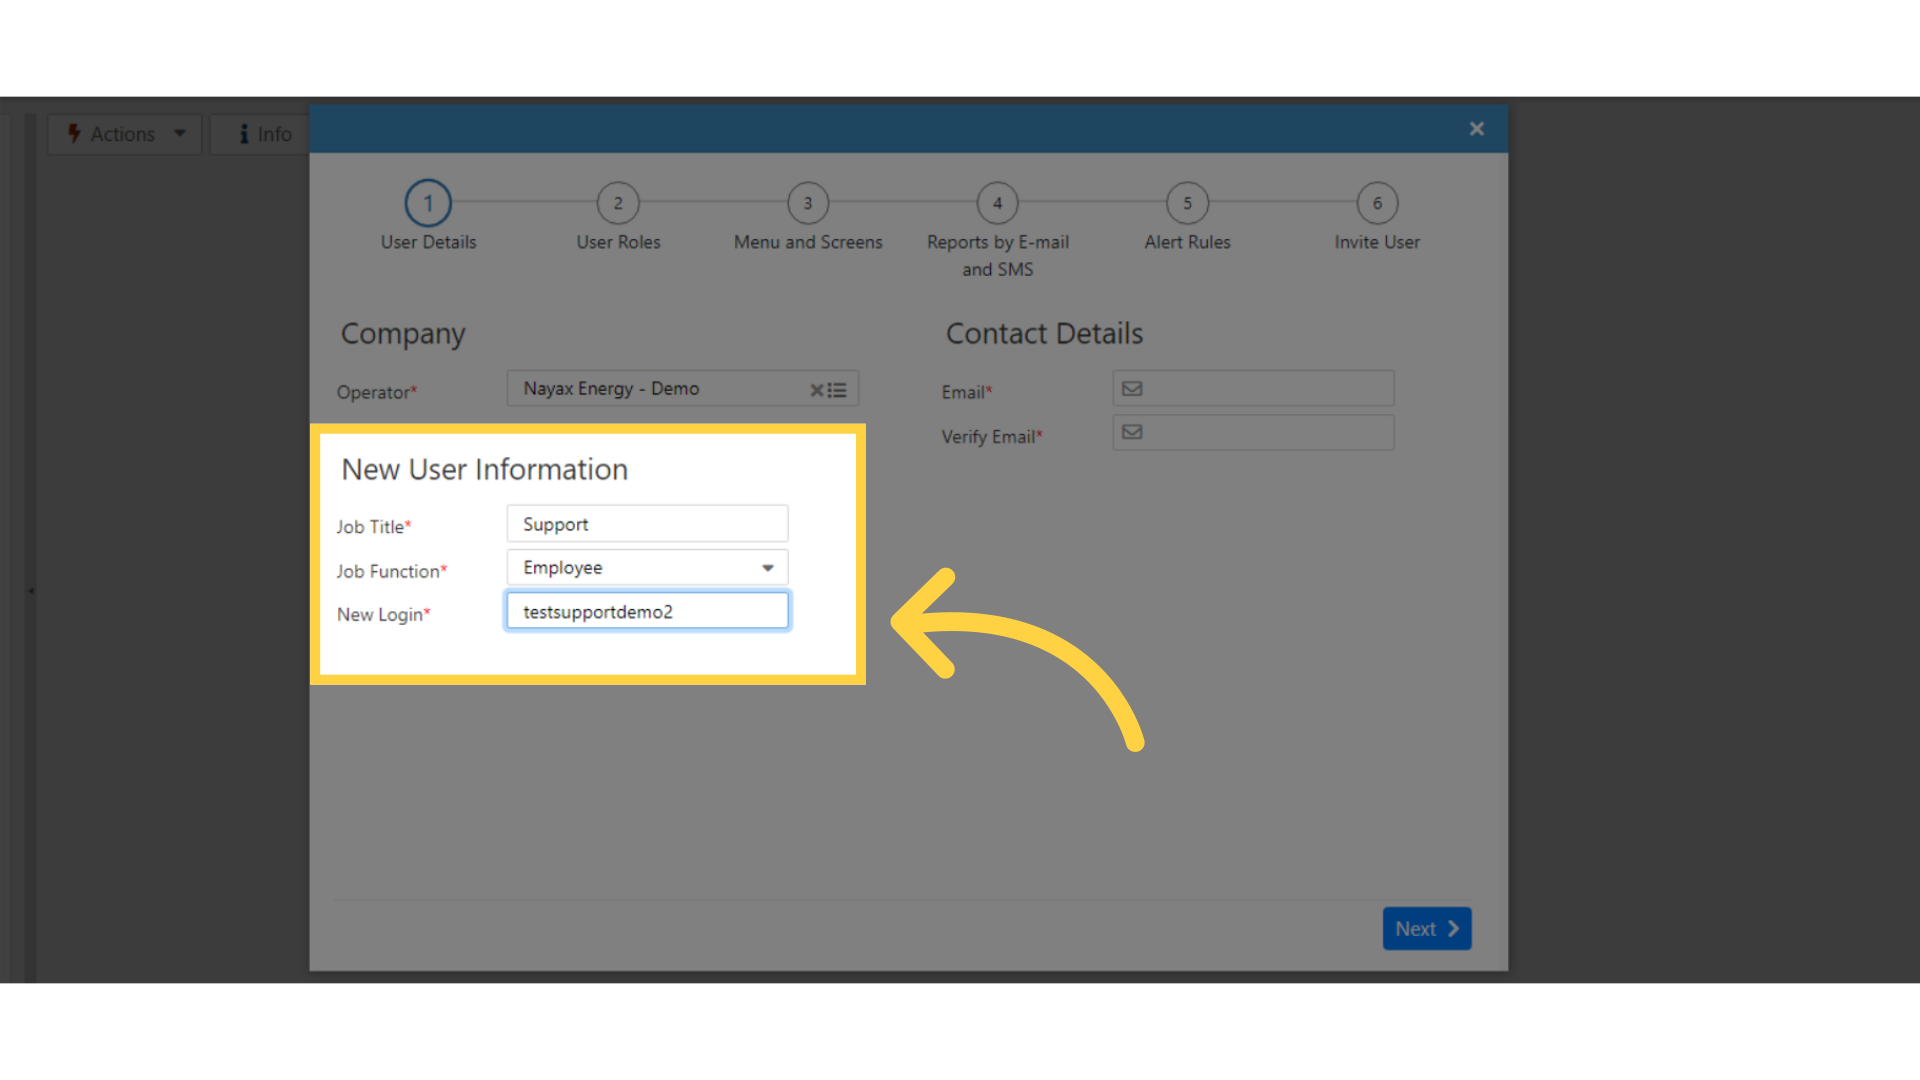
Specify User Name
Image AttachedIn the New login fields specify user name.
10
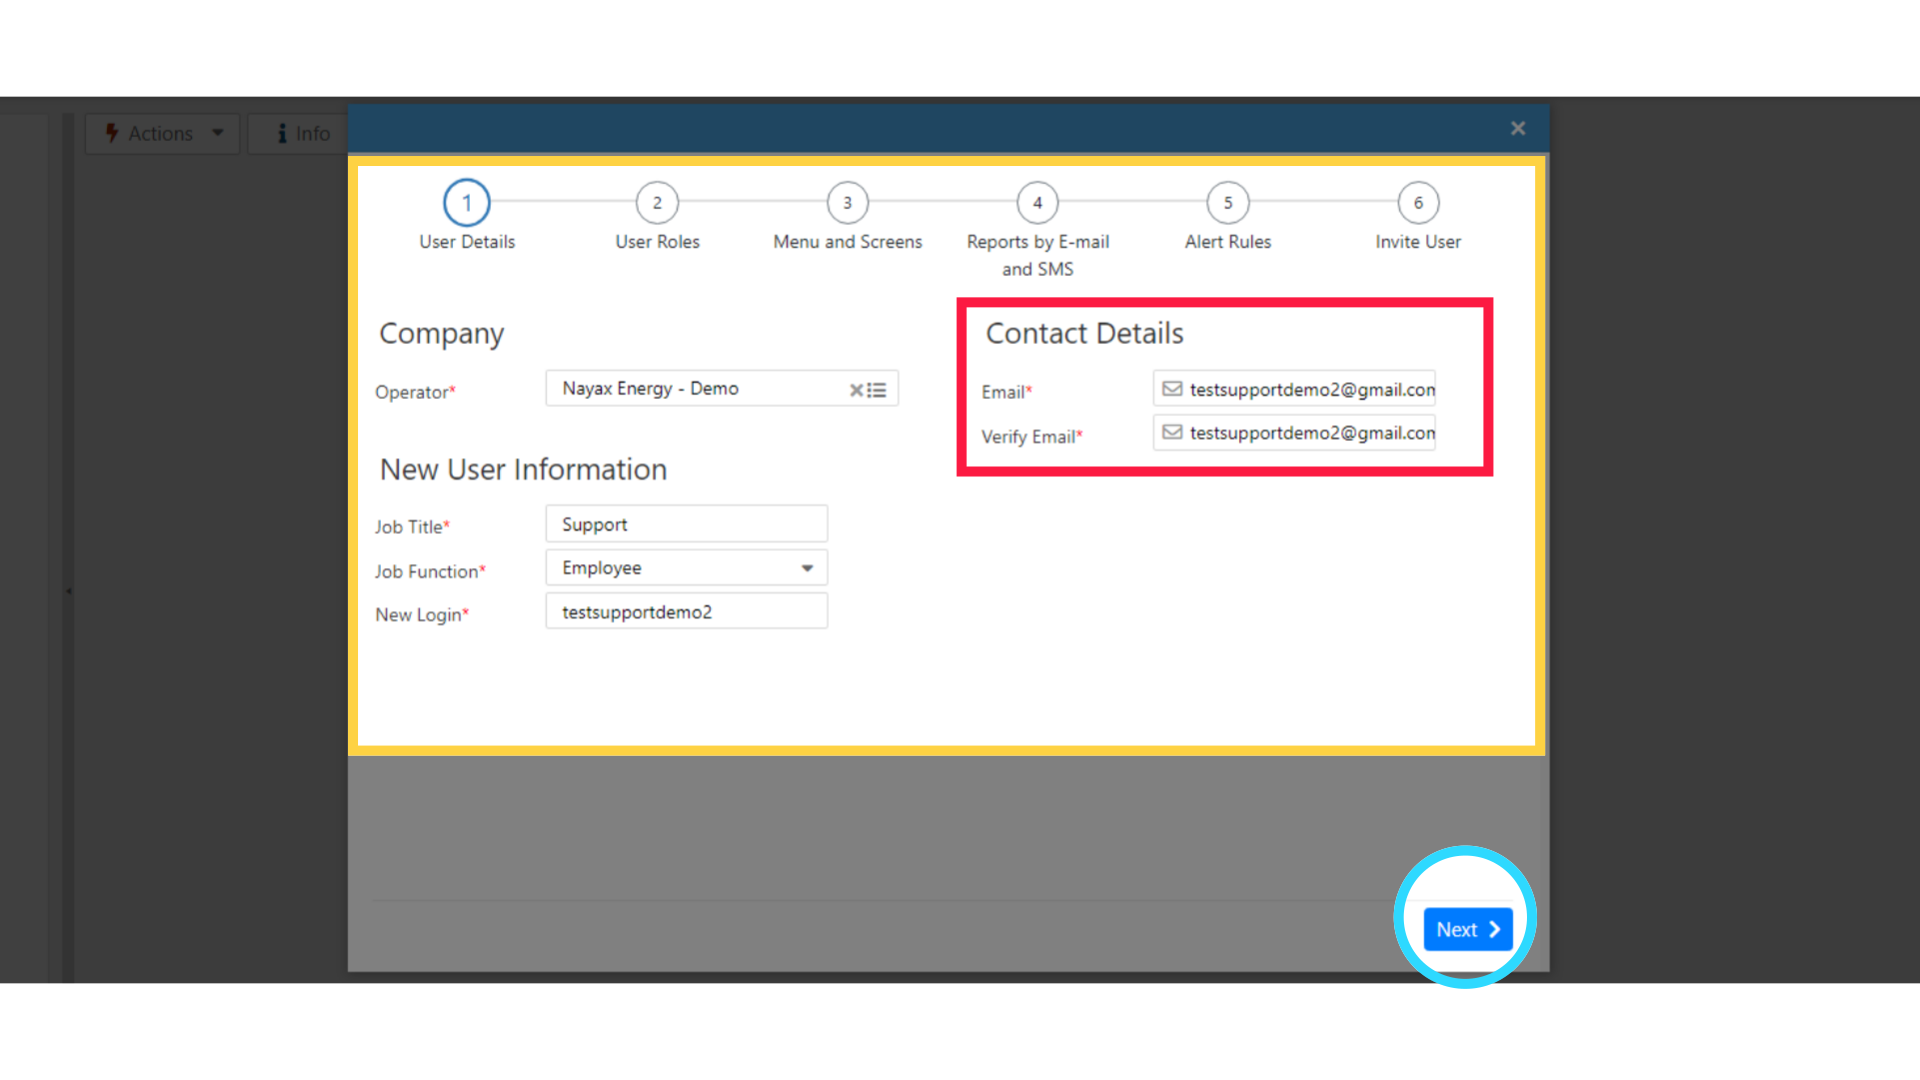
Enter User's Email
Image AttachedFill in the user's Email address as highlighted in RED on the visual and click Next as Highlighted in BLUE on the visual.
11
Assign Roles
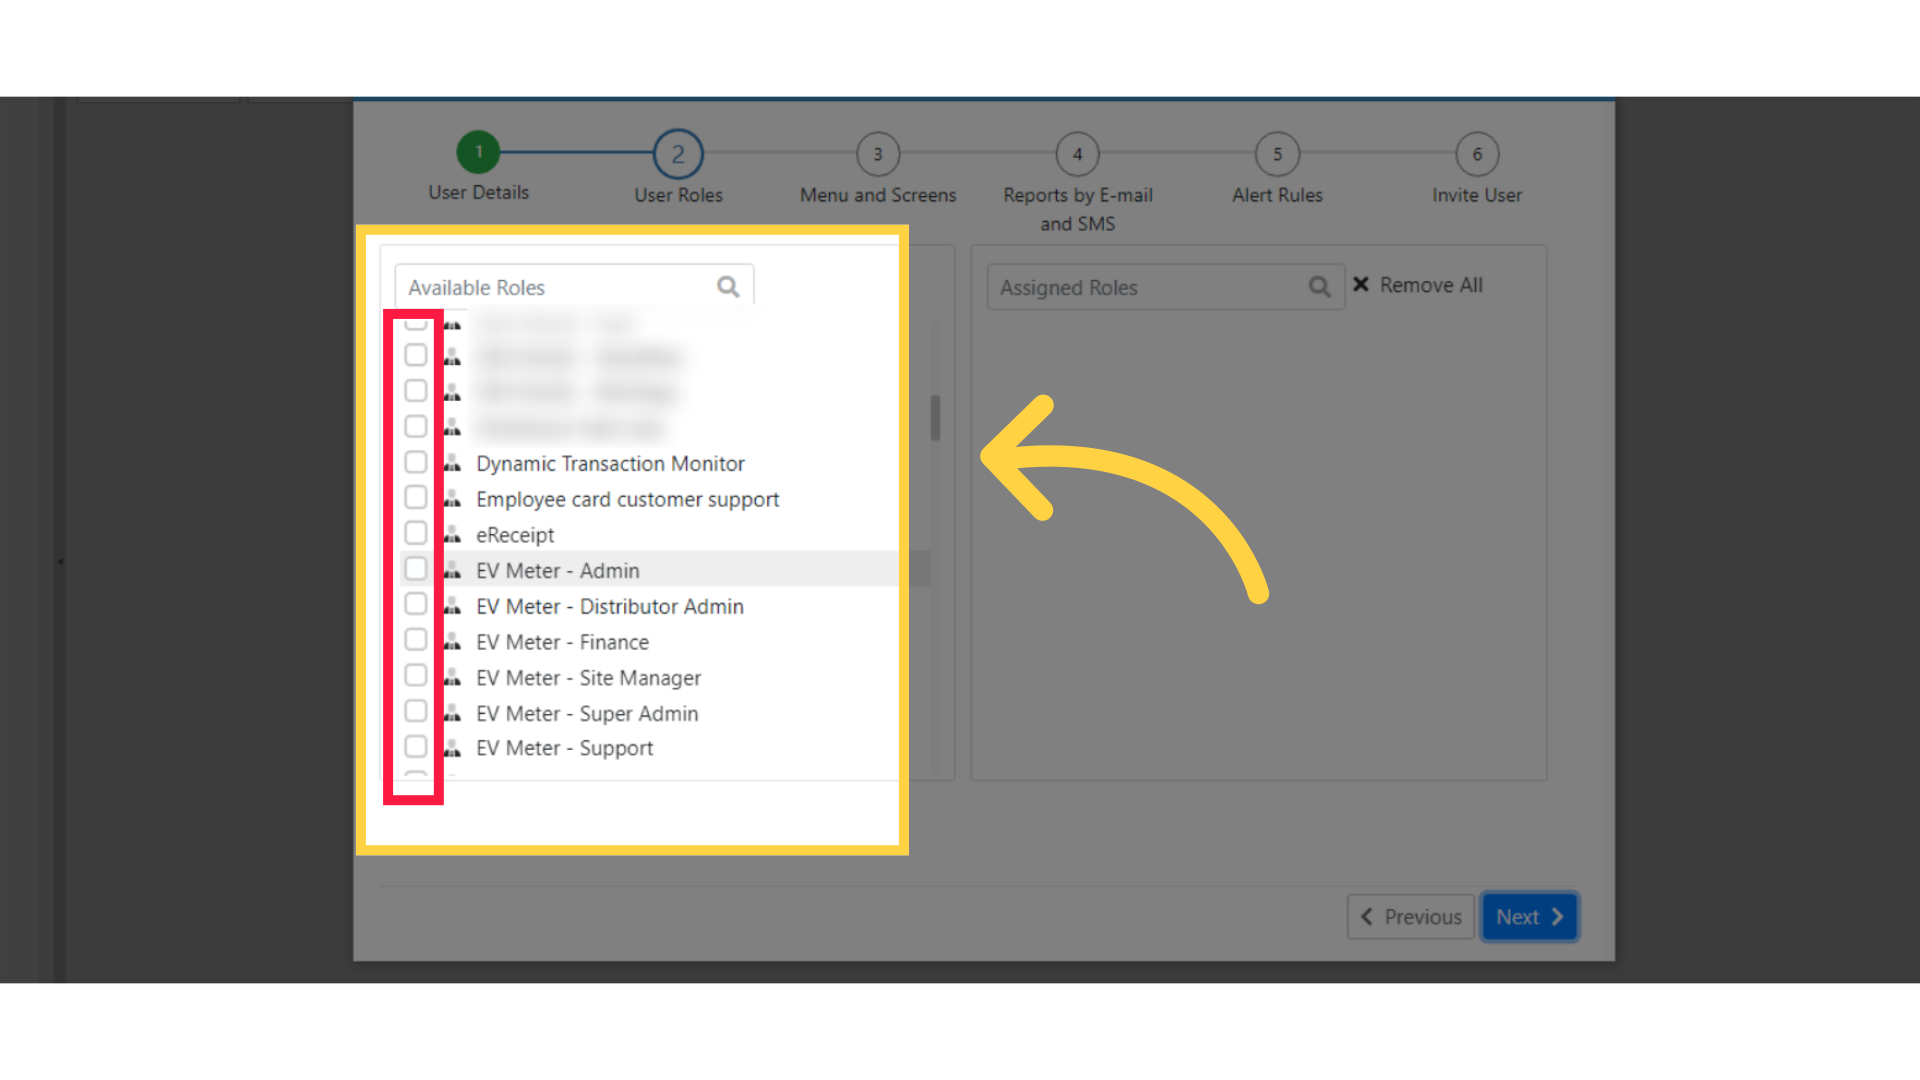
Image Attached
Select from the list of Available Roles the roles you wish to assign to the new user by clicking on the checkbox as highlighted in RED on the visual.
12
Click Next
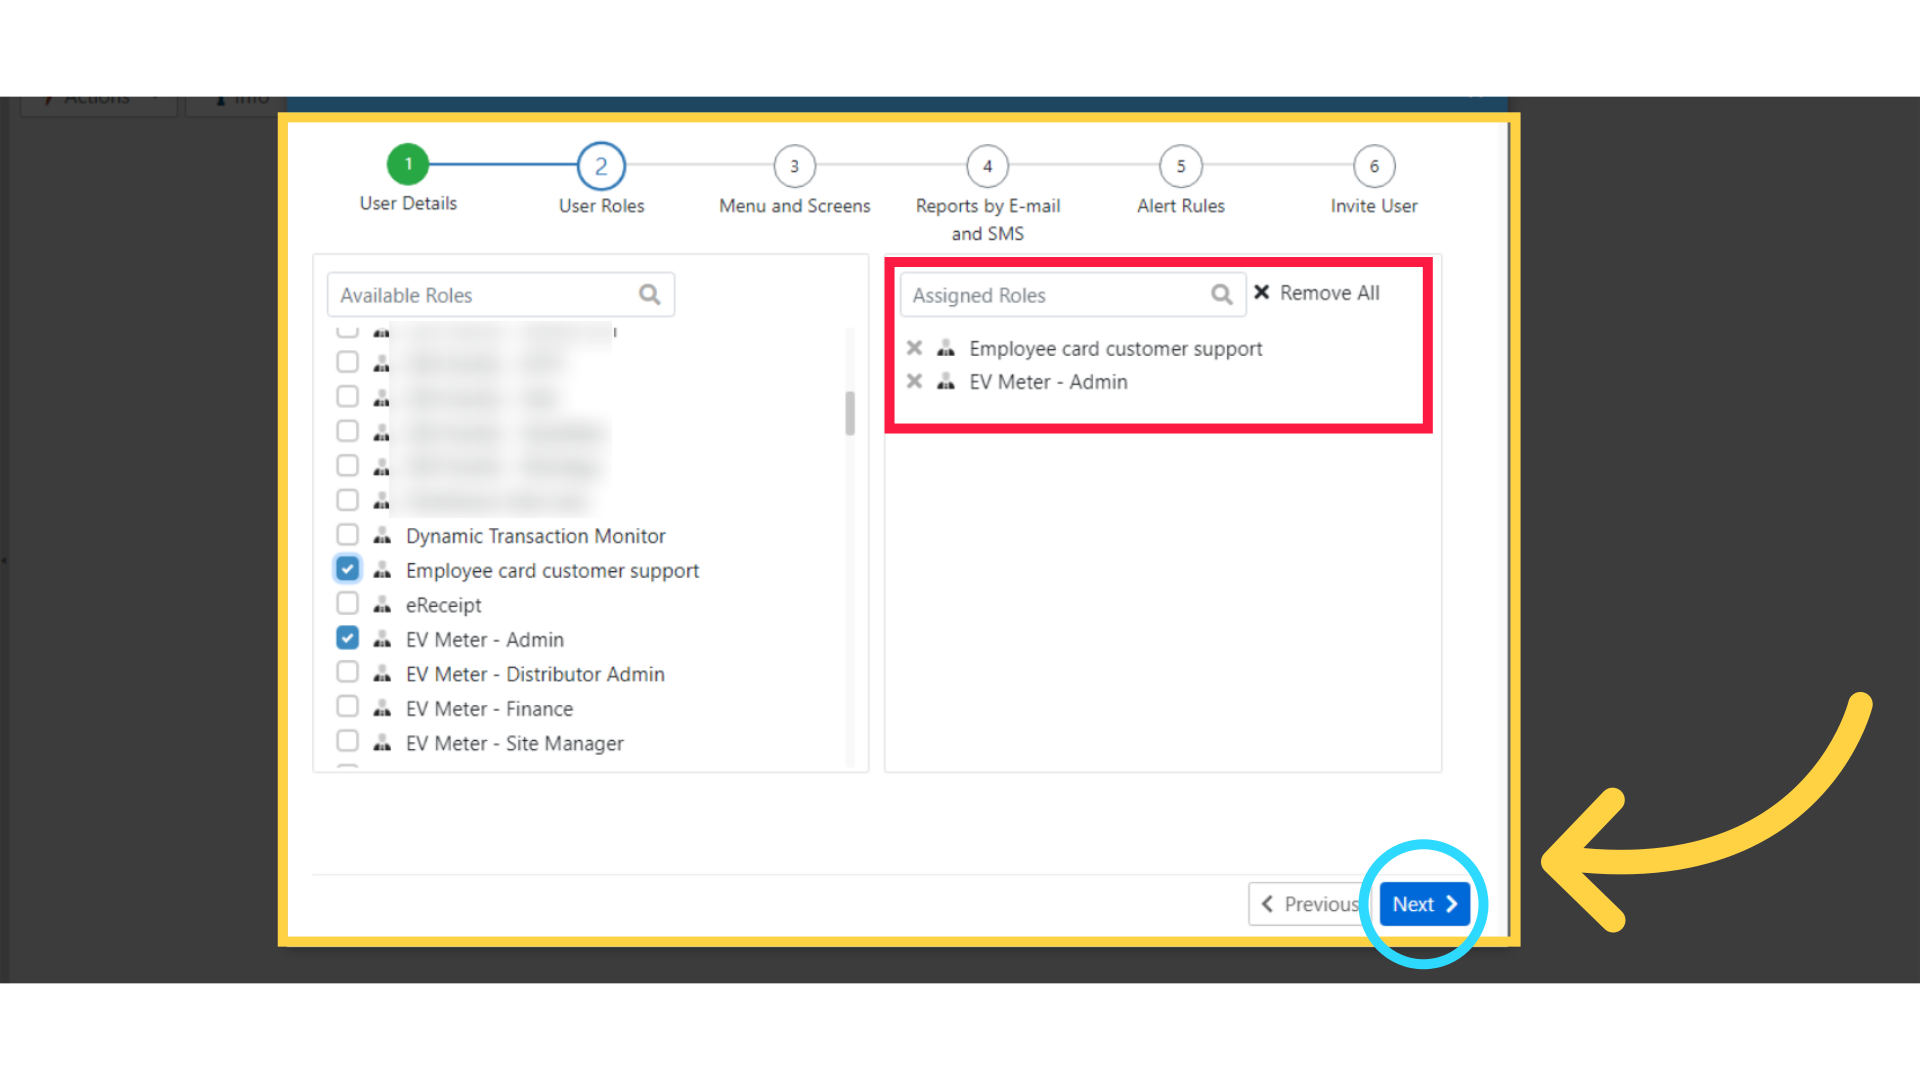
Image Attached
You will see as you assign the roles they will be shown in the second column as highlighted in RED on the visual. Once you have made all your assignments click next as highlighted in BLUE on the visual.
13
Check Relevant Screens
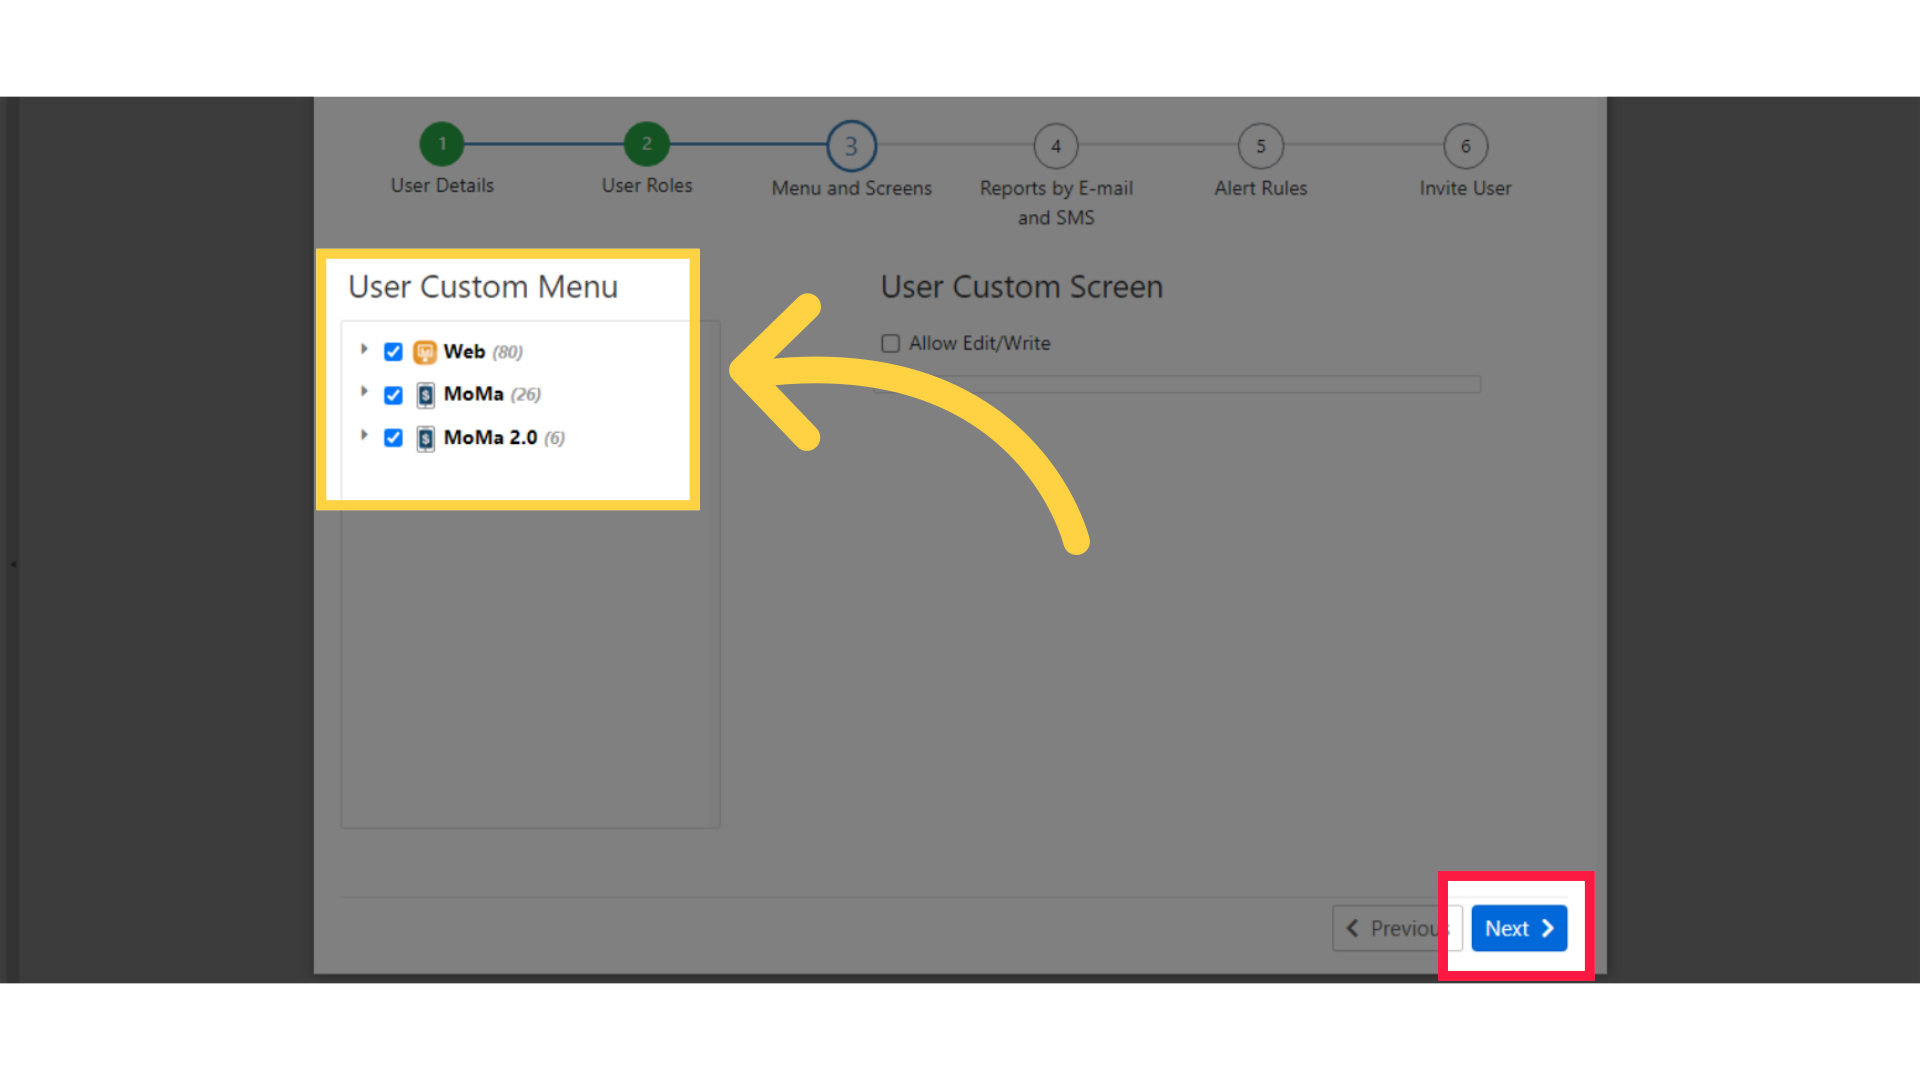
Image Attached
Tick the relevant screens for the user and then click Next as highlighted in RED on the visual.
14
Set Reports
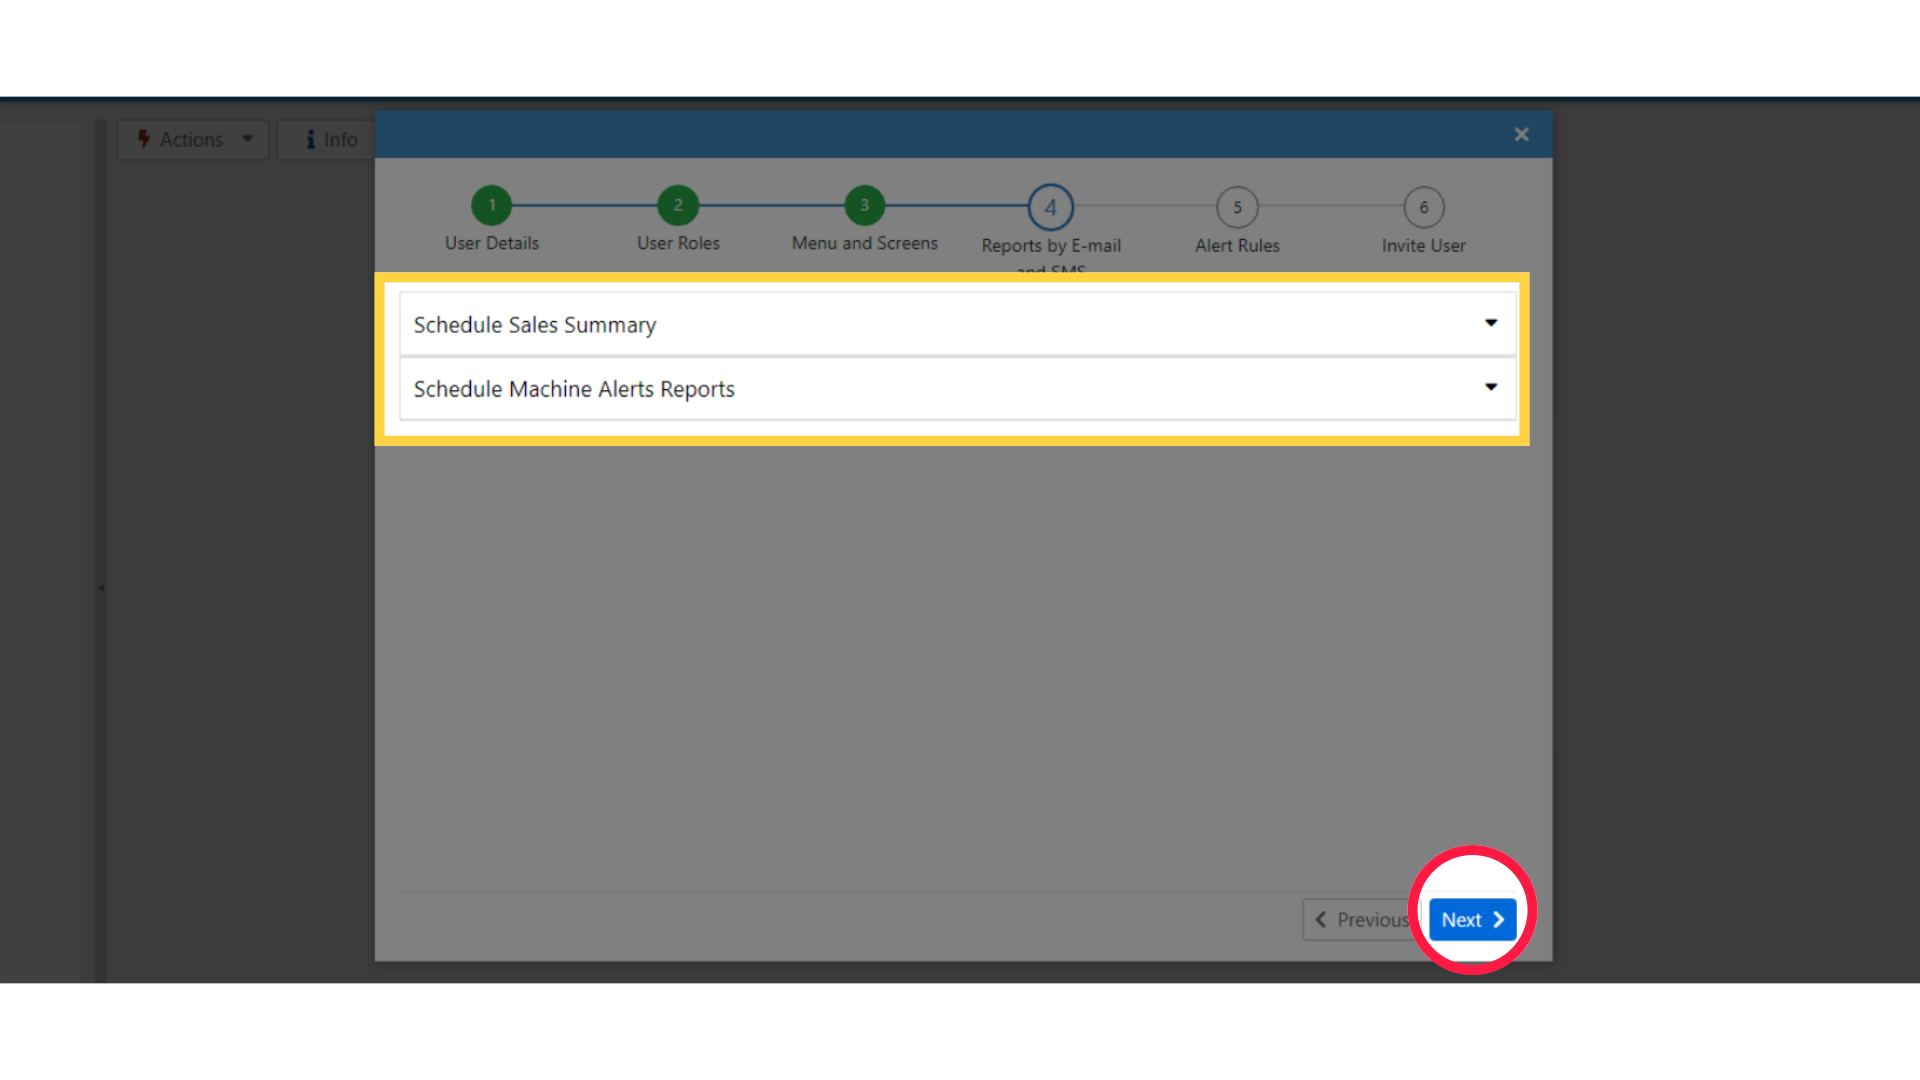
Image Attached
Choose how and when to send reports to the user then click Next as highlighted in RED on the visual.
15
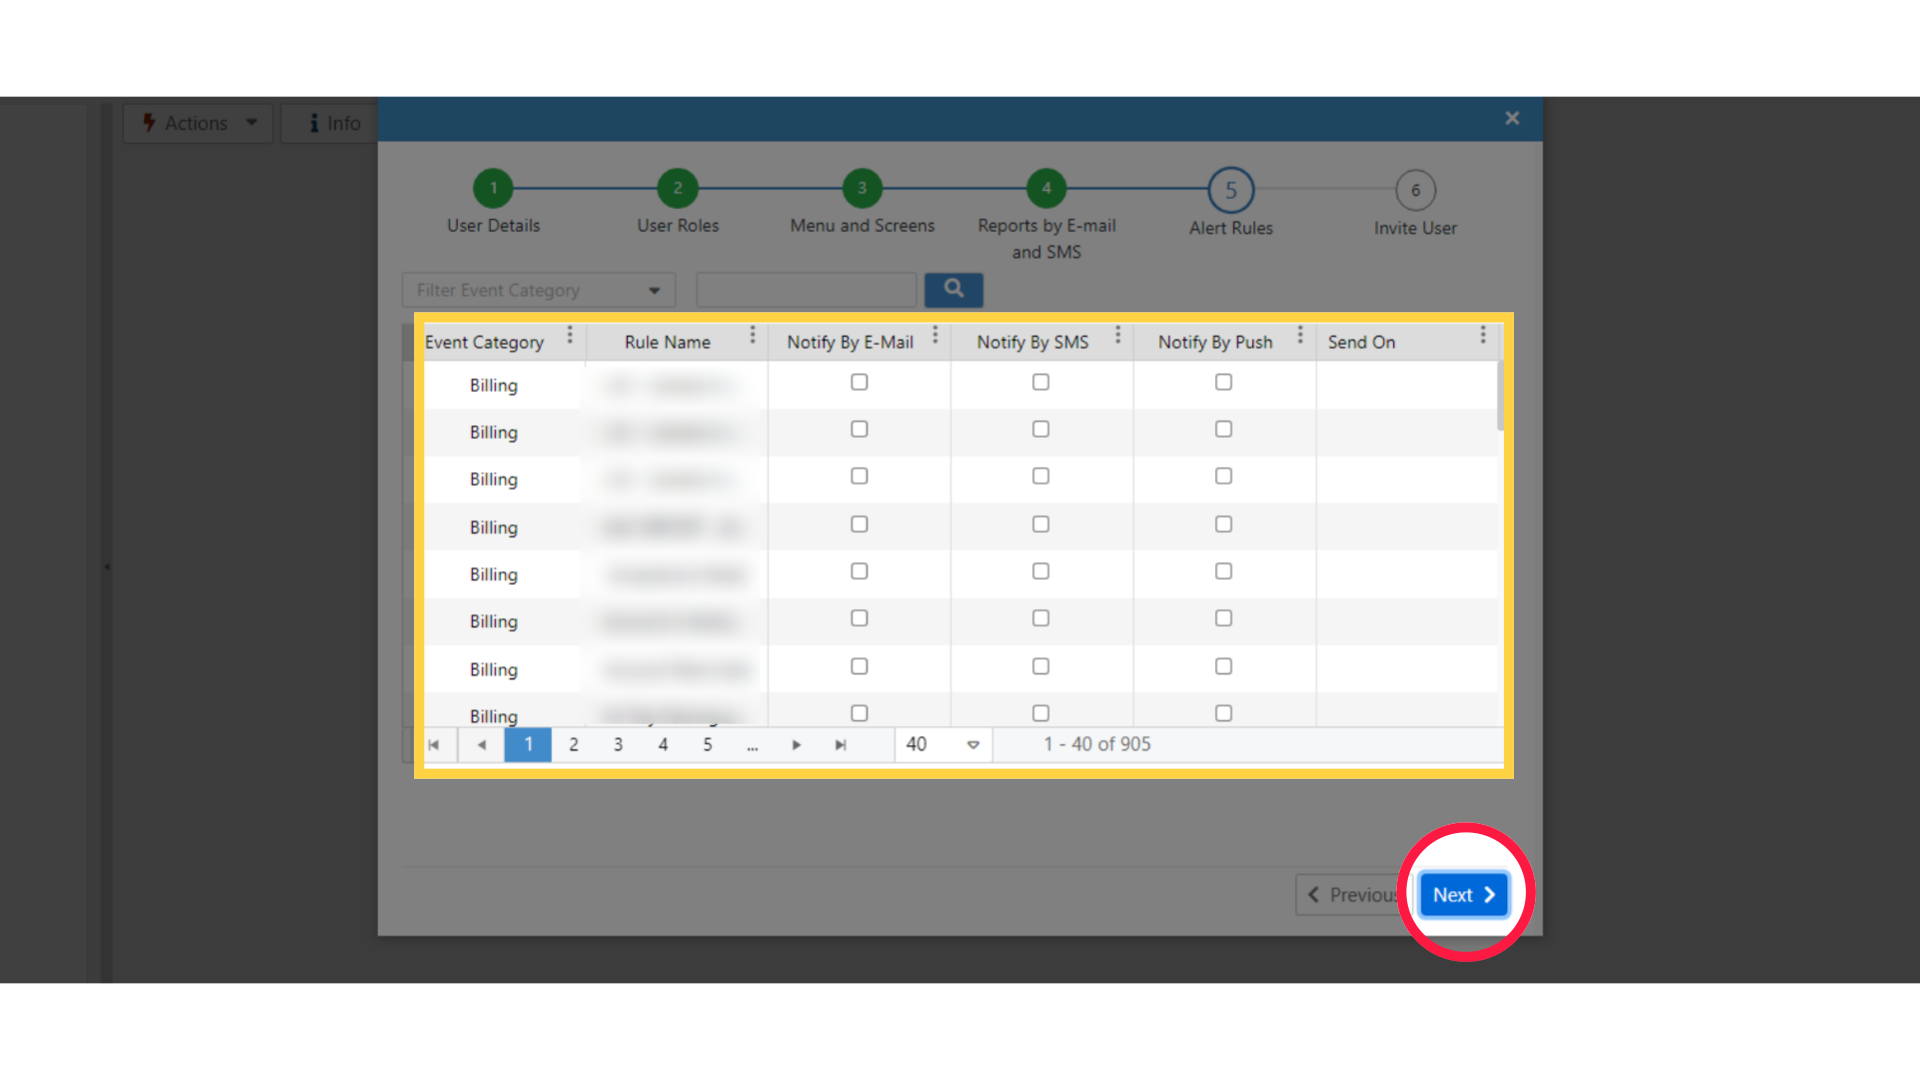
Set the Alert Rules
Image AttachedTick the relevant Alert Rules and the search can also be filtered.
In addition, you can choose how you want the alert delivered by email, by SMS, by push on the MoMa app, or by all three. When ready click Next as highlighted in RED on the visual.
16
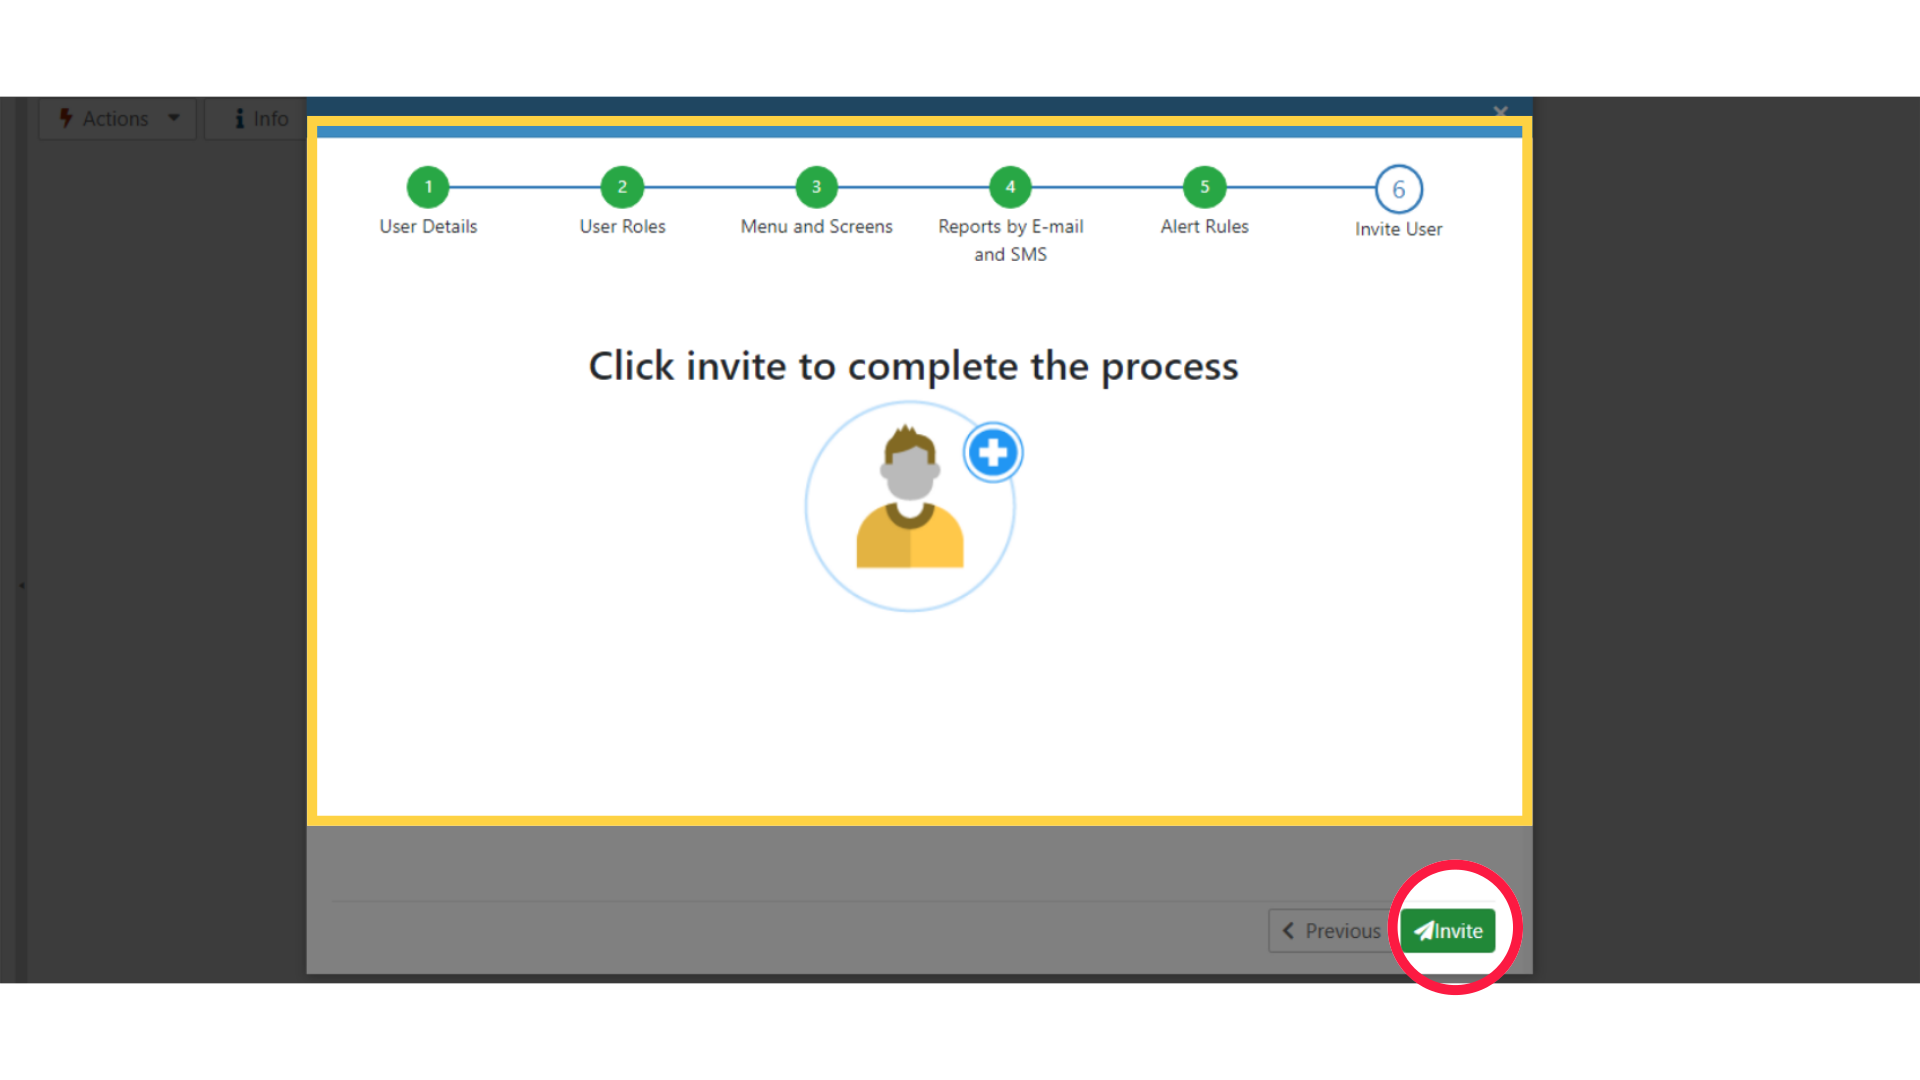
Click Invite
Image AttachedFinalize the process by sending the invitation.
Thank you!
Did you find this article helpful?