How to Activate Weezmo E-Receipts | Administration
1
Video Guide
2
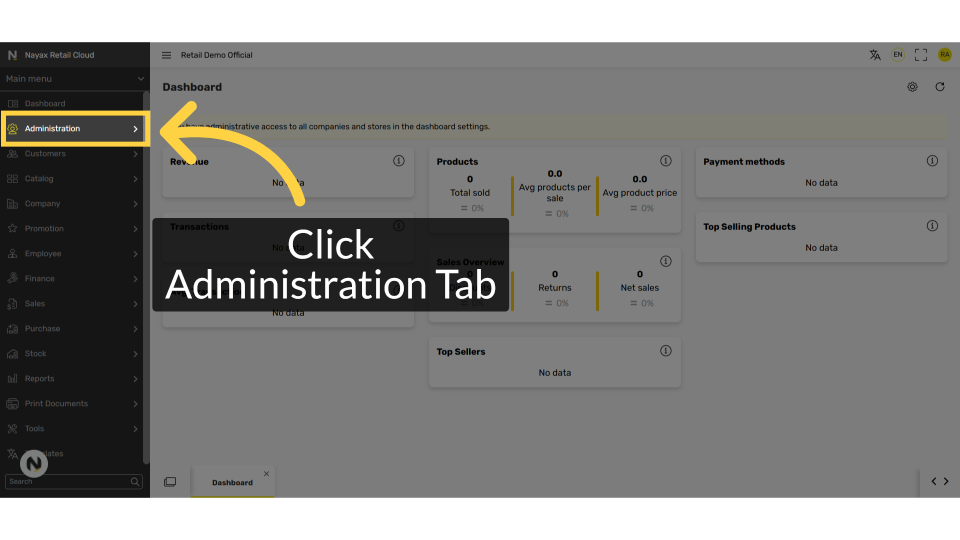
Click Administration Tab
Image AttachedOn the dashboard of your Retail Core management suite - click the Administration tab.
3
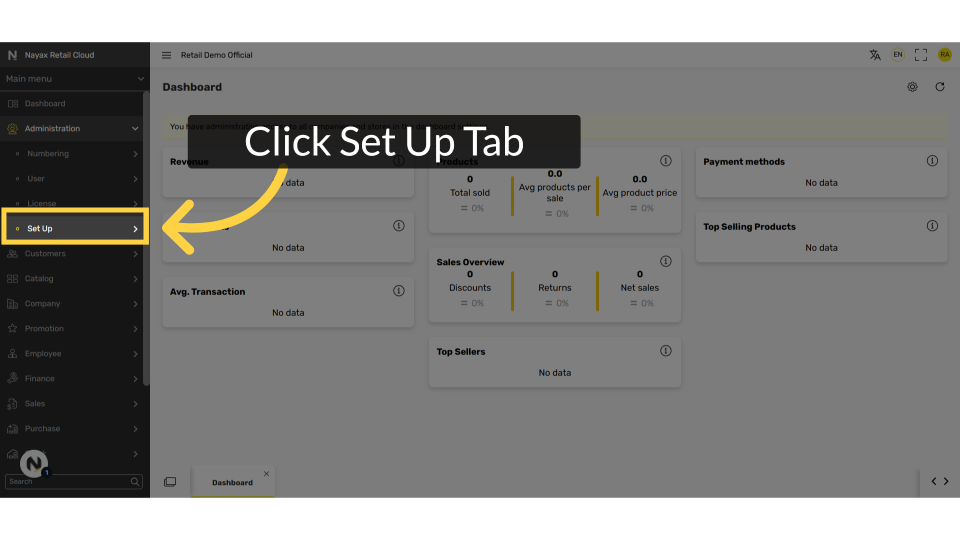
Click Set Up Tab
Image AttachedIn the sub-menu click on set up tab.
4
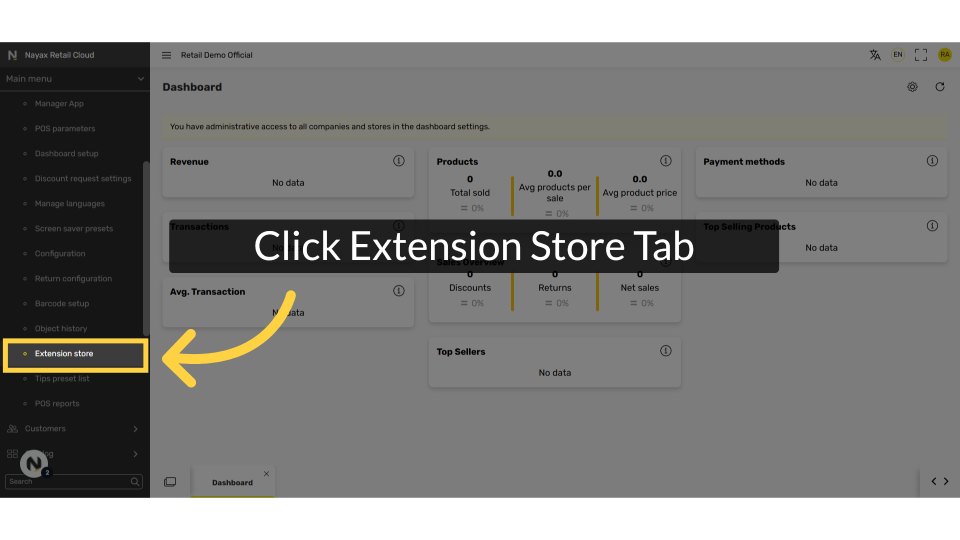
Click Extension Store Tab
Image AttachedIn the sub-menu click on extension store tab.
5
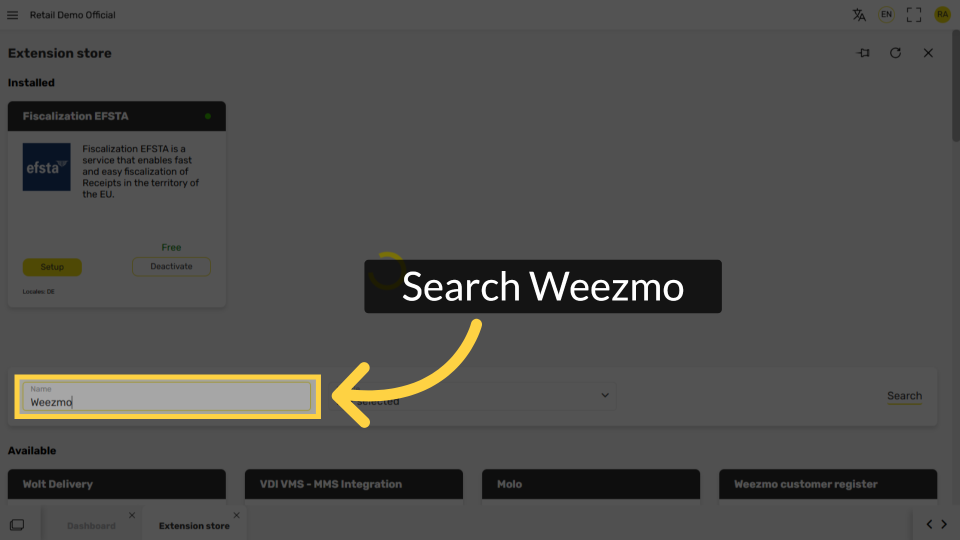
Search Weezmo
Image AttachedIn the name field search "Weezmo".
6
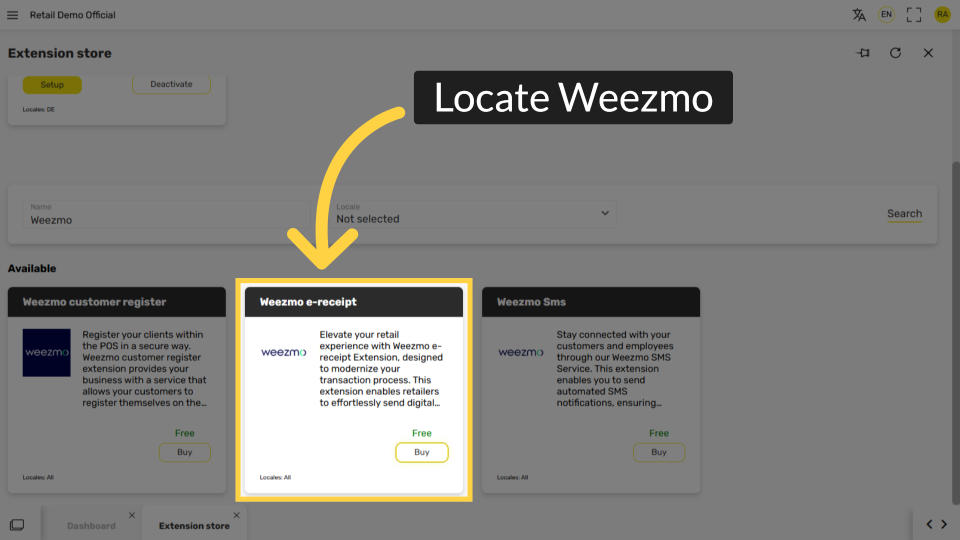
Locate Weezmo E-Receipt
Image AttachedThere are a few Weezmo options, make sure to locate Weezmo e-receipt.
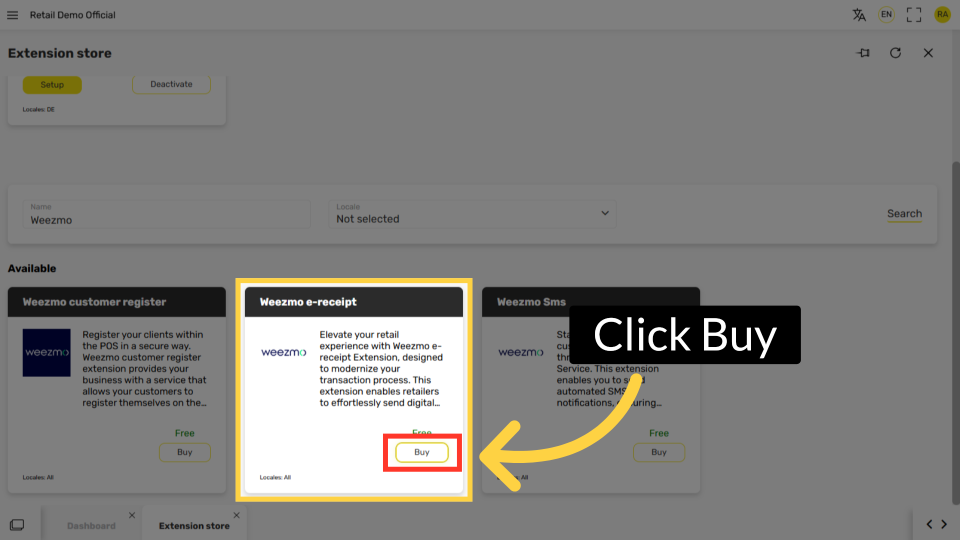
7
Click Buy
Image AttachedClick Buy.
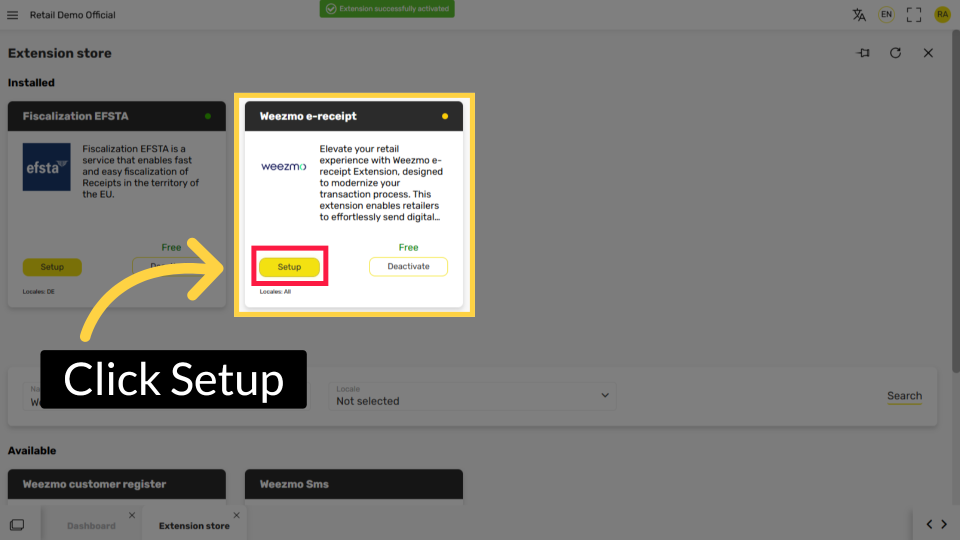
8
Click Set Up
Image AttachedThe extension store will now appear at the top of the screen under "installed". Scroll up and click on set up.
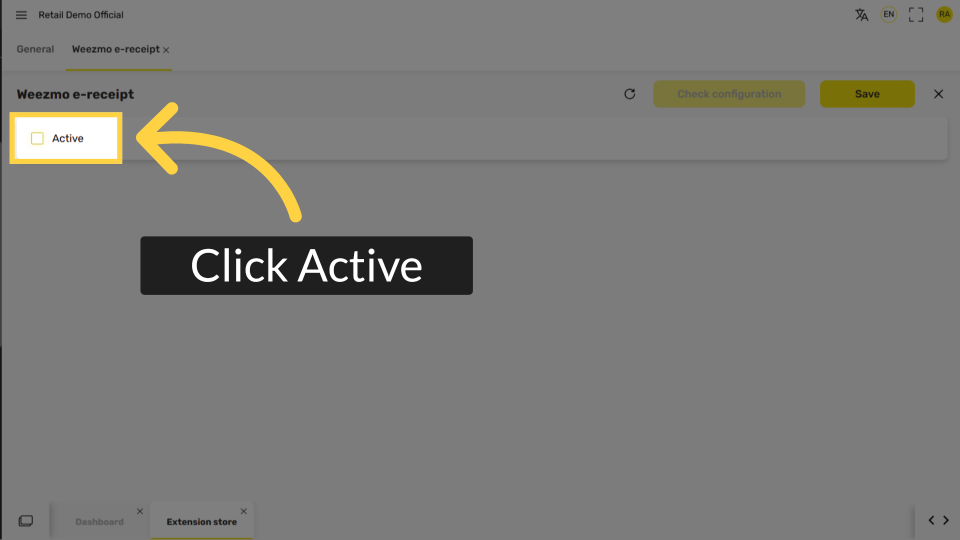
9
Click Active
Image AttachedClick on the checkbox to activate the extension store.
10
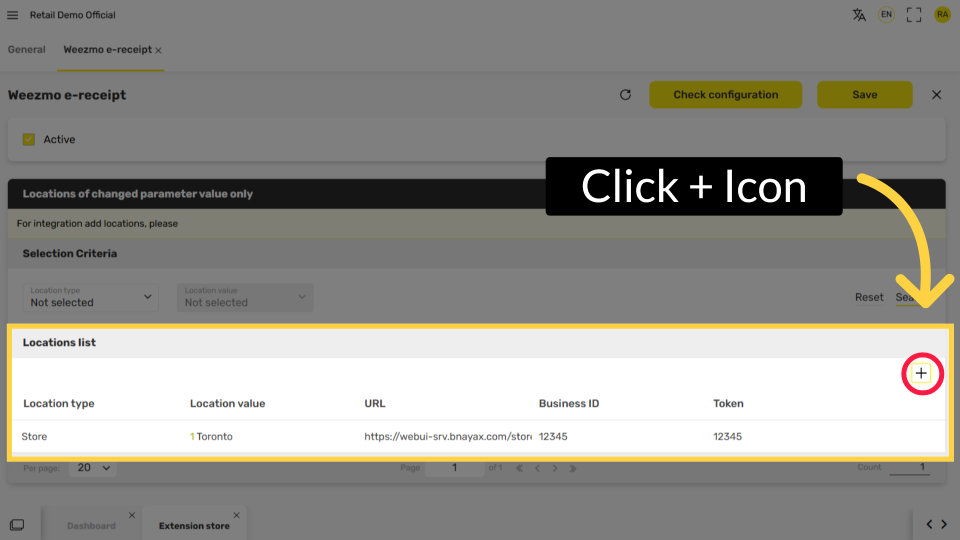
Click + Icon
Image AttachedClick the plus icon to the right of the locations list.
11
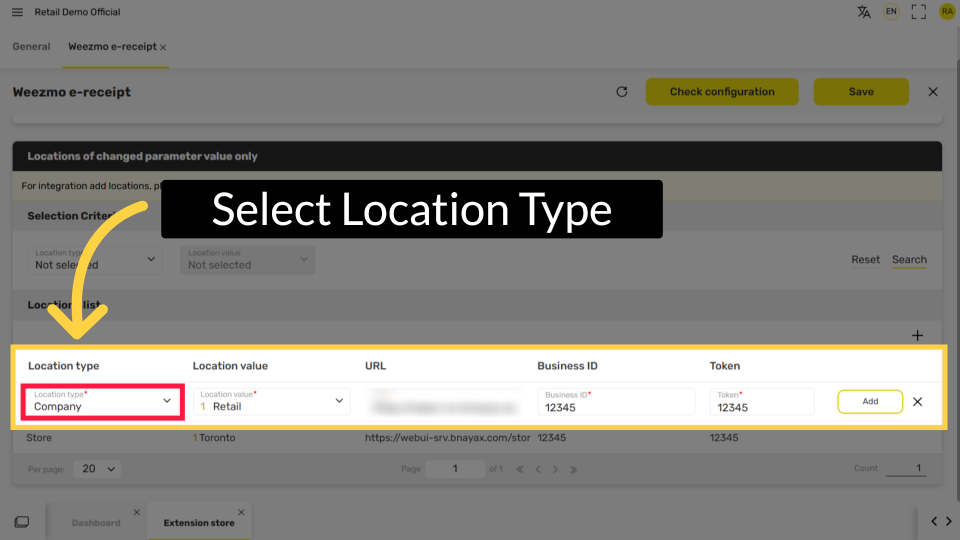
Select Location Type
Image AttachedSelect Location Type.
12
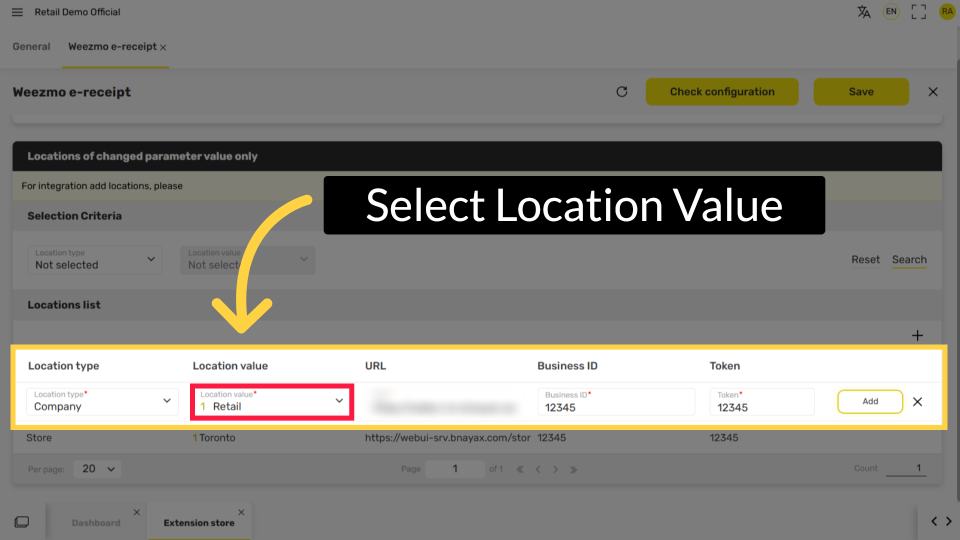
Enter Location Value
Image AttachedSelect Location Value.
13
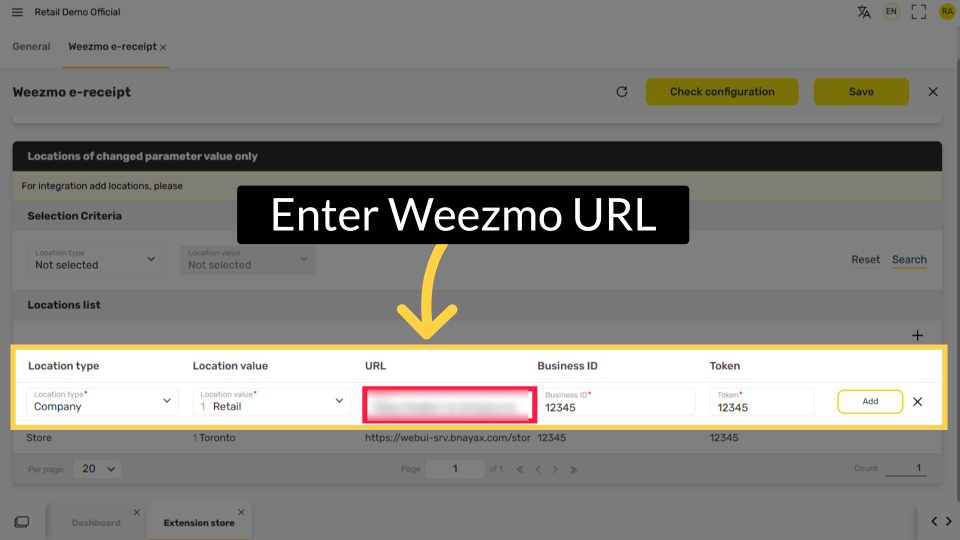
Enter Weezmo URL
Image AttachedEnter the Weezmo URL.
14
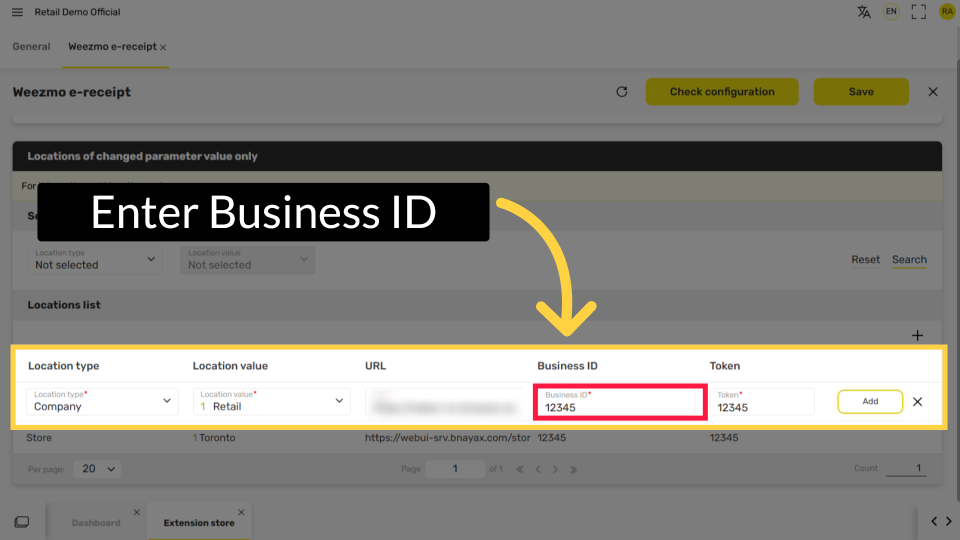
Enter Business ID
Image AttachedEnter Business ID.
Note: In order to accommodate different locations, make sure to change the business ID while the token number stays the same.
15
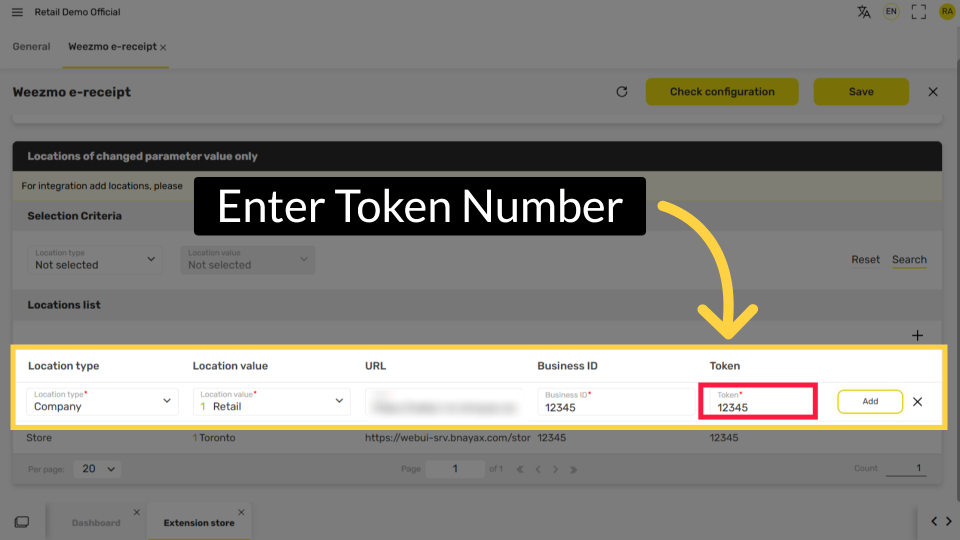
Enter Token Number
Image AttachedEnter Token Number.
16
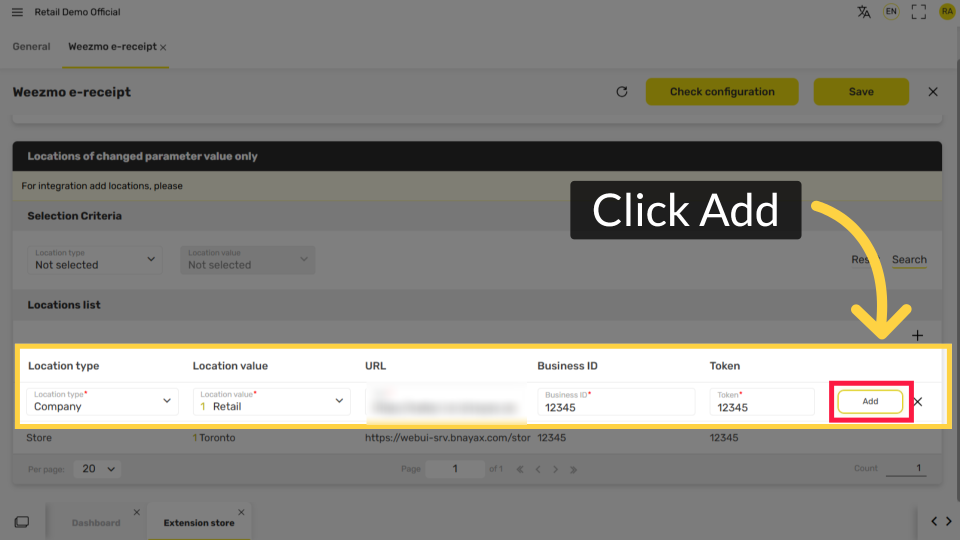
Click Add
Image AttachedClick add.
17
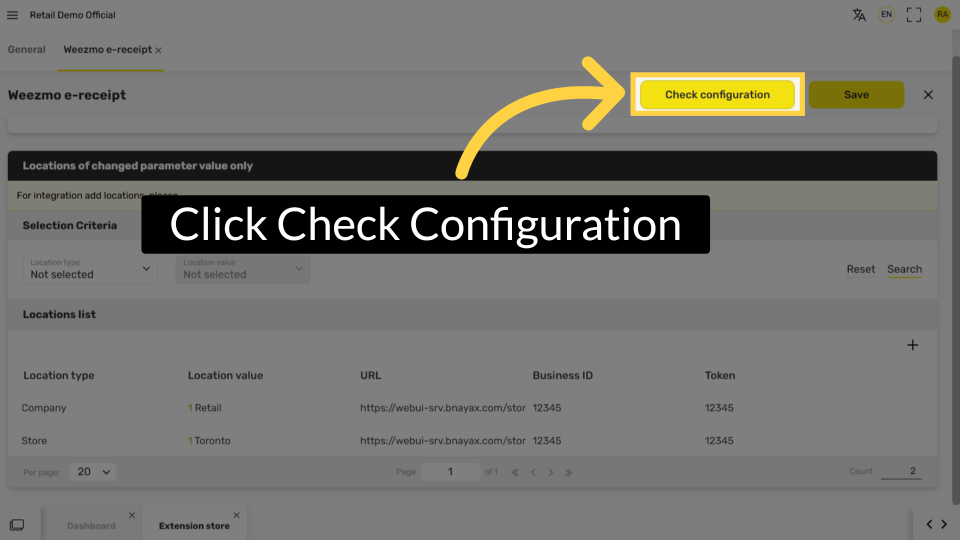
Click Check Configuration
Image AttachedClick check configuration to see that the information is correct.
18
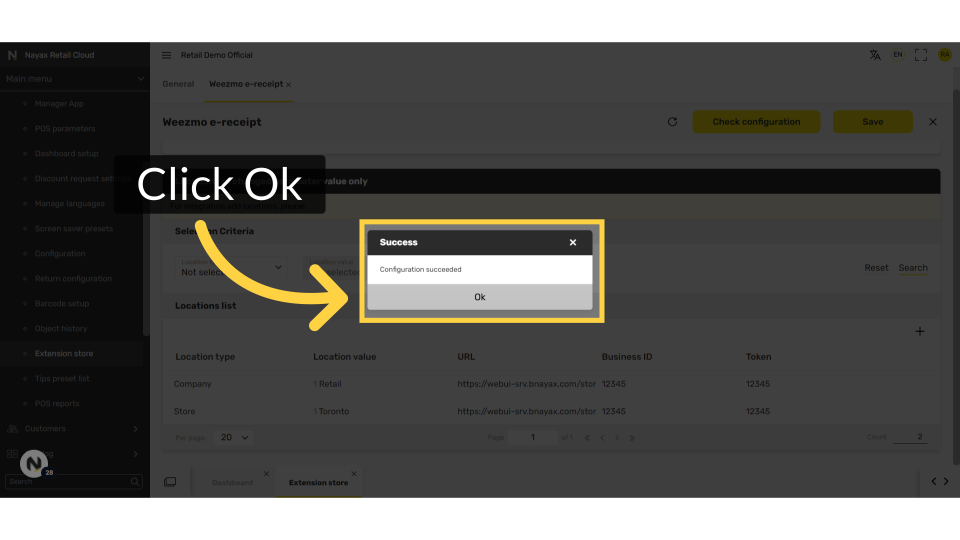
Click Ok
Image AttachedConfirm by clicking ok.
19
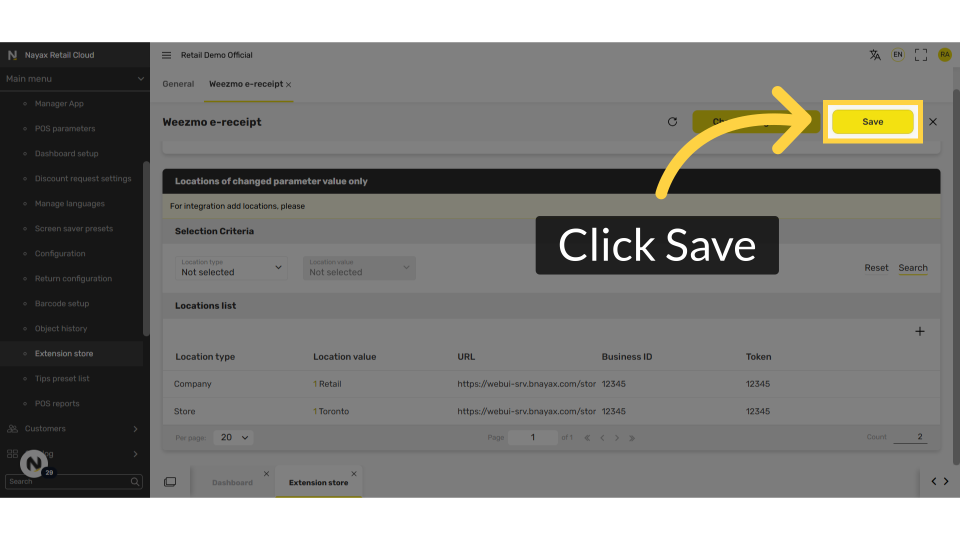
Click Save
Image AttachedDon't forget to save your progress by clicking the Save button!
Thank you!
Did you find this article helpful?