How to Create a Sets Discount Promotion | Promotion
With this promotion you will be able to set up promotions like buy 3 for 100$.
Video Guide
Click Promotion Tab
Image Attached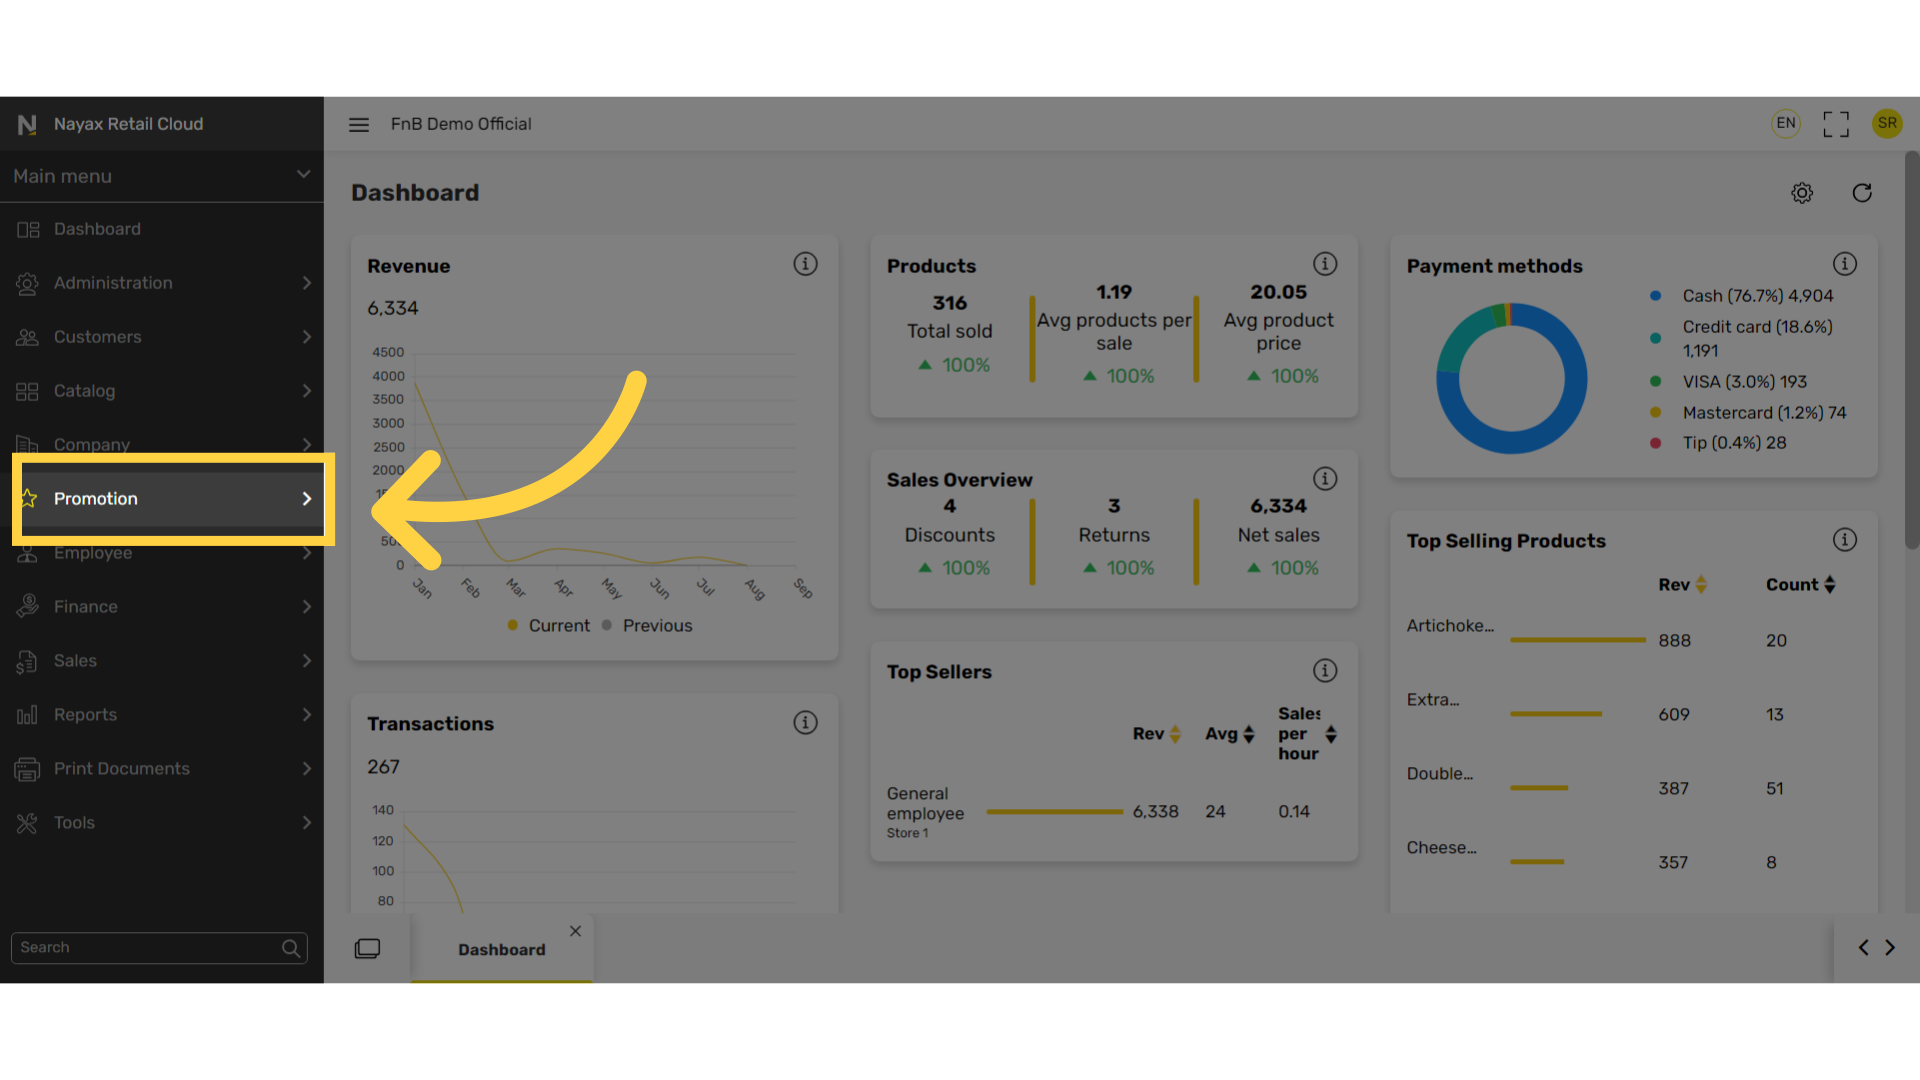
Click Promotions Tab
Image Attached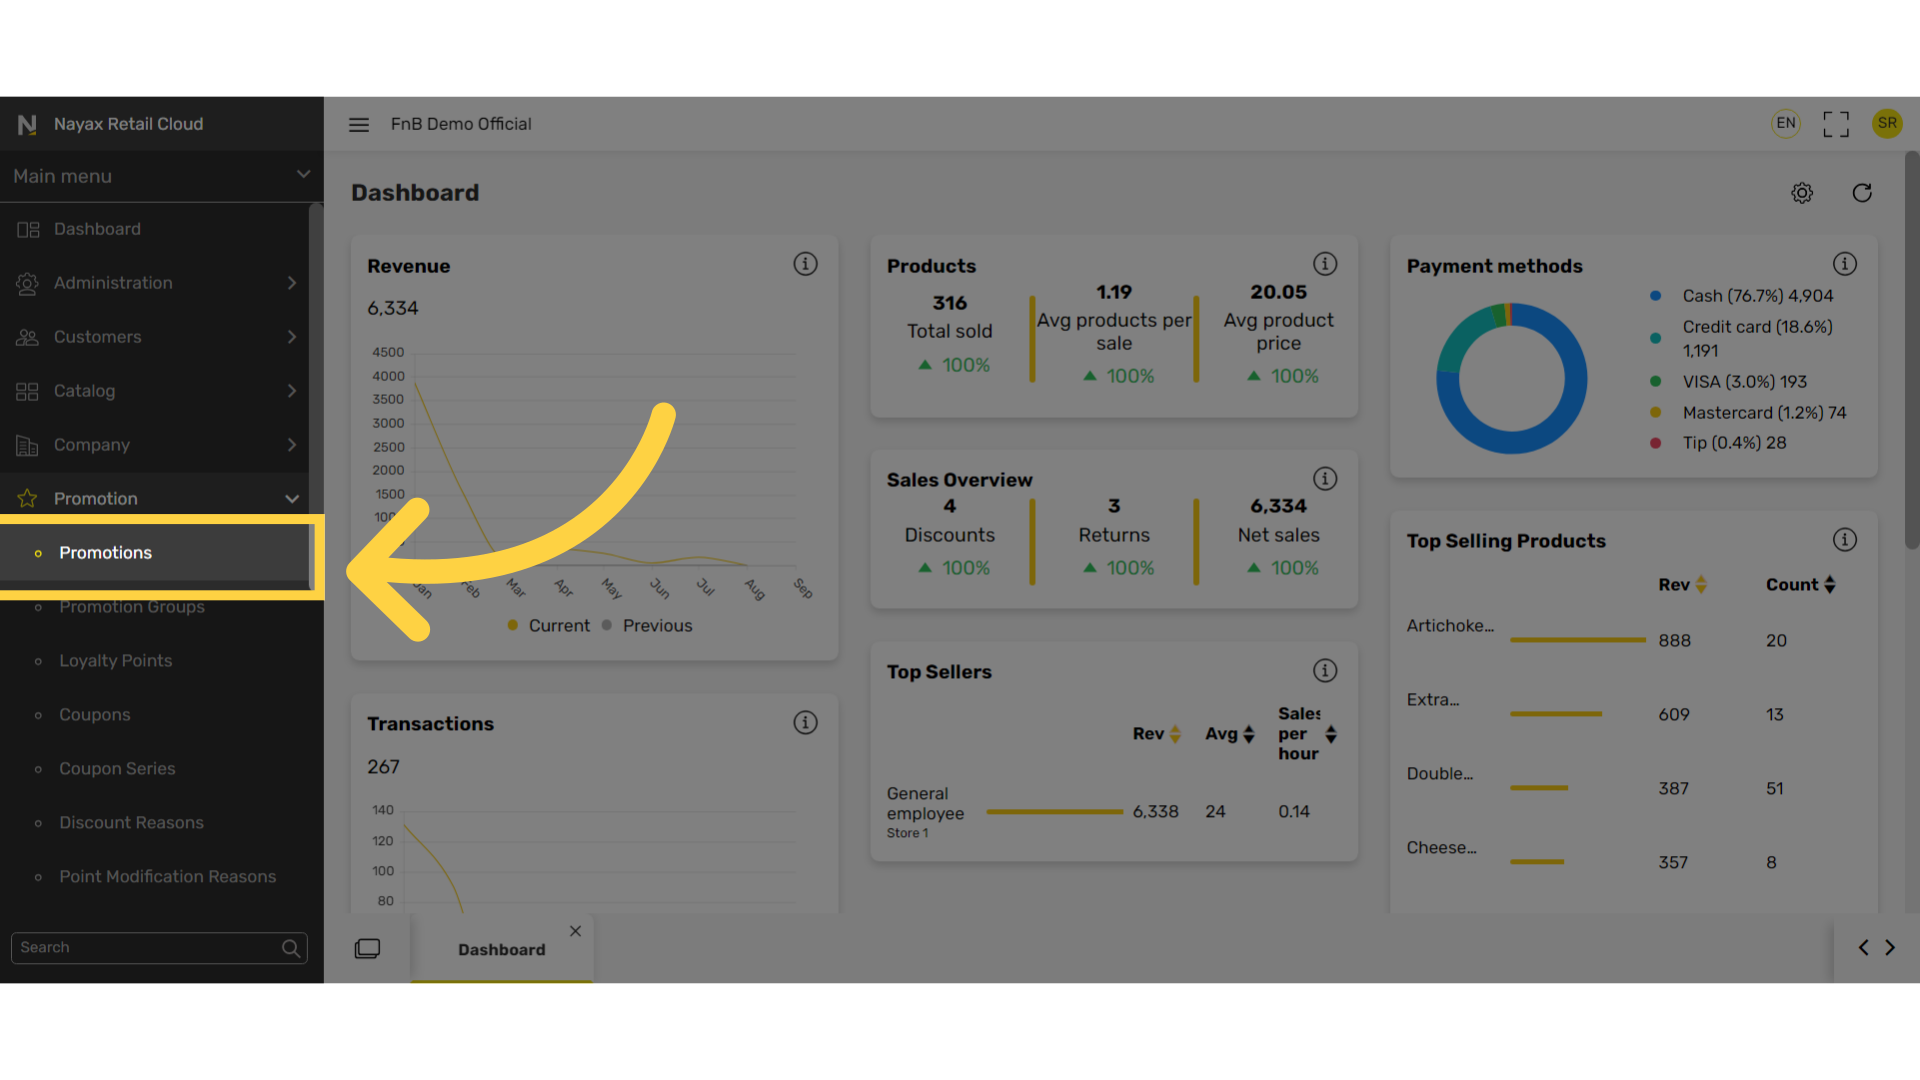
Click + Icon
Image Attached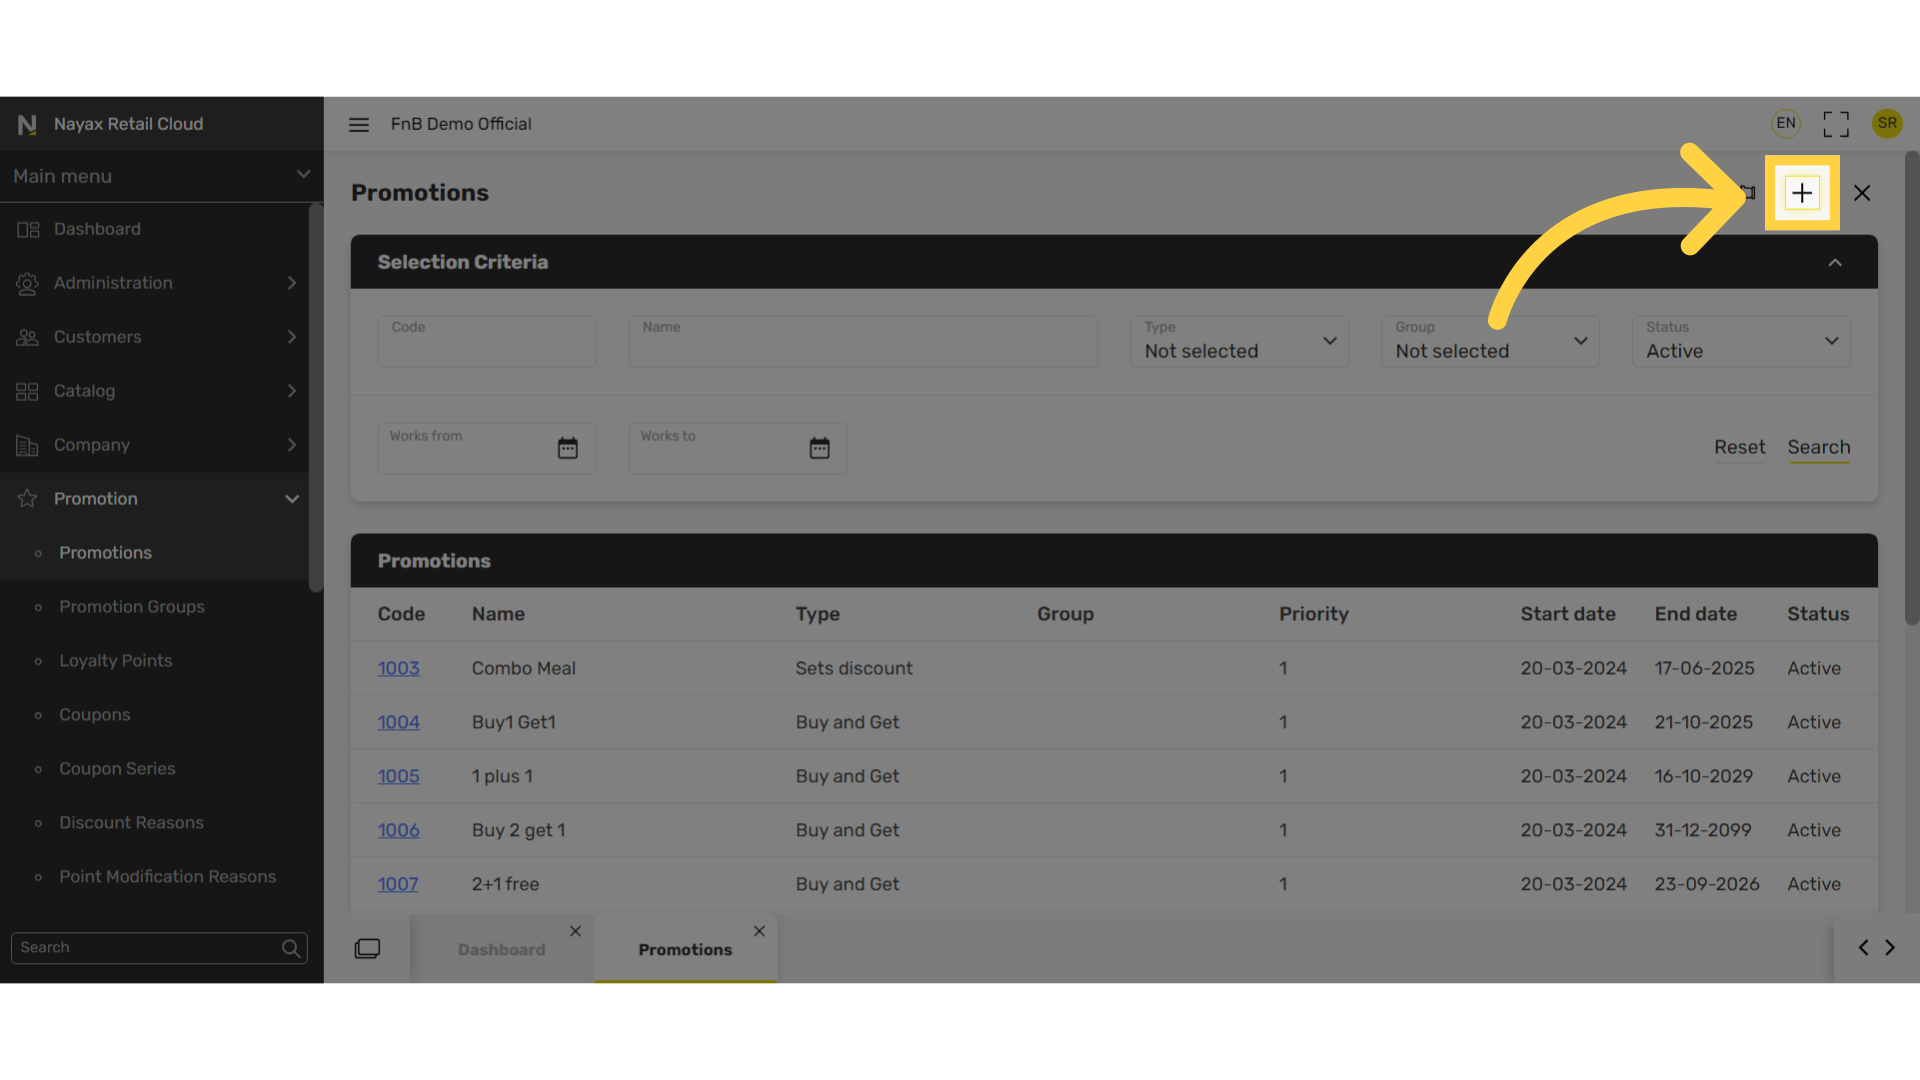
Select Sets Discount
Image Attached
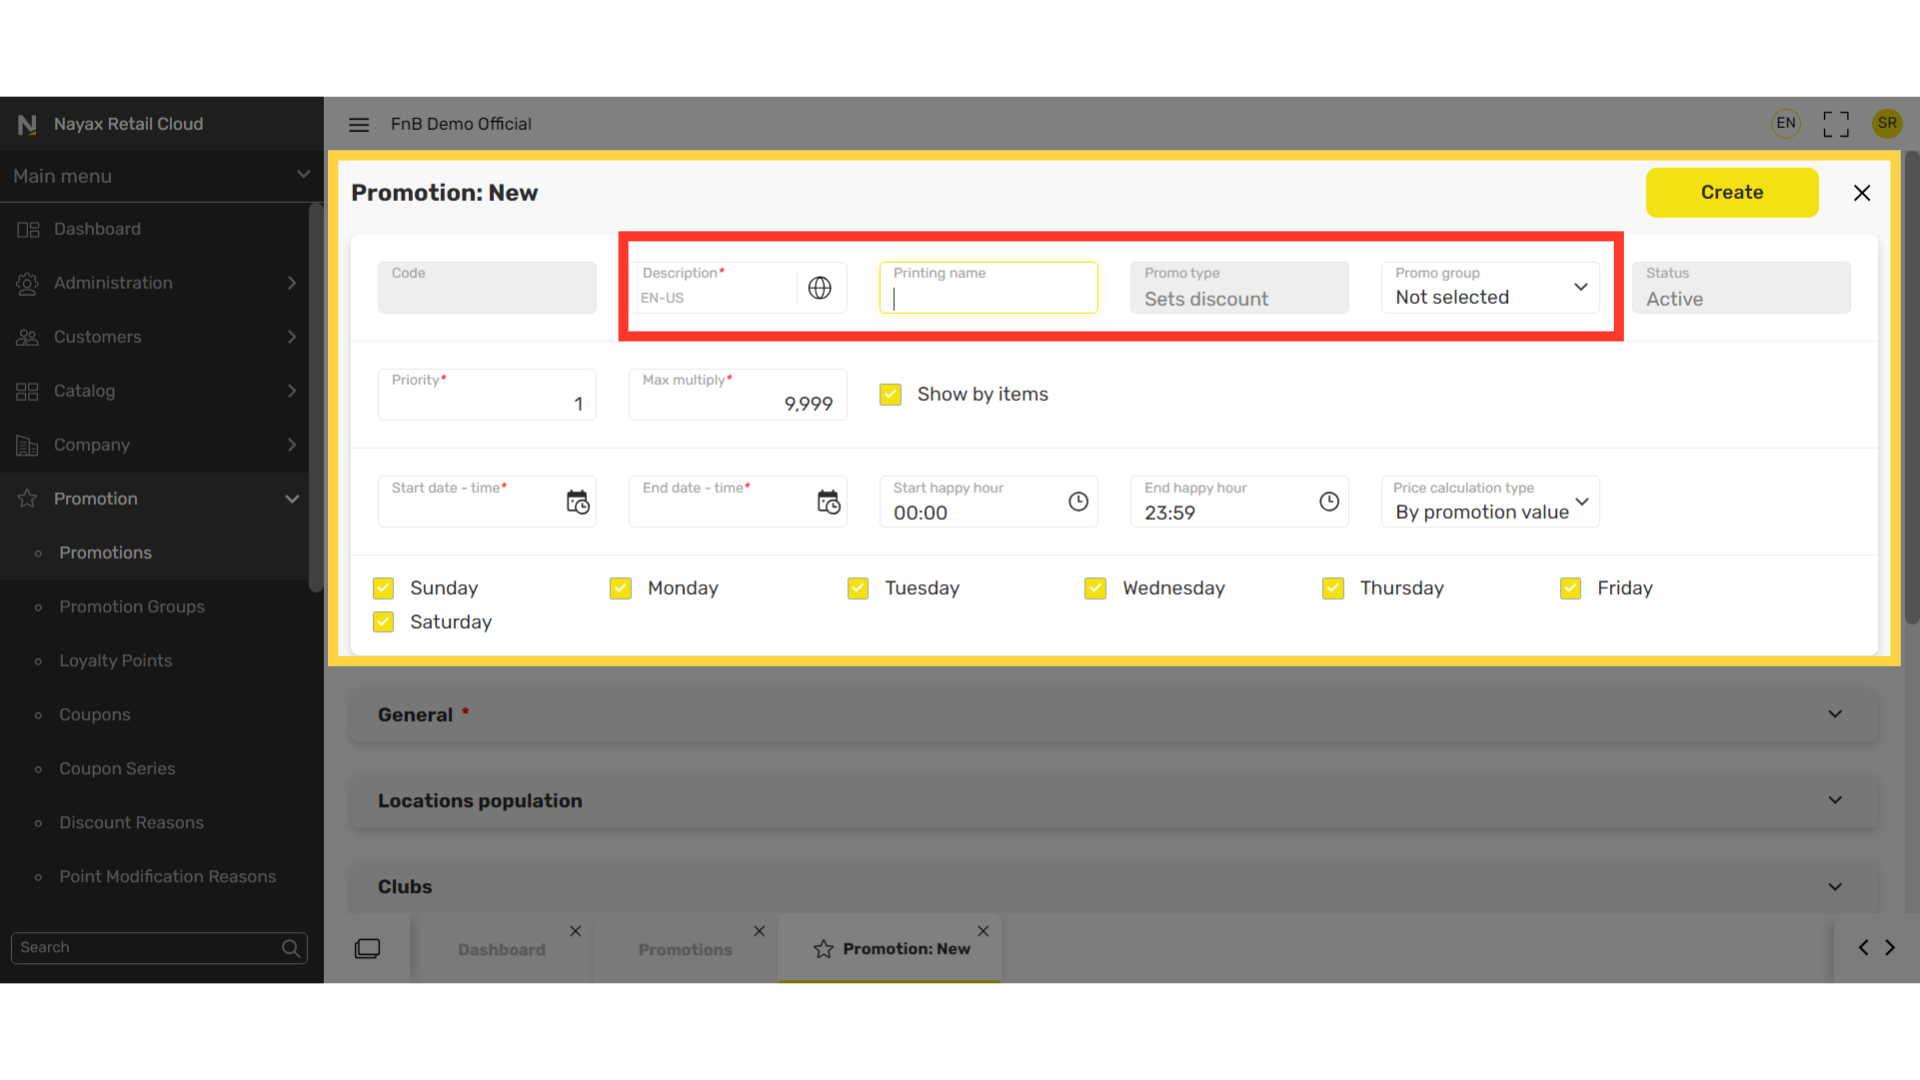
Fill in the following fields:
Image Attached|
Field name |
Description |
|
Description |
Name of the promotion |
|
Printing name |
Name of the promotion |
|
Promo group |
You can select a promotional group; this will allow you to manage your promotions more easily. |
|
Priority |
|
|
Max multiply |
|
|
Show by items checkbox |
|
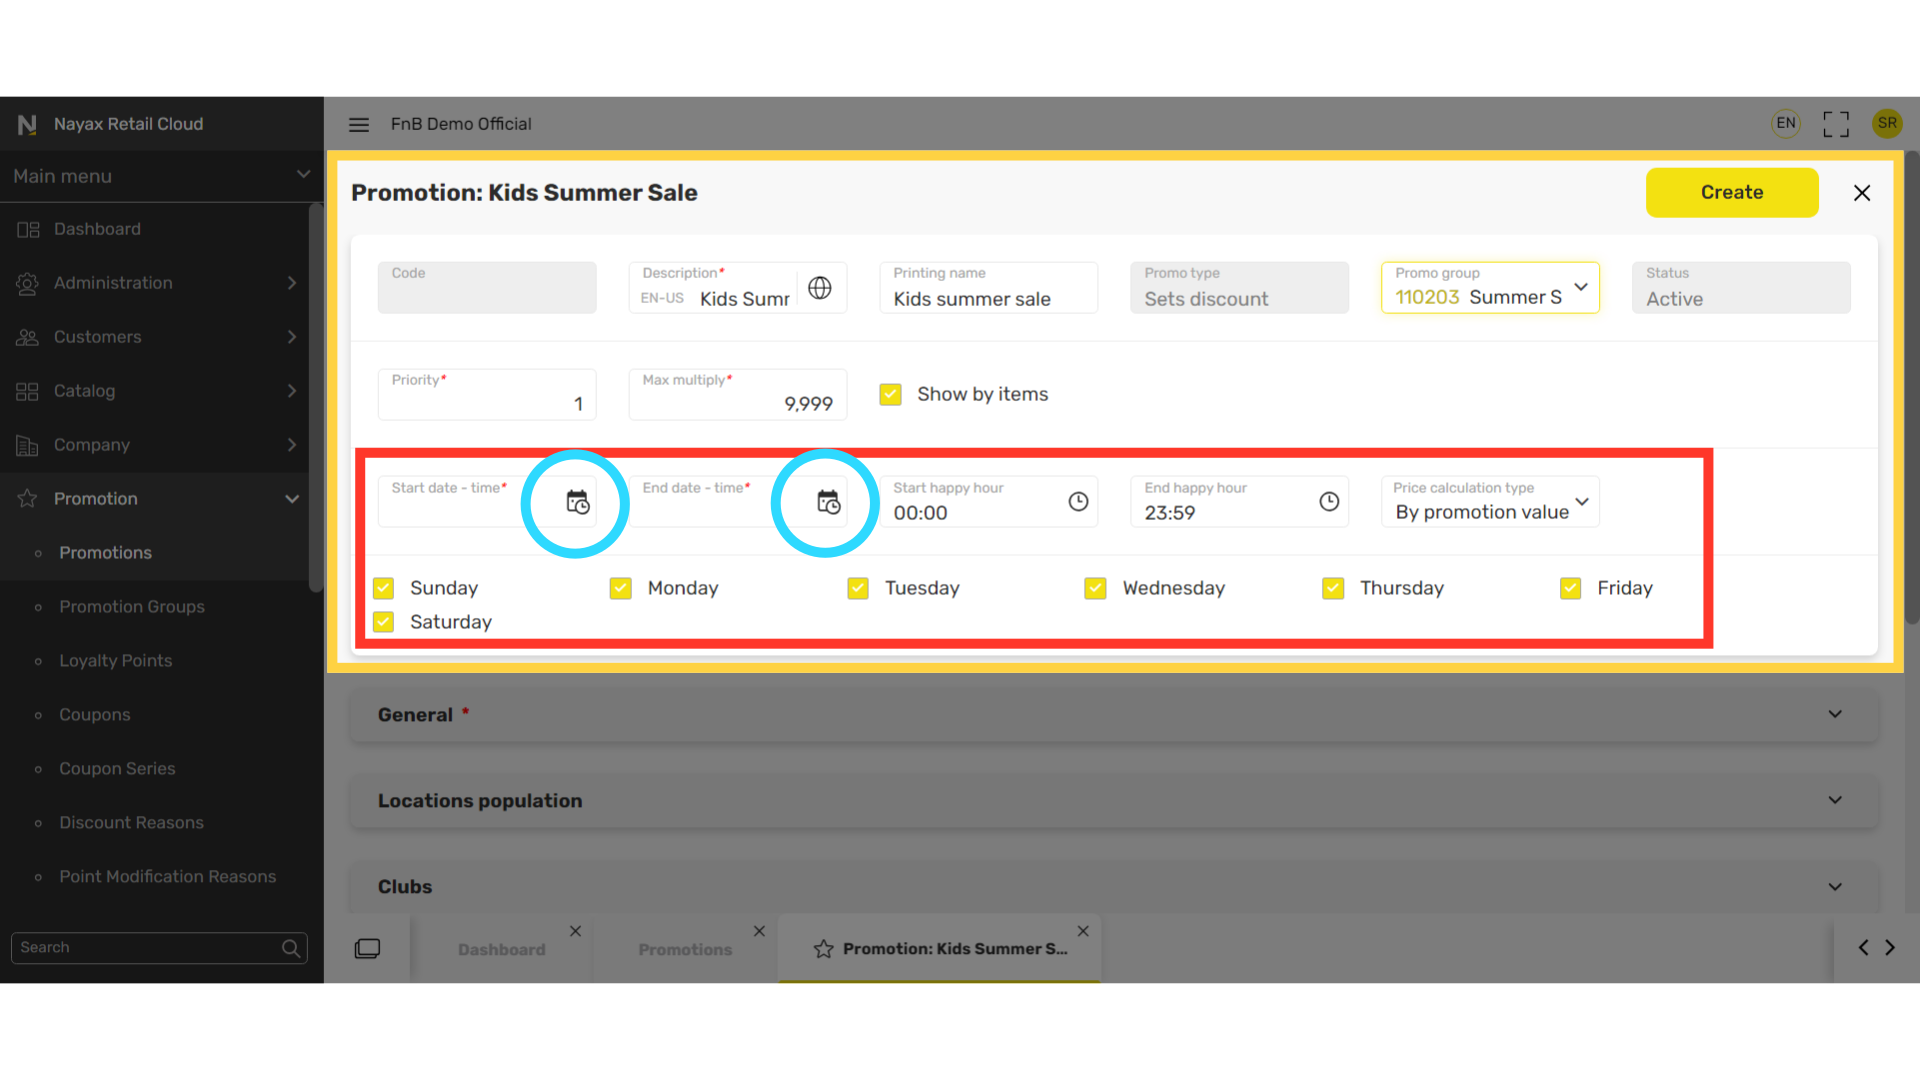
Set Date and Time
Image Attached|
Field name |
Description |
|
Start date - time End date - time |
Start and end date and time of the promotion |
|
Start happy hour End happy hour |
Start and end date time of the happy hour promotions |
|
Price calculation type |
By promotion value: discount is calculated by
|
|
Days of the week checkboxes |
Select the days which the promotion will be active on. |
Click General Tab
Image Attached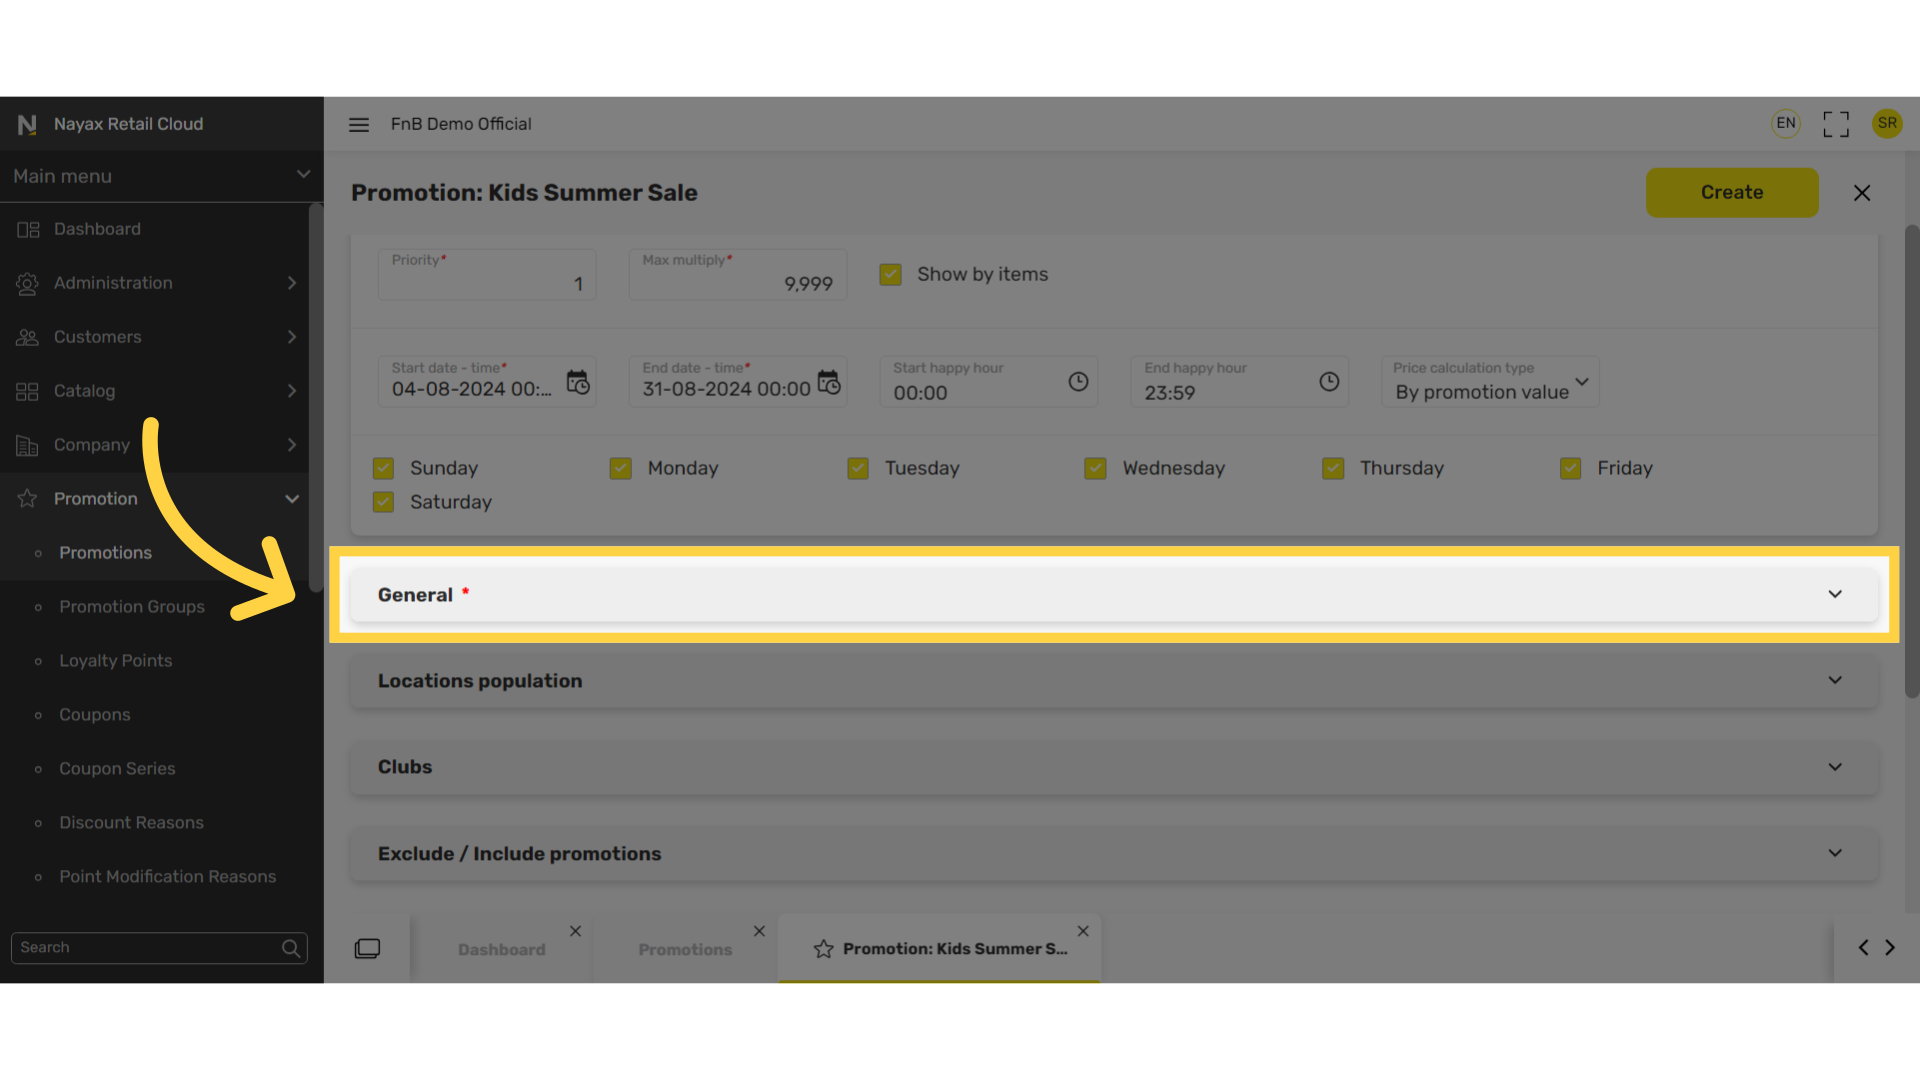
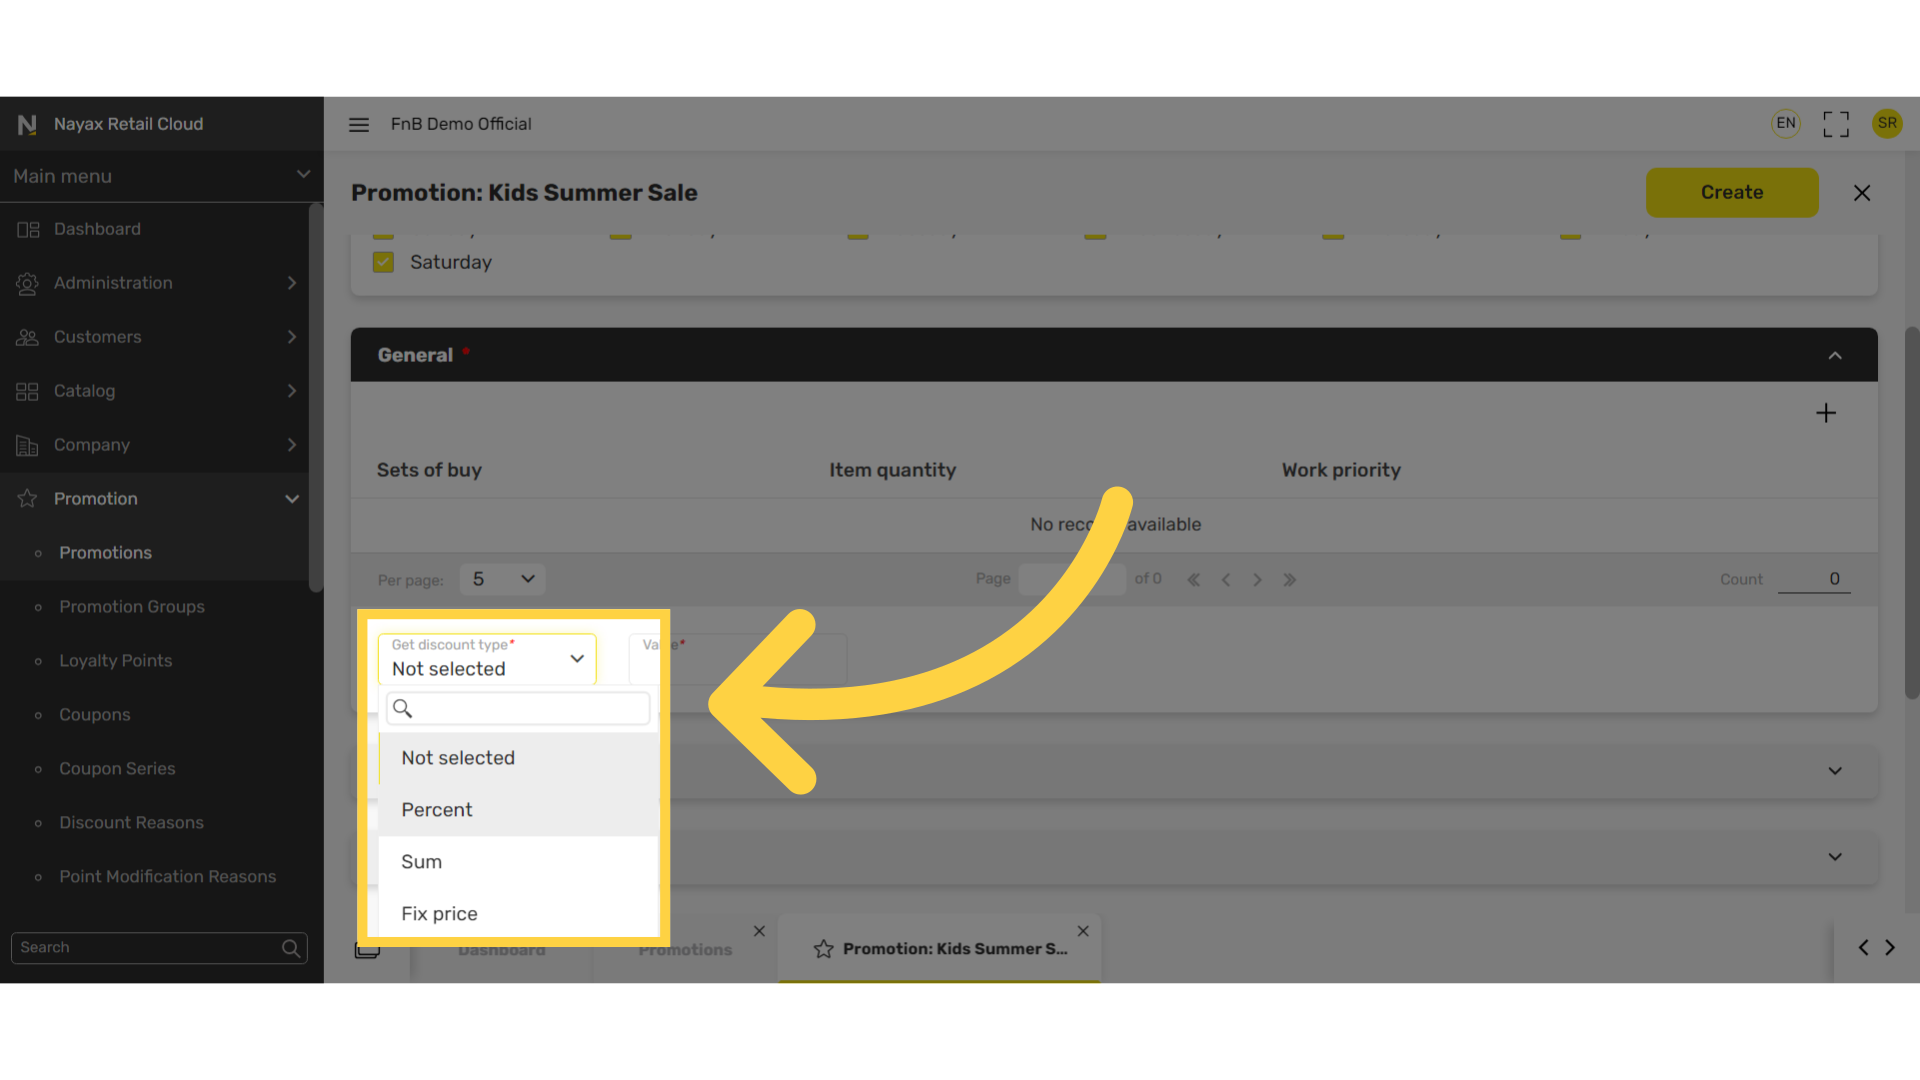
Select Discount Type
Image Attached|
Field name |
Description |
|
Set discount type |
Choose one of the three: Percent - the discount is a percentage off i.e. 10% off Sum - the monetary amount discounted off i.e. $10 off Fix Price - the the discounted monetary amount for the product. i.e. An item Product for $10 |
Click Locations Population Tab
Image Attached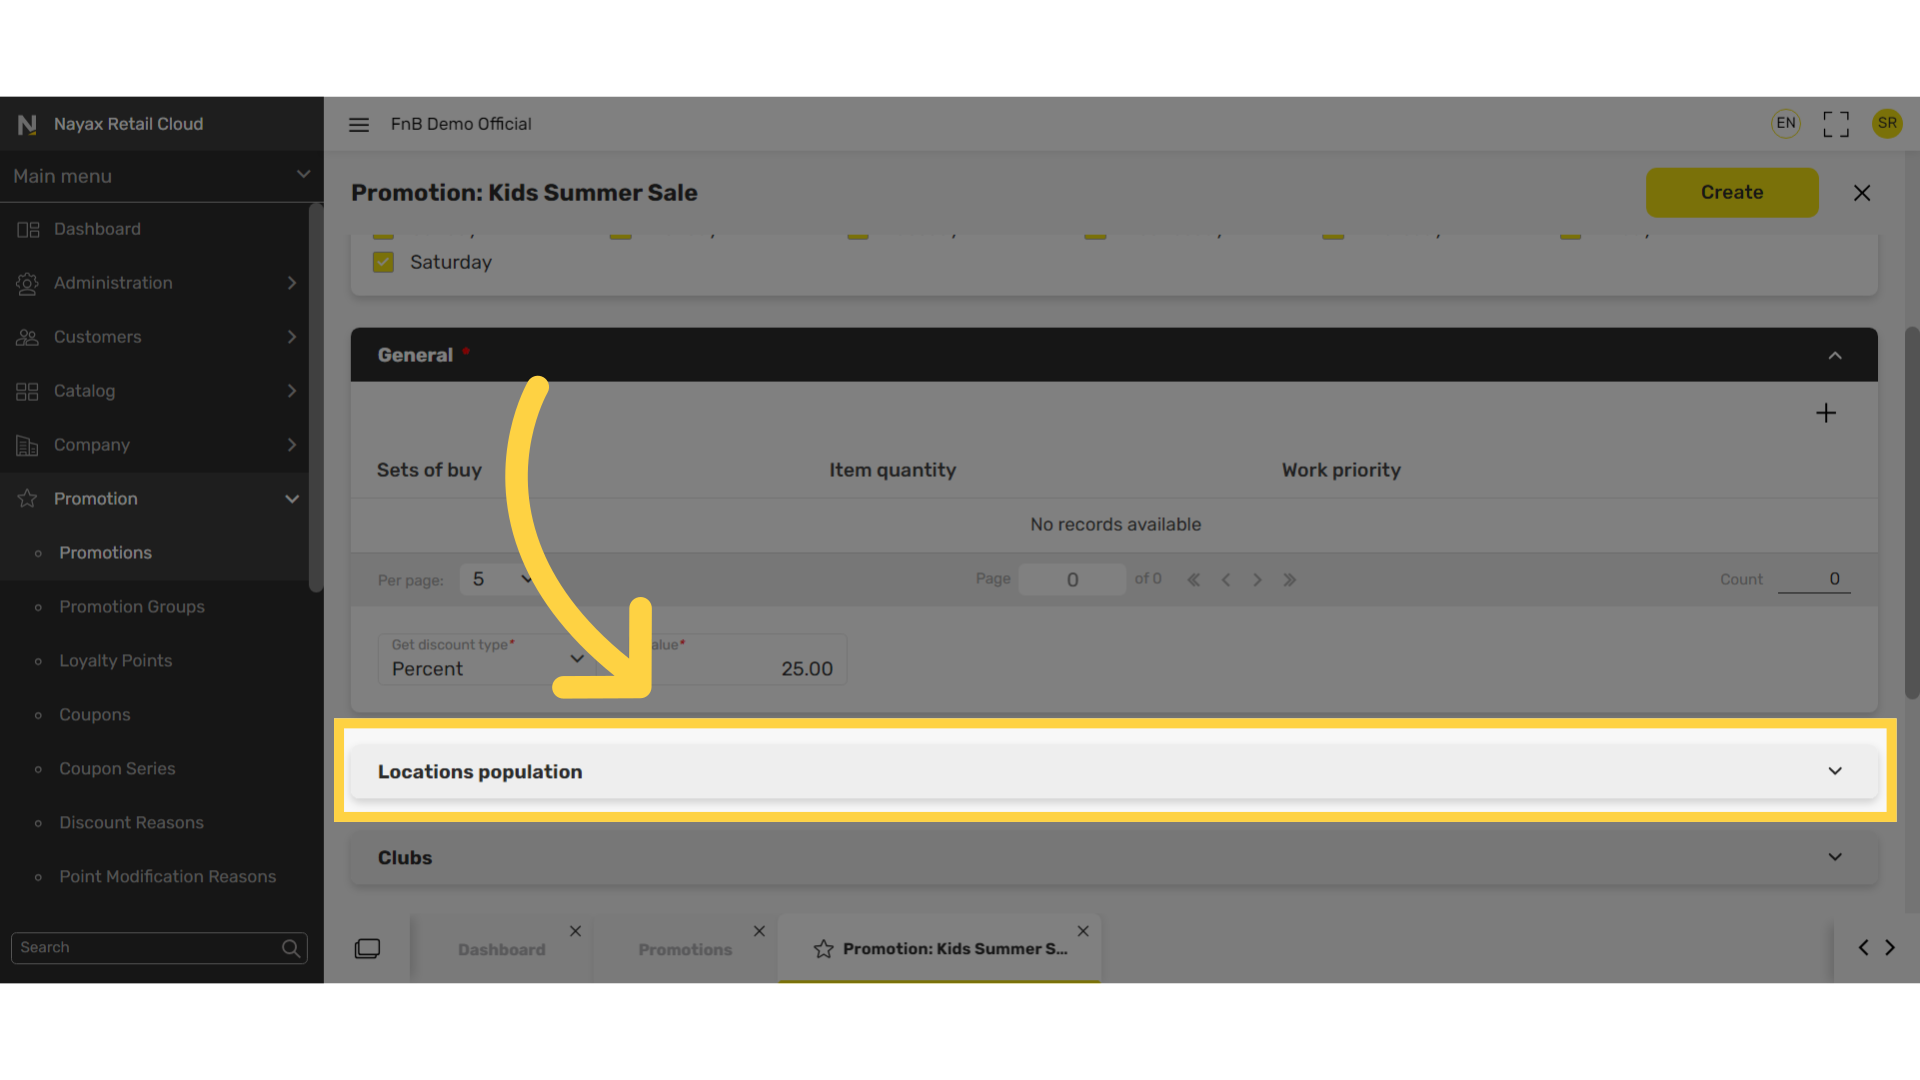
Click + Icon
Image Attached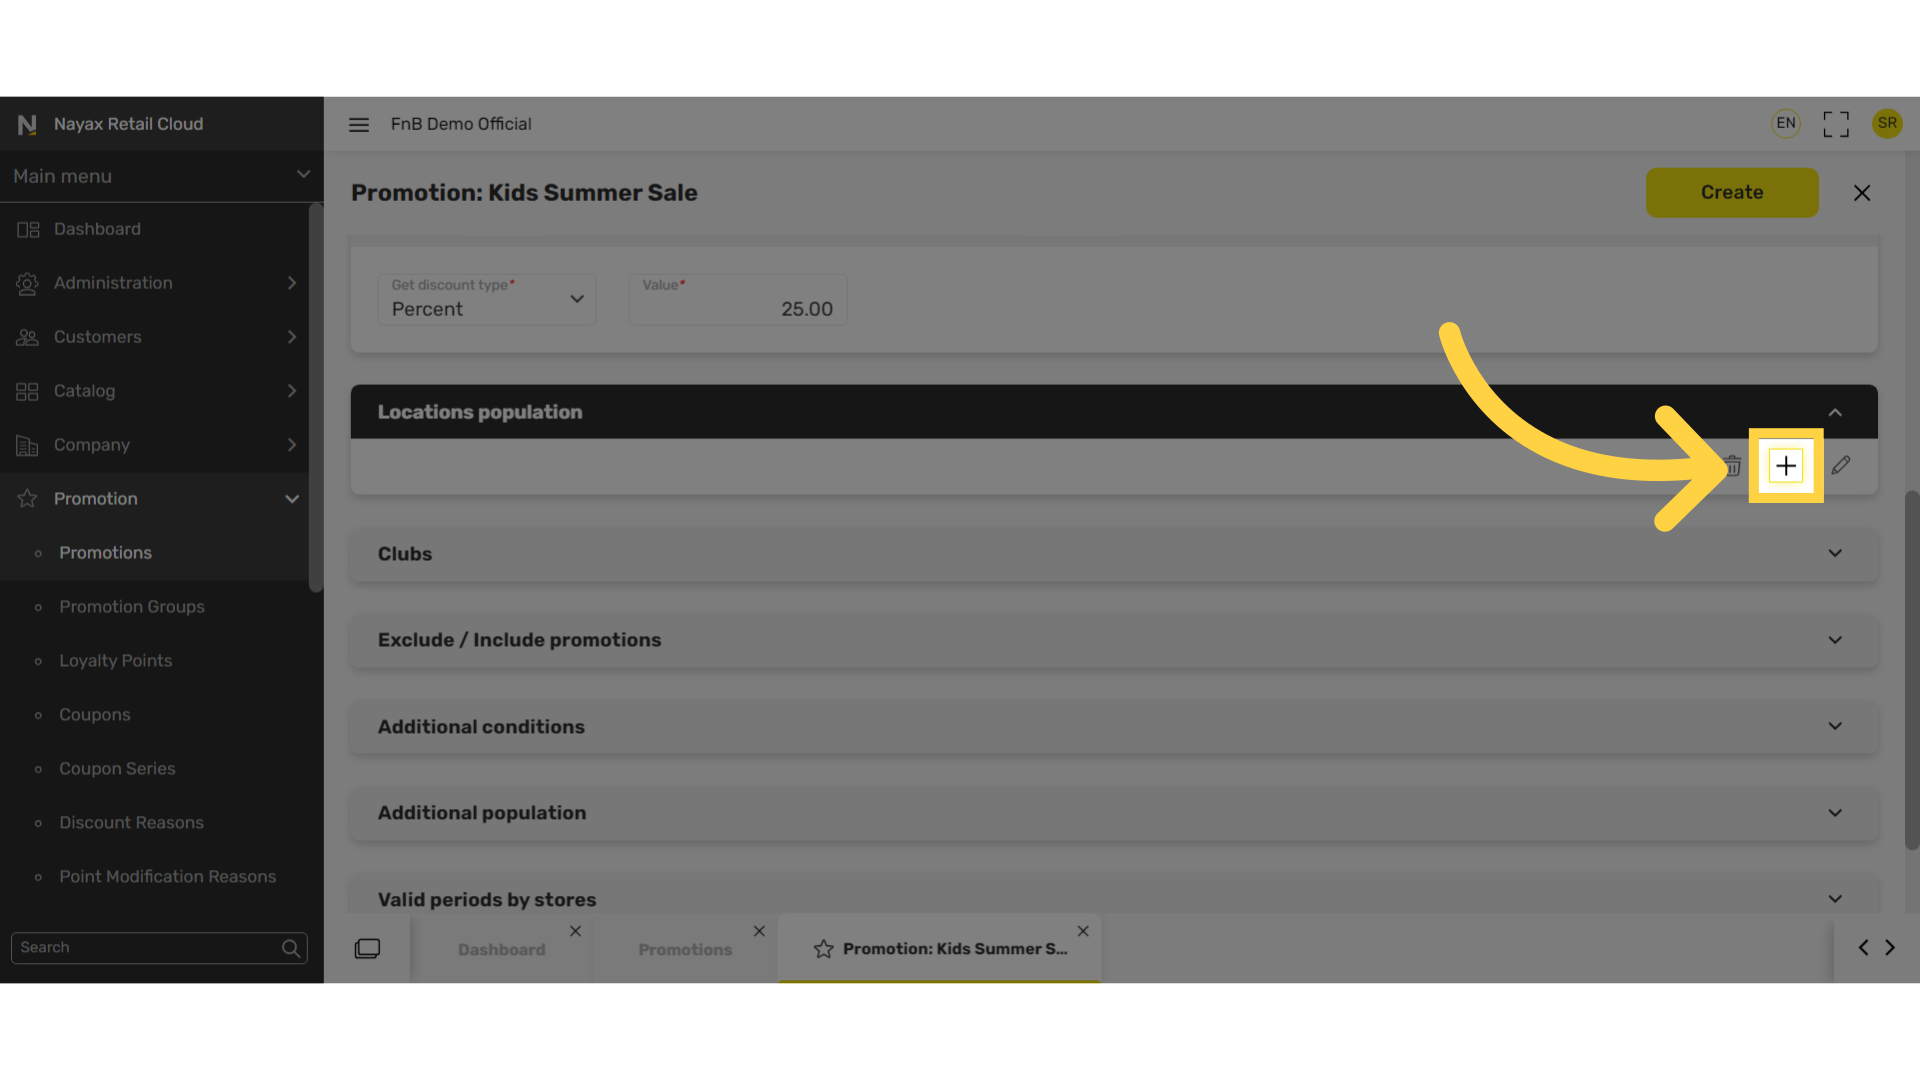
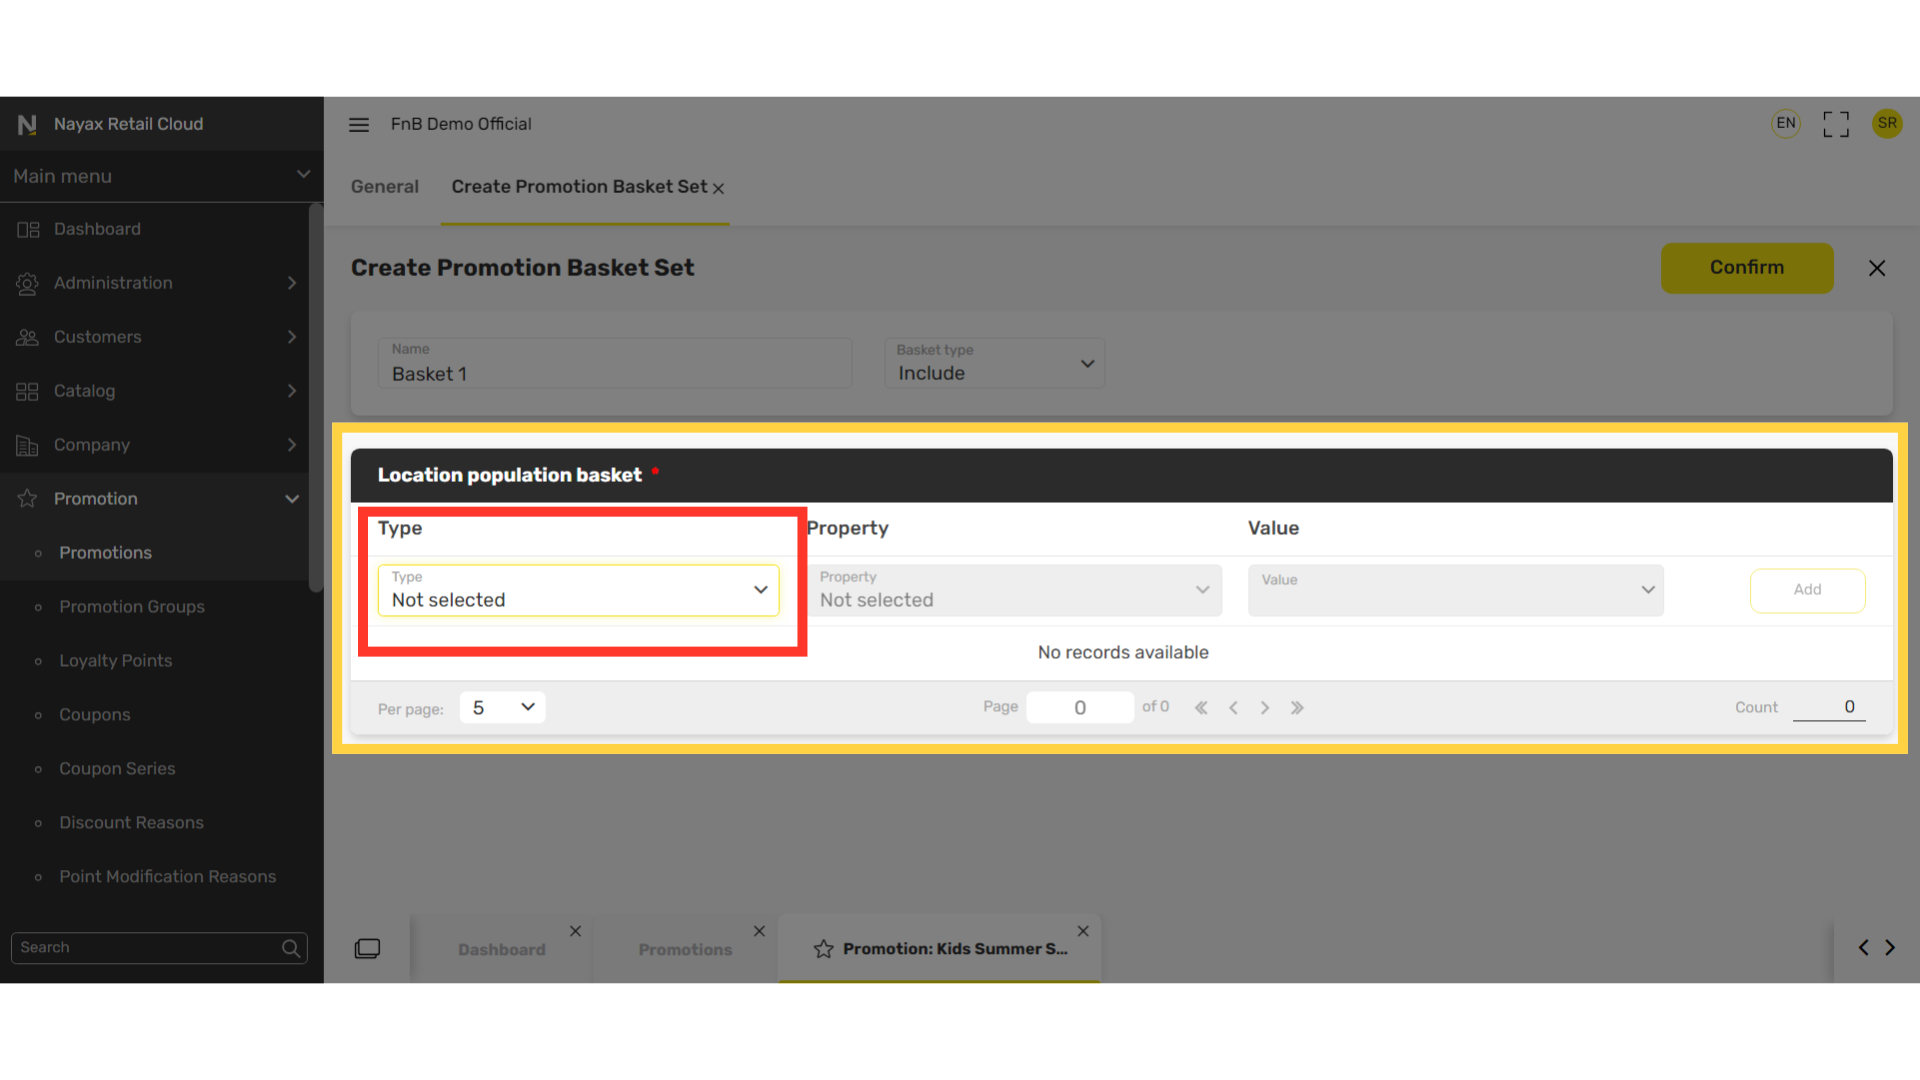
Select Basket Type
Image AttachedBaskets are created to allow control of which locations will have access to this promotion.
Select Value
Image Attached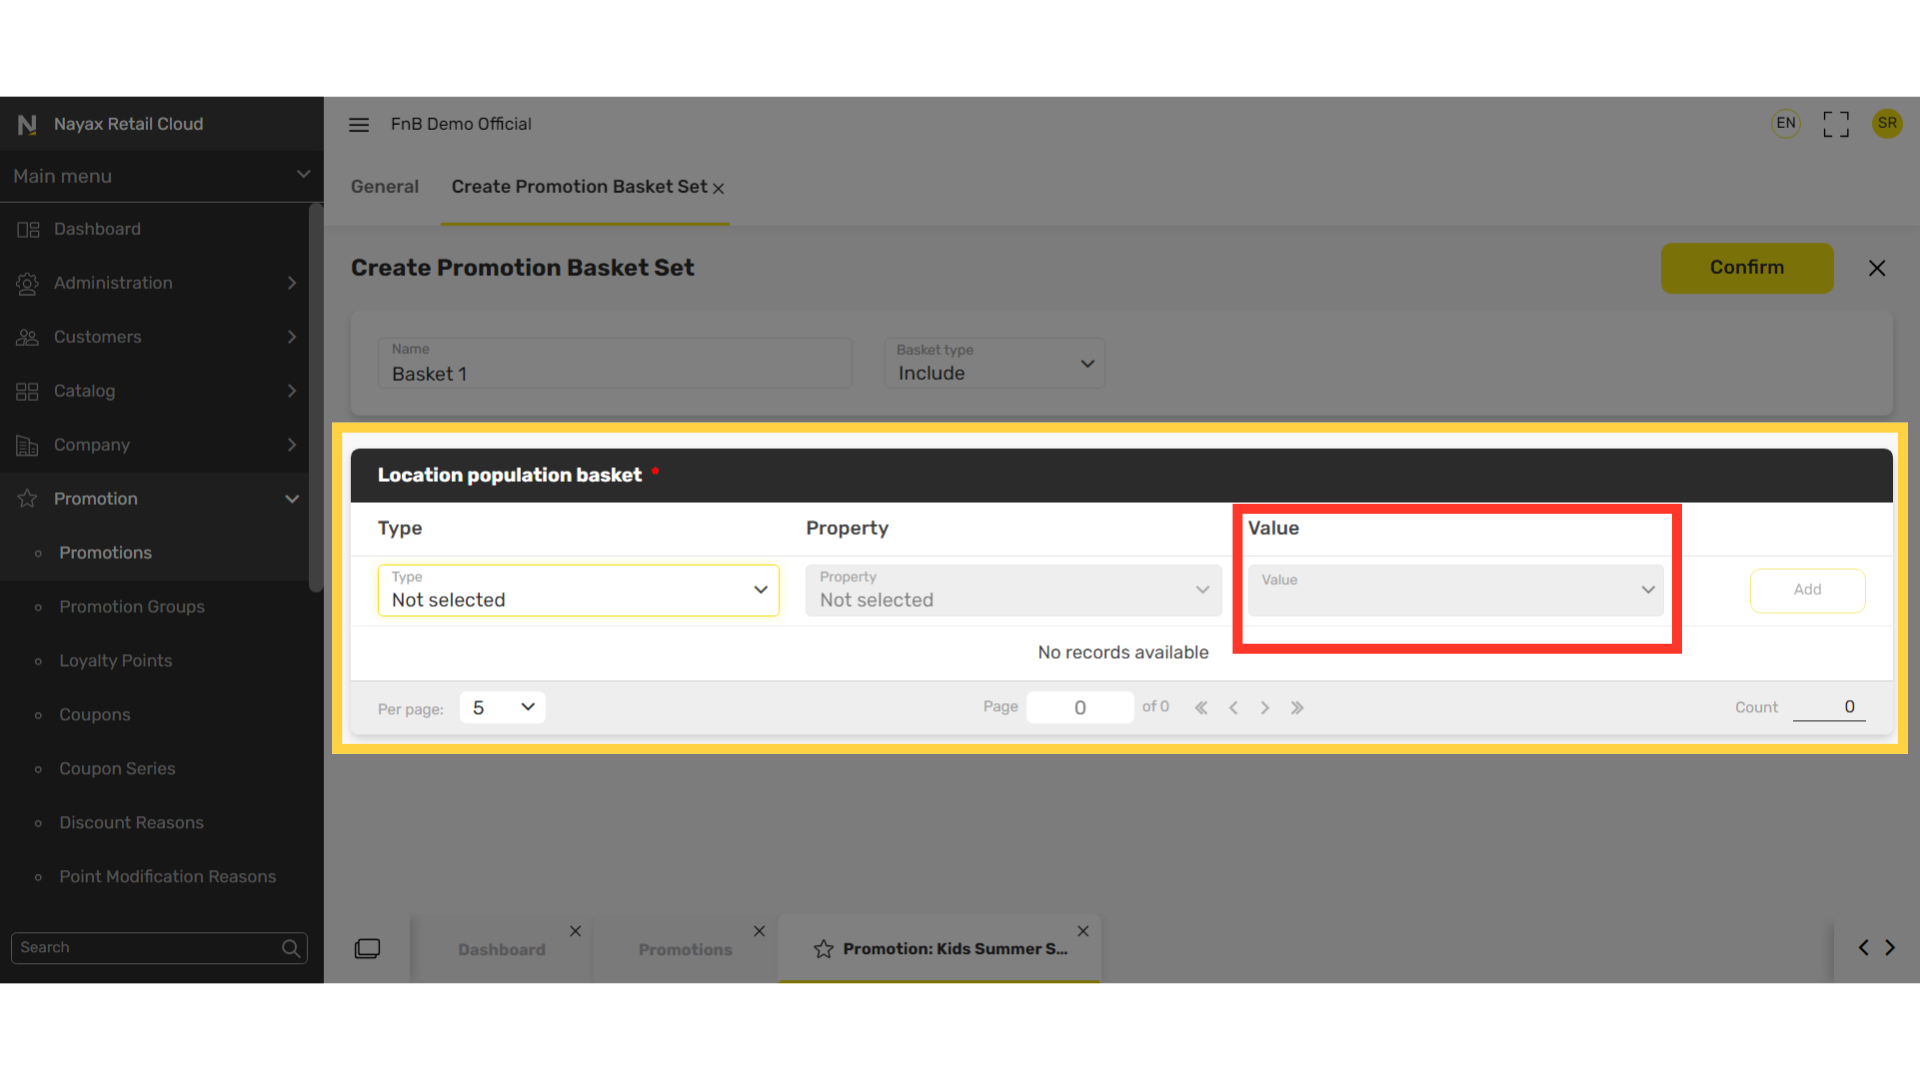
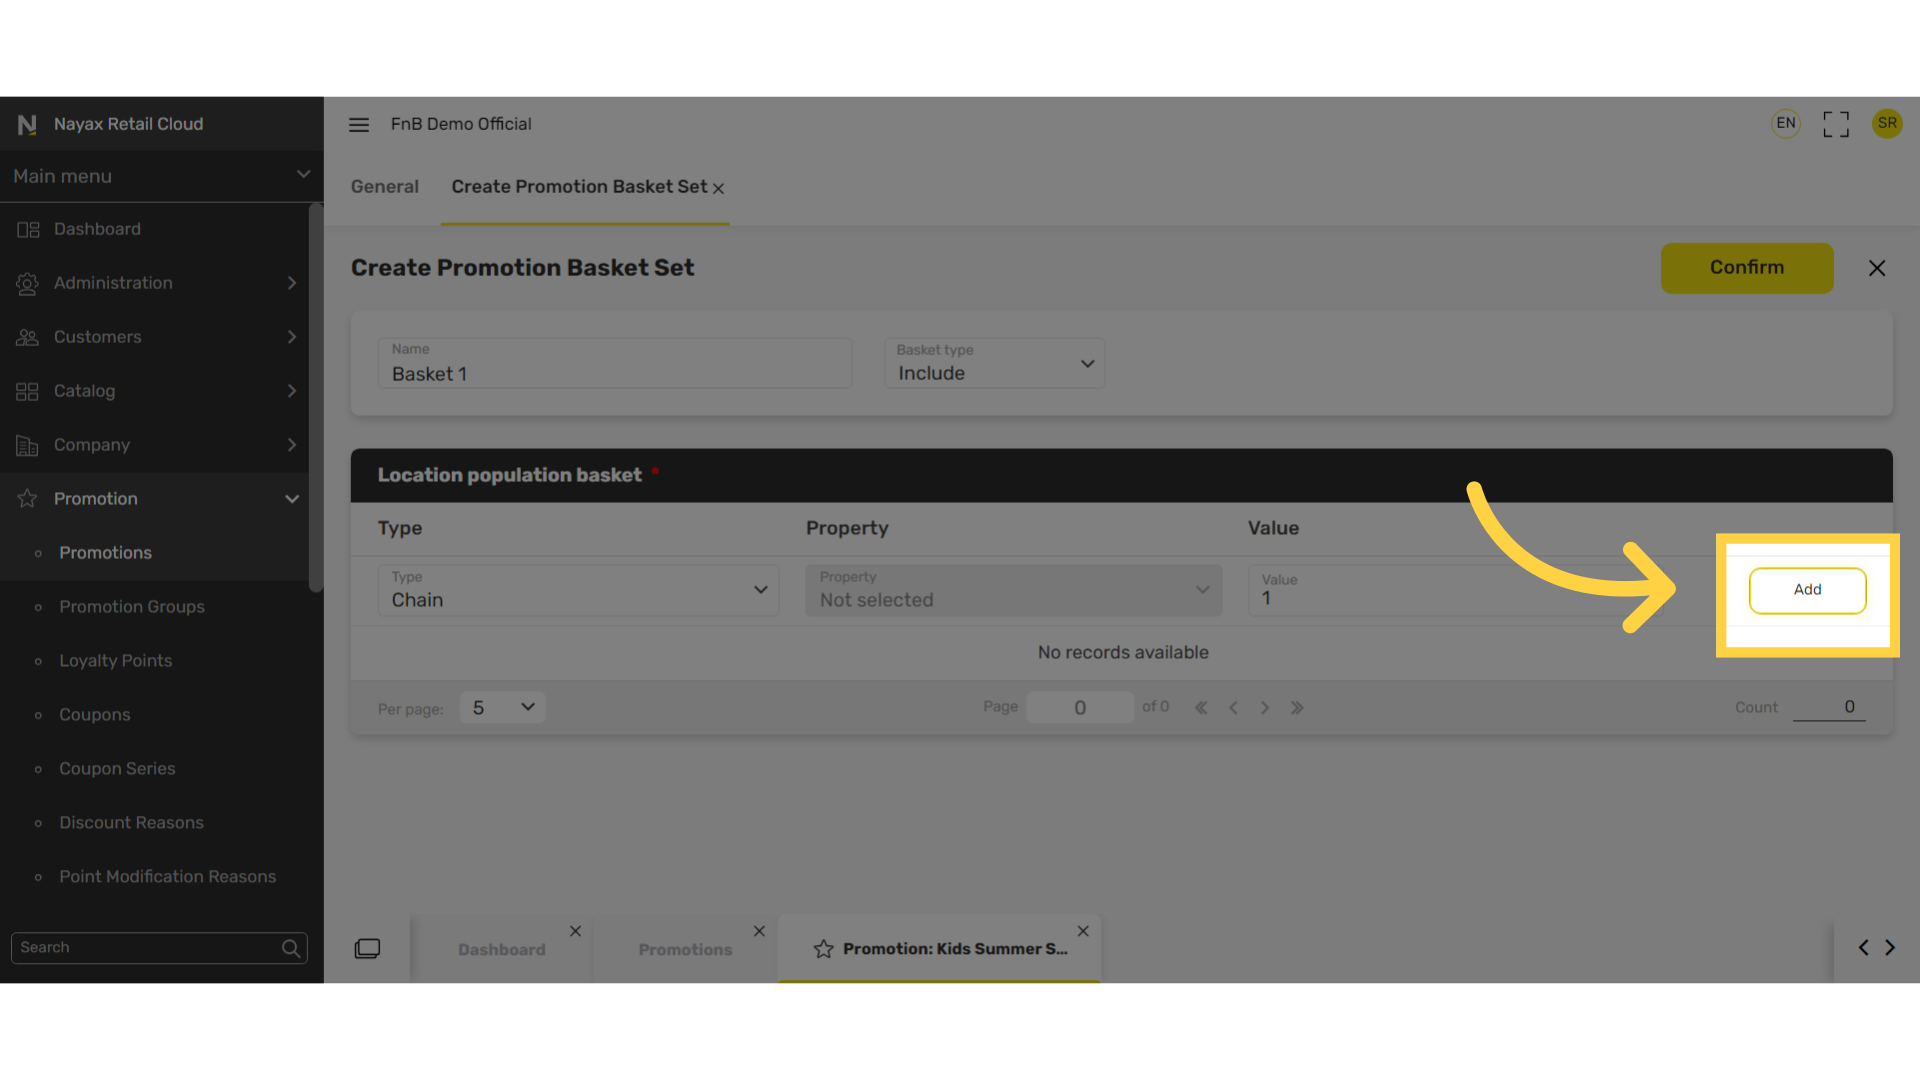
Click Add
Image AttachedClick the Add button.
Repeat Steps
Image AttachedClick Add
Image AttachedClick Confirm
Image Attached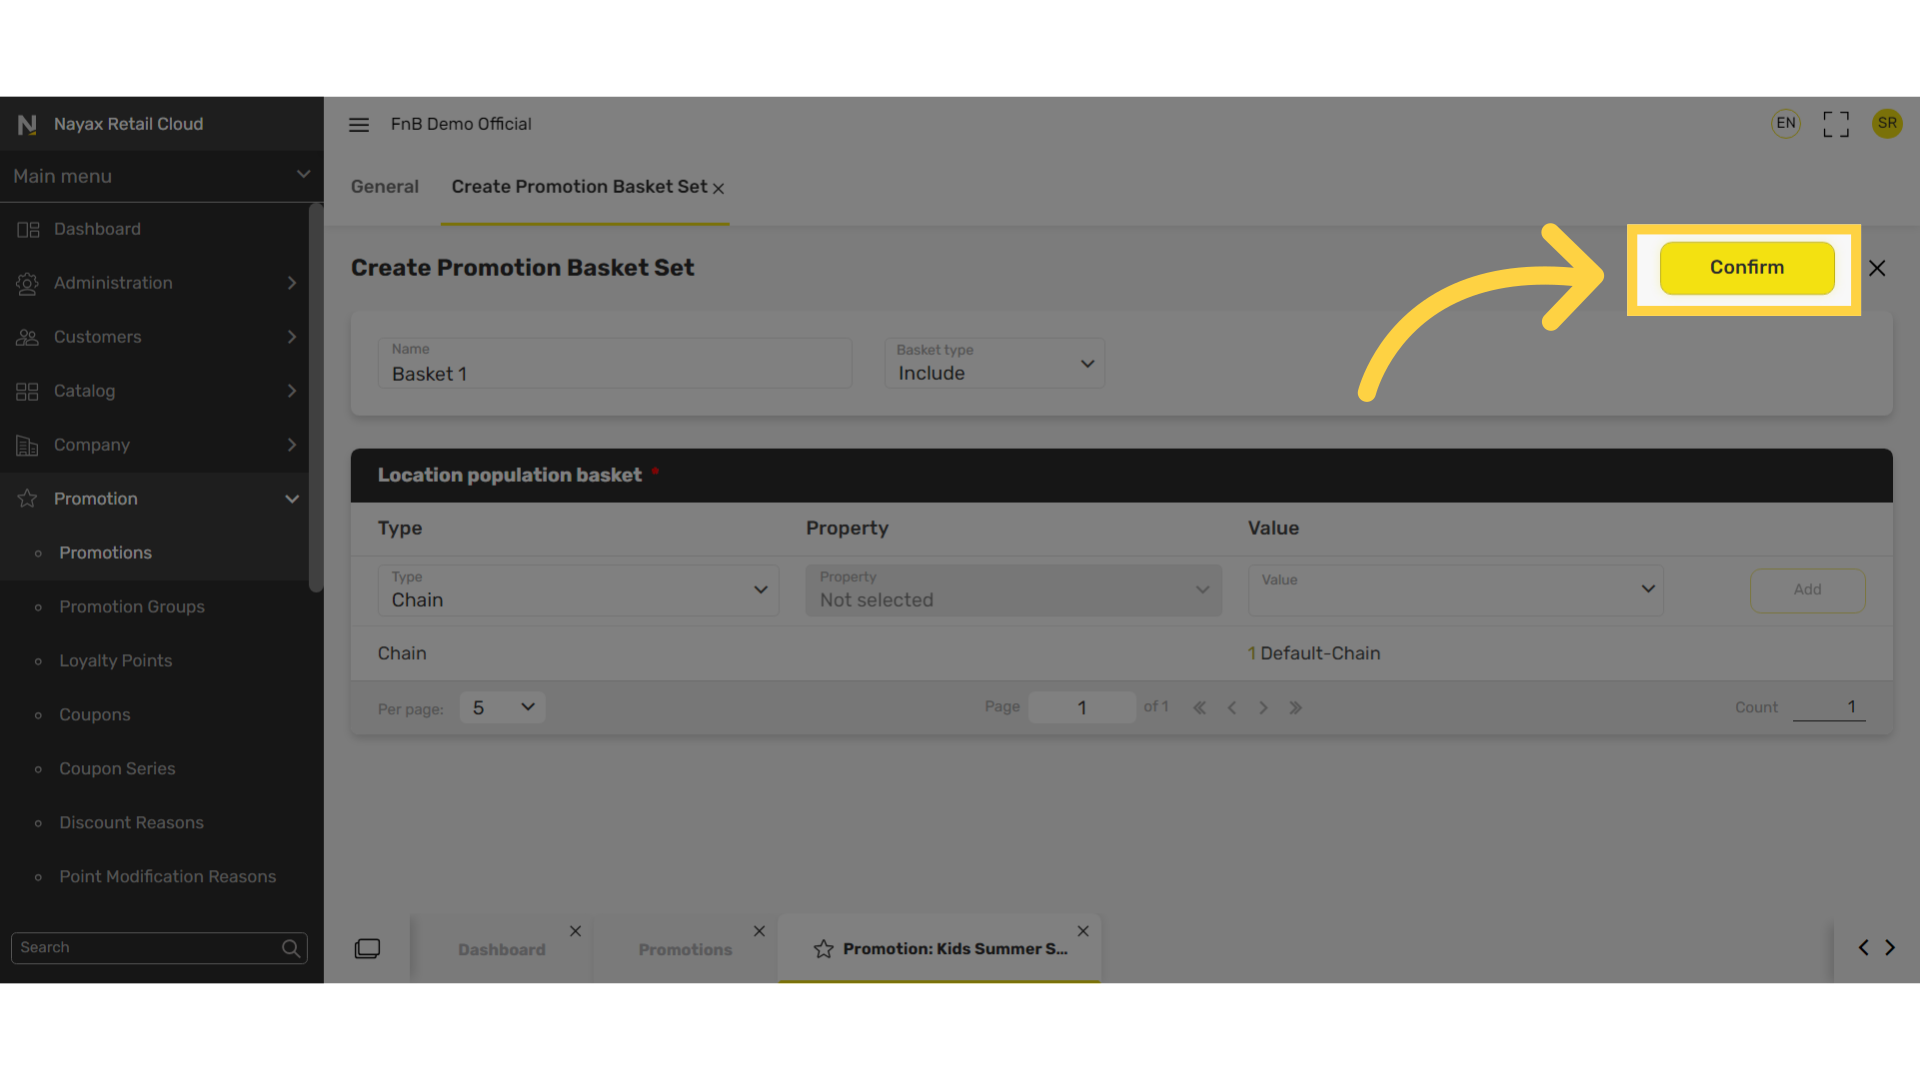
Click Create
Image Attached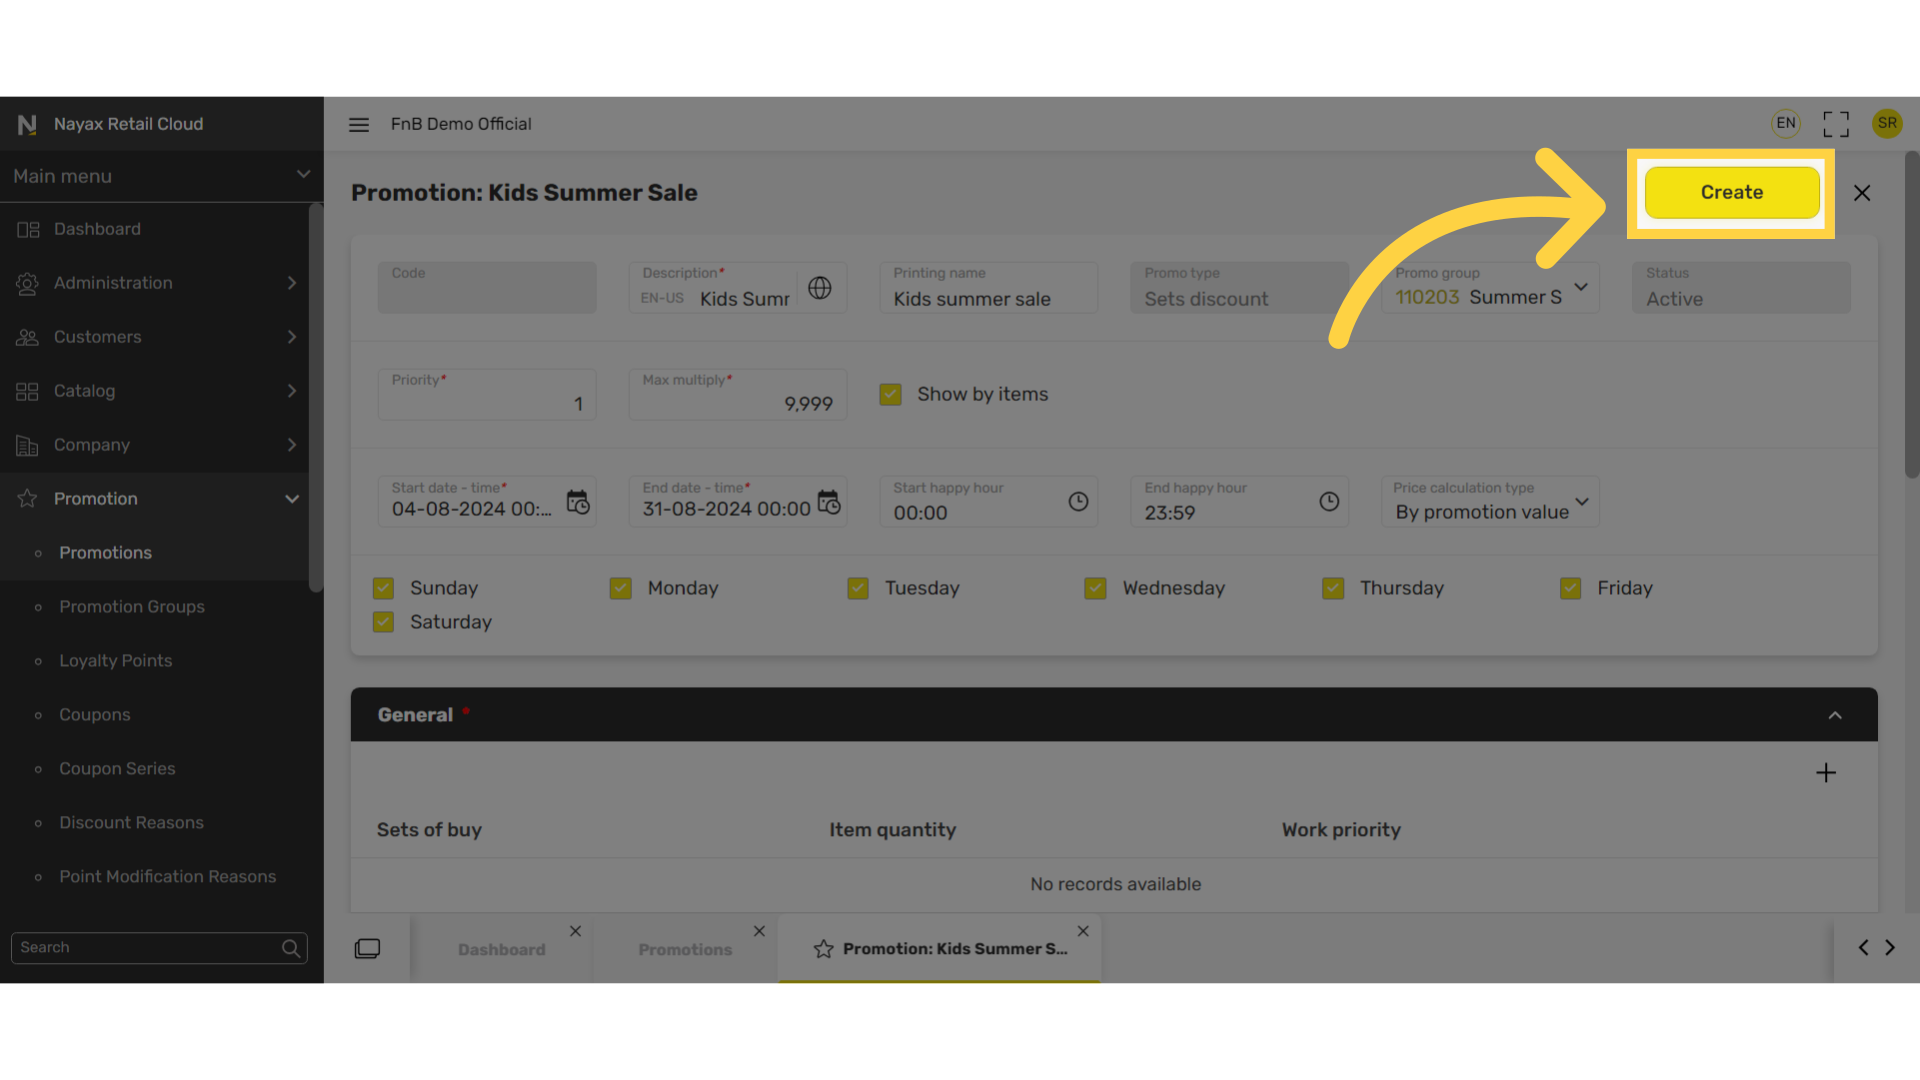
Thank you!
Did you find this article helpful?